

Toothpaste cleaning hacks – who knew that humble tube in your bathroom could be your secret weapon for a sparkling home? I’m always on the lookout for clever, budget-friendly ways to tackle everyday messes, and let me tell you, I was blown away when I discovered the surprising power of toothpaste beyond just oral hygiene!
For generations, toothpaste has been a staple in our daily routines, but its cleaning potential extends far beyond our pearly whites. Think about it: toothpaste is designed to gently polish and remove stains from a delicate surface (your teeth!), so it makes sense that it can work wonders on other household items too. From removing scuff marks on shoes to shining silverware, the possibilities are endless.
In today’s world, we’re all looking for ways to save time and money. Why spend a fortune on specialized cleaning products when you likely already have a multi-purpose solution sitting right there in your bathroom? I’m excited to share my favorite toothpaste cleaning hacks that will not only simplify your cleaning routine but also leave your home looking its best. Get ready to be amazed by the versatility of this everyday essential!
DIY Toothpaste Cleaning Hacks: Beyond Brushing Your Teeth!
Hey there, fellow DIY enthusiasts! I’m always on the lookout for clever cleaning hacks that save time and money. And guess what? My trusty tube of toothpaste has become my secret weapon! Forget just using it for pearly whites; toothpaste is a surprisingly versatile cleaner for all sorts of household messes. Let me share some of my favorite toothpaste cleaning hacks that I’ve personally tested and found incredibly effective.
Cleaning Shoes with Toothpaste
Dirty shoes can really bring down your whole look, right? And sometimes, just throwing them in the washing machine isn’t enough. That’s where toothpaste comes in! This works especially well on white sneakers or shoes with rubber soles.
What You’ll Need:
* An old toothbrush
* White, non-gel toothpaste (avoid colored or heavily abrasive formulas)
* A damp cloth or sponge
* Water
Step-by-Step Instructions:
1. Prepare Your Shoes: Before you start, give your shoes a quick once-over. Remove any loose dirt or debris with a dry brush or cloth. This will prevent you from just spreading the grime around.
2. Apply the Toothpaste: Squeeze a small amount of toothpaste onto the dirty areas of your shoes. I usually focus on the rubber soles, scuff marks, and any particularly stubborn stains.
3. Scrub Away! Using your old toothbrush, gently scrub the toothpaste into the affected areas. Use circular motions and apply a bit of pressure, especially on tough stains. You’ll start to see the dirt lifting away pretty quickly.
4. Wipe Clean: Once you’ve scrubbed thoroughly, use a damp cloth or sponge to wipe away the toothpaste residue. Rinse the cloth frequently to avoid just smearing the dirt back onto the shoes.
5. Repeat if Necessary: For really stubborn stains, you might need to repeat the process. Don’t be afraid to give it another go!
6. Air Dry: Let your shoes air dry completely before wearing them. Avoid putting them in direct sunlight, as this can sometimes cause discoloration.
Removing Scuff Marks from Walls
Kids (or clumsy adults like myself!) can leave scuff marks all over the walls. Instead of repainting, try this simple toothpaste trick.
What You’ll Need:
* White, non-gel toothpaste
* A soft, damp cloth
Step-by-Step Instructions:
1. Dampen the Cloth: Lightly dampen a soft cloth with water. Make sure it’s not dripping wet, just slightly moist.
2. Apply Toothpaste: Put a small dab of toothpaste onto the damp cloth. You don’t need a lot; a little goes a long way.
3. Gently Rub: Gently rub the toothpaste onto the scuff mark using a circular motion. Be careful not to scrub too hard, as you don’t want to damage the paint.
4. Wipe Clean: Use a clean, damp part of the cloth to wipe away the toothpaste residue.
5. Dry the Area: Use a dry cloth to gently dry the area.
6. Admire Your Work! The scuff mark should be gone, leaving your wall looking fresh and clean.
Polishing Chrome Fixtures
Dull chrome fixtures in your bathroom or kitchen can make the whole space look dingy. Toothpaste can bring back the shine!
What You’ll Need:
* White, non-gel toothpaste
* A soft cloth
* Water
Step-by-Step Instructions:
1. Apply Toothpaste: Apply a small amount of toothpaste directly to the chrome fixture.
2. Rub and Polish: Use a soft cloth to rub the toothpaste onto the fixture in a circular motion. Apply a bit of pressure to polish the surface.
3. Rinse Thoroughly: Rinse the fixture thoroughly with water to remove all traces of toothpaste.
4. Dry and Buff: Use a clean, dry cloth to dry and buff the fixture to a sparkling shine.
Cleaning Your Iron
A dirty iron can leave marks on your clothes. Keep it clean with this easy toothpaste hack. Make sure your iron is unplugged and completely cool before starting!
What You’ll Need:
* White, non-gel toothpaste
* A soft cloth
* Water
Step-by-Step Instructions:
1. Apply Toothpaste: Apply a small amount of toothpaste to the cool soleplate of your iron.
2. Rub Gently: Use a soft cloth to gently rub the toothpaste over the soleplate, focusing on any burnt-on residue or stains.
3. Wipe Clean: Use a damp cloth to wipe away the toothpaste and any loosened residue.
4. Dry Thoroughly: Make sure the soleplate is completely dry before using your iron again.
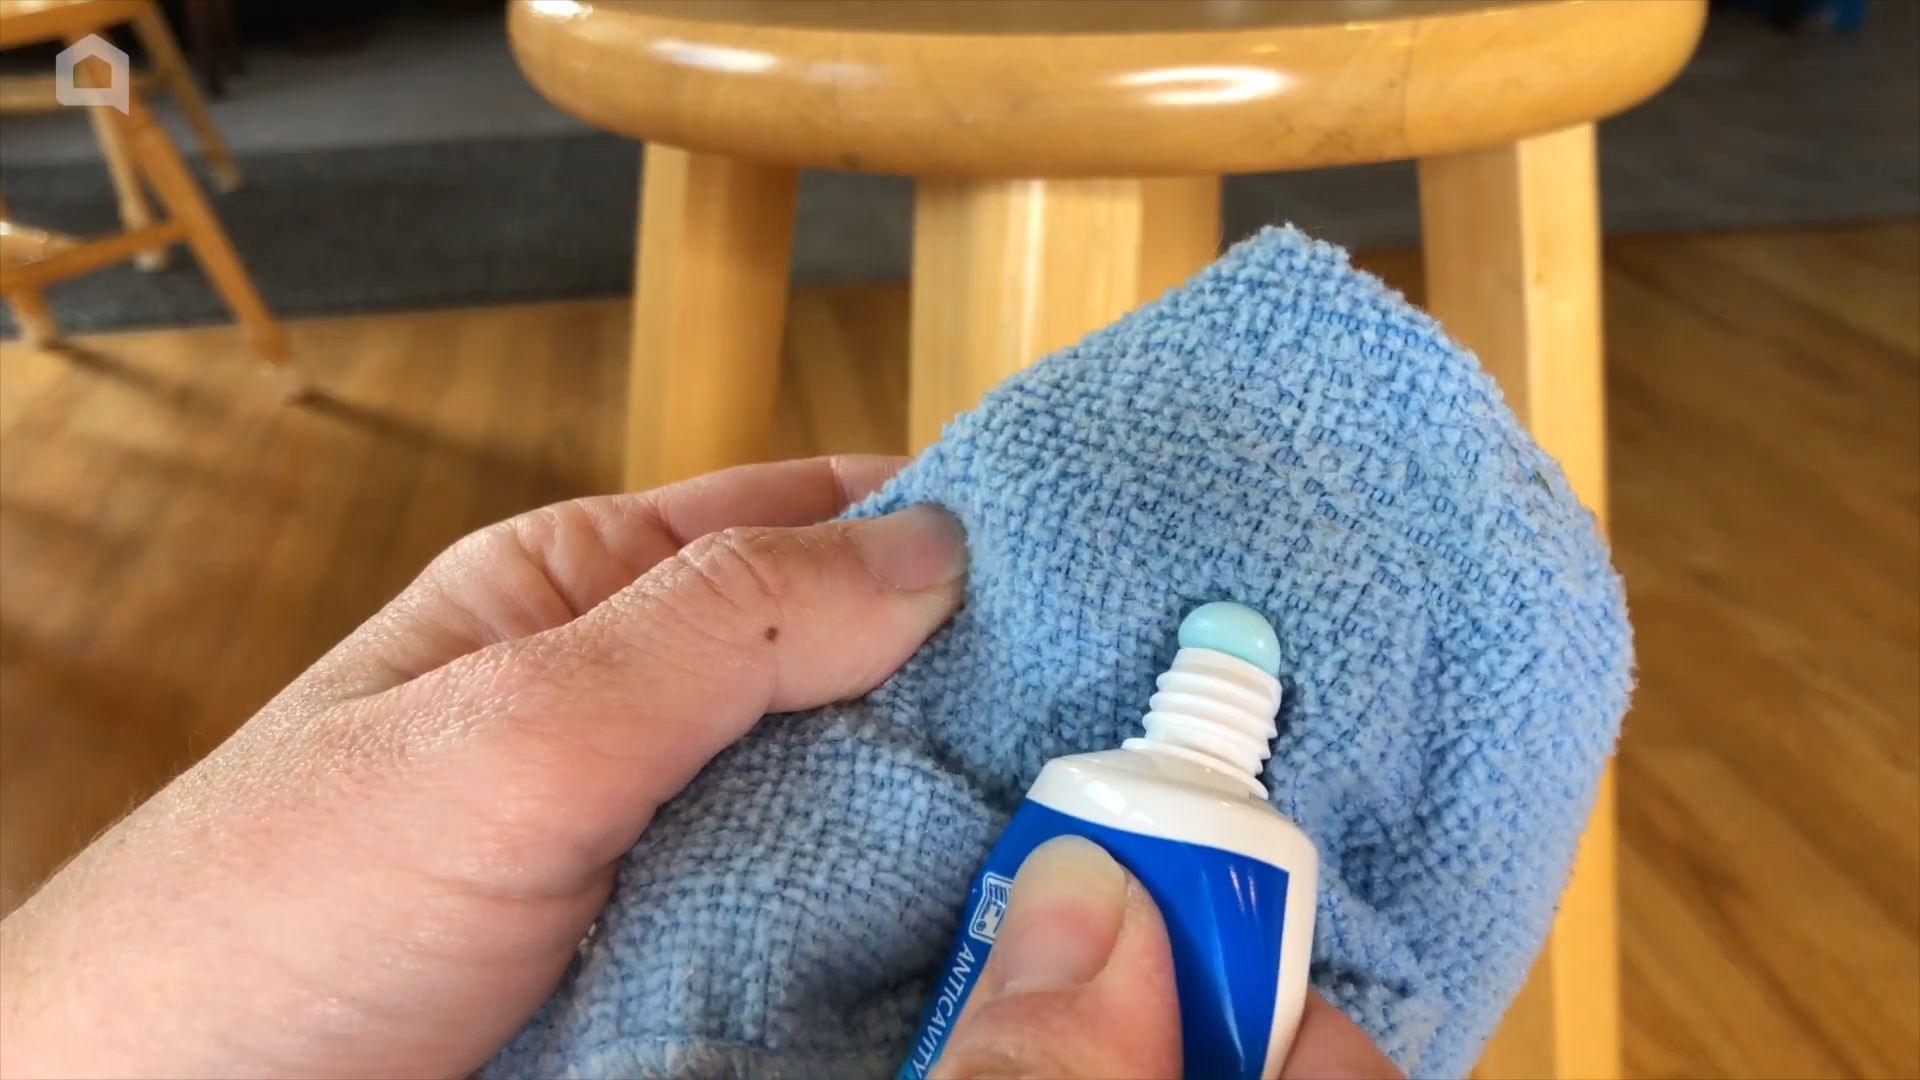
Removing Water Rings from Wood Furniture
Those dreaded water rings on your wooden furniture can be a real eyesore. Toothpaste can help!
What You’ll Need:
* White, non-gel toothpaste
* A soft cloth
Step-by-Step Instructions:
1. Apply Toothpaste: Apply a small amount of toothpaste to the water ring.
2. Gently Rub: Gently rub the toothpaste into the ring using a soft cloth and a circular motion. Be very gentle and avoid applying too much pressure.
3. Wipe Clean: Wipe away the toothpaste with a clean, damp cloth.
4. Dry and Polish: Dry the area thoroughly with a clean, dry cloth. You may want to follow up with a furniture polish to restore the shine.
Important Note: Always test this method in an inconspicuous area first to ensure it doesn’t damage the finish of your furniture.
Cleaning Your Cell Phone Screen
Our cell phone screens are magnets for fingerprints and smudges. Toothpaste can help keep them clean and clear.
What You’ll Need:
* White, non-gel toothpaste
* A soft, lint-free cloth (like a microfiber cloth)
* Water
Step-by-Step Instructions:
1. Apply Toothpaste: Apply a very tiny amount of toothpaste to the soft cloth. Seriously, just a tiny dot!
2. Gently Rub: Gently rub the cloth over the screen in a circular motion. Be extremely careful not to get any toothpaste into the phone’s ports or openings.
Hey there, fellow DIY enthusiasts! I’m always on the lookout for clever cleaning hacks that save time and money. And guess what? My trusty tube of toothpaste has become my secret weapon! Forget just using it for pearly whites; toothpaste is a surprisingly versatile cleaner for all sorts of household messes. Let me share some of my favorite toothpaste cleaning hacks that I’ve personally tested and found incredibly effective.
Cleaning Shoes with Toothpaste
Dirty shoes can really bring down your whole look, right? And sometimes, just throwing them in the washing machine isn’t enough. That’s where toothpaste comes in! This works especially well on white sneakers or shoes with rubber soles.
What You’ll Need:
* An old toothbrush
* White, non-gel toothpaste (avoid colored or heavily abrasive formulas)
* A damp cloth or sponge
* Water
Step-by-Step Instructions:
1. Prepare Your Shoes: Before you start, give your shoes a quick once-over. Remove any loose dirt or debris with a dry brush or cloth. This will prevent you from just spreading the grime around.
2. Apply the Toothpaste: Squeeze a small amount of toothpaste onto the dirty areas of your shoes. I usually focus on the rubber soles, scuff marks, and any particularly stubborn stains.
3. Scrub Away! Using your old toothbrush, gently scrub the toothpaste into the affected areas. Use circular motions and apply a bit of pressure, especially on tough stains. You’ll start to see the dirt lifting away pretty quickly.
4. Wipe Clean: Once you’ve scrubbed thoroughly, use a damp cloth or sponge to wipe away the toothpaste residue. Rinse the cloth frequently to avoid just smearing the dirt back onto the shoes.
5. Repeat if Necessary: For really stubborn stains, you might need to repeat the process. Don’t be afraid to give it another go!
6. Air Dry: Let your shoes air dry completely before wearing them. Avoid putting them in direct sunlight, as this can sometimes cause discoloration.
Removing Scuff Marks from Walls
Kids (or clumsy adults like myself!) can leave scuff marks all over the walls. Instead of repainting, try this simple toothpaste trick.
What You’ll Need:
* White, non-gel toothpaste
* A soft, damp cloth
Step-by-Step Instructions:
1. Dampen the Cloth: Lightly dampen a soft cloth with water. Make sure it’s not dripping wet, just slightly moist.
2. Apply Toothpaste: Put a small dab of toothpaste onto the damp cloth. You don’t need a lot; a little goes a long way.
3. Gently Rub: Gently rub the toothpaste onto the scuff mark using a circular motion. Be careful not to scrub too hard, as you don’t want to damage the paint.
4. Wipe Clean: Use a clean, damp part of the cloth to wipe away the toothpaste residue.
5. Dry the Area: Use a dry cloth to gently dry the area.
6. Admire Your Work! The scuff mark should be gone, leaving your wall looking fresh and clean.
Polishing Chrome Fixtures
Dull chrome fixtures in your bathroom or kitchen can make the whole space look dingy. Toothpaste can bring back the shine!
What You’ll Need:
* White, non-gel toothpaste
* A soft cloth
* Water
Step-by-Step Instructions:
1. Apply Toothpaste: Apply a small amount of toothpaste directly to the chrome fixture.
2. Rub and Polish: Use a soft cloth to rub the toothpaste onto the fixture in a circular motion. Apply a bit of pressure to polish the surface.
3. Rinse Thoroughly: Rinse the fixture thoroughly with water to remove all traces of toothpaste.
4. Dry and Buff: Use a clean, dry cloth to dry and buff the fixture to a sparkling shine.
Cleaning Your Iron
A dirty iron can leave marks on your clothes. Keep it clean with this easy toothpaste hack. Make sure your iron is unplugged and completely cool before starting!
What You’ll Need:
* White, non-gel toothpaste
* A soft cloth
* Water
Step-by-Step Instructions:
1. Apply Toothpaste: Apply a small amount of toothpaste to the cool soleplate of your iron.
2. Rub Gently: Use a soft cloth to gently rub the toothpaste over the soleplate, focusing on any burnt-on residue or stains.
3. Wipe Clean: Use a damp cloth to wipe away the toothpaste and any loosened residue.
4. Dry Thoroughly: Make sure the soleplate is completely dry before using your iron again.
Removing Water Rings from Wood Furniture
Those dreaded water rings on your wooden furniture can be a real eyesore. Toothpaste can help!
What You’ll Need:
* White, non-gel toothpaste
* A soft cloth
Step-by-Step Instructions:
1. Apply Toothpaste: Apply a small amount of toothpaste to the water ring.
2. Gently Rub: Gently rub the toothpaste into the ring using a soft cloth and a circular motion. Be very gentle and avoid applying too much pressure.
3. Wipe Clean: Wipe away the toothpaste with a clean, damp cloth.
4. Dry and Polish: Dry the area thoroughly with a clean, dry cloth. You may want to follow up with a furniture polish to restore the shine.
Important Note: Always test this method in an inconspicuous area first to ensure it doesn’t damage the finish of your furniture.
Cleaning Your Cell Phone Screen
Our cell phone screens are magnets for fingerprints and smudges. Toothpaste can help keep them clean and clear.
What You’ll Need:
* White, non-gel toothpaste
* A soft, lint-free cloth (like a microfiber cloth)
* Water
Step-by-Step Instructions:
1. Apply Toothpaste: Apply a very tiny amount of toothpaste to the soft cloth. Seriously, just a tiny dot!
2. Gently Rub: Gently rub the cloth over the screen in a circular motion. Be extremely careful not to get any toothpaste into the phone’s ports or openings.
3. Wipe Clean: Use a clean, slightly damp part of the cloth to wipe away the toothpaste residue.
4. Dry Thoroughly: Use a dry part of the cloth to dry the screen completely.
Important Note: This method is best for removing minor scratches and smudges. Avoid using it on phones with screen protectors, as it may damage them. Also, be extremely careful to avoid getting any moisture into the phone’s openings.
Cleaning Piano Keys
Over time, piano keys can become yellowed and grimy. Toothpaste can help restore their brightness.
What You’ll Need:
* White, non-gel toothpaste
* A soft cloth
* Water
Step-by-Step Instructions:
1. Apply Toothpaste: Apply a small amount of toothpaste to a soft cloth.
2. Gently Rub: Gently rub the toothpaste onto the piano keys, one at a time. Be careful not to get any toothpaste between the keys.
3. Wipe Clean: Use a clean, damp cloth to wipe away the toothpaste residue.
4. Dry Thoroughly: Dry the keys thoroughly with a clean, dry cloth.
Removing Crayon Marks
If you have kids, you know the struggle of finding crayon marks on walls, furniture, and other surfaces. Toothpaste to the rescue!
What You’ll Need:
* White, non-gel toothpaste
* A soft cloth
Step-by-Step Instructions:
1. Apply Toothpaste: Apply a small amount of toothpaste directly to the crayon marks.
2. Gently Rub: Gently rub the toothpaste over the crayon marks using a soft cloth.
3. Wipe Clean: Wipe away the toothpaste and crayon residue with a clean, damp cloth.
4. Dry Thoroughly: Dry the area with a clean, dry cloth.
General Tips and Precautions
* Always use white, non-gel toothpaste: Colored or gel toothpastes can stain or damage surfaces. Avoid toothpastes with whitening agents or abrasive particles, as these can also be too harsh.
* Test in an inconspicuous area first: Before applying toothpaste to a large or visible area, test it in a small, hidden spot to make sure it doesn’t damage the surface.
* Use a soft cloth: Avoid using abrasive sponges or scrub brushes, as these can scratch surfaces.
* Be gentle: Don

Conclusion
So, there you have it! This isn’t just another cleaning tip; it’s a game-changer. We’ve explored the surprising power of toothpaste beyond oral hygiene, revealing how it can be your secret weapon for tackling a multitude of household cleaning challenges. From restoring the sparkle to your jewelry to banishing stubborn stains on your sneakers, the versatility of this everyday item is truly remarkable.
Why is this DIY toothpaste cleaning hack a must-try? Because it’s effective, readily available, and incredibly budget-friendly. You likely already have a tube of toothpaste in your bathroom, making it a convenient solution for those unexpected cleaning emergencies. Forget about spending a fortune on specialized cleaning products filled with harsh chemicals. Toothpaste offers a gentler, yet equally potent, alternative for many common cleaning tasks.
But the beauty of this DIY approach lies in its adaptability. Feel free to experiment with different types of toothpaste to find what works best for your specific needs. For instance, a whitening toothpaste might be particularly effective for brightening discolored surfaces, while a gel toothpaste could be ideal for delicate items. Remember to always test a small, inconspicuous area first to ensure compatibility and prevent any potential damage.
Consider these variations to personalize your toothpaste cleaning experience:
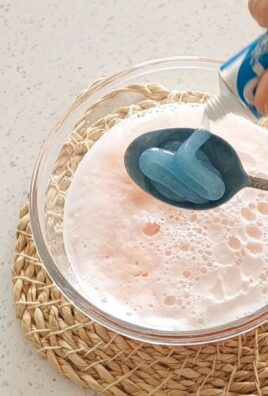
* **For extra scrubbing power:** Mix a small amount of baking soda with your toothpaste to create a paste with enhanced abrasive properties. This is perfect for tackling tough stains on grout or removing stubborn residue from cookware.
* **For a refreshing scent:** Add a drop or two of your favorite essential oil to the toothpaste before applying it to the surface. Lavender, lemon, or tea tree oil can add a pleasant aroma and provide additional cleaning benefits.
* **For delicate surfaces:** Use a soft-bristled toothbrush or a microfiber cloth to gently apply the toothpaste and avoid scratching or damaging the material.
We’re confident that once you experience the magic of toothpaste cleaning, you’ll be hooked. It’s a simple, yet incredibly effective way to keep your home sparkling clean without breaking the bank or exposing yourself to harsh chemicals.
Now, it’s your turn to put these tips to the test! We encourage you to try out these DIY toothpaste cleaning hacks and share your experiences with us. Did you discover a new and innovative use for toothpaste? Did you find a particular variation that worked wonders for a specific cleaning challenge? We’d love to hear all about it in the comments below. Your insights could help other readers discover even more amazing ways to harness the power of toothpaste for a cleaner, brighter home. So, grab that tube of toothpaste and get ready to be amazed! Let’s unlock the full potential of this everyday essential and transform the way we clean.
Frequently Asked Questions (FAQs)
1. What kind of toothpaste works best for cleaning?
Generally, plain white toothpaste (not gel) is recommended for most cleaning tasks. The mild abrasives in regular toothpaste are what make it effective for removing stains and grime. Gel toothpastes may not have the same abrasive properties and might not be as effective. Whitening toothpaste can be used for brightening purposes, but always test it on an inconspicuous area first, as it may be slightly more abrasive. Avoid using toothpaste with added glitter or large particles, as these could scratch delicate surfaces.
2. Can I use toothpaste on all surfaces?
No, toothpaste is not suitable for all surfaces. It’s essential to test it on a small, hidden area before applying it to the entire surface. Avoid using toothpaste on porous materials like unsealed stone or wood, as it can be absorbed and difficult to remove. Be cautious when using toothpaste on delicate surfaces like painted walls or certain types of plastic, as the abrasives could cause damage. Always use a soft cloth or brush and gentle pressure to minimize the risk of scratching.
3. How do I remove toothpaste residue after cleaning?
Removing toothpaste residue is usually quite simple. After applying the toothpaste and scrubbing the surface, use a clean, damp cloth to wipe away any remaining paste. You may need to rinse the cloth several times to ensure all the residue is removed. For stubborn residue, you can use a solution of warm water and a mild detergent. Dry the surface thoroughly with a clean towel to prevent water spots.
4. Is toothpaste safe to use on jewelry?
Yes, toothpaste can be used to clean certain types of jewelry, particularly silver and gold. However, avoid using it on delicate gemstones like pearls or opals, as the abrasives could damage them. Apply a small amount of toothpaste to a soft-bristled toothbrush or a microfiber cloth and gently scrub the jewelry. Rinse thoroughly with water and dry with a soft cloth. Be sure to avoid getting toothpaste inside any settings or crevices, as it can be difficult to remove.
5. Can toothpaste remove scratches from screens?
While some people claim that toothpaste can remove minor scratches from screens, it’s generally not recommended. Toothpaste is abrasive and could potentially worsen the scratches or damage the screen’s coating. There are specialized products designed specifically for removing scratches from screens, which are a safer and more effective option. If you’re considering using toothpaste on a screen, proceed with extreme caution and test it on a very small, inconspicuous area first.
6. What are some other unexpected uses for toothpaste?
Besides the cleaning tips mentioned in the article, toothpaste can also be used to:
* **Defog bathroom mirrors:** Apply a thin layer of toothpaste to the mirror, wipe it off with a damp cloth, and buff it dry to prevent fogging.
* **Soothe insect bites:** Apply a small amount of toothpaste to the bite to relieve itching and reduce inflammation.
* **Remove crayon marks from walls:** Gently rub toothpaste onto the crayon marks and wipe it off with a damp cloth.
* **Clean piano keys:** Use a soft cloth dampened with toothpaste to gently clean piano keys, then wipe them dry with a clean cloth.
* **Polish chrome fixtures:** Apply toothpaste to chrome fixtures like faucets and showerheads to remove water spots and restore their shine.
7. Can I use toothpaste to clean my teeth whitening trays?
Yes, you can use toothpaste to clean your teeth whitening trays. However, it is best to use a non-abrasive toothpaste to avoid scratching the trays. Gently brush the trays with the toothpaste and rinse thoroughly with cool water. Avoid using hot water, as it can warp the trays.
8. Is it safe to use toothpaste to clean baby bottles or pacifiers?
While toothpaste can be used to clean some household items, it is generally not recommended for cleaning baby bottles or pacifiers. Toothpaste contains ingredients that are not meant to be ingested and could be harmful to infants. There are specialized cleaning products designed specifically for baby bottles and pacifiers that are safer and more effective.
9. How often should I use toothpaste for cleaning?
The frequency of using toothpaste for cleaning depends on the specific task and the surface being cleaned. For regular cleaning tasks like polishing jewelry or removing water spots, you can use toothpaste as needed. However, for more delicate surfaces, it’s best to use toothpaste sparingly and only when necessary to avoid potential damage. Always test a small area first and use gentle pressure to minimize the risk of scratching or discoloration.
10. Where can I find more information about DIY cleaning hacks?
There are numerous online resources available that offer a wealth of information about DIY cleaning hacks. You can search for articles, videos, and blog posts on websites like Pinterest, YouTube, and various home improvement and cleaning blogs. Be sure to research the credibility of the source and always test any new cleaning hack on a small, inconspicuous area before applying it to the entire surface.


Leave a Comment