

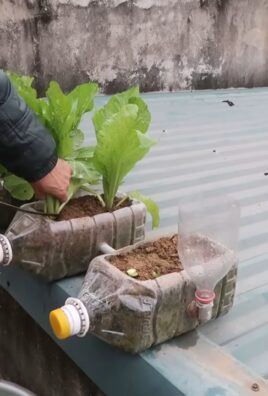
Tomato gardening tips are your secret weapon to unlocking a bountiful harvest right in your backyard! Imagine sinking your teeth into a juicy, sun-ripened tomato, bursting with flavor, knowing you nurtured it from a tiny seed. That’s the magic of home gardening, and it’s more achievable than you think. For centuries, cultivating tomatoes has been a cherished tradition, dating back to the Aztecs and Incas who first domesticated these vibrant fruits. Today, growing your own tomatoes isn’t just about fresh produce; it’s about connecting with nature, reducing your carbon footprint, and enjoying the satisfaction of creating something amazing with your own hands.
But let’s be honest, sometimes tomato gardening can feel a little daunting. Pests, diseases, and unpredictable weather can throw even the most seasoned gardeners for a loop. That’s where these DIY tricks and hacks come in! I’m here to share some simple, effective, and budget-friendly solutions to common tomato gardening challenges. Whether you’re a complete beginner or a seasoned green thumb, you’ll find valuable insights to help you maximize your yield and enjoy a thriving tomato patch. So, get ready to roll up your sleeves and discover how these tomato gardening tips can transform your garden into a tomato paradise!
DIY Tomato Trellis: From Scrap Wood to Garden Glory!
Hey there, fellow garden enthusiasts! Are you tired of your tomato plants sprawling all over the ground, becoming a tangled mess and vulnerable to pests and diseases? I know I was! That’s why I decided to build my own tomato trellis using scrap wood. It’s a fantastic way to support your plants, improve air circulation, and make harvesting a breeze. Plus, it’s a super satisfying DIY project that’s easy on the wallet. Let’s get started!
What You’ll Need:
Before we dive in, let’s gather our supplies. Don’t worry if you don’t have everything on hand; a little improvisation is part of the fun!
* **Scrap Wood:** This is the star of the show! Look for sturdy pieces of wood, like 2x4s, 1x2s, or even old fence posts. The length will depend on how tall you want your trellis to be. I aimed for about 6 feet tall.
* Measuring Tape: Essential for accurate cuts and spacing.
* Saw: A hand saw, circular saw, or even a jigsaw will work. Choose whatever you’re most comfortable with.
* Drill: For pre-drilling holes and attaching the wood pieces.
* Screws or Nails: Choose weather-resistant screws or nails to withstand the elements. I prefer screws for their added strength.
* Wood Glue (Optional): For extra reinforcement, especially if you’re using thinner wood.
* Sandpaper: To smooth out any rough edges and prevent splinters.
* Wood Stain or Paint (Optional): To protect the wood and give your trellis a polished look.
* Safety Glasses: Always protect your eyes when working with power tools.
* Work Gloves: To protect your hands.
* Pencil: For marking your cuts.
* Level: To ensure your trellis is straight and sturdy.
* Clamps (Optional): To hold pieces of wood together while the glue dries or while you’re screwing them together.
Planning Your Trellis Design
Before you start cutting, take a moment to plan your trellis design. There are tons of options, but here’s a simple and effective one that I used:
* Ladder Style: This involves creating two vertical supports with horizontal rungs connecting them. It’s easy to build and provides excellent support for your tomato plants.
* A-Frame Style: This involves creating two angled supports that meet at the top, forming an “A” shape. It’s very stable and can support heavy plants.
* Single Stake with Horizontal Supports: This is the simplest design, using a single tall stake with horizontal supports attached to it. It’s best for smaller tomato varieties.
I went with the ladder style because it was the easiest to adapt to the scrap wood I had available.
Building Your Tomato Trellis: Step-by-Step
Okay, let’s get our hands dirty! Here’s how I built my ladder-style tomato trellis:
1. Cut the Vertical Supports: First, I cut two pieces of wood to be my vertical supports. I wanted my trellis to be about 6 feet tall, so I cut two 2x4s to that length. Make sure your cuts are straight and even.
2. Cut the Horizontal Rungs: Next, I cut the horizontal rungs that would connect the vertical supports. The length of these rungs will determine the width of your trellis. I wanted mine to be about 2 feet wide, so I cut several 1x2s to that length. I cut about 6 rungs, spacing them about 1 foot apart.
3. Sand the Wood: Before assembling anything, I sanded all the pieces of wood to remove any rough edges or splinters. This will make the trellis safer to handle and prevent any injuries.
4. Assemble the Trellis Frame: Now comes the fun part! I laid the two vertical supports on a flat surface, parallel to each other. Then, I placed the horizontal rungs between them, spacing them evenly. I used a measuring tape to ensure the spacing was consistent.
5. Attach the Rungs: Once I was happy with the placement of the rungs, I pre-drilled holes through the vertical supports and into the ends of the rungs. This will prevent the wood from splitting when you drive in the screws. Then, I used screws to attach the rungs to the vertical supports. I used two screws per rung on each side for extra strength. If you’re using wood glue, apply it to the ends of the rungs before screwing them in.
6. Reinforce the Joints (Optional): For added stability, you can reinforce the joints where the rungs meet the vertical supports. I used small metal brackets and screws to do this. This is especially helpful if you’re using thinner wood.
7. Test for Stability: Once the trellis is assembled, stand it up and test it for stability. Make sure it’s sturdy and doesn’t wobble. If it’s wobbly, you may need to add more supports or reinforce the joints.
8. Finishing Touches (Optional): If you want to protect the wood and give your trellis a polished look, you can stain or paint it. I chose to stain mine with a weather-resistant stain to protect it from the elements. Let the stain or paint dry completely before using the trellis.
Installing Your Tomato Trellis
Now that your trellis is built, it’s time to install it in your garden!
1. Choose a Location: Select a sunny spot in your garden where your tomato plants will get at least 6-8 hours of sunlight per day.
2. Prepare the Soil: Dig a hole for each vertical support of the trellis. The holes should be deep enough to bury the supports about 1 foot into the ground. This will provide extra stability.
3. Position the Trellis: Place the trellis in the holes, making sure it’s straight and level. Use a level to check.
4. Backfill the Holes: Fill the holes with soil, packing it firmly around the vertical supports.
5. Secure the Trellis (Optional): For extra security, you can drive stakes into the ground next to the vertical supports and attach the trellis to the stakes with wire or twine. This is especially helpful in windy areas.
Training Your Tomato Plants
Once your trellis is installed, you’ll need to train your tomato plants to grow up it.
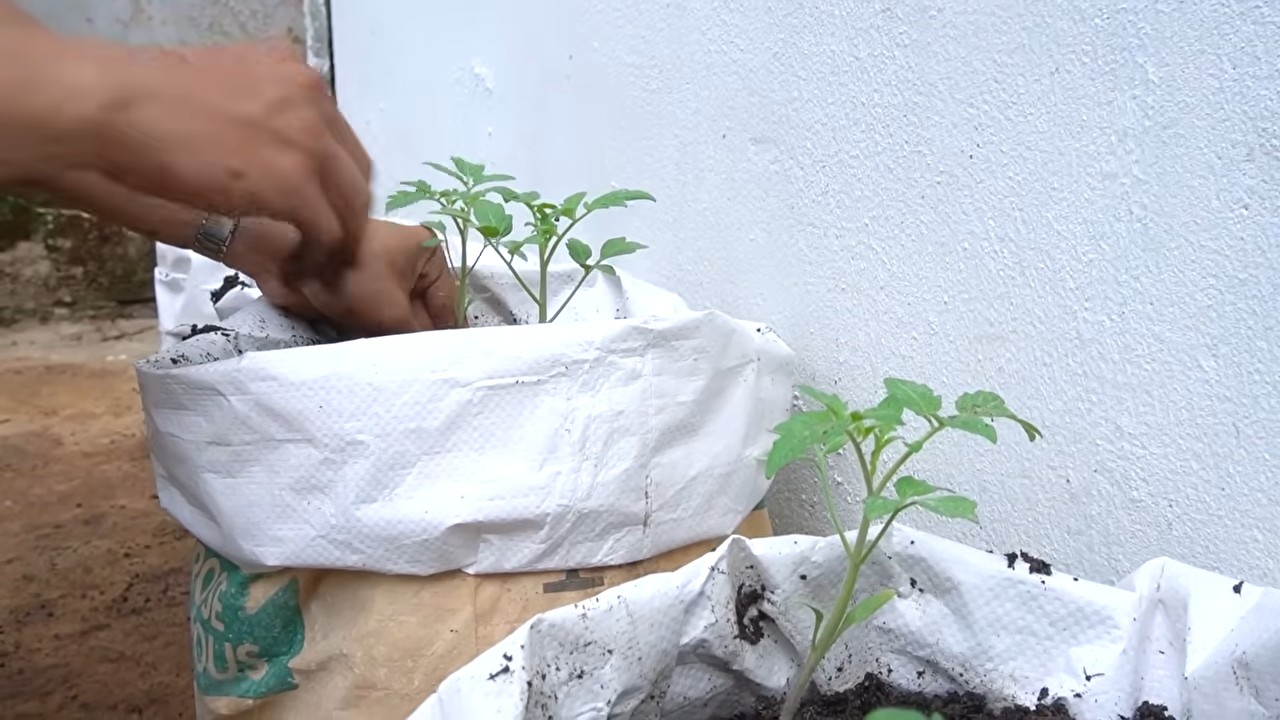
1. Start Early: Begin training your plants when they’re still small, about 1-2 feet tall.
2. Tie the Stems: Use soft twine or plant ties to gently tie the tomato stems to the trellis. Be careful not to tie them too tightly, as this can damage the stems.
3. Encourage Upward Growth: As the plants grow, continue to tie the stems to the trellis, encouraging them to grow upwards.
4. Prune Suckers: Remove any suckers that grow between the main stem and the branches. Suckers are unproductive shoots that will drain energy from the plant.
5. Monitor and Adjust: Regularly monitor your tomato plants and adjust the ties as needed. As the plants grow larger, you may need to add more ties to support the weight of the fruit.
Tips for Success
Here are a few extra tips to help you succeed with your DIY tomato trellis:
* Choose the Right Tomato Variety: Some tomato varieties are better suited for trellising than others. Indeterminate varieties, which continue to grow throughout the season, are ideal for trellising. Determinate varieties, which grow to a certain size and then stop, can also be trellised, but they may not need as much support.
* Water Regularly: Tomato plants need plenty of water, especially when they’re fruiting. Water deeply and regularly, especially during dry spells.
* Fertilize Regularly: Tomato plants are heavy feeders and need regular fertilization to produce a good crop. Use a balanced fertilizer that’s specifically formulated for tomatoes.
* Protect from Pests and Diseases: Tomato plants are susceptible to a variety of pests and diseases. Monitor your plants regularly and take action to control any problems that arise.
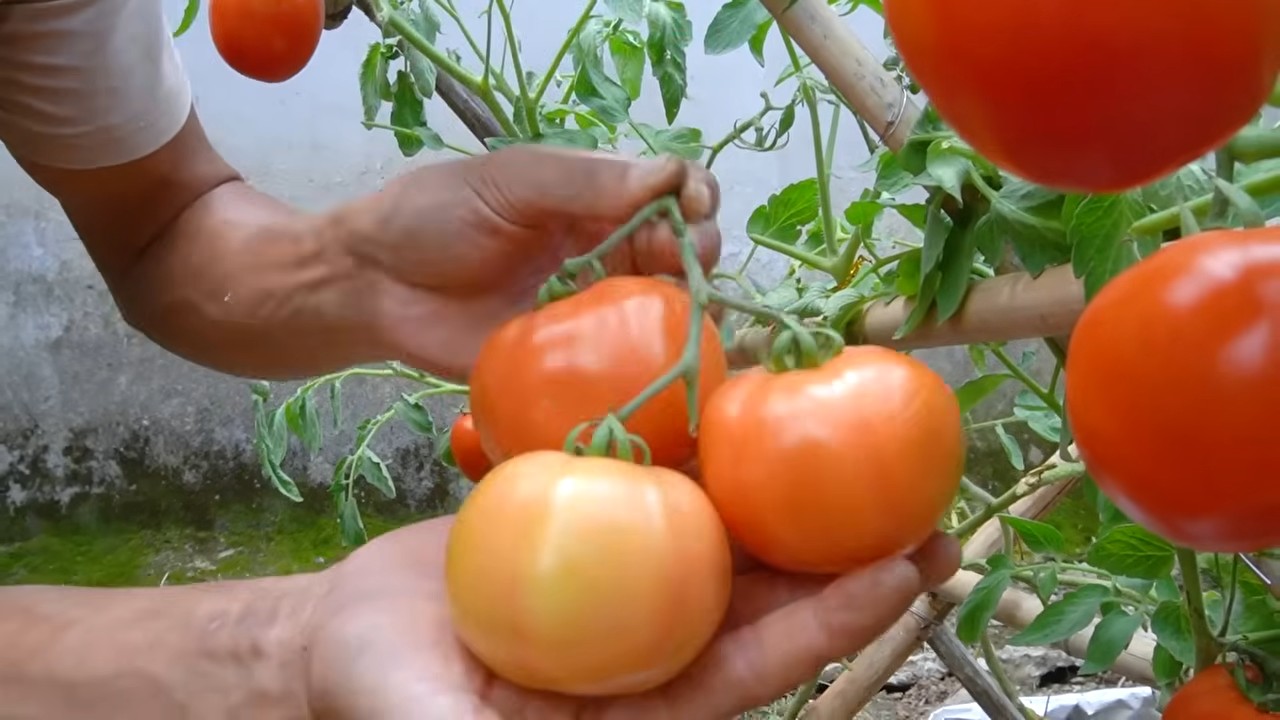
* Enjoy Your Harvest! The best part of growing your own tomatoes is enjoying the delicious, homegrown fruit. Harvest your tomatoes when they’re ripe and enjoy them in salads, sauces, or just plain!
Troubleshooting
Even with the best planning, things can sometimes go wrong. Here are a few common problems you might encounter and how to fix them:
* Trellis is Wobbly: If your trellis is wobbly, it could be due to several factors. Make sure the vertical supports are buried deep enough in the ground. You can also add stakes to provide extra support. If the joints are loose, reinforce them with metal brackets or wood glue.
* Plants are Falling Off the Trellis: If
Conclusion
So, there you have it! Mastering these simple yet effective DIY tomato gardening tips can truly transform your harvest from a handful of sad, store-bought-looking fruits to a bounty of juicy, flavorful tomatoes that will make your neighbors green with envy. We’ve covered everything from optimizing your soil with homemade compost tea to creating natural pest repellents that keep those pesky critters away without harmful chemicals.
Why is this a must-try? Because it’s about more than just growing tomatoes. It’s about connecting with nature, understanding the life cycle of your food, and enjoying the unparalleled satisfaction of biting into a tomato you nurtured from seed to table. It’s about saving money, reducing your carbon footprint, and knowing exactly what goes into your food. And let’s be honest, a homegrown tomato simply tastes better. The vibrant flavor, the perfect texture – it’s an experience that store-bought tomatoes just can’t replicate.
But don’t stop there! Experiment with different varieties of tomatoes. Try heirloom seeds for unique flavors and colors. Consider companion planting – basil, marigolds, and carrots are excellent choices for deterring pests and improving tomato growth. You can also explore different methods of staking or caging your plants to find what works best for your garden space and tomato variety. For example, determinate tomatoes, which grow to a certain size and then produce all their fruit at once, might benefit from a simple cage, while indeterminate tomatoes, which continue to grow and produce fruit throughout the season, might need a more robust staking system.
And remember, gardening is a journey, not a destination. There will be successes and failures, but each experience is a learning opportunity. Don’t be afraid to get your hands dirty, to experiment, and to adapt your techniques as you go. The most important thing is to enjoy the process and to celebrate the fruits (or vegetables!) of your labor.
We are confident that these DIY tomato gardening tips will empower you to grow the best tomatoes you’ve ever tasted. Now it’s your turn! Get out there, get planting, and get ready to enjoy a summer filled with delicious, homegrown tomatoes.
We’d love to hear about your experiences! Share your photos, your successes, and even your challenges in the comments below. Let’s build a community of tomato-loving gardeners who can learn from each other and inspire each other to grow the best possible tomatoes. What are you waiting for? Your tomato adventure awaits!
Frequently Asked Questions (FAQ)
What if I don’t have a lot of space for a traditional garden?
No problem! One of the great things about tomato gardening is its versatility. You can successfully grow tomatoes in containers on a balcony, patio, or even a sunny windowsill. Choose a container that is at least 12 inches in diameter and depth to provide enough room for the roots to grow. Use a high-quality potting mix and be sure to water regularly, as container-grown tomatoes tend to dry out more quickly than those grown in the ground. Dwarf or bush varieties of tomatoes are particularly well-suited for container gardening. Consider using self-watering containers to simplify watering and ensure consistent moisture levels.
How often should I water my tomato plants?
Watering frequency depends on several factors, including the weather, the type of soil, and the size of your plants. As a general rule, water deeply and less frequently, rather than shallowly and often. This encourages the roots to grow deeper, making the plants more drought-tolerant. Check the soil moisture by sticking your finger about an inch into the soil. If it feels dry, it’s time to water. During hot, dry weather, you may need to water daily, while during cooler, wetter periods, you may only need to water every few days. Avoid overhead watering, as this can promote fungal diseases. Instead, water at the base of the plant, using a soaker hose or watering can.
What are some common tomato pests and diseases, and how can I prevent them?
Tomatoes are susceptible to a variety of pests and diseases, including aphids, whiteflies, tomato hornworms, blossom end rot, and early blight. Prevention is key to minimizing these problems. Start by choosing disease-resistant varieties of tomatoes. Practice good garden hygiene by removing any diseased leaves or plant debris. Rotate your crops each year to prevent soilborne diseases from building up. Use row covers to protect young plants from pests. Encourage beneficial insects, such as ladybugs and lacewings, which prey on aphids and other pests. For blossom end rot, ensure consistent watering and add calcium to the soil. For fungal diseases like early blight, improve air circulation around the plants by pruning away some of the lower leaves.
How do I know when my tomatoes are ripe?
The color of the tomato is a good indicator of ripeness, but it’s not the only factor. The tomato should also feel slightly soft to the touch and have a pleasant aroma. Gently squeeze the tomato; if it gives slightly, it’s likely ripe. The stem should also detach easily from the plant. Keep in mind that different varieties of tomatoes ripen to different colors, so be sure to research the specific variety you are growing.
Can I save seeds from my homegrown tomatoes?
Yes, you can save seeds from your homegrown tomatoes, but it’s important to understand the difference between hybrid and heirloom varieties. Hybrid tomatoes are the result of cross-pollinating two different parent plants, and the seeds they produce may not grow true to type. Heirloom tomatoes, on the other hand, are open-pollinated varieties that have been passed down for generations, and their seeds will generally produce plants that are similar to the parent plant. To save seeds, choose ripe, healthy tomatoes. Scoop out the seeds and pulp into a jar, add a little water, and let it ferment for a few days. This process helps to remove the gelatinous coating around the seeds. Rinse the seeds thoroughly and spread them out on a paper towel to dry completely. Store the dried seeds in an airtight container in a cool, dark place.
What is the best type of fertilizer for tomato plants?
Tomato plants need a balanced fertilizer that provides the essential nutrients for growth and fruit production. Look for a fertilizer with an NPK ratio (nitrogen, phosphorus, potassium) that is relatively balanced, such as 5-10-5 or 10-10-10. Nitrogen promotes leafy growth, phosphorus promotes root development and flowering, and potassium promotes fruit development. You can also use organic fertilizers, such as compost, manure, or bone meal. Apply fertilizer according to the package directions, and avoid over-fertilizing, as this can lead to excessive leafy growth and reduced fruit production. Side-dress your tomato plants with fertilizer every few weeks throughout the growing season.
How do I prevent my tomato plants from getting leggy?
Leggy tomato plants are often the result of insufficient light. If your tomato plants are growing tall and spindly with long spaces between the leaves, they are likely not getting enough sunlight. Provide at least 6-8 hours of direct sunlight per day. If you are starting your tomato plants indoors, use grow lights to supplement natural light. You can also pinch off the lower leaves of leggy tomato plants to encourage bushier growth. When transplanting your tomato plants, bury the stem deeply in the soil, as this will encourage the plant to develop roots along the buried stem.
What are some good companion plants for tomatoes?
Companion planting can be a great way to improve the health and productivity of your tomato plants. Some good companion plants for tomatoes include basil, marigolds, carrots, onions, garlic, and nasturtiums. Basil repels tomato hornworms and whiteflies, while marigolds deter nematodes and other pests. Carrots improve soil drainage, and onions and garlic repel aphids and other insects. Nasturtiums attract beneficial insects, such as ladybugs and lacewings. Avoid planting tomatoes near brassicas, such as cabbage and broccoli, as they can compete for nutrients.
My tomatoes are cracking. What causes this, and how can I prevent it?
Tomato cracking is often caused by inconsistent watering. When the soil is dry, and then suddenly receives a large amount of water, the tomatoes can swell rapidly, causing the skin to crack. To prevent cracking, water your tomato plants consistently, especially during hot, dry weather. Use mulch to help retain moisture in the soil. Choose crack-resistant varieties of tomatoes. Harvest your tomatoes as soon as they are ripe, as overripe tomatoes are more prone to cracking.
Leave a Comment