

Surprise Bean Harvest Tips: Unlocking a Bountiful Harvest You Never Expected!
Ever feel like your bean plants are playing hide-and-seek with their produce? You nurture them, water them, and patiently wait, only to find a handful of beans when you finally decide to harvest? I’ve been there! It’s frustrating, especially when you’re dreaming of fresh bean salads and hearty stews. But what if I told you there are simple, often overlooked, surprise bean harvest tips that can dramatically increase your yield?
Beans have been a staple crop for centuries, dating back to ancient civilizations in the Americas. They’re not just delicious; they’re packed with nutrients and play a vital role in soil health by fixing nitrogen. Our ancestors relied on these humble legumes, and now, we can tap into that same abundance with a little know-how.
This DIY guide is your secret weapon to maximizing your bean harvest. We’ll delve into the often-missed signs of ripeness, the best harvesting techniques to encourage continued production, and even some clever tricks to protect your precious beans from pests and diseases. Forget those disappointing harvests! With these surprise bean harvest tips, you’ll be amazed at the bounty you can reap from your own backyard. Let’s get started and turn those bean dreams into a delicious reality!
Überraschende Tipps für eine reiche Bohnenernte: So maximierst du deinen Ertrag!
Hallo liebe Gartenfreunde! Ich bin total begeistert, euch heute meine besten Tricks für eine überraschend reiche Bohnenernte zu verraten. Bohnen sind ja wirklich dankbare Pflanzen, aber mit ein paar Kniffen kann man den Ertrag nochmal ordentlich steigern. Lasst uns gleich loslegen!
Die richtige Vorbereitung ist das A und O
Bevor wir mit dem eigentlichen Anbau beginnen, ist eine gute Vorbereitung entscheidend. Das fängt schon bei der Auswahl der richtigen Sorte an.
* Sortenwahl: Informiert euch, welche Bohnensorten in eurer Region am besten gedeihen. Es gibt Buschbohnen, Stangenbohnen, Trockenbohnen – die Auswahl ist riesig! Buschbohnen sind ideal für kleinere Gärten, da sie nicht so viel Platz brauchen. Stangenbohnen hingegen klettern in die Höhe und liefern oft einen höheren Ertrag. Trockenbohnen werden, wie der Name schon sagt, getrocknet und sind super für die Vorratshaltung.
* Bodenbeschaffenheit: Bohnen lieben lockeren, humusreichen Boden. Schweren Lehmboden solltet ihr unbedingt mit Kompost oder Sand auflockern. Ein pH-Wert zwischen 6,0 und 7,0 ist ideal.
* Standort: Wählt einen sonnigen Standort für eure Bohnen. Mindestens sechs Stunden Sonne am Tag sind wichtig für eine gute Entwicklung. Achtet auch darauf, dass der Standort windgeschützt ist, besonders bei Stangenbohnen.
* Vorkultur: Bohnen sind Schwachzehrer, das heißt, sie brauchen nicht so viele Nährstoffe. Eine Vorkultur mit Gründüngung (z.B. Phacelia oder Klee) kann den Boden aber trotzdem verbessern.
Aussaat und Anzucht: So gelingt der Start
Jetzt geht’s ans Eingemachte! Die Aussaat ist ein wichtiger Schritt, um den Grundstein für eine erfolgreiche Ernte zu legen.
1. Direktsaat oder Vorziehen? Bohnen können direkt ins Freiland gesät werden, sobald keine Frostgefahr mehr besteht (meist ab Mitte Mai). Wer früher ernten möchte, kann die Bohnen aber auch im Haus vorziehen.
2. Direktsaat im Freiland:
* Lockert den Boden gründlich auf und entfernt Unkraut.
* Zieht Saatrillen mit einem Abstand von ca. 40-50 cm.
* Legt die Bohnenkerne in einem Abstand von ca. 5-8 cm in die Rillen.
* Bedeckt die Kerne mit ca. 2-3 cm Erde und drückt sie leicht an.
* Gießt die Erde vorsichtig an.
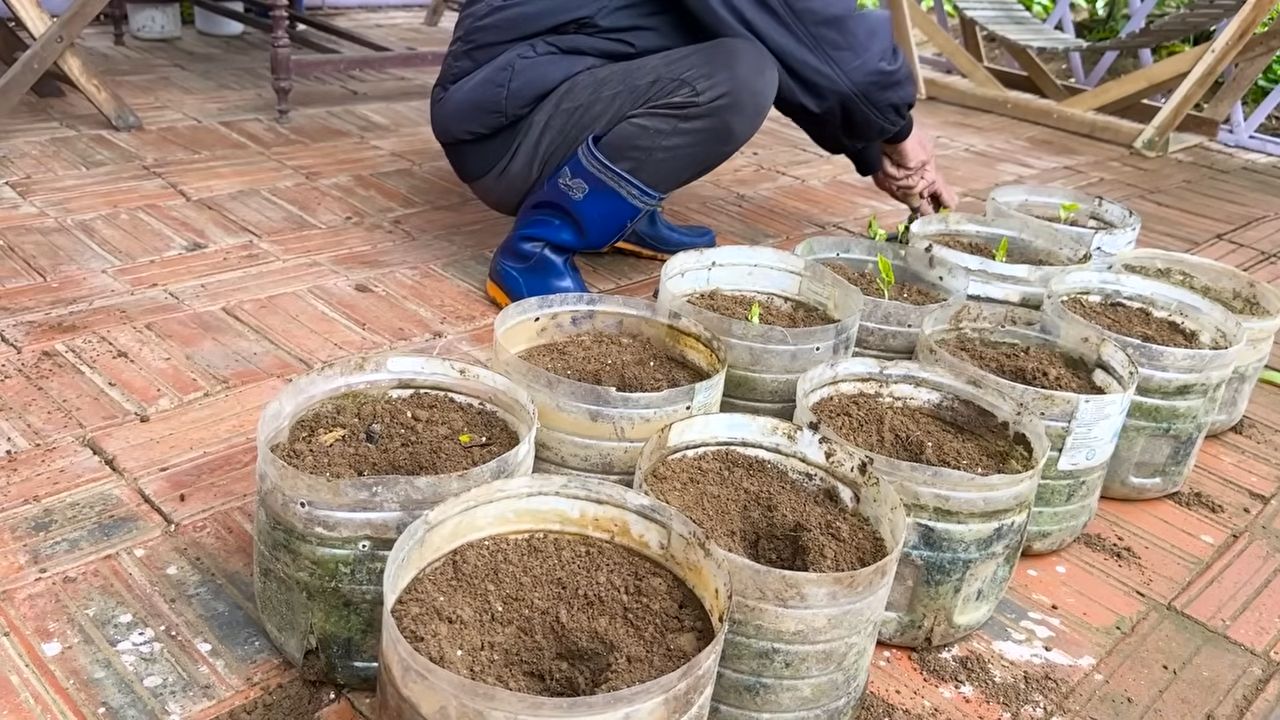
3. Vorziehen im Haus:
* Füllt kleine Töpfe mit Anzuchterde.
* Legt in jeden Topf 2-3 Bohnenkerne.
* Bedeckt die Kerne mit ca. 1 cm Erde und gießt sie an.
* Stellt die Töpfe an einen hellen, warmen Ort (ca. 20-25°C).
* Haltet die Erde feucht, aber nicht nass.
* Sobald die Keimlinge kräftig genug sind (ca. 10-15 cm hoch), können sie ins Freiland umgepflanzt werden.
4. Aussaattiefe: Die Faustregel lautet: Die Kerne sollten etwa doppelt so tief in die Erde, wie sie dick sind.
5. Gießen: Nach der Aussaat ist es wichtig, die Erde gleichmäßig feucht zu halten. Vermeidet aber Staunässe, da die Bohnenkerne sonst faulen können.
6. Schutz vor Schädlingen: Gerade junge Bohnenpflanzen sind anfällig für Schnecken. Schützt sie mit Schneckenzäunen oder anderen geeigneten Maßnahmen.
Pflege während der Wachstumsphase: So bleiben deine Bohnen gesund und kräftig
Die Bohnen sind ausgesät und keimen fleißig? Super! Jetzt kommt es auf die richtige Pflege an, damit sie optimal wachsen und viele leckere Früchte tragen.
1. Gießen: Bohnen brauchen regelmäßig Wasser, besonders während der Blütezeit und der Fruchtbildung. Gießt am besten morgens, damit die Blätter über den Tag abtrocknen können. Vermeidet es, die Blätter direkt zu gießen, da dies Pilzkrankheiten fördern kann.
2. Unkraut jäten: Haltet das Beet sauber und entfernt regelmäßig Unkraut. Unkraut entzieht den Bohnen Nährstoffe und Wasser.
3. Häufeln: Wenn die Bohnenpflanzen etwas größer sind, könnt ihr sie anhäufeln. Das bedeutet, dass ihr Erde um die Stängel herum anhäuft. Das gibt den Pflanzen mehr Stabilität und fördert die Wurzelbildung.
4. Düngen: Bohnen sind, wie gesagt, Schwachzehrer. Eine leichte Düngung mit Kompost oder organischem Dünger während der Blütezeit kann aber trotzdem nicht schaden. Vermeidet stickstoffhaltige Dünger, da diese das Wachstum der Blätter fördern, aber die Fruchtbildung hemmen können.
5. Stangenbohnen unterstützen: Stangenbohnen brauchen eine Rankhilfe, an der sie hochklettern können. Ihr könnt ihnen Stangen, Zäune oder Netze zur Verfügung stellen. Achtet darauf, dass die Rankhilfe stabil ist und den Pflanzen genügend Halt bietet.
6. Ausgeizen: Bei Stangenbohnen könnt ihr die Seitentriebe ausbrechen, um die Haupttriebe zu stärken. Das ist aber nicht unbedingt notwendig.
7. Schädlinge und Krankheiten: Achtet auf Anzeichen von Schädlingen oder Krankheiten. Blattläuse, Bohnenfliegen und Pilzkrankheiten können die Bohnen befallen. Bei Bedarf könnt ihr biologische Pflanzenschutzmittel einsetzen.
Der Trick mit dem Bohnenkraut: Ein natürlicher Helfer
Ein kleiner Geheimtipp von mir: Pflanzt Bohnenkraut in die Nähe eurer Bohnen. Bohnenkraut hält nicht nur Schädlinge fern, sondern soll auch den Geschmack der Bohnen verbessern. Außerdem ist es eine tolle Bienenweide!
Die Ernte: Der Lohn für deine Mühe
Endlich ist es soweit: Die Bohnen sind reif und können geerntet werden!
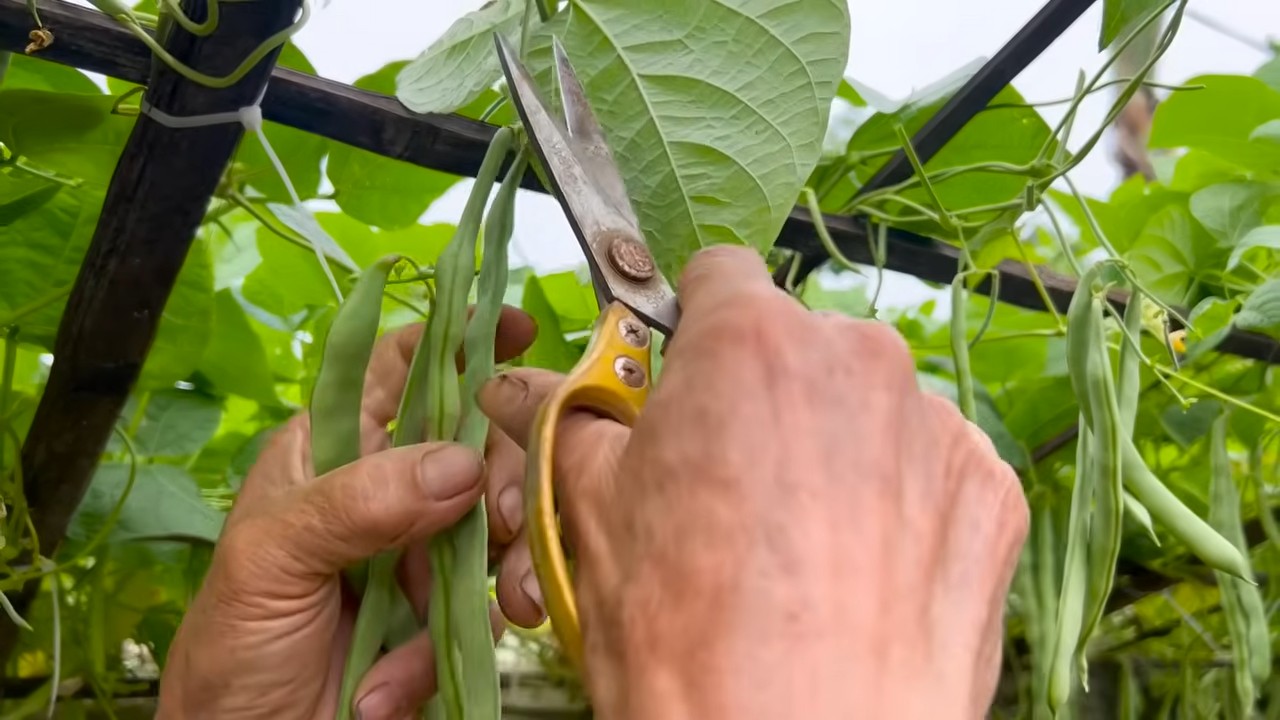
1. Erntezeitpunkt: Der richtige Erntezeitpunkt hängt von der Sorte ab. Buschbohnen können meist schon nach 8-10 Wochen geerntet werden, Stangenbohnen etwas später. Die Bohnen sind reif, wenn sie prall und fest sind, aber noch nicht zu dick.
2. Erntetechnik: Pflückt die Bohnen vorsichtig ab, ohne die Pflanzen zu beschädigen. Am besten erntet ihr die Bohnen regelmäßig, da dies die Bildung neuer Früchte anregt.
3. Trockenbohnen: Trockenbohnen werden erst geerntet, wenn die Hülsen trocken und braun sind. Die Bohnenkerne sollten hart und trocken sein.
4. Lagerung: Frische Bohnen können im Kühlschrank einige Tage aufbewahrt werden. Trockenbohnen können in einem luftdichten Behälter an einem kühlen, trockenen Ort mehrere Monate gelagert werden.
5. Nach der Ernte: Nach der Ernte könnt ihr die Bohnenpflanzen abschneiden und als Gründüngung im Boden belassen. Die Wurzeln der Bohnen reichern den Boden mit Stickstoff an, was gut für die nachfolgenden Pflanzen ist.
Zusätzliche Tipps für eine reiche Ernte
Hier noch ein paar zusätzliche Tipps, die euch helfen können, eure Bohnenernte zu maximieren:
* Fruchtfolge beachten: Baut Bohnen nicht jedes Jahr am selben Standort an. Eine Fruchtfolge mit anderen Gemüsearten (z.B. Kohl, Kartoffeln, Salat) hilft, den Boden gesund zu halten und Krankheiten vorzubeugen.
* Mischkultur: Bohnen vertragen sich gut mit anderen Gemüsearten wie Karotten, Gurken, Radieschen und Salat. Eine Mischkultur kann Schädlinge abwehren und den Ertrag steigern.
* Regelmäßig ernten: Wie bereits erwähnt, regt regelmäßiges Ernten die Bildung neuer Früchte an. Pflückt die Bohnen also lieber öfter und dafür weniger.
* Auf die Witterung achten: Bei extremen Wetterbedingungen (z
Conclusion
So, there you have it! Unlocking the secrets to a truly bountiful bean harvest isn’t about expensive fertilizers or complicated techniques. It’s about understanding the needs of your plants and employing a few clever, DIY tricks that can make all the difference. We’ve explored how simple adjustments to watering schedules, strategic companion planting, and, most importantly, the art of **DIY bean trellises** can transform your bean patch from a modest yield to an overflowing cornucopia of deliciousness.
Why is this a must-try? Because it’s effective, economical, and empowering. You’re not just buying a solution; you’re creating one, tailored to your specific garden environment and bean varieties. Imagine the satisfaction of harvesting basket after basket of plump, juicy beans, knowing that you played a direct role in their success. This isn’t just about growing beans; it’s about connecting with nature, learning new skills, and enjoying the fruits (or rather, legumes!) of your labor.
But the beauty of gardening lies in its adaptability. Feel free to experiment with variations on these techniques. For example, instead of traditional bamboo stakes for your DIY bean trellises, consider using repurposed branches from pruned trees or even sturdy tomato cages. If you’re short on space, vertical gardening with hanging baskets or stacked planters can be a game-changer. And when it comes to companion planting, don’t be afraid to explore different combinations of herbs and flowers to see what works best in your garden. Perhaps marigolds to deter bean beetles, or nasturtiums to attract aphids away from your precious bean plants.
Remember, the key is observation. Pay attention to your plants, notice how they respond to different treatments, and adjust your approach accordingly. Gardening is a journey of continuous learning, and every season brings new opportunities for discovery.
We are confident that these surprise bean harvest tips will significantly improve your yield. But don’t just take our word for it. We urge you to put these techniques into practice and witness the results for yourself. Start small, perhaps with a single row of beans, and gradually expand as you gain confidence.
And most importantly, share your experience! We want to hear about your successes, your challenges, and any variations you’ve discovered along the way. Post photos of your overflowing bean harvests on social media, tag us in your posts, and let’s create a community of bean-growing enthusiasts who are passionate about sharing their knowledge and inspiring others. Together, we can unlock the full potential of our gardens and enjoy the abundance that nature has to offer. So, get out there, get your hands dirty, and prepare to be amazed by the power of these simple yet effective DIY bean harvest tips! Happy gardening!
Frequently Asked Questions (FAQ)
What type of beans benefit most from these surprise harvest tips?
These tips are generally beneficial for all types of beans, but they are particularly effective for climbing or pole beans, such as Kentucky Wonder, Blue Lake, and Scarlet Runner. Bush beans can also benefit from improved watering and companion planting, although they don’t require trellises. The key is to understand the specific needs of the bean variety you’re growing and tailor your approach accordingly. For example, some bean varieties are more susceptible to certain pests or diseases, so you may need to adjust your companion planting strategy to address those specific concerns.
How often should I water my bean plants?
Watering frequency depends on several factors, including the weather, soil type, and stage of plant growth. As a general rule, bean plants need about 1 inch of water per week. However, during hot, dry weather, you may need to water more frequently. The best way to determine if your plants need water is to check the soil moisture. Stick your finger into the soil about an inch deep. If the soil feels dry, it’s time to water. Avoid overwatering, as this can lead to root rot. Water deeply and less frequently, rather than shallowly and often.
What are the best companion plants for beans?
Beans are known to be good companions with several plants. Some excellent choices include:
* **Corn:** Provides a natural trellis for climbing beans.
* **Carrots:** Repel bean flies and improve soil health.
* **Marigolds:** Deter bean beetles and nematodes.
* **Nasturtiums:** Attract aphids away from bean plants.
* **Rosemary:** Deters bean beetles.
* **Summer Savory:** Deters bean beetles and improves bean flavor.
Avoid planting beans near onions or garlic, as these can inhibit bean growth.
How do I build a DIY bean trellis?
There are many ways to build a DIY bean trellis, depending on your resources and preferences. A simple option is to use bamboo stakes or wooden poles arranged in a teepee shape. Tie the stakes together at the top with twine or wire. Another option is to create a trellis using chicken wire or netting stretched between two posts. You can also repurpose old ladders or fences as trellises. The key is to create a sturdy structure that can support the weight of the bean plants as they grow. Ensure the trellis is tall enough for the specific bean variety you’re growing.
When is the best time to harvest beans?
The best time to harvest beans depends on the type of bean and your desired use. For snap beans, harvest when the pods are firm, plump, and snap easily. Avoid harvesting when the pods are overly mature, as they can become tough and stringy. For dry beans, allow the pods to dry completely on the plant before harvesting. Once the pods are dry and brittle, shell the beans and store them in an airtight container. Regular harvesting encourages continued production, so check your bean plants frequently.
What if I don’t have a lot of space for a garden?
Even if you have limited space, you can still grow beans using vertical gardening techniques. Consider growing beans in hanging baskets, stacked planters, or even on a balcony railing. Choose bush bean varieties, as they are more compact than climbing beans. You can also use a small trellis or support structure to encourage vertical growth. With a little creativity, you can enjoy a bountiful bean harvest even in a small space.
How can I prevent pests and diseases from affecting my bean plants?
Prevention is key when it comes to pests and diseases. Start by choosing disease-resistant bean varieties. Practice crop rotation to prevent soilborne diseases from building up. Keep your garden clean and free of weeds, which can harbor pests and diseases. Use companion planting to deter pests and attract beneficial insects. Inspect your plants regularly for signs of pests or diseases, and take action promptly if you notice any problems. Organic pest control methods, such as insecticidal soap or neem oil, can be effective for controlling many common bean pests.
What should I do if my bean plants are not producing beans?
There are several reasons why your bean plants may not be producing beans. Ensure they are getting enough sunlight, water, and nutrients. Check the soil pH, as beans prefer slightly acidic soil. Pollination problems can also prevent bean production. If you suspect pollination is the issue, try hand-pollinating the flowers. Finally, make sure the plants are not stressed by extreme temperatures or other environmental factors. By addressing these potential issues, you can increase your chances of a successful bean harvest.


Leave a Comment