

Sack Grown Watermelons: Imagine sinking your teeth into a juicy, homegrown watermelon, bursting with sweetness, knowing you nurtured it from seed to fruit, all without a sprawling garden! Sounds impossible? Think again! For generations, resourceful gardeners have been finding innovative ways to cultivate their favorite crops, even in limited spaces. From ancient hanging gardens to modern-day vertical farms, the desire to connect with nature and grow our own food has always driven ingenuity.
But let’s face it, not everyone has acres of land to dedicate to watermelon vines. That’s where this DIY trick comes in. Growing watermelons in sacks is a game-changer for urban gardeners, apartment dwellers, or anyone with limited space. It’s a surprisingly effective method that allows you to enjoy the taste of summer, regardless of your garden size.
I’m going to show you how to create your own thriving sack grown watermelons. This method is not only space-saving but also offers better control over soil conditions and drainage, leading to healthier, more productive plants. Plus, it’s a fantastic way to recycle those old burlap sacks or even sturdy grow bags. So, ditch the store-bought melons and get ready to experience the unparalleled satisfaction of harvesting your very own, sack-grown watermelon!
Grow Watermelons in a Sack: A DIY Guide for Small Spaces
Hey there, fellow gardening enthusiasts! Ever dreamed of growing your own juicy watermelons but thought you didn’t have the space? Well, I’m here to tell you that you absolutely can, even if you only have a small balcony or patio! The secret? Sack gardening! It’s a fantastic way to maximize your growing area and enjoy fresh, homegrown watermelons. Let’s dive into how you can make this happen.
What You’ll Need
Before we get started, let’s gather all the necessary materials. This will make the whole process smoother and more enjoyable. Trust me, being prepared is half the battle!
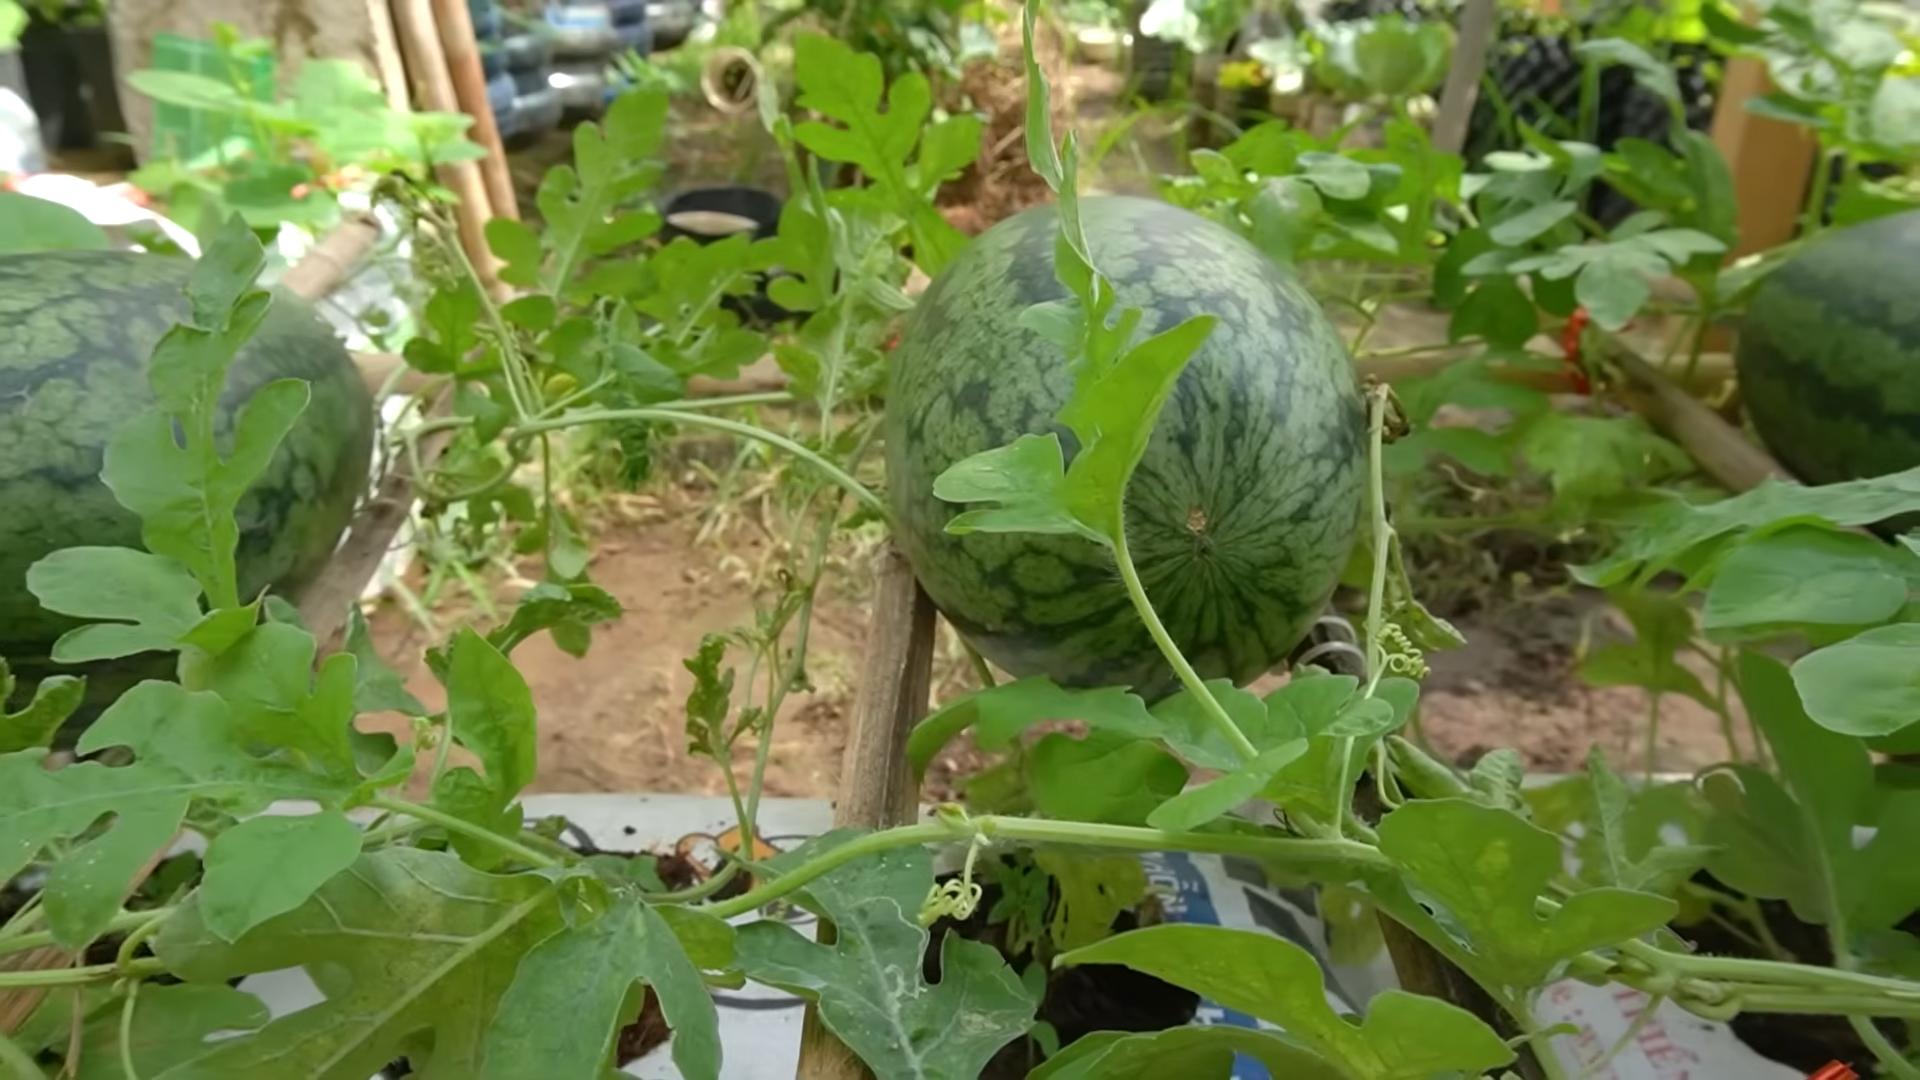
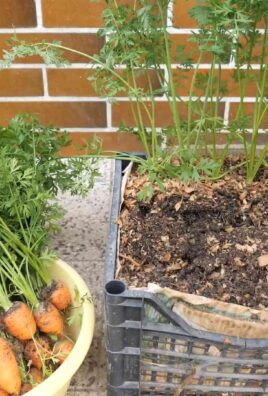
* A Large, Sturdy Sack: Think burlap, heavy-duty polypropylene (like a feed sack), or even a reinforced grow bag. The bigger, the better – aim for at least 20-25 gallons. This gives the watermelon roots plenty of room to spread out.
* Potting Mix: A high-quality potting mix is crucial. It should be well-draining and rich in organic matter. I like to use a mix of compost, peat moss (or coco coir), and perlite.
* Watermelon Seeds or Seedlings: Choose a variety that’s known for its smaller size and shorter growing season. Bush or dwarf varieties are ideal for sack gardening. Sugar Baby, Bush Sugar Baby, or even some icebox varieties work great.
* Slow-Release Fertilizer: This will provide your watermelon plant with a steady supply of nutrients throughout the growing season. Look for a fertilizer specifically formulated for fruits and vegetables.
* Water-Soluble Fertilizer: For an extra boost, especially during fruiting, a water-soluble fertilizer will come in handy.
* Trowel or Shovel: For mixing and transferring the potting mix.
* Watering Can or Hose: Essential for keeping your watermelon plant hydrated.
* Support Structure (Optional): Depending on the variety you choose, you might need a trellis or some other support to keep the vines off the ground.
* Gloves: To keep your hands clean and protected.
* Scissors or Utility Knife: For cutting the sack if needed.
Preparing the Sack
The first step is to get your sack ready for planting. This involves ensuring proper drainage and creating a stable base for your watermelon plant.
1. Clean the Sack: If you’re using a recycled sack, make sure it’s clean and free of any debris. Give it a good shake and wipe it down if necessary.
2. Reinforce the Sack (Optional): If your sack seems a bit flimsy, you can reinforce it by lining the inside with a heavy-duty plastic bag. Just make sure to poke plenty of drainage holes in the bottom of the bag.
3. Create Drainage Holes: This is super important! Waterlogged soil is a watermelon’s worst enemy. Use your scissors or utility knife to create several drainage holes in the bottom of the sack. I usually make about 6-8 holes, spaced evenly apart.
4. Position the Sack: Choose a sunny spot for your sack garden. Watermelons need at least 6-8 hours of direct sunlight per day. Place the sack where it will stay for the entire growing season, as it will be heavy to move once it’s filled with soil.
Filling the Sack with Potting Mix
Now comes the fun part – filling the sack with the nutrient-rich potting mix that will nourish your watermelon plant.
1. Mix the Potting Mix: In a large container or on a tarp, thoroughly mix your compost, peat moss (or coco coir), and perlite. Add the slow-release fertilizer according to the package instructions. I like to use a ratio of about 1 part compost, 1 part peat moss (or coco coir), and 1 part perlite.
2. Fill the Sack: Gradually fill the sack with the potting mix, leaving about 4-6 inches of space at the top. As you fill, gently pat down the soil to remove any air pockets.
3. Water the Soil: Once the sack is filled, thoroughly water the soil until water drains out of the drainage holes. This will help settle the soil and prepare it for planting.
Planting Your Watermelon Seeds or Seedlings
Now it’s time to introduce your watermelon plant to its new home!
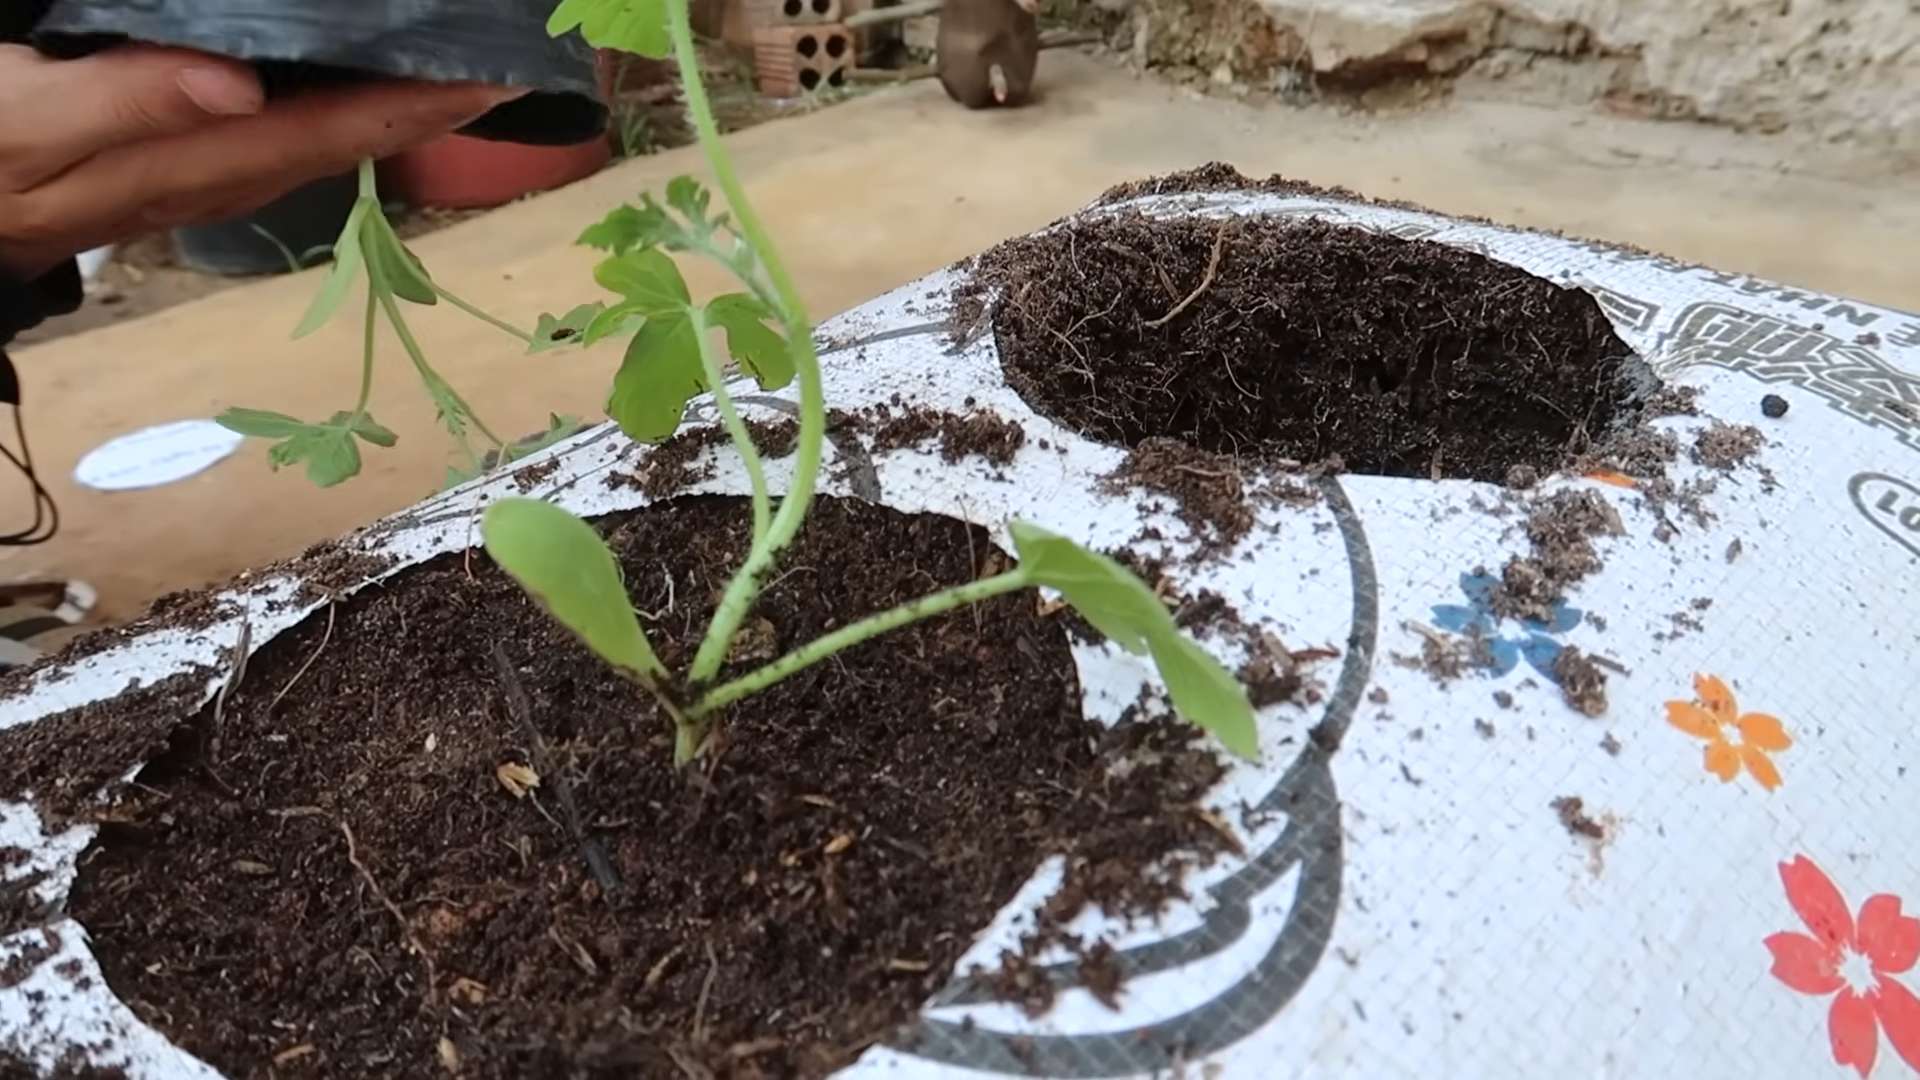
1. Starting from Seed: If you’re starting from seed, sow 2-3 seeds in the center of the sack, about 1 inch deep. Cover the seeds with soil and gently water. Keep the soil consistently moist until the seeds germinate, which usually takes about 7-10 days. Once the seedlings emerge, thin them to one strong plant.
2. Planting Seedlings: If you’re using seedlings, gently remove the seedling from its container, being careful not to damage the roots. Dig a hole in the center of the sack that’s large enough to accommodate the root ball. Place the seedling in the hole and backfill with soil. Gently pat down the soil around the base of the plant.
3. Water Thoroughly: After planting, water the seedling thoroughly. This will help it establish its roots in the new soil.
Caring for Your Sack-Grown Watermelon
Now that your watermelon plant is in its sack, it’s time to provide it with the care it needs to thrive.
1. Watering: Watermelons need consistent moisture, especially during hot weather. Check the soil moisture regularly and water when the top inch of soil feels dry to the touch. Water deeply, ensuring that the water reaches the roots. Avoid overwatering, as this can lead to root rot.
2. Fertilizing: In addition to the slow-release fertilizer you added to the potting mix, you can also supplement with a water-soluble fertilizer every 2-3 weeks. Follow the package instructions for application rates. I like to use a fertilizer that’s high in phosphorus and potassium, as these nutrients are essential for fruit development.
3. Sunlight: Make sure your watermelon plant is getting at least 6-8 hours of direct sunlight per day. If you live in a particularly hot climate, you may need to provide some afternoon shade to prevent the plant from getting scorched.
4. Support: As your watermelon vine grows, it may need some support to keep the fruits off the ground. You can use a trellis, stakes, or even a sling made from old pantyhose to support the developing watermelons. This will help prevent them from rotting or getting damaged.
5. Pruning: Pruning can help improve air circulation and encourage fruit production. Remove any dead or yellowing leaves, as well as any suckers (small shoots that grow from the base of the plant). You can also pinch off the tips of the vines to encourage branching.
6. Pollination: Watermelons need to be pollinated in order to produce fruit. If you’re growing your watermelon plant indoors or in an area with limited bee activity, you may need to hand-pollinate the flowers. To do this, use a small paintbrush to transfer pollen from the male flowers to the female flowers. The female flowers have a small swelling at the base, which will eventually develop into a watermelon.
Harvesting Your Watermelon
The moment you’ve been waiting for! Harvesting your own homegrown watermelon is incredibly rewarding.
1. Check for Ripeness: Watermelons typically take about 80-90 days to mature. There are several ways to tell if a watermelon is ripe. One way is to look at the tendril closest to the fruit. If the tendril is brown and dry, the watermelon is likely ripe. Another way is to thump the watermelon. A ripe watermelon will sound hollow. You can also check the underside of the watermelon where it rests on the ground. If the spot is yellow or cream-colored, the watermelon is likely ripe.
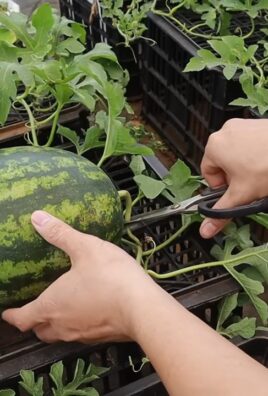
2. Harvest Carefully: Once you’ve determined that your watermelon is ripe, use a sharp knife to cut it from the vine, leaving a few inches of stem attached. Be careful not to damage the watermelon.
3. Enjoy! Now it’s time to enjoy the fruits (or rather, the watermelon) of your labor! Slice it up and savor the sweet, juicy flavor of your homegrown watermelon.
Troubleshooting
Even with the best care, you might encounter some challenges along the way. Here are a few common problems and how to address them:
* Yellowing Leaves: This could be a sign of overwatering, underwatering, nutrient deficiency, or disease. Check the soil moisture and adjust your watering accordingly. Fertilize with a balanced fertilizer. If you suspect disease, treat with an appropriate fungicide.
* Lack of Fruit: This could be due to poor pollination, lack of sunlight, or nutrient deficiency. Hand-pollinate the flowers if necessary. Make sure your watermelon plant is getting enough sunlight. Fertilize with a fertilizer that’s high in phosphorus and potassium.
* Pests: Common watermelon pests include
Conclusion
So, there you have it! Growing watermelons in sacks might sound unconventional, but as we’ve explored, it’s a surprisingly effective and rewarding method, especially for those with limited garden space or challenging soil conditions. This DIY trick isn’t just about growing watermelons; it’s about embracing innovation, maximizing resources, and enjoying the satisfaction of nurturing your own food from seed to harvest.
Why is this a must-try? Because it offers a multitude of benefits. It allows you to control the soil composition, ensuring your watermelon receives the precise nutrients it needs. It elevates the plant, improving drainage and air circulation, which minimizes the risk of fungal diseases. And let’s not forget the sheer novelty and conversation-starting potential of growing watermelons in sacks! Imagine the looks of amazement when your friends and neighbors see your thriving watermelon patch, suspended in mid-air.
But the beauty of this method lies in its adaptability. Feel free to experiment with different sack materials. Burlap sacks offer excellent breathability, while heavy-duty plastic sacks can retain moisture more effectively in drier climates. You can also adjust the soil mix to suit your specific needs. Consider adding compost tea or worm castings for an extra boost of nutrients.
For those feeling adventurous, why not try growing different varieties of watermelons in sacks? Smaller, personal-sized watermelons like Sugar Baby or Yellow Doll are particularly well-suited for this method. You could even try growing other vining fruits like cantaloupe or honeydew melons in sacks, adapting the support system as needed.
Don’t be afraid to get creative and personalize your sack-grown watermelon experience. The key is to provide adequate support, consistent watering, and plenty of sunlight.
We wholeheartedly encourage you to give this DIY trick a try. It’s a fun, educational, and ultimately delicious way to grow your own watermelons. And most importantly, we want to hear about your experiences! Share your photos, tips, and challenges in the comments below. Let’s build a community of sack-grown watermelon enthusiasts and learn from each other. Did you find a particular soil mix that worked wonders? Did you encounter any unexpected challenges? Your insights could be invaluable to other aspiring sack gardeners.
Remember, gardening is a journey of experimentation and discovery. So, embrace the challenge, get your hands dirty, and enjoy the sweet taste of success. Happy growing! This method of growing sack grown watermelons is a game changer for small space gardeners.
Frequently Asked Questions (FAQ)
What type of sack is best for growing watermelons?
The best type of sack depends on your climate and personal preference. Burlap sacks are a popular choice due to their excellent breathability, which helps prevent the soil from becoming waterlogged. However, they may dry out quickly in hot, arid climates. Heavy-duty plastic sacks retain moisture better but require careful monitoring to ensure proper drainage. Woven polypropylene sacks are another durable option. Consider the size of the sack as well; a larger sack (at least 20 gallons) is generally recommended to provide ample space for the watermelon’s root system. Ensure the sack is strong enough to support the weight of the soil and the growing watermelon.
How do I provide support for the watermelon as it grows in the sack?
Watermelons can become quite heavy, so providing adequate support is crucial. You can use a variety of methods, including:
* Trellis System: Construct a sturdy trellis behind the sack and gently train the watermelon vine to climb it. Use soft ties or netting to secure the vine to the trellis.
* Sling Support: As the watermelon grows, create a sling out of netting, fabric, or even an old t-shirt to support its weight. Attach the sling to the trellis or a sturdy overhead structure.
* Individual Platforms: Place small platforms or crates underneath each watermelon to provide additional support.
The key is to distribute the weight evenly and prevent the watermelon from pulling on the vine or the sack.
What kind of soil mix should I use for sack-grown watermelons?
A well-draining and nutrient-rich soil mix is essential for healthy watermelon growth. A good starting point is a mix of:
* 1/3 Compost: Provides essential nutrients and improves soil structure.
* 1/3 Garden Soil: Provides a base for the mix.
* 1/3 Perlite or Vermiculite: Improves drainage and aeration.
You can also add amendments like bone meal (for phosphorus) and kelp meal (for micronutrients) to further enhance the soil’s fertility. Avoid using heavy clay soil, as it can become compacted and restrict root growth.
How often should I water sack-grown watermelons?
Watermelons are thirsty plants, especially when grown in sacks. The frequency of watering will depend on the climate, the type of sack used, and the size of the plant. As a general rule, water deeply whenever the top inch of soil feels dry to the touch. During hot, dry weather, you may need to water daily or even twice a day. Be sure to water at the base of the plant to avoid wetting the foliage, which can increase the risk of fungal diseases. Monitor the plant closely for signs of overwatering (yellowing leaves, wilting) or underwatering (drooping leaves, dry soil).
What are some common pests and diseases that affect sack-grown watermelons, and how can I prevent them?
Common pests that can affect watermelons include aphids, squash bugs, and vine borers. Diseases include powdery mildew, fusarium wilt, and anthracnose. To prevent these problems:
* Inspect plants regularly: Look for signs of pests or diseases early on.
* Use organic pest control methods: Insecticidal soap, neem oil, and diatomaceous earth can be effective against many pests.
* Ensure good air circulation: Proper spacing and pruning can help prevent fungal diseases.
* Water at the base of the plant: Avoid wetting the foliage.
* Rotate crops: Avoid planting watermelons in the same location year after year.
* Choose disease-resistant varieties: If you live in an area with a history of certain diseases, select watermelon varieties that are resistant to those diseases.
Can I grow watermelons in sacks in a greenhouse?
Yes, growing watermelons in sacks in a greenhouse is possible and can even be advantageous, especially in colder climates. The greenhouse provides a controlled environment, allowing you to extend the growing season and protect the plants from harsh weather conditions. However, you’ll need to ensure adequate ventilation and pollination. You may need to hand-pollinate the flowers if there are not enough pollinators inside the greenhouse. Also, monitor the temperature and humidity levels closely to prevent overheating or excessive moisture buildup.
How long does it take to grow a watermelon in a sack?
The time it takes to grow a watermelon from seed to harvest varies depending on the variety, climate, and growing conditions. Generally, it takes between 70 and 90 days for most watermelon varieties to mature. Start seeds indoors 4-6 weeks before the last expected frost and transplant them into the sacks once the weather has warmed up. Be patient and monitor the plant closely for signs of maturity, such as a dull rind, a dry tendril near the stem, and a hollow sound when you thump the watermelon.
Can I reuse the soil from the sacks for other plants?
Yes, you can reuse the soil from the sacks, but it’s important to amend it before planting other crops. Watermelons are heavy feeders, so the soil may be depleted of nutrients. Add compost, aged manure, or other organic matter to replenish the soil’s fertility. You may also want to test the soil’s pH and adjust it as needed. Avoid planting the same type of plant in the same soil year after year to prevent the buildup of soilborne diseases.
Leave a Comment