

Potato harvest no yard? No problem! I know, I know, the image of digging up a bountiful potato harvest usually involves sprawling fields and acres of farmland. But what if I told you that you could enjoy the satisfaction of homegrown potatoes, even without a traditional garden?
For centuries, potatoes have been a staple food source across the globe, originating in the Andes Mountains and playing a crucial role in feeding populations worldwide. From simple peasant fare to gourmet dishes, the humble potato has proven its versatility and nutritional value. But access to fresh, homegrown produce shouldn’t be limited to those with large plots of land.
That’s where this DIY guide comes in! We’re diving into the world of container gardening and exploring innovative techniques that allow you to achieve a successful potato harvest no yard required. Imagine the joy of plucking fresh potatoes from a bag, bucket, or even a repurposed container right on your balcony or patio. This isn’t just about growing food; it’s about connecting with nature, reducing your carbon footprint, and enjoying the unparalleled flavor of homegrown goodness.
Many people believe that growing potatoes is only for those with large gardens, but I’m here to debunk that myth. With a few simple tricks and readily available materials, you can experience the magic of a potato harvest no yard needed. Let’s get started and transform your small space into a thriving potato patch!

Growing Potatoes in Buckets: A No-Yard Harvest!
Hey there, fellow gardening enthusiasts! Don’t have a sprawling backyard? No problem! You can still enjoy the satisfaction of harvesting your own homegrown potatoes. I’m going to walk you through how to grow potatoes in buckets – it’s a fun, easy, and space-saving way to get your potato fix.
What You’ll Need:
* Large Buckets (5-10 gallon size are ideal)
* Seed Potatoes (certified disease-free)
* Potting Mix (a well-draining mix is crucial)
* Water
* Fertilizer (optional, but recommended)
* Sunlight (at least 6 hours a day)
* Sharp Knife (for cutting seed potatoes)
* Gardening Gloves (to keep your hands clean)
Choosing Your Seed Potatoes
First things first, let’s talk about seed potatoes. These aren’t just any potatoes you find at the grocery store. Seed potatoes are specifically grown to be planted and produce new potato plants. They’re certified disease-free, which is super important for a healthy harvest.
You can find seed potatoes at most garden centers or online retailers. Look for varieties that are well-suited to your climate and that you enjoy eating! Some popular choices include Yukon Gold, Russet, and Red Pontiac.
Preparing Your Seed Potatoes
Before planting, you’ll want to “chit” your seed potatoes. Chitting encourages the development of sprouts, giving your plants a head start.
* What is Chitting? Chitting is simply letting your seed potatoes sprout before planting.
* How to Chit: Place your seed potatoes in a cool, bright location (but not in direct sunlight) for a week or two. You’ll start to see small green sprouts, called “eyes,” emerging from the potato.
If your seed potatoes are large (bigger than an egg), you can cut them into smaller pieces. Each piece should have at least one or two “eyes.” Let the cut pieces dry for a day or two before planting to prevent rotting.
Planting Your Potatoes
Now for the fun part – planting!
1. Prepare Your Buckets: Make sure your buckets have drainage holes at the bottom. This is essential to prevent waterlogging, which can lead to root rot.
2. Add Initial Soil Layer: Fill the bottom of each bucket with about 4-6 inches of potting mix.
3. Plant the Seed Potatoes: Place your seed potato pieces (or whole small seed potatoes) on top of the soil, with the “eyes” facing up. Space them evenly in the bucket. If you’re using multiple pieces, give them a few inches of space between each other.
4. Cover with Soil: Cover the seed potatoes with another 4-6 inches of potting mix.
5. Water Thoroughly: Water the soil well until it’s evenly moist, but not soggy.
The “Hilling” Process: Encouraging More Potatoes!
This is where the magic happens! As your potato plants grow, you’ll need to “hill” them. Hilling encourages the plants to produce more potatoes along the stems.
1. Wait for Growth: Once your potato plants have grown about 6-8 inches tall, it’s time to hill.
2. Add More Soil: Add more potting mix to the bucket, covering the stems of the plants, leaving only the top few leaves exposed.
3. Repeat: Continue this process every few weeks as the plants grow, until the bucket is almost full. Each time, cover the stems with more soil, leaving only the top leaves exposed.
Caring for Your Potato Plants
* Sunlight: Potatoes need at least 6 hours of sunlight per day. Place your buckets in a sunny location.
* Watering: Water regularly, especially during hot, dry weather. The soil should be consistently moist, but not waterlogged. Check the soil moisture by sticking your finger into the soil – if it feels dry an inch or two down, it’s time to water.
* Fertilizing (Optional): You can fertilize your potato plants every few weeks with a balanced fertilizer. Follow the instructions on the fertilizer package. I like to use a liquid fertilizer diluted in water for easy application.
* Pest Control: Keep an eye out for pests like aphids, potato beetles, and flea beetles. If you spot any pests, you can try using insecticidal soap or neem oil to control them.
Harvesting Your Potatoes
The moment you’ve been waiting for! Harvesting your potatoes is the most rewarding part of the process.
1. When to Harvest: Potatoes are typically ready to harvest about 70-90 days after planting, depending on the variety. You’ll know they’re ready when the plants start to flower and the foliage begins to turn yellow and die back.
2. Stop Watering: About two weeks before you plan to harvest, stop watering the plants. This will help the potatoes to cure and develop a thicker skin.
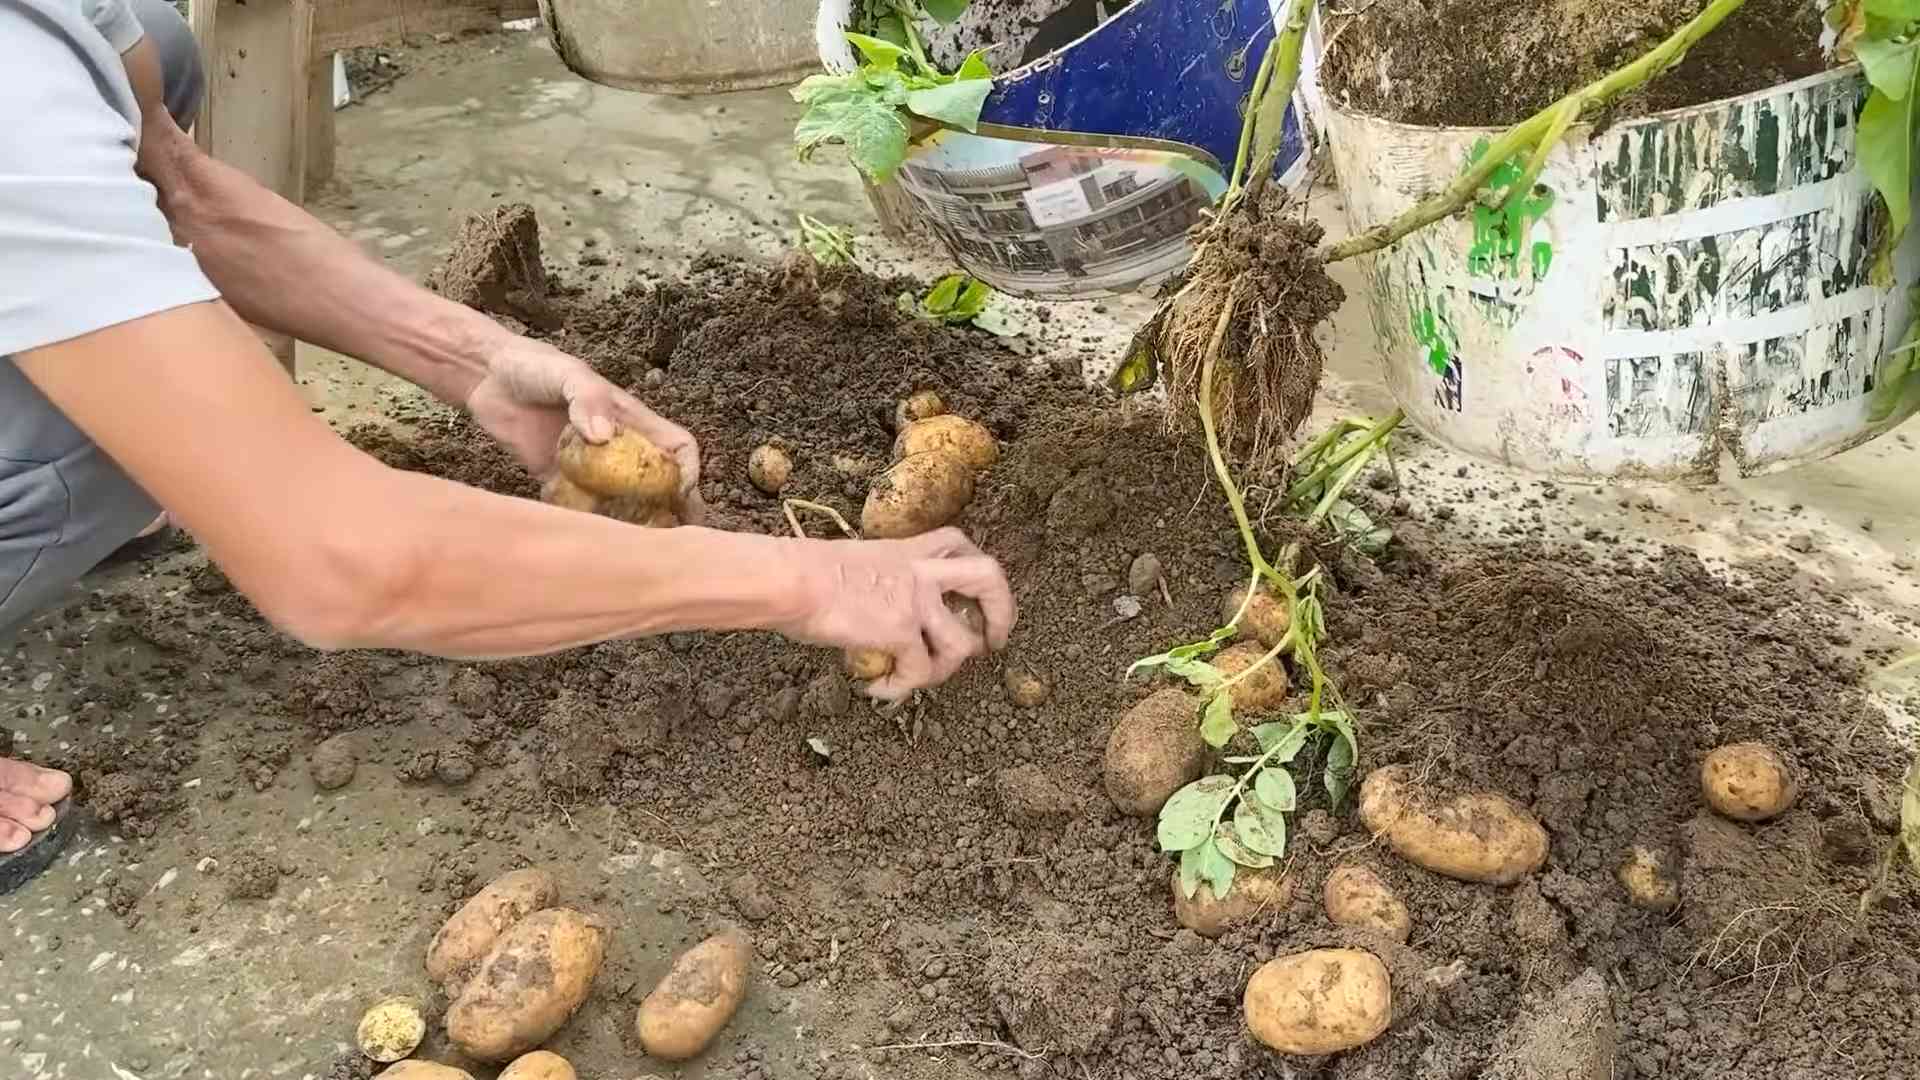
3. The Big Reveal: Now for the fun part! You have a couple of options for harvesting:
* Option 1: Dump and Dig: Carefully tip the bucket over and dump out the soil. Then, gently dig through the soil to find your potatoes.
* Option 2: Gradual Harvest: Reach into the bucket and carefully feel around for potatoes. You can harvest a few at a time, leaving the rest to continue growing. This is a good option if you want to enjoy fresh potatoes over a longer period.
4. Curing Your Potatoes: After harvesting, let your potatoes cure in a cool, dark, and well-ventilated place for a week or two. This will help them to develop a thicker skin and store better.
Troubleshooting
* Potato Blight: Potato blight is a fungal disease that can affect potato plants. It’s characterized by brown spots on the leaves and stems. To prevent blight, choose disease-resistant varieties and avoid overhead watering. If you see signs of blight, remove the affected leaves and stems immediately.
* Root Rot: Root rot is caused by overwatering. Make sure your buckets have good drainage and avoid watering too frequently.
* Pests: Keep an eye out for pests like aphids, potato beetles, and flea beetles. Use insecticidal soap or neem oil to control them.
Tips for Success
* Choose the Right Potting Mix: A well-draining potting mix is essential for growing potatoes in buckets. Avoid using garden soil, as it can be too heavy and compact.
* Don’t Overwater: Overwatering can lead to root rot. Water regularly, but allow the soil to dry out slightly between waterings.
* Fertilize Regularly: Fertilizing your potato plants will help them to grow strong and produce a good harvest.
* Be Patient: Growing potatoes takes time. Don’t get discouraged if you don’t see results right away. Just keep watering and fertilizing, and you’ll be rewarded with a delicious harvest.
* Experiment with Varieties: Try growing different varieties of potatoes to see which ones you like best.
Enjoy Your Homegrown Potatoes!
There you have it! Growing potatoes in buckets is a simple and rewarding way to enjoy fresh, homegrown potatoes, even if you don’t have a yard. I hope this guide has been helpful. Happy gardening!
Conclusion
So, you’ve reached the end of our guide on harvesting potatoes without a yard! By now, you should be brimming with confidence and ready to embark on your own container potato growing adventure. This method, born out of necessity for those of us lacking sprawling gardens, is more than just a workaround; it’s a revelation. It’s a testament to the fact that fresh, homegrown produce is accessible to everyone, regardless of their living situation.
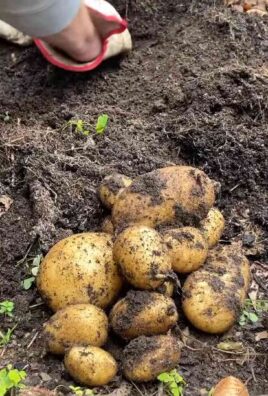
Why is this DIY trick a must-try? Because it democratizes potato cultivation. It removes the barriers of land ownership and extensive gardening knowledge. Imagine the satisfaction of digging into a pot and unearthing a treasure trove of your own, organically grown potatoes. Think of the delicious meals you can create, knowing exactly where your ingredients came from. This isn’t just about growing potatoes; it’s about connecting with your food, fostering a sense of self-sufficiency, and enjoying the simple pleasures of nature, even in the heart of the city.
But the beauty of this method lies in its adaptability. Feel free to experiment with different potato varieties. Russets are fantastic for baking, Yukon Golds are perfect for creamy mashed potatoes, and fingerling potatoes add a touch of elegance to any dish. Consider adding companion plants to your containers, such as marigolds to deter pests or basil to enhance the flavor of your potatoes. You can even try different container sizes and materials to see what works best for your space and climate.
Don’t be afraid to get creative with your “hilling” material. While we’ve recommended straw and compost, you can also use shredded leaves, grass clippings (ensure they are herbicide-free), or even old potting soil. The key is to provide a loose, nutrient-rich medium for the potato plants to develop more tubers along the buried stem.
And speaking of nutrients, remember that potatoes are heavy feeders. Supplementing your soil with a balanced organic fertilizer throughout the growing season will significantly boost your yield. Look for fertilizers specifically formulated for root vegetables.
We understand that embarking on a new gardening endeavor can be daunting, but we assure you that growing potatoes in containers is surprisingly easy and rewarding. The most important thing is to start! Don’t overthink it. Follow our guide, adapt it to your specific circumstances, and most importantly, have fun.
We are confident that you will be amazed by the results. The taste of freshly harvested, homegrown potatoes is simply unparalleled. It’s a flavor that you won’t find in any supermarket.
So, what are you waiting for? Grab a container, some seed potatoes, and get planting! And once you’ve harvested your bounty, we encourage you to share your experience with us. Post photos of your potato harvest on social media using [Your Hashtag Here], or leave a comment below sharing your tips and tricks. We love hearing from our readers and learning from your experiences. Let’s build a community of container potato growers and inspire others to embrace this simple, sustainable, and incredibly rewarding way to grow their own food. This **potato harvest** method is a game changer!
Frequently Asked Questions (FAQ)
What kind of container should I use for growing potatoes?
The ideal container for growing potatoes should be large and deep. A minimum size of 10 gallons is recommended, but larger is generally better. A 20-gallon container or even a half-barrel planter will provide ample space for the potato plants to develop a substantial root system and produce a generous harvest. The container should also have drainage holes to prevent waterlogging, which can lead to root rot. As for the material, you can use plastic, terracotta, wood, or even repurposed containers like old trash cans or laundry baskets (just make sure they are clean and have drainage holes). Fabric pots are also a great option as they allow for good air circulation and drainage.
How many seed potatoes can I plant in one container?
The number of seed potatoes you can plant in one container depends on the size of the container and the size of the seed potatoes. In a 10-gallon container, you can typically plant one to two seed potatoes. In a 20-gallon container, you can plant two to three seed potatoes. If your seed potatoes are particularly large, you may want to stick to one per container to avoid overcrowding. Make sure to space the seed potatoes evenly within the container to allow for optimal growth.
How often should I water my potato plants?
Potato plants need consistent moisture, especially during tuber formation. Water deeply whenever the top inch of soil feels dry to the touch. The frequency of watering will depend on the weather conditions, the type of container you are using, and the type of soil. In hot, dry weather, you may need to water daily, while in cooler, wetter weather, you may only need to water every few days. Avoid overwatering, as this can lead to root rot. A good rule of thumb is to water thoroughly until water drains out of the drainage holes.
What kind of soil should I use for growing potatoes?
Potatoes prefer well-draining, slightly acidic soil. A good potting mix specifically formulated for vegetables is ideal. You can also create your own potting mix by combining equal parts of compost, peat moss (or coconut coir), and perlite or vermiculite. Avoid using garden soil, as it can be too heavy and compacted, which can hinder root growth. The soil should be loose and airy to allow for good drainage and aeration.
How much sunlight do potato plants need?
Potato plants need at least six to eight hours of direct sunlight per day. Choose a location for your containers that receives plenty of sunlight. If you live in a particularly hot climate, you may want to provide some afternoon shade to prevent the plants from overheating.
How do I know when my potatoes are ready to harvest?
The timing of your **potato harvest** depends on the variety of potato you are growing and the desired size of the potatoes. Generally, potatoes are ready to harvest when the foliage begins to yellow and die back. You can also gently dig around the base of the plant to check the size of the tubers. If you want small “new” potatoes, you can harvest them earlier, about two to three weeks after flowering. For larger, mature potatoes, wait until the foliage has completely died back.
Can I grow potatoes indoors?
While it is possible to grow potatoes indoors, it can be challenging to provide them with the necessary amount of sunlight and space. If you want to try growing potatoes indoors, you will need to use grow lights to supplement the natural sunlight. You will also need to use a large container and provide adequate ventilation.
What are some common pests and diseases that affect potato plants?
Some common pests that affect potato plants include aphids, potato beetles, and flea beetles. Common diseases include early blight, late blight, and potato scab. You can prevent pests and diseases by using healthy seed potatoes, providing good air circulation, and avoiding overwatering. If you do encounter pests or diseases, you can treat them with organic pesticides or fungicides.
Can I reuse the soil from my potato containers?
Yes, you can reuse the soil from your potato containers, but it is important to amend it with fresh compost and fertilizer before planting again. Potatoes are heavy feeders and deplete the soil of nutrients. Adding compost and fertilizer will replenish the nutrients and improve the soil structure. You should also check the soil for any signs of pests or diseases and treat them accordingly before reusing the soil.
What if my potato plants don’t flower?
Not all potato varieties flower, and even those that do may not flower consistently. The absence of flowers does not necessarily mean that your plants are not producing potatoes. Focus on providing the plants with adequate sunlight, water, and nutrients, and you should still be able to harvest a good crop of potatoes.

Leave a Comment