

Melon yield backyard hack – ever dreamt of biting into a juicy, homegrown melon bursting with flavor, but your backyard patch only delivers a few sad, small fruits? I know the feeling! For centuries, cultures around the globe have cherished melons, from the watermelons depicted in ancient Egyptian tombs to the cantaloupes enjoyed in Renaissance Europe. These sweet treats were once reserved for royalty and the wealthy, but now, we can all enjoy them, especially when we maximize our harvest.
But let’s face it, getting a bountiful melon harvest can be tricky. That’s why I’m so excited to share this game-changing DIY trick that will help you dramatically increase your melon yield right in your own backyard! This isn’t just about growing more melons; it’s about growing bigger, sweeter, and more delicious melons than you ever thought possible.
Imagine impressing your friends and family with your gardening prowess, serving up slices of perfectly ripe, homegrown melon all summer long. This simple, yet effective, melon yield backyard hack will empower you to transform your garden into a melon-producing powerhouse. So, ditch the store-bought melons and get ready to unlock the secrets to a truly abundant harvest!
Grow Giant Melons: My Backyard Yield-Boosting Secrets!
Okay, melon lovers, gather ’round! I’m about to spill my secrets on how I consistently get HUGE, juicy melons from my backyard garden. Forget those puny grocery store melons – we’re talking prize-winning potential here! This isn’t just about planting seeds; it’s about understanding the plant’s needs and giving it a little boost along the way. Get ready to roll up your sleeves and get your hands dirty!
Choosing the Right Melon Variety
Before we even think about soil, let’s talk varieties. Not all melons are created equal! Some are naturally smaller, while others are bred for size and flavor. Here’s what I look for:
* Heirloom Varieties: These often have superior flavor and can be surprisingly large. Look for names like ‘Charleston Gray’ (watermelon), ‘Hale’s Best Jumbo’ (cantaloupe), or ‘Honey Dew Green Flesh’.
* Hybrid Varieties: These are often bred for disease resistance and high yields. ‘Big Beef’ (watermelon) is a popular choice.
* Consider Your Climate: Make sure the variety you choose is suited to your growing zone. Check the seed packet for days to maturity and compare it to your average growing season length.
* Read Reviews: See what other gardeners are saying about the variety’s size, flavor, and ease of growing.
Preparing the Soil: The Foundation for Success
Melons are heavy feeders, meaning they need a lot of nutrients to produce those massive fruits. Soil preparation is absolutely crucial!
* Sunlight is Key: Melons need at least 6-8 hours of direct sunlight per day. Choose a location that gets plenty of sun.
* Well-Drained Soil: Melons hate soggy feet! Make sure your soil drains well. If you have heavy clay soil, amend it with plenty of organic matter.
* Soil Testing: A soil test will tell you exactly what nutrients your soil is lacking. You can get a soil test kit at most garden centers or send a sample to your local agricultural extension office.
* Amending the Soil: Based on your soil test results, amend your soil with compost, aged manure, or other organic matter. I like to add a generous amount of composted chicken manure – it’s packed with nutrients!
* Raised Beds (Optional): If you have poor drainage or rocky soil, consider growing your melons in raised beds. This will improve drainage and give the roots plenty of room to grow.
Planting Your Melon Seeds or Seedlings
Now for the fun part – getting those melons started!
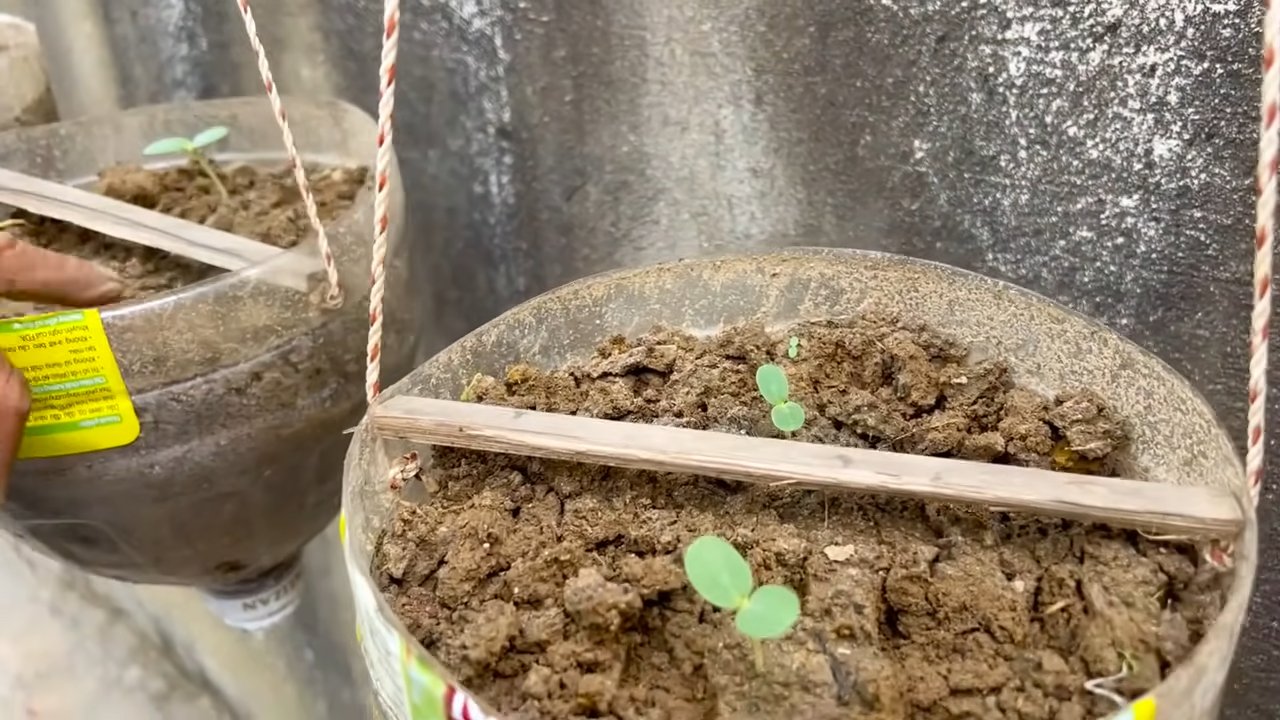
* Starting Seeds Indoors (Recommended): I prefer to start my melon seeds indoors about 4-6 weeks before the last expected frost. This gives them a head start and protects them from pests and diseases.
* Use seed starting trays or small pots filled with seed starting mix.
* Sow the seeds about 1 inch deep.
* Keep the soil moist but not soggy.
* Provide plenty of light – a grow light is ideal.
* Once the seedlings have a few true leaves, transplant them into larger pots.
* Direct Sowing (If Your Climate Allows): If you live in a warm climate with a long growing season, you can direct sow melon seeds into the garden.
* Wait until the soil has warmed up to at least 70°F (21°C).
* Sow the seeds about 1 inch deep, spacing them according to the seed packet instructions.
* Keep the soil moist until the seeds germinate.
* Hardening Off Seedlings: Before transplanting your seedlings into the garden, you need to harden them off. This means gradually exposing them to outdoor conditions over a period of about a week.
* Start by placing the seedlings in a sheltered location outdoors for a few hours each day.
* Gradually increase the amount of time they spend outdoors each day.
* Protect them from strong winds and direct sunlight.
* Transplanting Seedlings: Once the seedlings are hardened off, you can transplant them into the garden.
* Choose a cloudy day to minimize stress on the plants.
* Dig a hole that is slightly larger than the root ball.
* Gently remove the seedling from the pot and place it in the hole.
* Backfill the hole with soil and water thoroughly.
* Space the plants according to the seed packet instructions. Watermelons need a lot of space!
* Mulching: After planting, mulch around the plants with straw, hay, or wood chips. This will help to retain moisture, suppress weeds, and regulate soil temperature. I prefer straw because it breaks down nicely and adds organic matter to the soil.
Watering and Fertilizing: Keeping Your Melons Happy
Consistent watering and feeding are essential for growing large, juicy melons.
* Watering: Melons need consistent moisture, especially during fruit development.
* Water deeply and regularly, especially during hot, dry weather.
* Avoid overhead watering, as this can promote fungal diseases.
* Use a soaker hose or drip irrigation to deliver water directly to the roots.
* Check the soil moisture regularly and water when the top inch of soil feels dry.
* Fertilizing: Melons are heavy feeders and need regular fertilization.
* Use a balanced fertilizer (e.g., 10-10-10) at planting time.
* Side-dress with a nitrogen-rich fertilizer (e.g., ammonium nitrate) when the vines start to run.
* Switch to a phosphorus- and potassium-rich fertilizer (e.g., bone meal and wood ash) when the fruits start to develop.
* I also like to use liquid seaweed extract as a foliar feed – it provides micronutrients and helps to boost the plant’s immune system.
* Avoid Over-Fertilizing: Too much fertilizer can lead to excessive vine growth and fewer fruits. Follow the instructions on the fertilizer label carefully.
Pruning and Training: Directing the Plant’s Energy
Pruning and training your melon vines can help to improve air circulation, reduce disease, and direct the plant’s energy into fruit production.
* Pruning:
* Remove any dead, damaged, or diseased leaves and stems.
* Pinch off the tips of the vines to encourage branching.
* Remove any suckers (small shoots that grow from the base of the plant).
* Once the plant has set a few fruits, you can remove some of the smaller, less vigorous vines to direct the plant’s energy into the remaining fruits.
* Training:
* Train the vines to grow along a trellis or fence. This will improve air circulation and make it easier to harvest the fruits.
* Use twine or plant ties to secure the vines to the trellis.
* You can also let the vines sprawl on the ground, but make sure to provide plenty of space.
* Fruit Support: As the melons grow larger, they may need support to prevent them from breaking off the vine.
* Use slings made from old t-shirts or pantyhose to support the fruits.
* Tie the slings to the trellis or fence.
* You can also place the fruits on a bed of straw or wood chips to protect them from the soil.
Pollination: Ensuring Fruit Set
Melons need to be pollinated in order to produce fruit.
* Hand Pollination (If Necessary): If you’re not seeing a lot of bees in your garden, you may need to hand-pollinate your melon flowers.
* Identify the male and female flowers. Male flowers have a long, thin stem, while female flowers have a small, immature fruit at the base.
* Use a small paintbrush to transfer pollen from the male flower to the female flower.
* Do this in the morning, when the flowers are open.
* Attracting Pollinators: Plant flowers that attract bees and other pollinators near your melon patch. Some good choices include sunflowers, zinnias, and lavender.
* Avoid Pesticides: Pesticides can kill pollinators, so avoid using them in your garden.
Pest and Disease Control: Protecting Your Investment
Melons can be susceptible to a variety of pests and diseases.
* Common Pests:
* Aphids: These small, sap-sucking insects can weaken plants and transmit diseases. Control them with insecticidal soap or neem oil.
* Squash Bugs: These pests can damage leaves and stems. Handpick them or use insecticidal soap.
* Cucumber Beetles: These beetles can damage leaves and transmit diseases. Use row covers to protect young plants.
* Vine Borers: These pests can bore into the stems of melon plants, causing them to wilt and die. Wrap the base of the stems with aluminum foil to prevent vine bor
Conclusion
So, there you have it! This simple yet incredibly effective backyard hack for boosting your melon yield is more than just a gardening tip; it’s a game-changer. We’ve explored how strategic pruning, combined with a few other key techniques, can transform your melon patch from a modest producer to a veritable fruit factory. The beauty of this method lies in its accessibility. You don’t need to be a seasoned horticulturalist or invest in expensive equipment. All it takes is a little time, attention, and a willingness to experiment.
Why is this DIY trick a must-try? Because it addresses the fundamental needs of your melon plants. By directing their energy towards fruit production rather than excessive vine growth, you’re essentially optimizing their resources. This leads to larger, sweeter, and more abundant melons. Imagine biting into a juicy, homegrown watermelon, cantaloupe, or honeydew, knowing that you played a direct role in its creation. That’s the satisfaction this hack provides.
But the benefits extend beyond just the taste. By implementing this method, you’re also promoting healthier plants. Proper pruning improves air circulation, reducing the risk of fungal diseases that can plague melon crops. You’re also encouraging stronger root systems, which are essential for nutrient uptake and overall plant vigor. In essence, you’re creating a more resilient and productive garden.
Looking for variations? Consider these options:
* Vertical Gardening: If you’re short on space, train your melon vines to grow vertically on a trellis or fence. This not only saves space but also improves air circulation and makes harvesting easier. Just be sure to provide adequate support for the developing melons.
* Companion Planting: Enhance your melon patch by planting companion plants like marigolds, basil, or nasturtiums. These plants can deter pests and attract beneficial insects, further protecting your melon crop.
* Soil Enrichment: Before planting, amend your soil with compost or well-rotted manure to provide your melon plants with the nutrients they need to thrive. A healthy soil is the foundation for a successful harvest.
* Grafting: For advanced gardeners, consider grafting your melon plants onto more vigorous rootstock. This can improve disease resistance and overall plant performance.
We wholeheartedly encourage you to try this backyard hack for boosting your melon yield. It’s a rewarding experience that will transform your gardening efforts. Don’t be afraid to experiment and adapt the techniques to suit your specific growing conditions. Every garden is unique, and what works for one person may need to be tweaked for another.
Most importantly, we want to hear about your experiences! Share your results, tips, and variations in the comments section below. Let’s create a community of melon enthusiasts who are passionate about growing the best possible fruit. Together, we can unlock the full potential of our melon patches and enjoy a bountiful harvest year after year. So, grab your pruning shears, get out into your garden, and start boosting your melon yield today! You won’t regret it. Remember, a little effort can go a long way in the world of gardening, and this hack is proof of that. Happy gardening!
Frequently Asked Questions (FAQ)
Q: What types of melons does this backyard hack work for?
A: This hack is effective for a wide variety of melons, including watermelons, cantaloupes, honeydews, and even smaller varieties like Galia melons. The principles of pruning and directing plant energy towards fruit production apply to most melon types. However, the specific pruning techniques may need to be adjusted slightly depending on the variety. For example, some watermelon varieties may require more aggressive pruning than cantaloupes. Always research the specific needs of your melon variety before implementing this hack.
Q: When is the best time to start pruning my melon plants?
A: The ideal time to start pruning your melon plants is when they are young and actively growing, typically around 4-6 weeks after planting. At this stage, the plants will have developed several healthy leaves and vines. Avoid pruning too early, as this can stress the plants and stunt their growth. It’s also important to avoid pruning during periods of extreme heat or drought, as this can further stress the plants. The best time of day to prune is in the morning, allowing the cuts to dry and heal before nightfall.
Q: How much of the melon vine should I prune?
A: The amount of pruning you should do depends on the variety of melon and the overall health of the plant. In general, you should focus on removing suckers (small shoots that grow from the base of the plant), excessive vine growth, and any yellowing or diseased leaves. The goal is to direct the plant’s energy towards fruit production, so prioritize removing growth that is not contributing to this goal. A good rule of thumb is to leave 2-3 healthy leaves beyond each developing melon.
Q: Will pruning my melon plants reduce the number of melons I get?
A: While it may seem counterintuitive, pruning your melon plants can actually increase the overall yield. By removing excessive vine growth, you’re allowing the plant to focus its energy on developing fewer, but larger and higher-quality melons. Without pruning, the plant may produce a larger number of smaller, less flavorful melons. The key is to strike a balance between removing enough growth to promote fruit production without removing too much and stressing the plant.
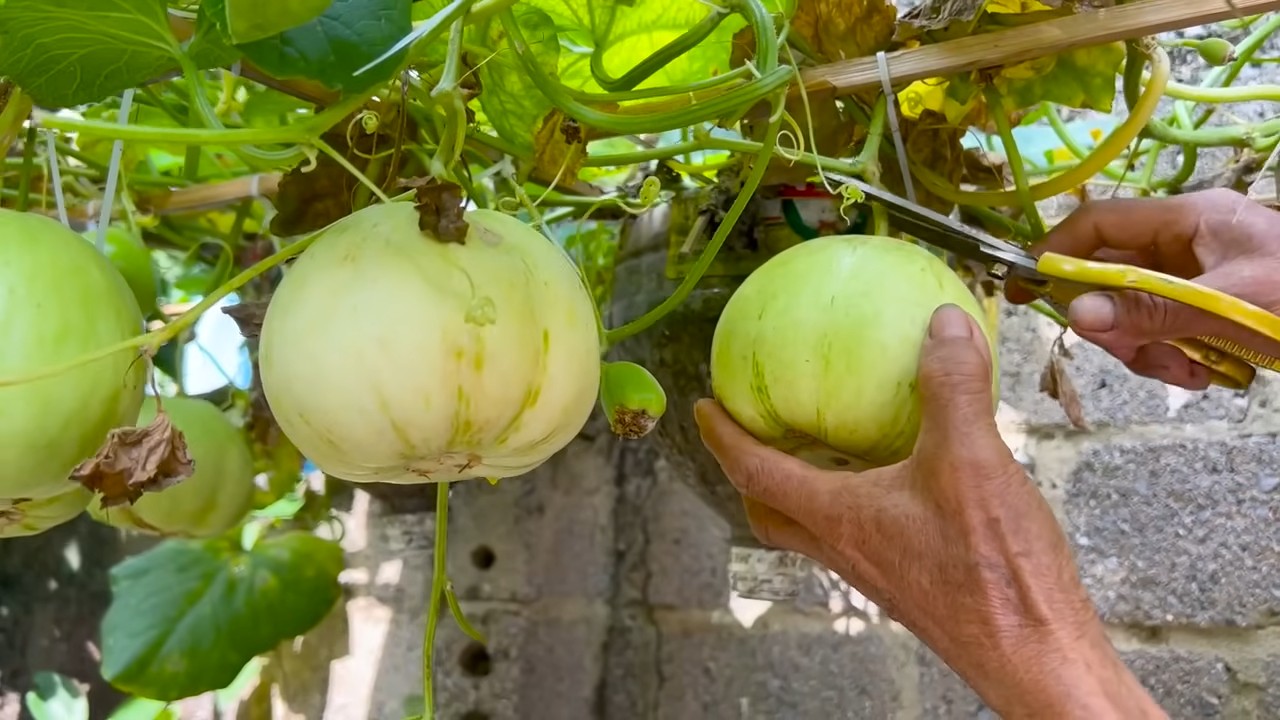
Q: What tools do I need for pruning melon plants?
A: The essential tools for pruning melon plants are a sharp pair of pruning shears or scissors. Make sure the blades are clean and sanitized to prevent the spread of diseases. You may also want to wear gloves to protect your hands from thorns or sap. Avoid using dull or rusty tools, as these can damage the plant and make it more susceptible to infection.
Q: How often should I water my melon plants after pruning?
A: After pruning, it’s important to maintain consistent watering to help the plants recover and continue growing. Water deeply and regularly, especially during periods of hot weather or drought. Avoid overwatering, as this can lead to root rot. A good rule of thumb is to water when the top inch of soil feels dry to the touch. Consider using a soaker hose or drip irrigation system to deliver water directly to the roots, minimizing water loss through evaporation.
Q: Can I use fertilizer to boost my melon yield after pruning?
A: Yes, fertilizing your melon plants after pruning can help them recover and promote fruit production. Use a balanced fertilizer that is specifically formulated for melons or vegetables. Follow the instructions on the fertilizer package carefully, and avoid over-fertilizing, as this can damage the plants. You can also supplement with organic fertilizers like compost tea or fish emulsion.
Q: What are some common pests and diseases that affect melon plants, and how can I prevent them?
A: Common pests that affect melon plants include aphids, squash bugs, and cucumber beetles. Common diseases include powdery mildew, downy mildew, and fusarium wilt. To prevent these problems, practice good garden hygiene, such as removing plant debris and weeds. You can also use insecticidal soap or neem oil to control pests, and fungicides to control diseases. Choose disease-resistant varieties of melons whenever possible. Crop rotation can also help prevent soilborne diseases.
Q: How do I know when my melons are ripe and ready to harvest?
A: The signs of ripeness vary depending on the type of melon. For watermelons, look for a dull thud when you tap the fruit, a yellow or cream-colored spot on the underside where it rested on the ground, and a dried tendril near the stem. For cantaloupes, look for a sweet aroma, a slight softening of the blossom end, and a stem that slips easily from the fruit. For honeydews, look for a creamy yellow color and a slightly waxy feel.
Q: What if I don’t have a backyard? Can I still use this hack in a container garden?
A: Absolutely! This hack can be adapted for container gardening. Choose a large container (at least 20 gallons) with good drainage. Use a high-quality potting mix and provide adequate support for the vines, such as a trellis or stake. Prune the vines as described above, and be sure to water and fertilize regularly. Container-grown melons may require more frequent watering and fertilizing than those grown in the ground.
Leave a Comment