

Honeyberry Harvest Garden Tour: Ever dreamt of strolling through your backyard, basket in hand, overflowing with juicy, antioxidant-rich berries you grew yourself? I know I have! And let me tell you, it’s even more rewarding than it sounds. This isn’t just about gardening; it’s about creating a sustainable, delicious, and visually stunning landscape right outside your door.
For centuries, honeyberries, also known as Haskap berries, have been cherished in Japan and Russia, prized for their unique sweet-tart flavor and incredible hardiness. Now, these resilient berries are making waves in North American gardens, and for good reason! They’re relatively easy to grow, incredibly productive, and offer a taste experience unlike any other.
But where do you even begin? That’s where this DIY Honeyberry Harvest Garden Tour comes in. I’m going to walk you through everything you need to know, from selecting the right varieties for your climate to maximizing your harvest. Forget complicated gardening techniques and expensive equipment. I’ll share simple, effective tips and tricks that anyone can use to create their own thriving honeyberry patch.
Why do you need this? Because fresh, homegrown berries are simply better! They taste better, they’re better for you, and they connect you to the natural world in a way that store-bought produce simply can’t. Plus, imagine the bragging rights when you offer your friends and family a taste of your very own honeyberry harvest! Let’s get started and transform your garden into a berry-filled paradise!
DIY Vertical Herb Garden from Pallet Wood
Hey there, fellow garden enthusiasts! I’m super excited to share one of my favorite DIY projects with you: creating a vertical herb garden from reclaimed pallet wood. Not only is this project budget-friendly and eco-conscious, but it also adds a charming, rustic touch to any outdoor space, big or small. Plus, having fresh herbs right at your fingertips is a total game-changer in the kitchen! Let’s dive in!
Materials You’ll Need
Before we get started, let’s gather all the necessary materials. Trust me, having everything organized beforehand will make the whole process much smoother.
* **A Pallet:** Look for a heat-treated pallet (marked with “HT”) rather than one chemically treated (marked with “MB”). You can often find these for free behind grocery stores, hardware stores, or on online marketplaces. Make sure it’s in decent condition, without any broken or severely damaged boards.
* **Gardening Gloves:** Protect those hands!
* **Safety Glasses:** Essential for sawing and sanding.
* **Staple Gun and Staples:** For securing the landscape fabric.
* **Heavy-Duty Landscape Fabric:** This will line the pallet and create pockets for the soil.
* **Measuring Tape:** For accurate cuts and measurements.
* **Scissors or Utility Knife:** For cutting the landscape fabric.
* **Sandpaper (Various Grits):** To smooth out the wood and prevent splinters. I recommend starting with a coarse grit (80) and finishing with a finer grit (120 or 150).
* **Drill and Screws (Optional):** For reinforcing any loose boards on the pallet.
* **Wood Stain or Paint (Optional):** To customize the look of your garden. Choose something weather-resistant.
* **Potting Soil:** A good quality potting mix is crucial for healthy herb growth.
* **Your Favorite Herb Seedlings or Seeds:** Think basil, mint, oregano, thyme, rosemary – the possibilities are endless!
* **Trowel:** For planting your herbs.
* **Wood Sealer (Optional):** To protect the wood from moisture and extend its lifespan.
* **Saw (Hand Saw or Power Saw):** For cutting the pallet if needed.
Preparing the Pallet
This is a crucial step to ensure your pallet is safe and ready for planting.
1. **Inspect the Pallet:** Carefully examine the pallet for any loose nails, staples, or broken boards. Remove any hazards using a hammer and pliers. If any boards are loose, use a drill and screws to secure them.
2. **Clean the Pallet:** Use a brush and soapy water to thoroughly clean the pallet. This will remove any dirt, grime, or debris that may be present. Let it dry completely before moving on to the next step.
3. **Sand the Pallet:** This is where the elbow grease comes in! Sand the entire pallet, paying special attention to any rough edges or splinters. Start with a coarse grit sandpaper (80) to remove any imperfections, then move on to a finer grit (120 or 150) for a smooth finish. This will not only make the pallet look better but also prevent any accidental scratches or splinters.
4. **Cut the Pallet (Optional):** Depending on the size and design you want, you might need to cut the pallet down to a more manageable size. Use a saw to carefully cut the pallet to your desired dimensions. Remember to wear safety glasses!
5. **Stain or Paint (Optional):** If you want to customize the look of your vertical garden, now’s the time to stain or paint it. Choose a weather-resistant stain or paint that complements your outdoor space. Apply the stain or paint according to the manufacturer’s instructions, and let it dry completely before proceeding. I personally love a natural wood stain to show off the pallet’s character.
6. **Apply Wood Sealer (Optional):** To protect the wood from moisture and extend its lifespan, consider applying a wood sealer. This will help prevent rot and decay, especially if you live in a humid climate.
Creating the Planting Pockets
This is where the magic happens! We’ll be using landscape fabric to create pockets that will hold the soil and herbs.
1. **Measure and Cut the Landscape Fabric:** Measure the width and depth of each section of the pallet where you want to create a planting pocket. Add a few extra inches to each measurement to allow for overlap and secure stapling. Cut the landscape fabric into rectangles according to your measurements.
2. **Attach the Landscape Fabric:** Starting at the bottom of the pallet, staple the landscape fabric to the inside of each section, creating a pocket. Make sure the fabric is taut and secure, with no gaps or loose edges. Overlap the fabric at the sides and bottom to create a strong, waterproof barrier. Use plenty of staples to ensure the fabric stays in place.
3. **Repeat for Each Pocket:** Continue this process for each section of the pallet, creating multiple planting pockets. You can customize the size and shape of the pockets to accommodate different types of herbs. I like to make some pockets larger for herbs like rosemary and smaller pockets for herbs like thyme.
4. **Reinforce the Bottom (Important!):** For the bottom row of pockets, I highly recommend reinforcing the bottom with an extra layer of landscape fabric. This will help prevent the soil from sagging and potentially tearing the fabric.
Planting Your Herbs
Now for the fun part – bringing your vertical garden to life with herbs!
1. **Fill the Pockets with Potting Soil:** Carefully fill each planting pocket with a good quality potting soil. Leave a little space at the top to allow for watering. Gently pat down the soil to remove any air pockets.
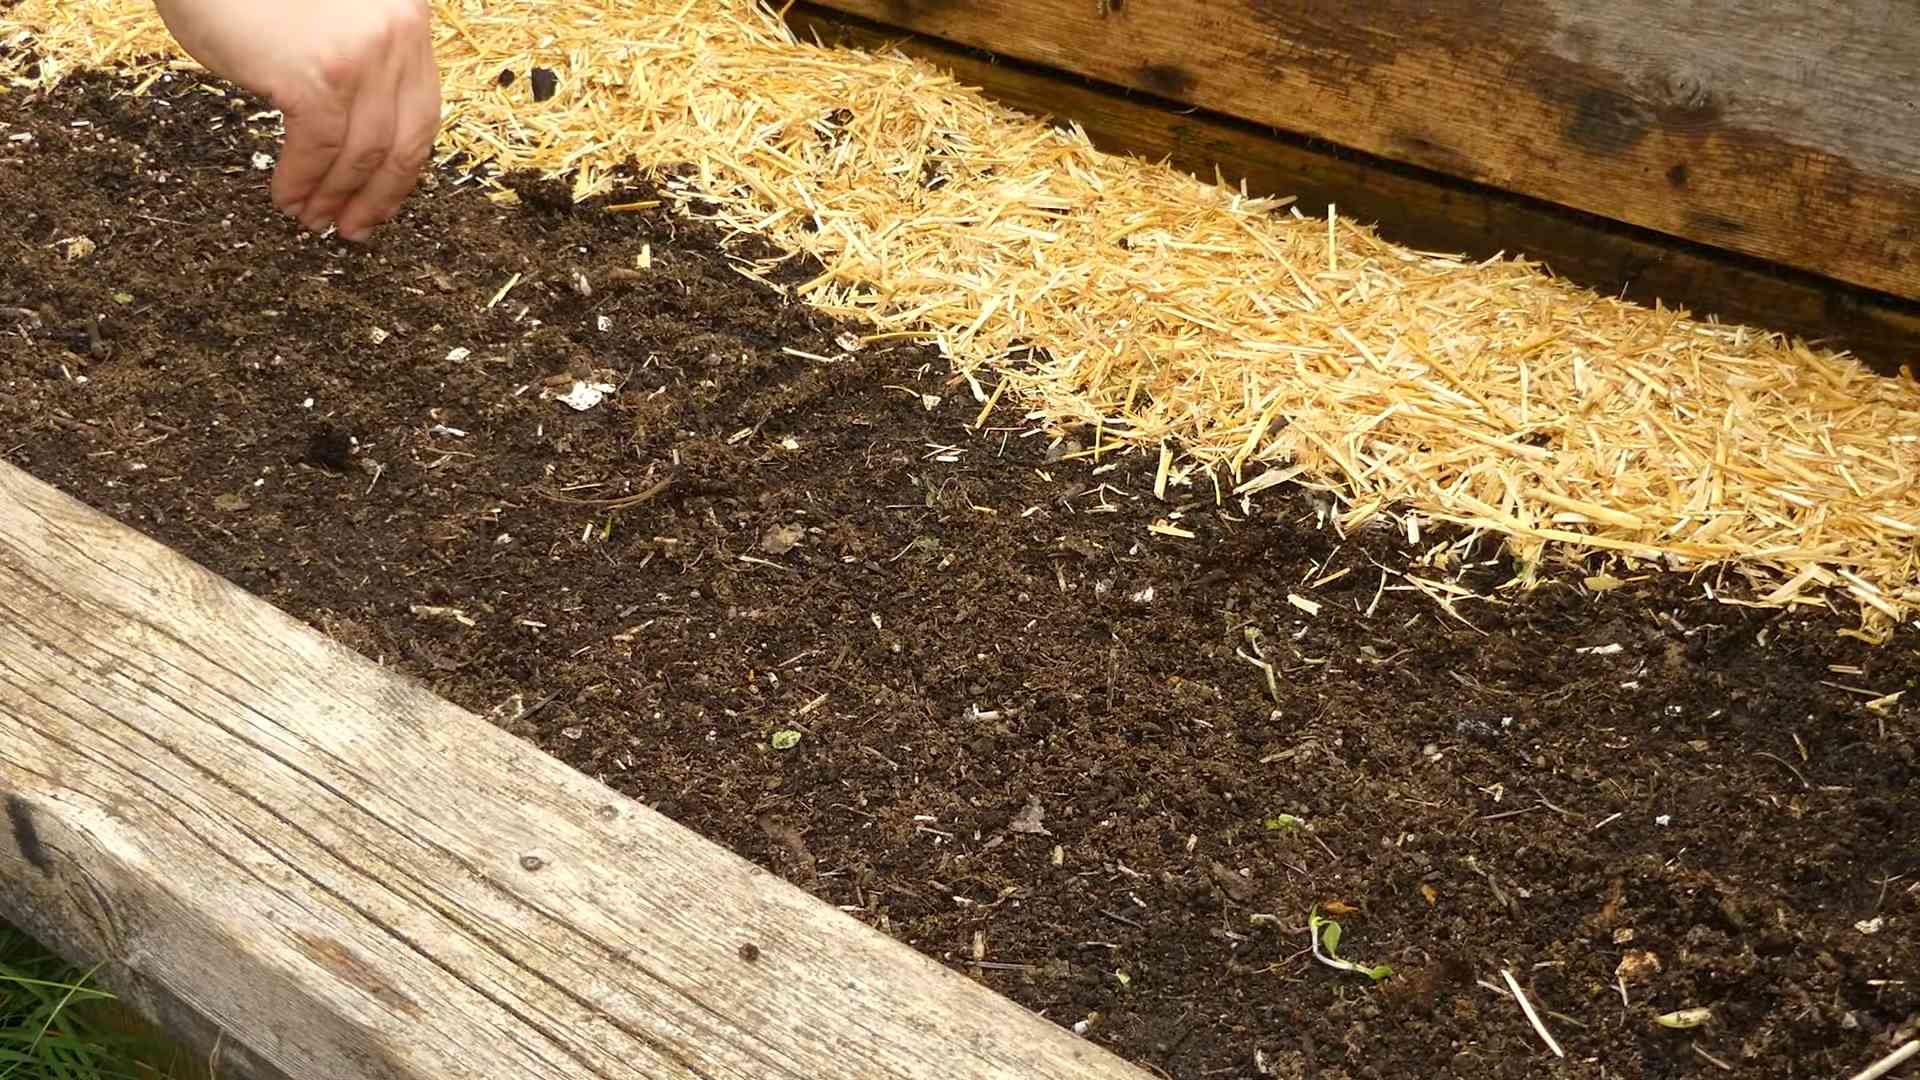
2. **Plant Your Herbs:** Gently remove your herb seedlings from their containers and loosen the roots. Dig a small hole in the soil in each pocket and plant the seedlings, making sure the roots are covered with soil. Space the herbs appropriately, considering their mature size. If you’re using seeds, follow the instructions on the seed packet for planting depth and spacing.
3. **Water Thoroughly:** Water your newly planted herbs thoroughly, until the water drains out of the bottom of the pockets. This will help settle the soil and encourage root growth.
4. **Add More Soil if Needed:** After watering, the soil may settle a bit. Add more potting soil to the pockets if necessary to fill them to the desired level.
5. **Label Your Herbs (Optional):** Use plant markers or labels to identify each herb. This will help you remember what you planted and prevent any accidental misidentification. You can get creative with your labels – use wooden sticks, painted rocks, or even write directly on the pallet with a permanent marker.
Maintaining Your Vertical Herb Garden
A little TLC will keep your herb garden thriving!
1. **Water Regularly:** Check the soil moisture regularly and water your herbs when the top inch of soil feels dry to the touch. Water deeply, until the water drains out of the bottom of the pockets. Avoid overwatering, as this can lead to root rot. The frequency of watering will depend on the weather and the type of herbs you’re growing.
2. **Fertilize as Needed:** Herbs generally don’t need a lot of fertilizer, but you can give them a boost with a diluted liquid fertilizer every few weeks. Follow the instructions on the fertilizer packaging.
3. **Prune Regularly:** Pruning your herbs regularly will encourage bushier growth and prevent them from becoming leggy. Simply pinch off the tips of the stems or harvest leaves as needed.
4. **Sunlight:** Most herbs need at least 6 hours of sunlight per day. Place your vertical garden in a sunny location where it will receive plenty of light. If you don’t have a sunny spot, you can supplement with grow lights.
5. **Pest Control:** Keep an eye out for pests, such as aphids or spider mites. If you notice any pests, treat them with an organic insecticide or insecticidal soap.
6. **Winter Protection:** If you live in a cold climate, you may need to protect your herbs from frost and freezing temperatures. You can move the pallet indoors or cover it with a frost blanket. Some herbs, like rosemary and thyme, are relatively hardy and can tolerate light frosts.
Tips and Tricks
Here are a few extra tips to help you succeed with your vertical herb garden:
* Choose the Right Herbs: Consider the amount of sunlight your garden will receive and choose herbs that are well-suited to those conditions. Some herbs, like mint and parsley, prefer partial shade, while others, like basil and rosemary, need full sun.
* Use a Good Quality Potting Mix: A good quality potting mix will provide your herbs with the nutrients they need to thrive. Avoid using garden soil, as it can be too heavy and compacted for container gardening.
* Don’t Overcrowd: Give your herbs enough space to grow. Overcrowding can lead to poor air circulation and increased risk of disease.
* Rotate Your Crops: To prevent soil depletion, rotate your crops each year. Plant different herbs in the same pockets each season.
* Get
Conclusion
So, there you have it! Transforming your honeyberry harvest into a delightful garden tour experience is more than just a way to showcase your hard work; it’s an opportunity to connect with nature, share your passion, and create lasting memories. This DIY trick, turning your harvest into an event, is a must-try for any gardener looking to elevate their experience and foster a sense of community.
Why is this a must-try? Because it transcends the simple act of picking berries. It’s about creating an immersive experience. It’s about sharing the joy of gardening with others. It’s about educating people about the amazing honeyberry and its potential. It’s about building a community around a shared love of nature and delicious, homegrown food. And, let’s be honest, who doesn’t love a good garden tour?
Consider these variations to personalize your honeyberry harvest garden tour:
* **Themed Tours:** Focus on a specific aspect of honeyberry cultivation, such as pruning techniques, pest control, or different honeyberry varieties. You could even create a “Honeyberry Tasting Tour” featuring various honeyberry-infused treats.
* **Educational Workshops:** Incorporate short workshops on topics like honeyberry propagation, companion planting, or making honeyberry jam. This adds value to the tour and provides guests with practical skills.
* **Family-Friendly Activities:** Include activities for children, such as a honeyberry scavenger hunt, a coloring station with honeyberry-themed images, or a demonstration on how to plant a honeyberry seedling.
* **Partner with Local Businesses:** Collaborate with local bakeries, restaurants, or breweries to offer honeyberry-themed products or refreshments during the tour. This can help promote your tour and support other local businesses.
* **Evening Tours:** Host a twilight tour with string lights and lanterns for a magical ambiance. Serve honeyberry-infused cocktails or mocktails and offer live music.
* **Photography Focus:** Encourage guests to capture the beauty of your honeyberry patch by offering photography tips or even hosting a mini-photography contest.
Don’t be afraid to experiment and find what works best for you and your garden. The key is to create an engaging and memorable experience for your guests.
We wholeheartedly encourage you to try this DIY trick and transform your next honeyberry harvest into a memorable garden tour. It’s a rewarding experience that will not only enhance your own enjoyment of gardening but also allow you to share your passion with others.
Once you’ve hosted your tour, we’d love to hear about your experience! Share your photos, stories, and tips in the comments below. What worked well? What would you do differently next time? Your feedback will help other gardeners create their own successful honeyberry harvest garden tours. Let’s build a community of honeyberry enthusiasts and spread the joy of gardening!
Frequently Asked Questions (FAQ)
What is the best time to host a honeyberry harvest garden tour?
The ideal time to host your tour depends on your local climate and the specific honeyberry varieties you grow. Generally, honeyberries ripen in late spring to early summer, typically from late May to early June in many regions. Monitor your plants closely and start planning your tour when the berries are nearing peak ripeness. Consider offering multiple tour dates to accommodate different schedules and ensure that guests have the opportunity to pick ripe berries.
How do I prepare my garden for a tour?
Preparation is key to a successful tour. Start by weeding and tidying up your honeyberry patch. Ensure that pathways are clear and accessible for all guests, including those with mobility issues. Consider adding signage to identify different honeyberry varieties and provide information about their unique characteristics. Make sure to have plenty of containers available for guests to collect their harvested berries. It’s also a good idea to have a designated area for washing hands and cleaning berries. Finally, don’t forget to add some decorative touches to create a welcoming and festive atmosphere.
What should I charge for a honeyberry harvest garden tour?
The pricing for your tour can vary depending on several factors, including the length of the tour, the activities included, and the amount of honeyberries guests are allowed to pick. You can offer a flat fee per person, charge by the pound for harvested berries, or combine both. Research similar events in your area to get an idea of what people are willing to pay. Consider offering discounts for children, seniors, or groups. You can also offer different ticket options with varying levels of access and amenities.
How do I promote my honeyberry harvest garden tour?
Promoting your tour is essential to attract guests. Start by creating a visually appealing flyer or poster with all the relevant information, including the date, time, location, price, and activities. Share the flyer on social media platforms, local community groups, and gardening forums. Consider creating a Facebook event page to allow people to RSVP and share the event with their friends. You can also reach out to local media outlets, such as newspapers, radio stations, and television stations, to see if they’re interested in covering your tour. Don’t forget to put up signs in your neighborhood and at local businesses to spread the word.
What if it rains on the day of my tour?
Have a backup plan in case of inclement weather. If possible, consider moving the tour to a covered area, such as a greenhouse or barn. If that’s not feasible, you can reschedule the tour for another day. Communicate any changes to your guests as soon as possible via email, social media, or phone. You can also offer a rain check for a future tour or a refund.
What are some safety precautions I should take?
Safety should be a top priority. Make sure your garden is free of hazards, such as uneven ground, sharp objects, or poisonous plants. Provide guests with clear instructions on how to safely pick honeyberries and avoid damaging the plants. If you have any bees or other stinging insects in your garden, warn guests and provide them with insect repellent. It’s also a good idea to have a first-aid kit on hand in case of any minor injuries.
How can I make my tour more sustainable?
There are many ways to make your tour more environmentally friendly. Encourage guests to bring their own reusable containers for collecting berries. Use biodegradable or compostable cups and plates for refreshments. Provide recycling bins for guests to dispose of their waste properly. Consider using organic gardening practices to minimize the use of pesticides and herbicides. You can also educate guests about sustainable gardening practices during the tour.
What if I don’t have a large honeyberry patch? Can I still host a tour?
Absolutely! Even a small honeyberry patch can be the basis for a delightful tour. Focus on the unique aspects of your garden, such as the different varieties you grow or the specific techniques you use. You can also incorporate other elements into the tour, such as a demonstration on how to make honeyberry jam or a tasting of honeyberry-infused treats. The key is to create an engaging and informative experience, regardless of the size of your garden.
How do I handle guests who are overly enthusiastic about picking berries?
It’s important to set clear expectations for guests regarding how many berries they are allowed to pick. Communicate these expectations before the tour begins and reiterate them throughout the event. Monitor the picking activity and gently remind guests if they are exceeding the limit. You can also provide guests with a visual guide to help them identify ripe berries and avoid picking unripe ones.
What are some creative ways to use honeyberries after the harvest?
Honeyberries are incredibly versatile and can be used in a wide variety of culinary creations. You can make honeyberry jam, jelly, pies, muffins, smoothies, and even wine. They can also be frozen for later use. Experiment with different recipes and find your favorite ways to enjoy this delicious and nutritious fruit. Consider sharing your recipes with your tour guests or even offering a honeyberry cooking demonstration during the tour.

Leave a Comment