

Harvesting Celery Backyard can feel like a real victory! Imagine the satisfaction of snipping fresh, crisp celery stalks grown right outside your door, ready to add a burst of flavor to your soups, salads, or even just enjoyed as a healthy snack. But knowing *when* and *how* to harvest your celery is key to maximizing your yield and enjoying the best possible taste.
Celery, with its origins tracing back to the Mediterranean, has been cultivated for centuries, initially valued for its medicinal properties before becoming a culinary staple. Today, it’s a beloved ingredient worldwide, and growing your own allows you to bypass the grocery store and connect with this rich history in a tangible way.
Let’s be honest, store-bought celery can sometimes be a bit… lackluster. It might be limp, bitter, or simply lacking that vibrant, fresh flavor we crave. That’s where mastering the art of harvesting celery backyard comes in. This DIY guide will equip you with the knowledge and simple techniques to ensure you’re picking your celery at its peak ripeness, resulting in a far superior taste and texture. Plus, you’ll reduce food waste and save money – it’s a win-win! So, grab your gardening gloves, and let’s get started on unlocking the secrets to a bountiful celery harvest!
Selbstgemachtes Glück: So erntest du deinen eigenen Staudensellerie im Garten
Hey Gartenfreunde! Ich freue mich riesig, euch heute zu zeigen, wie ihr euren eigenen Staudensellerie (oder Bleichsellerie, wie er auch genannt wird) direkt aus eurem Garten ernten könnt. Es ist wirklich einfacher als man denkt und der Geschmack von frisch geerntetem Sellerie ist einfach unschlagbar. Also, krempeln wir die Ärmel hoch und legen los!
Wann ist der richtige Zeitpunkt für die Ernte?
Das ist eine der wichtigsten Fragen! Du willst ja nicht zu früh oder zu spät ernten. Hier sind ein paar Anzeichen, auf die du achten solltest:
* Die Größe: Dein Staudensellerie sollte eine ansehnliche Größe erreicht haben. Die Stangen sollten mindestens 20-30 cm hoch sein.
* Die Dicke: Die Stangen sollten sich fest anfühlen und eine gewisse Dicke haben. Sie sollten nicht dünn und schlaff sein.
* Die Farbe: Die Farbe kann je nach Sorte variieren, aber im Allgemeinen sollte der Sellerie eine schöne, gleichmäßige Farbe haben. Vermeide Sellerie mit gelben oder braunen Flecken.
* Die Reifezeit: Beachte die empfohlene Reifezeit für deine Selleriesorte. Diese findest du normalerweise auf der Saatgutpackung oder im Internet.
Was du für die Ernte brauchst
Keine Sorge, du brauchst keine ausgefallene Ausrüstung. Hier ist eine kurze Liste:
* Ein scharfes Messer oder eine Gartenschere: Damit schneidest du den Sellerie sauber ab.
* Gartenhandschuhe (optional): Um deine Hände sauber zu halten.
* Ein Eimer oder eine Kiste: Zum Transport des geernteten Selleries.
* Wasser: Um den Sellerie nach der Ernte zu reinigen.
Schritt-für-Schritt-Anleitung zur Sellerieernte
Jetzt kommt der spannende Teil! Folge diesen Schritten, um deinen Sellerie erfolgreich zu ernten:
1. Vorbereitung: Zieh deine Gartenhandschuhe an (wenn du welche benutzt) und nimm dein scharfes Messer oder deine Gartenschere zur Hand. Stelle sicher, dass dein Eimer oder deine Kiste bereitsteht.
2. Auswahl: Wähle die Selleriepflanzen aus, die reif sind (siehe oben). Achte darauf, dass sie die richtige Größe, Dicke und Farbe haben.
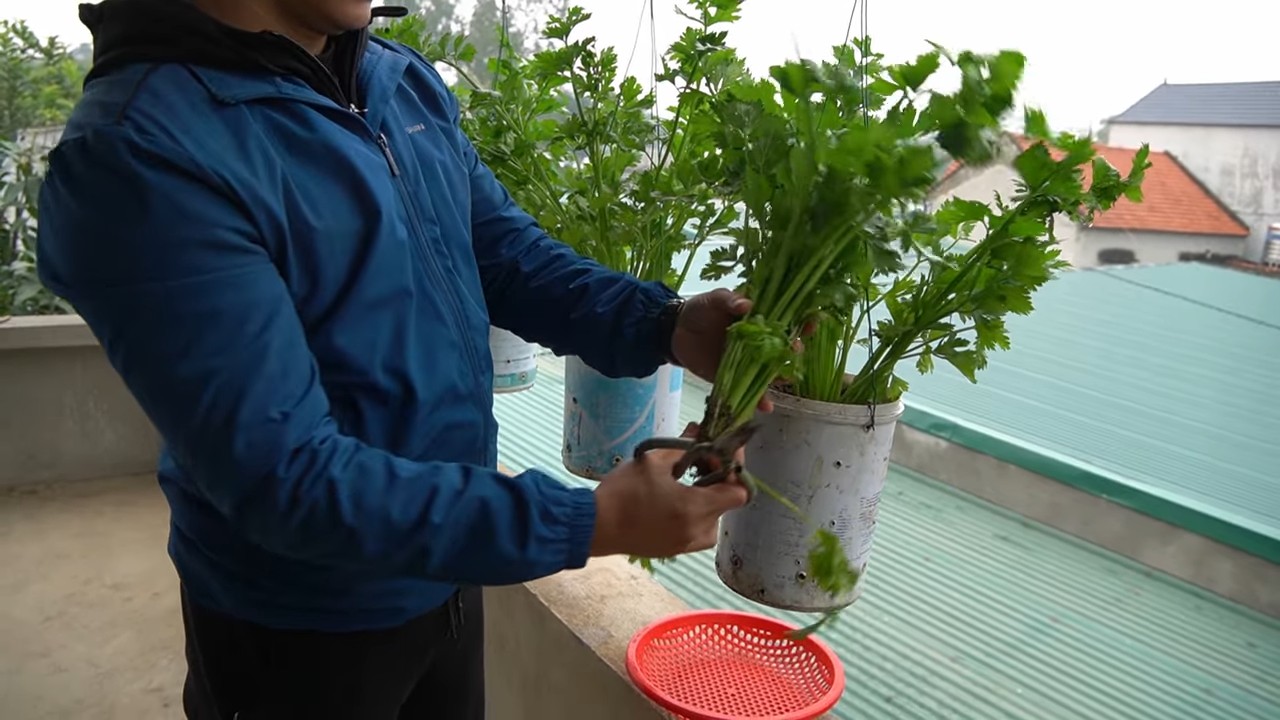
3. Schneiden: Mit dem Messer oder der Schere schneidest du den Sellerie direkt unterhalb der Bodenoberfläche ab. Achte darauf, einen sauberen Schnitt zu machen, um die Pflanze nicht zu beschädigen.
4. Reinigung: Entferne groben Schmutz von den Stangen. Du kannst den Sellerie auch kurz mit Wasser abspülen, um ihn sauberer zu machen.
5. Transport: Lege den geernteten Sellerie vorsichtig in deinen Eimer oder deine Kiste.
6. Wiederholung: Wiederhole die Schritte 2-5 für alle reifen Selleriepflanzen in deinem Garten.
Nach der Ernte: So lagerst du deinen Staudensellerie richtig
Damit dein frisch geernteter Sellerie lange frisch bleibt, solltest du ihn richtig lagern. Hier sind ein paar Tipps:
* Reinigung: Spüle den Sellerie gründlich mit kaltem Wasser ab, um alle Erd- und Schmutzreste zu entfernen.
* Trocknen: Tupfe den Sellerie mit einem sauberen Tuch trocken oder lass ihn an der Luft trocknen.
* Verpackung: Wickle den Sellerie in ein feuchtes Papiertuch oder ein sauberes Küchentuch.
* Lagerung: Lege den eingewickelten Sellerie in einen Plastikbeutel oder eine luftdichte Dose und lagere ihn im Kühlschrank.
Wichtig: Lagere den Sellerie nicht in der Nähe von Äpfeln, Bananen oder anderen Früchten, die Ethylen absondern. Ethylen kann dazu führen, dass der Sellerie schneller verdirbt.
Verwendungsmöglichkeiten für deinen geernteten Sellerie
Jetzt kommt der beste Teil: die Verwendungsmöglichkeiten! Hier sind ein paar Ideen, wie du deinen frisch geernteten Sellerie genießen kannst:
* Roh: Einfach so knabbern! Sellerie ist ein gesunder und erfrischender Snack.
* Salate: Füge ihn zu deinen Lieblingssalaten hinzu, um einen knackigen und würzigen Geschmack zu erhalten.
* Suppen und Eintöpfe: Sellerie ist eine wichtige Zutat in vielen Suppen und Eintöpfen.
* Dips: Schneide den Sellerie in Stifte und dippe ihn in Hummus, Guacamole oder andere Dips.
* Smoothies: Füge ein paar Stangen Sellerie zu deinem Smoothie hinzu, um eine extra Portion Vitamine und Mineralstoffe zu erhalten.
* Saft: Selleriesaft ist ein beliebter Detox-Drink.
* Gegrillt: Ja, du kannst Sellerie auch grillen! Er wird dadurch weicher und bekommt einen leicht rauchigen Geschmack.
Häufige Probleme und Lösungen
Manchmal läuft nicht alles glatt. Hier sind ein paar häufige Probleme, die bei der Sellerieernte auftreten können, und wie du sie beheben kannst:
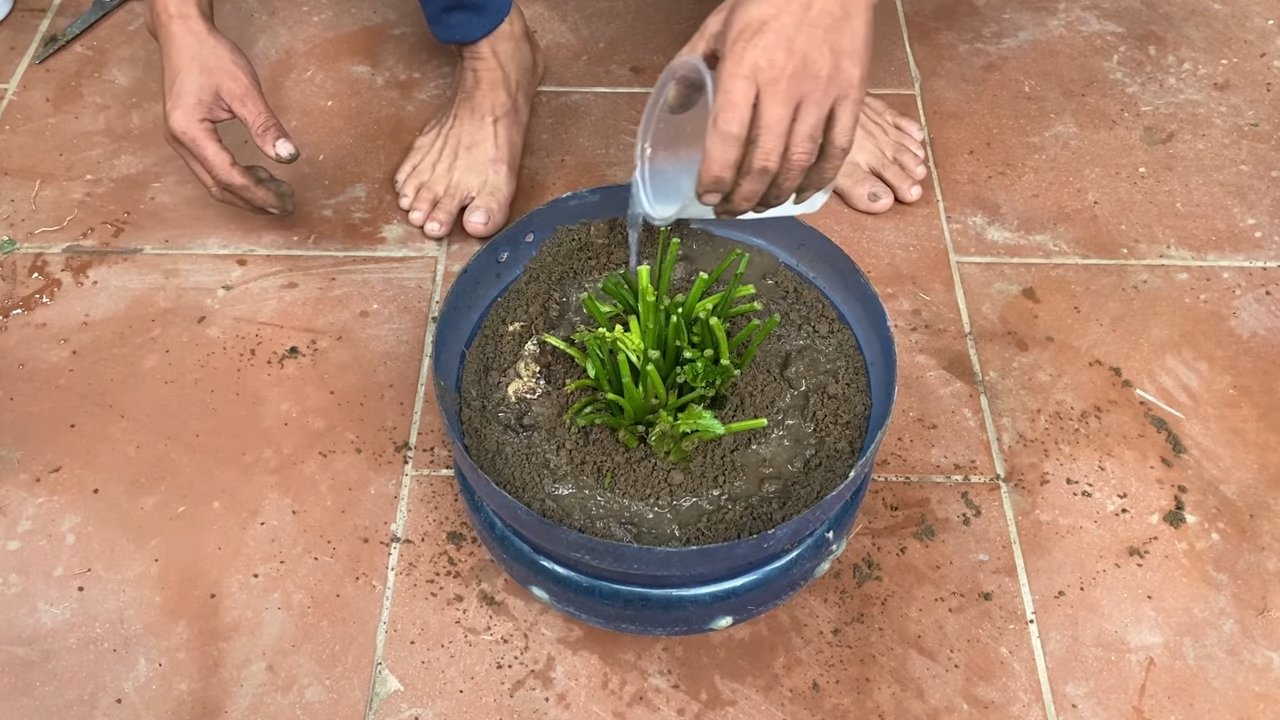
* Sellerie ist zu klein: Wenn dein Sellerie nicht die gewünschte Größe erreicht hat, kann das verschiedene Gründe haben. Möglicherweise hat er nicht genügend Wasser oder Nährstoffe bekommen. Stelle sicher, dass du ihn regelmäßig gießt und düngst.
* Sellerie ist bitter: Bitterer Sellerie kann ein Zeichen dafür sein, dass er zu viel Sonne abbekommen hat. Versuche, ihn an einem halbschattigen Standort anzubauen oder ihn mit einem Tuch abzudecken.
* Sellerie ist schlaff: Schlaffer Sellerie ist oft ein Zeichen dafür, dass er nicht genügend Wasser bekommen hat. Gieße ihn regelmäßig, besonders bei heißem Wetter.
* Schädlinge: Sellerie kann von verschiedenen Schädlingen befallen werden, wie z.B. Blattläusen oder Schnecken. Kontrolliere deine Pflanzen regelmäßig und bekämpfe Schädlinge bei Bedarf mit geeigneten Mitteln.
Zusätzliche Tipps und Tricks
Hier sind noch ein paar zusätzliche Tipps, die dir bei der Sellerieernte helfen können:
* Ernte am Morgen: Ernte deinen Sellerie am besten am Morgen, wenn er noch frisch und knackig ist.
* Nicht alle auf einmal: Du musst nicht alle Selleriepflanzen auf einmal ernten. Ernte nur die, die reif sind, und lass die anderen noch etwas wachsen.
* Sellerieblätter: Wirf die Sellerieblätter nicht weg! Du kannst sie zum Würzen von Suppen und Eintöpfen verwenden oder sie trocknen und als Gewürz verwenden.
* Nachsaat: Wenn du regelmäßig Sellerie ernten möchtest, solltest du alle paar Wochen neue Samen aussäen.
Fazit
Ich hoffe, diese Anleitung hat dir geholfen, deinen eigenen Staudensellerie erfolgreich zu ernten. Es ist wirklich ein lohnendes Gefühl, etwas Eigenes anzubauen und zu ernten. Also, viel Spaß beim Gärtnern und guten Appetit! Und denk daran: Übung macht den Meister! Je öfter du Sellerie anbaust und erntest, desto besser wirst du darin. Also, nur Mut und probiere es aus! Ich bin sicher, du wirst begeistert sein.
Conclusion
So, there you have it! Mastering the art of harvesting celery from your own backyard isn’t just about saving money; it’s about connecting with your food, enjoying unparalleled freshness, and experiencing the satisfaction of nurturing something from seed (or transplant) to table. This simple DIY trick transforms your garden into a personal produce aisle, offering celery that bursts with flavor and vitality, far surpassing anything you’ll find in a grocery store.
Why is this a must-try? Because store-bought celery often suffers from long transit times and storage, leading to a loss of crispness and flavor. When you harvest your own celery, you’re getting it at its peak, packed with nutrients and that characteristic celery crunch. Plus, you’re reducing your carbon footprint by eliminating the need for transportation and packaging. It’s a win-win for your taste buds and the planet!
But the fun doesn’t stop there. Once you’ve mastered the basic harvesting technique, you can experiment with different celery varieties. Try growing ‘Utah Tall’ for its classic flavor and sturdy stalks, or ‘Golden Self-Blanching’ for a milder, sweeter taste. You can even explore growing celery for its leaves, which can be used as a flavorful herb in soups, stews, and salads.
Consider these variations to elevate your celery harvesting experience:
* **Succession Planting:** Plant celery seeds or transplants every few weeks to ensure a continuous harvest throughout the growing season. This way, you’ll always have fresh celery on hand whenever you need it.
* **Blanching for Tenderness:** While some celery varieties are self-blanching, you can blanch others by mounding soil around the stalks a few weeks before harvesting. This will result in whiter, more tender stalks with a milder flavor.
* **Seed Saving:** If you’re feeling adventurous, you can even save seeds from your best celery plants to grow your own next year. This is a great way to preserve unique varieties and adapt them to your local climate.
* **Companion Planting:** Plant celery alongside other vegetables like tomatoes, onions, and cabbage to deter pests and improve growth. Celery is a great companion plant!
Don’t be intimidated by the prospect of growing and harvesting your own celery. It’s a rewarding experience that will transform the way you think about this versatile vegetable. So, grab your gardening gloves, head out to your backyard, and give this DIY trick a try. You’ll be amazed at how easy and satisfying it is to harvest your own fresh, flavorful celery.
We’re confident that once you experience the joy of harvesting your own celery, you’ll never go back to store-bought again. We encourage you to share your experiences with us! Post photos of your homegrown celery on social media using #HomegrownCelery and tell us about your favorite ways to use it. We can’t wait to see what you create!
Frequently Asked Questions (FAQ)
Q: How do I know when my celery is ready to harvest?
A: Celery is typically ready to harvest when the stalks are at least 6-8 inches long and have reached a good size for your liking. The exact time will depend on the variety you’re growing and your local growing conditions. A good rule of thumb is to check the maturity date on your seed packet or transplant label and start checking your celery around that time. The stalks should be firm and crisp, not limp or soft. You can also taste a small piece of a stalk to see if it has the flavor you’re looking for.
Q: Can I harvest just a few stalks at a time, or do I have to harvest the whole plant?
A: Yes, you can absolutely harvest just a few stalks at a time! This is one of the great advantages of growing your own celery. Simply use a sharp knife to cut the outer stalks near the base of the plant. Leave the inner stalks to continue growing. This will allow you to enjoy a continuous harvest of fresh celery over a longer period.
Q: What’s the best way to store harvested celery?
A: To keep your harvested celery fresh and crisp, wrap it tightly in a damp paper towel and store it in a plastic bag or container in the refrigerator. This will help to prevent it from drying out. You can also store celery stalks upright in a container of water in the refrigerator, changing the water every few days. Celery stored properly can last for several weeks in the refrigerator.
Q: My celery stalks are tough and stringy. What did I do wrong?
A: Tough and stringy celery stalks can be caused by a few factors. One common cause is insufficient watering. Celery needs consistent moisture to grow properly. Make sure you’re watering your celery regularly, especially during hot, dry weather. Another cause can be nutrient deficiencies. Celery is a heavy feeder and needs plenty of nutrients to thrive. Amend your soil with compost or fertilizer before planting and side-dress with fertilizer during the growing season. Finally, harvesting celery too late can also result in tough stalks. Harvest your celery when the stalks are the right size and firmness for your liking.
Q: Can I grow celery in containers?
A: Yes, you can grow celery in containers, but you’ll need to choose a large container (at least 12 inches in diameter) to accommodate the plant’s root system. Use a well-draining potting mix and water regularly. Container-grown celery may need more frequent fertilization than celery grown in the ground.
Q: What are some common pests and diseases that affect celery?
A: Some common pests that affect celery include aphids, celery leaf tiers, and carrot rust flies. Common diseases include celery blight and pink rot. You can prevent many pest and disease problems by practicing good garden hygiene, such as removing weeds and debris, and by providing adequate air circulation. If you do encounter pests or diseases, you can treat them with organic pesticides or fungicides.
Q: Can I regrow celery from the base I buy at the store?
A: Yes, you can! Cut off the celery stalks, leaving about 2 inches of the base intact. Place the base in a shallow dish of water, with the cut side facing up. Put the dish in a sunny location and change the water every day. After a few days, you should see new roots and leaves starting to grow. Once the roots are well-developed, you can transplant the celery base into a pot or garden bed. While it may not produce a full-sized head of celery, you’ll still get some fresh stalks and leaves.
Q: Is there anything else I can do with my celery besides eating the stalks?
A: Absolutely! Celery is a versatile vegetable with many uses. You can use celery leaves as a flavorful herb in soups, stews, and salads. Celery seeds can be used as a spice. Celery juice is a popular health drink. And celery can be used to make homemade vegetable broth. Don’t let any part of your celery go to waste!
Leave a Comment