

Hanging bottle celery garden: Ever dreamed of snipping fresh celery right outside your kitchen window? Imagine a vibrant, green cascade of celery stalks, all grown from repurposed plastic bottles! This isn’t just a whimsical fantasy; it’s a surprisingly simple and rewarding DIY project that brings a touch of sustainable charm to your home.
While the exact origins of bottle gardening are hard to pinpoint, the practice of repurposing containers for growing plants has been around for centuries, reflecting a deep connection between humans and resourcefulness. From ancient civilizations utilizing clay pots to modern-day urban gardeners embracing upcycling, the spirit of making the most of what we have remains constant.
In today’s world, where space is often a premium and environmental consciousness is growing, a hanging bottle celery garden offers a fantastic solution. It’s perfect for apartment dwellers, balcony gardeners, or anyone looking to add a unique and eco-friendly element to their living space. Plus, let’s be honest, store-bought celery can sometimes be a bit… lackluster. With this DIY trick, you’ll have crisp, flavorful celery readily available for soups, salads, or a healthy snack. I’m excited to show you how to create your own thriving vertical garden with just a few simple steps!
DIY Hängender Selleriegarten aus Plastikflaschen: Ein Leitfaden
Hallo liebe Gartenfreunde! Habt ihr auch genug von welkem Sellerie aus dem Supermarkt? Oder wollt ihr einfach nur einen kleinen, grünen Hingucker auf eurem Balkon? Dann habe ich heute genau das Richtige für euch: einen hängenden Selleriegarten aus recycelten Plastikflaschen! Das ist nicht nur super nachhaltig, sondern auch kinderleicht umzusetzen. Lasst uns loslegen!
Was du brauchst:
* Mehrere Plastikflaschen (am besten 1,5 oder 2 Liter)
* Ein scharfes Messer oder eine Schere
* Einen Bohrer oder eine Ahle
* Stabile Schnur oder Draht
* Blumenerde
* Selleriestangen mit Wurzelansatz (entweder aus dem Supermarkt oder vom letzten Sellerie, den du verwendet hast)
* Optional: Sprühfarbe (für die Flaschen)
* Optional: Vlies oder Filterpapier (für den Boden der Flaschen)
Die Vorbereitung der Flaschen:
1. Reinigung: Zuerst müssen wir die Plastikflaschen gründlich reinigen. Entferne alle Etiketten und spüle sie mit warmem Seifenwasser aus. Achte darauf, dass keine Seifenreste zurückbleiben.
2. Zuschneiden: Jetzt kommt der spannende Teil: das Zuschneiden der Flaschen. Wir wollen im Prinzip Pflanztöpfe aus den Flaschen machen.
* Variante 1 (Horizontal): Schneide die Flasche horizontal durch, etwa ein Drittel vom Flaschenhals entfernt. Der untere Teil wird unser Pflanztopf. Den oberen Teil (mit dem Flaschenhals) können wir später umgedreht in den unteren Teil stecken, um die Erde feucht zu halten (wie ein Dochtbewässerungssystem).
* Variante 2 (Vertikal): Schneide ein großes Rechteck aus der Seite der Flasche. Achte darauf, dass du genügend Platz für die Erde und die Selleriepflanze hast.
3. Löcher bohren: Damit das Wasser gut ablaufen kann und keine Staunässe entsteht, bohren wir Löcher in den Boden der Flaschen.
* Drainagelöcher: Bohre mit dem Bohrer oder der Ahle mehrere kleine Löcher in den Boden jeder Flasche.
* Aufhängungslöcher: Bohre außerdem Löcher in den oberen Rand der Flaschen, durch die wir später die Schnur oder den Draht ziehen, um die Flaschen aufzuhängen. Die Anzahl und Position der Löcher hängt davon ab, wie du die Flaschen aufhängen möchtest. Ich empfehle, mindestens zwei Löcher pro Flasche zu bohren, damit sie stabil hängen.
4. Optional: Bemalen: Wenn du möchtest, kannst du die Flaschen jetzt noch mit Sprühfarbe bemalen. Das ist natürlich rein optional, aber es macht den hängenden Garten optisch ansprechender. Achte darauf, dass du eine Farbe verwendest, die für Plastik geeignet ist und die ungiftig ist, falls sie mit der Erde in Berührung kommt. Lass die Farbe gut trocknen, bevor du mit dem nächsten Schritt fortfährst.
5. Optional: Vlies einlegen: Um zu verhindern, dass die Erde durch die Drainagelöcher rieselt, kannst du ein Stück Vlies oder Filterpapier auf den Boden der Flaschen legen. Das hilft auch, die Erde länger feucht zu halten.
Das Einpflanzen des Selleries:
1. Erde einfüllen: Fülle die vorbereiteten Flaschen mit Blumenerde. Achte darauf, dass die Erde locker und luftig ist, damit die Wurzeln des Selleries gut wachsen können.
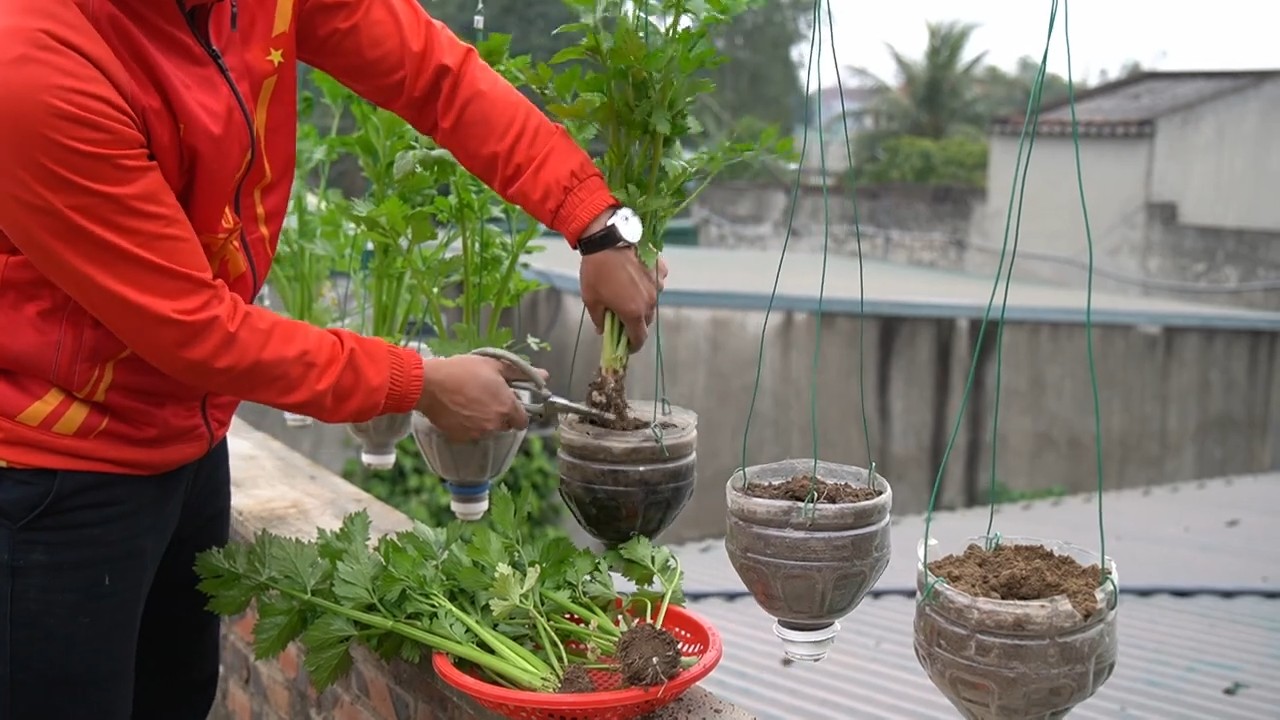
2. Sellerie vorbereiten: Jetzt kommt der Sellerie ins Spiel! Wenn du Selleriestangen aus dem Supermarkt verwendest, schneide den oberen Teil ab und stelle den unteren Teil mit dem Wurzelansatz in ein Glas Wasser. Nach ein paar Tagen sollten sich neue Wurzeln bilden. Wenn du bereits Sellerie mit Wurzeln hast, kannst du ihn direkt einpflanzen.
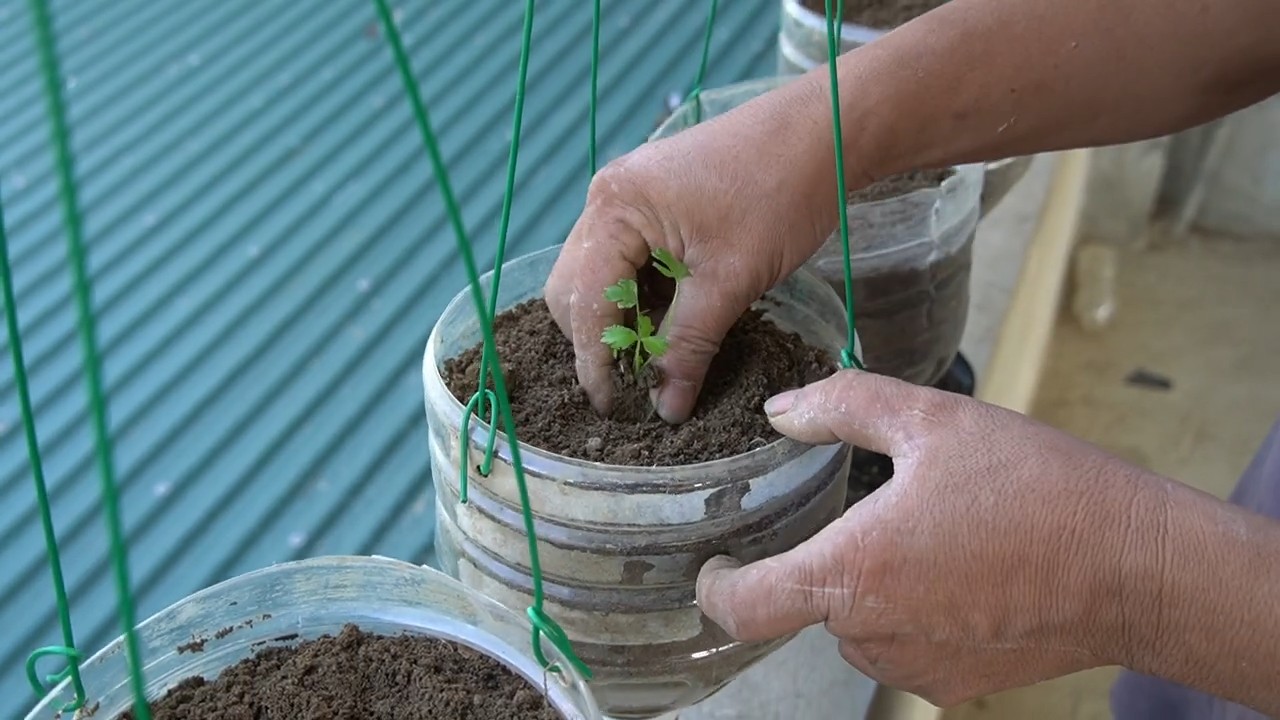
3. Einpflanzen: Setze die Selleriepflanzen in die Erde. Achte darauf, dass die Wurzeln gut bedeckt sind und die Pflanze stabil steht. Drücke die Erde leicht an.
4. Angießen: Gieße die Selleriepflanzen vorsichtig an. Achte darauf, dass die Erde gut durchfeuchtet ist, aber nicht zu nass.
Das Aufhängen des Selleriegartens:
1. Schnur oder Draht befestigen: Ziehe die Schnur oder den Draht durch die Löcher, die du in den oberen Rand der Flaschen gebohrt hast. Knote die Schnur oder den Draht fest, sodass die Flaschen sicher hängen.
2. Aufhängen: Suche dir einen geeigneten Platz für deinen hängenden Selleriegarten. Am besten ist ein sonniger oder halbschattiger Platz, der vor starkem Wind geschützt ist. Hänge die Flaschen an einem Haken, einer Stange oder einem Geländer auf.
3. Anordnen: Ordne die Flaschen so an, dass sie gut aussehen und die Selleriepflanzen genügend Licht bekommen. Du kannst die Flaschen in einer Reihe aufhängen oder sie versetzt anordnen.
Die Pflege des Selleriegartens:
1. Gießen: Gieße die Selleriepflanzen regelmäßig, aber nicht zu viel. Die Erde sollte immer leicht feucht sein, aber nicht nass. Achte darauf, dass das Wasser gut ablaufen kann, um Staunässe zu vermeiden.
2. Düngen: Dünge die Selleriepflanzen regelmäßig mit einem organischen Dünger. Das sorgt für ein gesundes Wachstum und eine reiche Ernte.
3. Ernten: Du kannst die Sellerieblätter jederzeit ernten, wenn du sie brauchst. Schneide einfach die äußeren Blätter ab. Die Pflanze wird weiterwachsen und neue Blätter bilden. Wenn du die ganze Selleriestange ernten möchtest, ziehe die Pflanze vorsichtig aus der Erde.
Zusätzliche Tipps und Tricks:
* Sortenvielfalt: Du kannst verschiedene Selleriesorten in deinem hängenden Garten anbauen. Es gibt Stangensellerie, Knollensellerie und Schnittsellerie.
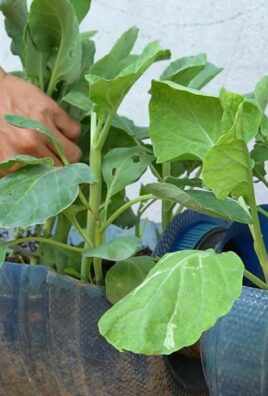
* Begleitpflanzen: Sellerie verträgt sich gut mit anderen Pflanzen wie Tomaten, Kohl und Zwiebeln. Du könntest also auch diese Pflanzen in deinem hängenden Garten anbauen.
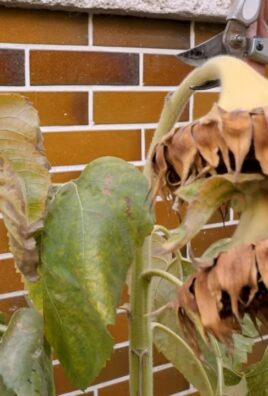
* Schutz vor Schädlingen: Sellerie kann von verschiedenen Schädlingen befallen werden, wie z.B. Blattläusen oder Schnecken. Kontrolliere deine Pflanzen regelmäßig und bekämpfe Schädlinge bei Bedarf mit natürlichen Mitteln.
* Überwinterung: Sellerie ist nicht winterhart. Wenn du ihn überwintern möchtest, musst du ihn an einen frostfreien Ort stellen.
* Upcycling: Anstatt Plastikflaschen kannst du auch andere recycelte Materialien verwenden, wie z.B. Konservendosen oder Joghurtbecher.
Häufige Fragen (FAQ):
* Wie oft muss ich den Sellerie gießen? Das hängt von der Temperatur und der Luftfeuchtigkeit ab. In der Regel reicht es, den Sellerie alle paar Tage zu gießen. Achte darauf, dass die Erde immer leicht feucht ist.
* Welchen Dünger soll ich verwenden? Am besten verwendest du einen organischen Dünger, wie z.B. Kompost oder Hornspäne.
* Kann ich den Sellerie auch im Winter anbauen? Ja, du kannst den Sellerie auch im Winter anbauen, wenn du ihn an einen hellen und warmen Ort stellst.
* Wie lange dauert es, bis ich den Sellerie ernten kann? Das hängt von der Sorte und den Anbaubedingungen ab. In der Regel kannst du die Sellerieblätter nach einigen Wochen ernten. Die ganze Selleriestange kannst du nach einigen Monaten ernten.
Ich hoffe, diese Anleitung hat dir gefallen und du hast jetzt Lust, deinen eigenen hängenden Selleriegarten zu bauen. Es ist wirklich ein tolles Projekt, das nicht nur Spaß macht, sondern auch noch nachhaltig ist. Viel Erfolg und viel Spaß beim Gärtnern!
Conclusion
So, there you have it! Transforming discarded plastic bottles into a thriving vertical celery garden is not just a fun project; it’s a sustainable solution that brings fresh, flavorful celery right to your doorstep. This DIY hanging bottle celery garden is a game-changer for urban gardeners, space-conscious individuals, and anyone looking to reduce waste while enjoying the benefits of homegrown produce.
Why is this a must-try? Because it’s incredibly simple, cost-effective, and yields impressive results. Imagine snipping fresh celery stalks for your soups, salads, or smoothies, knowing you grew them yourself in a repurposed container. The satisfaction is unparalleled. Plus, it’s a fantastic way to teach children about recycling, gardening, and the importance of sustainable living.
But the beauty of this project lies in its adaptability. Feel free to experiment with different bottle sizes and arrangements. You could create a single-bottle celery planter for a small balcony or a multi-tiered system for a larger patio. Consider painting the bottles to add a splash of color and personality to your garden. You can also explore different varieties of celery, from the classic Pascal celery to the more compact and flavorful cutting celery.
For those looking to expand their vertical garden, consider incorporating other herbs and vegetables that thrive in similar conditions. Lettuce, spinach, and even strawberries can be successfully grown in hanging bottle gardens alongside your celery. Just be sure to research the specific needs of each plant to ensure optimal growth.
Don’t be afraid to get creative with your watering system. While hand-watering is perfectly fine, you could also explore drip irrigation systems to automate the process and ensure consistent moisture levels. This is especially helpful during hot summer months when celery plants require more frequent watering.
We wholeheartedly encourage you to embark on this rewarding DIY adventure. Building your own hanging bottle celery garden is not only a practical way to grow your own food but also a statement about your commitment to sustainability. It’s a conversation starter, a source of pride, and a delicious addition to your culinary repertoire.
Once you’ve created your own vertical celery oasis, we’d love to hear about your experience! Share your photos, tips, and challenges in the comments below. Let’s build a community of DIY gardeners and inspire others to embrace sustainable living. Your insights could be invaluable to someone just starting out. So, grab those empty bottles, gather your supplies, and get ready to grow your own fresh, delicious celery! This **hanging bottle celery garden** is waiting to be brought to life by your green thumb.
Frequently Asked Questions (FAQ)
What type of plastic bottles are best for this project?
Ideally, you should use food-grade plastic bottles, such as those that previously contained water, juice, or soda. Avoid using bottles that held harsh chemicals or cleaning products, as these may contaminate the soil and affect the celery’s growth. PET (polyethylene terephthalate) bottles are a common and safe choice. Ensure the bottles are thoroughly cleaned and rinsed before use to remove any residue. The size of the bottle will depend on the size of the celery plant you intend to grow. Larger bottles will provide more room for root development.
What kind of soil should I use for my hanging bottle celery garden?
A well-draining potting mix is essential for growing healthy celery in containers. Celery prefers soil that is rich in organic matter and retains moisture without becoming waterlogged. A good mix would consist of equal parts of potting soil, compost, and perlite or vermiculite. The compost provides nutrients, while the perlite or vermiculite improves drainage and aeration. Avoid using garden soil, as it can be too heavy and compact, hindering root growth. You can also add a slow-release fertilizer to the soil mix to provide a steady supply of nutrients to the celery plants.
How often should I water my hanging bottle celery garden?
Celery requires consistent moisture to thrive. Water your hanging bottle celery garden regularly, especially during hot and dry weather. Check the soil moisture level daily by inserting your finger into the soil. If the top inch feels dry, it’s time to water. Water thoroughly until excess water drains out of the bottom of the bottle. Avoid overwatering, as this can lead to root rot. Consider using a watering can with a gentle nozzle to avoid disturbing the soil and damaging the celery plants. In general, you may need to water your celery garden every day or every other day, depending on the weather conditions.
How much sunlight does celery need in a hanging bottle garden?
Celery thrives in full sun to partial shade. Aim for at least 6 hours of direct sunlight per day for optimal growth. However, in hot climates, providing some afternoon shade can prevent the celery plants from scorching. Observe your plants closely and adjust their position as needed to ensure they receive adequate sunlight without being exposed to excessive heat. If you’re growing your celery garden indoors, you may need to supplement with grow lights to provide sufficient light.
How do I fertilize my hanging bottle celery garden?
Celery is a heavy feeder and requires regular fertilization to maintain healthy growth. Start by incorporating a slow-release fertilizer into the soil mix when planting. Then, supplement with a liquid fertilizer every 2-3 weeks during the growing season. Choose a balanced fertilizer with equal amounts of nitrogen, phosphorus, and potassium (e.g., 10-10-10). Follow the instructions on the fertilizer label carefully to avoid over-fertilizing, which can damage the plants. You can also use organic fertilizers, such as compost tea or fish emulsion, to provide nutrients to your celery plants.
How do I prevent pests and diseases in my hanging bottle celery garden?
Regularly inspect your celery plants for signs of pests and diseases. Common pests that affect celery include aphids, spider mites, and celery leaf miners. You can control these pests by spraying the plants with insecticidal soap or neem oil. Diseases that can affect celery include blight and root rot. To prevent these diseases, ensure good air circulation around the plants and avoid overwatering. Remove any infected leaves or plants immediately to prevent the spread of disease. You can also use organic fungicides to protect your celery plants from fungal diseases.
How long does it take for celery to grow in a hanging bottle garden?
Celery typically takes 100-130 days to mature from seed to harvest. However, you can start harvesting individual stalks as soon as they reach a usable size. To harvest celery, simply cut the outer stalks near the base of the plant. The inner stalks will continue to grow and mature. You can also harvest the entire plant at once by cutting it off at the base. With proper care and maintenance, you can enjoy a continuous harvest of fresh celery from your hanging bottle garden for several months.
Can I grow celery from celery scraps in a hanging bottle?
Yes, you can regrow celery from the base of a celery stalk purchased from the grocery store. Cut off the celery stalks, leaving about 2 inches of the base intact. Place the base in a shallow dish of water, with the cut side facing up. Change the water every day or two. After a few days, you should see new roots and leaves emerging from the base. Once the roots are about an inch long, you can transplant the celery base into your hanging bottle garden. This is a great way to recycle celery scraps and grow your own fresh celery.
Leave a Comment