

Handyman Tricks You Should Know: Ever feel like your to-do list is a mile long and you’re fresh out of time (and patience)? I get it! From that leaky faucet driving you crazy to a picture frame stubbornly refusing to hang straight, home repairs can feel overwhelming. But what if I told you there’s a secret weapon in your arsenal – a collection of simple, yet incredibly effective, handyman tricks you should know that can transform you from a DIY novice to a confident home improver?
For generations, mastering basic home repairs has been a source of pride and self-sufficiency. Think back to your grandparents, who could seemingly fix anything with a roll of duct tape and a trusty wrench! This tradition of resourcefulness is not only practical but also deeply satisfying. It empowers us to take control of our living spaces and save money in the process.
In today’s fast-paced world, calling a professional for every minor repair simply isn’t feasible for most of us. That’s where these DIY hacks come in. Imagine being able to quickly silence a squeaky door, effortlessly patch a small hole in the wall, or even unclog a drain without reaching for harsh chemicals. These aren’t just skills; they’re life savers! So, let’s dive into some essential handyman tricks that will make your life easier and your home a happier place.
Handyman Tricks You Should Know: Level Up Your DIY Game!
Okay, folks, let’s dive into some seriously useful handyman tricks that’ll make your DIY projects smoother, faster, and way more professional-looking. I’ve learned these over the years through trial and error (mostly error, if I’m being honest!), so you can skip the mistakes and get straight to the good stuff.
Stripped Screw Savior
We’ve all been there. You’re happily screwing something in, and suddenly… *strip!* The screw head is mangled, and you can’t get it out. Don’t panic! Here are a few ways to tackle this common problem:
- Rubber Band Rescue: This is my go-to for mildly stripped screws.
- Steel Wool Solution: Similar to the rubber band, but with a bit more grip.
- Screw Extractor Kit: For the seriously stubborn screws.
Step-by-Step: Rubber Band Method
1. Find a Rubber Band: You’ll need a wide, thick rubber band. The kind that comes around broccoli works great!
2. Place the Rubber Band: Fold the rubber band over itself to make it thicker. Place it directly over the stripped screw head, making sure it fills the gap.
3. Insert Screwdriver: Press your screwdriver firmly into the rubber band and the screw head. Apply downward pressure.
4. Turn Slowly: Slowly and steadily turn the screwdriver counterclockwise. The rubber band should provide enough grip to catch the remaining threads and allow you to unscrew it.
5. Success! Hopefully, the screw comes out. If not, try the steel wool method or move on to a screw extractor.
Step-by-Step: Steel Wool Method
1. Gather Steel Wool: Grab a small piece of fine-grade steel wool.
2. Stuff the Screw Head: Pack the steel wool into the stripped screw head. Make sure it’s filling the void.
3. Insert Screwdriver: Insert your screwdriver into the steel wool-filled screw head. Apply firm downward pressure.
4. Turn Slowly: Slowly and steadily turn the screwdriver counterclockwise. The steel wool should provide enough grip to catch the remaining threads.
5. Remove the Screw: Once the screw is loose, remove it carefully.
Step-by-Step: Screw Extractor Kit
1. Choose the Right Size: Select a screw extractor bit that’s appropriate for the size of the stripped screw. The kit should have instructions on which size to use.
2. Drill a Pilot Hole (If Necessary): Some kits require you to drill a small pilot hole in the screw head first. Follow the instructions that came with your kit.
3. Insert the Extractor Bit: Insert the extractor bit into your drill.
4. Apply Pressure and Reverse: Apply firm downward pressure and run the drill in reverse (counterclockwise). The extractor bit will bite into the screw head.
5. Remove the Screw: Continue applying pressure and reversing until the screw starts to come out. Be patient and don’t force it.
Perfectly Straight Picture Hanging
Hanging pictures straight can be surprisingly tricky. I used to end up with a wall full of tiny nail holes before I figured out these tricks:
- The Painter’s Tape Trick: Mark your nail placement perfectly.
- The Level and Pencil Method: Classic and reliable.
- The Laser Level Advantage: For hanging multiple pictures in a straight line.
Step-by-Step: Painter’s Tape Trick
1. Measure and Mark: Measure the distance from the top of the picture frame to the hanging hardware (wire, hook, etc.).
2. Apply Tape to the Frame: Apply a strip of painter’s tape across the back of the frame, covering the hanging hardware.
3. Mark the Nail Spot: On the tape, mark the exact spot where the nail needs to go. Use a pen or marker.
4. Transfer to the Wall: Peel the tape off the frame and stick it to the wall where you want to hang the picture. Use a level to ensure the tape is straight.
5. Hammer the Nail: Hammer the nail directly into the wall through the marked spot on the tape. The tape will help prevent the wall from chipping.
6. Hang the Picture: Remove the tape and hang your picture. It should be perfectly positioned!
Step-by-Step: Level and Pencil Method
1. Determine Placement: Decide where you want to hang the picture.
2. Mark the Top: Use a pencil to lightly mark the top edge of where you want the picture to hang.
3. Measure Down: Measure the distance from the top of the picture frame to the hanging hardware.
4. Mark the Nail Spot: Below the top mark, measure down the distance you just calculated and mark the spot for the nail.
5. Use a Level: Hold a level horizontally at the nail spot to ensure it’s straight.
6. Hammer the Nail: Hammer the nail into the wall at the marked spot.
7. Hang the Picture: Hang your picture and use the level again to make sure it’s perfectly straight. Adjust as needed.
Step-by-Step: Laser Level Advantage
1. Set Up the Laser Level: Place the laser level on a stable surface and turn it on. Adjust the height and angle until the laser line is where you want the top of your pictures to be.
2. Mark the Nail Spots: Use a pencil to mark the wall where you want to place the nails for each picture, using the laser line as a guide for the top edge.
3. Hammer the Nails: Hammer the nails into the wall at the marked spots.
4. Hang the Pictures: Hang your pictures. They should all be perfectly aligned along the laser line.
Caulking Like a Pro
Caulking is essential for sealing gaps around bathtubs, sinks, windows, and more. A good caulk job prevents water damage and makes everything look cleaner. But getting a smooth, professional finish can be tricky. Here’s how I do it:
- Prep is Key: Clean and dry the surface thoroughly.
- Apply Evenly: Use a steady hand and consistent pressure.
- The Finger Trick: My secret weapon for a smooth finish.
Step-by-Step: Caulking Perfection
1. Gather Your Supplies: You’ll need a caulk gun, caulk (choose the right type for the job – silicone for wet areas, acrylic for paintable surfaces), a utility knife, paper towels, and a bowl of water.
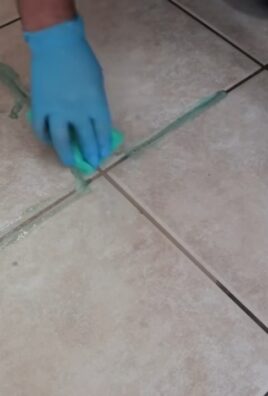
2. Prepare the Surface: This is crucial! Remove any old caulk with a utility knife or caulk removal tool. Clean the surface thoroughly with a cleaner and let it dry completely.
3. Cut the Caulk Tube: Cut the tip of the caulk tube at a 45-degree angle. The size of the opening will determine the bead size. Start small – you can always cut more off.
4. Load the Caulk Gun: Insert the caulk tube into the caulk gun.
5. Apply the Caulk: Hold the caulk gun at a 45-degree angle to the surface. Apply a steady, even bead of caulk along the joint. Use consistent pressure on the trigger to avoid unevenness. Work in manageable sections (a few feet at a time).
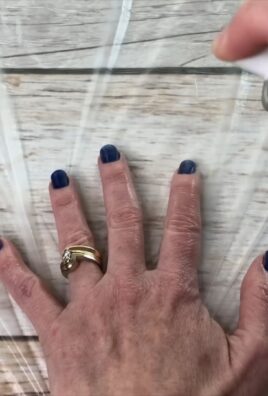
6. Smooth the Caulk: This is where the magic happens! Dip your finger in the bowl of water (this prevents the caulk from sticking to your finger). Gently run your finger along the bead of caulk, applying light pressure to smooth it out and remove excess caulk. Wipe your finger clean on a paper towel after each pass.
7. Clean Up: Use a damp paper towel to wipe away any excess caulk from the surrounding surfaces.
8. Let it Cure: Allow the caulk to cure completely according to the manufacturer’s instructions (usually 24-48 hours) before exposing it to water or painting it.
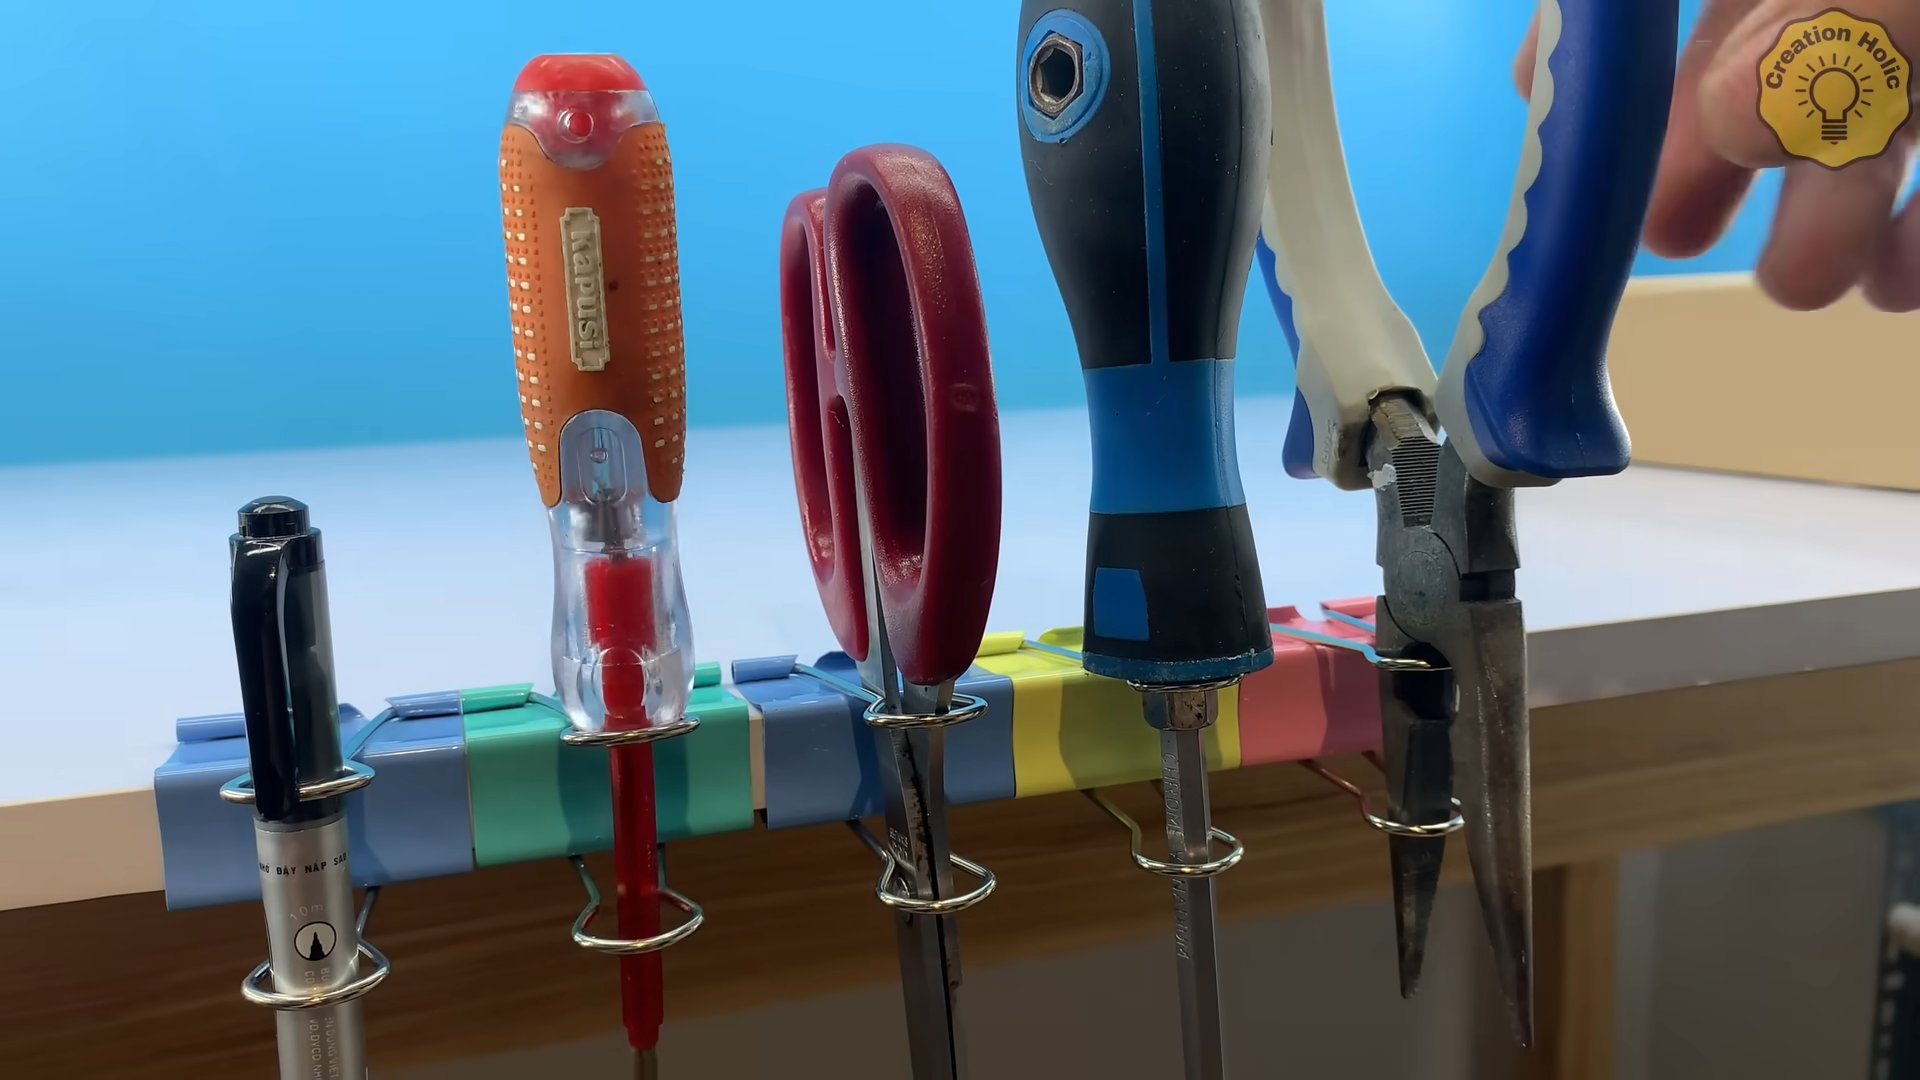
Easy Stud Finding
Finding studs in your walls is essential for securely mounting heavy objects like shelves, TVs, and cabinets. Here are a few methods I’ve found helpful:
- The Knock Test: Listen for a solid sound.
- Stud Finder: Electronic stud finders are readily available and relatively inexpensive.
- Outlet and Switch Trick: Electrical boxes are usually attached to studs.
Step-by-Step: The Knock Test
1. Start Tapping: Gently tap on the wall with your knuckles, moving horizontally along the wall.
2. Listen Carefully: Listen for a change in sound. When you tap
Conclusion
So, there you have it! These handyman tricks aren’t just clever; they’re game-changers for anyone who wants to tackle home repairs and improvements with confidence and efficiency. We’ve covered a range of solutions, from simple fixes to more involved projects, all designed to save you time, money, and frustration.
Why is this a must-try? Because these aren’t just theoretical tips; they’re practical, proven methods used by professionals to achieve better results, faster. Imagine effortlessly removing stripped screws, creating perfectly straight lines for painting, or silencing that annoying squeaky door hinge with ease. These handyman tricks empower you to take control of your home maintenance and repair needs, transforming daunting tasks into manageable projects.
But the beauty of DIY lies in its adaptability. Feel free to experiment with variations on these techniques. For example, instead of using rubber bands to remove stripped screws, try using a piece of steel wool. For painting, consider using a laser level for even more precise lines. If you don’t have WD-40 for squeaky hinges, try using a bit of petroleum jelly or even cooking oil in a pinch. The key is to understand the underlying principle and adapt it to the materials and tools you have on hand.
We’ve also touched upon safety, emphasizing the importance of wearing appropriate protective gear and taking precautions when working with power tools or potentially hazardous materials. Remember, a successful DIY project is one that’s completed safely and effectively.
Ultimately, the goal is to equip you with the knowledge and confidence to tackle those nagging home repairs and improvements. Don’t be intimidated by the prospect of DIY; start with a small project, master the basics, and gradually work your way up to more complex tasks. The satisfaction of fixing something yourself is incredibly rewarding, and the money you save can be substantial.
We wholeheartedly encourage you to try these handyman tricks. Put them to the test in your own home, and see the difference they can make. And most importantly, share your experiences with us! Let us know which tricks worked best for you, what variations you tried, and any other helpful tips you’ve discovered along the way. Your feedback will not only help us improve this guide but also inspire other DIY enthusiasts to take on their own home improvement projects. So, grab your toolbox, put on your safety glasses, and get ready to unleash your inner handyman! Let’s build, fix, and improve our homes together!
Frequently Asked Questions (FAQs)
Q: What if I don’t have all the tools mentioned in the article?
A: Don’t worry! Many of these handyman tricks can be adapted to the tools you already have. For example, if you don’t have a specialized screw extractor, you can often use a wide rubber band or a piece of steel wool to get a better grip on a stripped screw. The key is to be resourceful and think creatively. Before buying a new tool, consider if you can borrow one from a friend or neighbor, or if there’s a cheaper alternative that will work just as well. Also, many tool rental shops offer a wide variety of tools for short-term use, which can be a cost-effective option for occasional projects.
Q: I’m a complete beginner. Are these handyman tricks too advanced for me?
A: Not at all! While some of the tricks might seem a bit intimidating at first, most of them are quite simple and easy to learn. Start with the basics, like using painter’s tape for clean lines or silencing squeaky hinges. As you gain confidence, you can gradually move on to more complex projects. There are also countless online resources, including videos and tutorials, that can provide step-by-step guidance. Remember, everyone starts somewhere, and with a little practice, you’ll be surprised at how quickly you can develop your handyman skills.
Q: How important is safety when using these handyman tricks?
A: Safety is paramount! Always prioritize safety when working on any DIY project. Wear appropriate protective gear, such as safety glasses, gloves, and a dust mask, especially when working with power tools or potentially hazardous materials. Read and understand the instructions for all tools and materials before using them. Be aware of your surroundings and take precautions to prevent accidents. If you’re unsure about how to perform a task safely, consult a professional. It’s always better to be safe than sorry.
Q: Can these handyman tricks really save me money?
A: Absolutely! By learning to perform basic home repairs and improvements yourself, you can save a significant amount of money on professional services. Even simple tasks like fixing a leaky faucet or patching a hole in the wall can cost a considerable amount if you hire a handyman. Over time, the savings can really add up. Plus, you’ll gain valuable skills and knowledge that will empower you to tackle future projects with confidence.
Q: What’s the best way to remove a stripped screw if the rubber band trick doesn’t work?
A: If the rubber band trick fails, there are a few other options you can try. One is to use a screw extractor, which is a specialized tool designed to grip and remove stripped screws. Another option is to try using a flat-head screwdriver that’s slightly larger than the stripped screw head. Apply firm pressure and try to turn the screw slowly and carefully. You can also try tapping the screwdriver with a hammer to help it grip the screw head. As a last resort, you can drill out the screw head using a drill bit that’s slightly smaller than the screw shank.
Q: How can I prevent squeaky hinges in the first place?
A: Prevention is always better than cure! To prevent squeaky hinges, lubricate them regularly with a lubricant like WD-40 or silicone spray. You can also use a dry lubricant like graphite powder. Apply the lubricant to the hinge pin and work it in by opening and closing the door several times. Wipe away any excess lubricant. Regular lubrication will keep your hinges working smoothly and quietly for years to come.
Q: Are there any handyman tricks for dealing with plumbing issues?
A: Yes, there are several basic plumbing tricks you can learn. For example, you can use a plunger to clear clogged drains, tighten loose faucets with a wrench, and replace worn-out washers to stop leaks. However, it’s important to know your limits. If you’re dealing with a complex plumbing issue, such as a burst pipe or a major leak, it’s best to call a professional plumber.
Q: Where can I find more information about these handyman tricks?
A: There are countless resources available online, including websites, blogs, and YouTube channels dedicated to DIY home improvement. You can also find helpful information in books and magazines. Don’t be afraid to ask for advice from friends, family members, or neighbors who have experience with DIY projects. And remember, practice makes perfect! The more you experiment and learn, the more confident and skilled you’ll become.

Leave a Comment