

Growing Tomatoes at Home can feel like a daunting task, especially if you’re new to gardening. But what if I told you that with a few simple tricks and DIY hacks, you could be harvesting juicy, flavorful tomatoes right from your own backyard (or balcony!) in no time? Forget those bland, store-bought tomatoes – we’re talking about sun-ripened goodness bursting with flavor!
The history of tomato cultivation is fascinating, dating back to the Aztecs and Incas. These cultures recognized the potential of this vibrant fruit, and now, centuries later, we can enjoy the fruits (pun intended!) of their agricultural wisdom. Tomatoes have become a staple in cuisines worldwide, and there’s nothing quite like the taste of a homegrown tomato in your favorite dish.
So, why do you need these DIY tricks for growing tomatoes at home? Well, let’s face it, gardening can be tricky! Pests, diseases, and unpredictable weather can all threaten your precious tomato plants. But with the right knowledge and a little bit of elbow grease, you can overcome these challenges and create a thriving tomato garden. I’m here to share some of my favorite, tried-and-true methods that will help you maximize your yield and enjoy the most delicious tomatoes you’ve ever tasted. Get ready to roll up your sleeves and let’s get growing!
Growing Tomatoes at Home: A DIY Guide to Juicy Success
Okay, tomato lovers, let’s get our hands dirty! I’m going to walk you through everything you need to know to grow your own delicious tomatoes right at home. Forget those bland, store-bought things – we’re talking about sun-ripened, bursting-with-flavor tomatoes that will make your summer salads sing.
Choosing Your Tomato Varieties
First things first, you need to decide what kind of tomatoes you want to grow. There are literally hundreds of varieties, so it can be a little overwhelming. Here’s a quick rundown of some popular choices:
* **Determinate Tomatoes:** These are bush-type tomatoes that grow to a certain size and then stop. They produce most of their fruit all at once, making them great for canning or making sauce. Roma and Celebrity are popular determinate varieties.
* **Indeterminate Tomatoes:** These are vining tomatoes that keep growing and producing fruit throughout the season. They need to be staked or caged. Beefsteak, Cherry, and Heirloom tomatoes are often indeterminate.
* **Cherry Tomatoes:** Small, sweet, and perfect for snacking. They come in both determinate and indeterminate varieties.
* **Beefsteak Tomatoes:** Large, meaty tomatoes ideal for slicing and sandwiches.
* **Heirloom Tomatoes:** These are older varieties that have been passed down through generations. They often have unique flavors and colors.
* **Paste Tomatoes:** These are meaty tomatoes with fewer seeds and less juice, perfect for making sauce.
Consider your space, your climate, and what you plan to do with your tomatoes when choosing your varieties. I personally love growing a mix of cherry tomatoes for snacking, beefsteaks for sandwiches, and Roma tomatoes for sauce.
Starting Your Tomato Seeds (or Buying Seedlings)
You have two main options here: starting your own seeds indoors or buying tomato seedlings from a nursery. Starting your own seeds gives you more control over the varieties you grow and can save you money, but it requires a bit more time and effort.
Starting Seeds Indoors:
This is what I usually do, because I like to get a head start on the season.
1. **Gather Your Supplies:** You’ll need seed starting trays or small pots, seed starting mix (not regular potting soil!), tomato seeds, a spray bottle, and a grow light (optional, but highly recommended).
2. **Sow Your Seeds:** Moisten the seed starting mix and fill your trays or pots. Plant 2-3 seeds per cell or pot, about ¼ inch deep. Gently cover the seeds with soil and mist with water.
3. **Provide Warmth and Light:** Tomato seeds need warmth to germinate. Place the trays in a warm location (around 70-75°F) or use a heat mat. If you’re using a grow light, position it a few inches above the trays and keep it on for 14-16 hours per day.
4. **Keep the Soil Moist:** Mist the soil regularly to keep it moist but not soggy.
5. **Thin Seedlings:** Once the seedlings emerge (usually in 5-10 days), thin them to one seedling per cell or pot by snipping off the weaker seedlings at the soil line. Don’t pull them out, as this can disturb the roots of the remaining seedling.
6. **Harden Off Seedlings:** About a week before you plan to transplant your seedlings outdoors, you need to “harden them off.” This means gradually exposing them to outdoor conditions to acclimate them to the sun, wind, and temperature changes. Start by placing them outside for an hour or two each day in a sheltered location, gradually increasing the amount of time they spend outdoors each day.
Buying Seedlings:
If you don’t have the time or space to start your own seeds, buying seedlings is a perfectly good option.
1. **Choose Healthy Seedlings:** Look for seedlings that are about 6-8 inches tall, with thick stems and healthy green leaves. Avoid seedlings that are leggy (tall and spindly), yellowed, or have spots on their leaves.
2. **Check the Roots:** Gently remove a seedling from its pot and inspect the roots. They should be white and healthy-looking, not brown or root-bound (tightly circling the pot).
Preparing Your Garden Bed or Containers
Tomatoes need at least 6-8 hours of sunlight per day and well-drained soil.
Preparing a Garden Bed:
1. **Choose a Sunny Location:** Select a spot in your garden that gets plenty of sunlight.
2. **Improve the Soil:** Tomatoes prefer slightly acidic soil with a pH of 6.0-6.8. Amend the soil with compost or other organic matter to improve drainage and fertility. I usually add a generous amount of compost and some aged manure.
3. **Remove Weeds:** Clear the area of weeds and grass.
4. **Till or Dig the Soil:** Loosen the soil to a depth of at least 12 inches.
Preparing Containers:
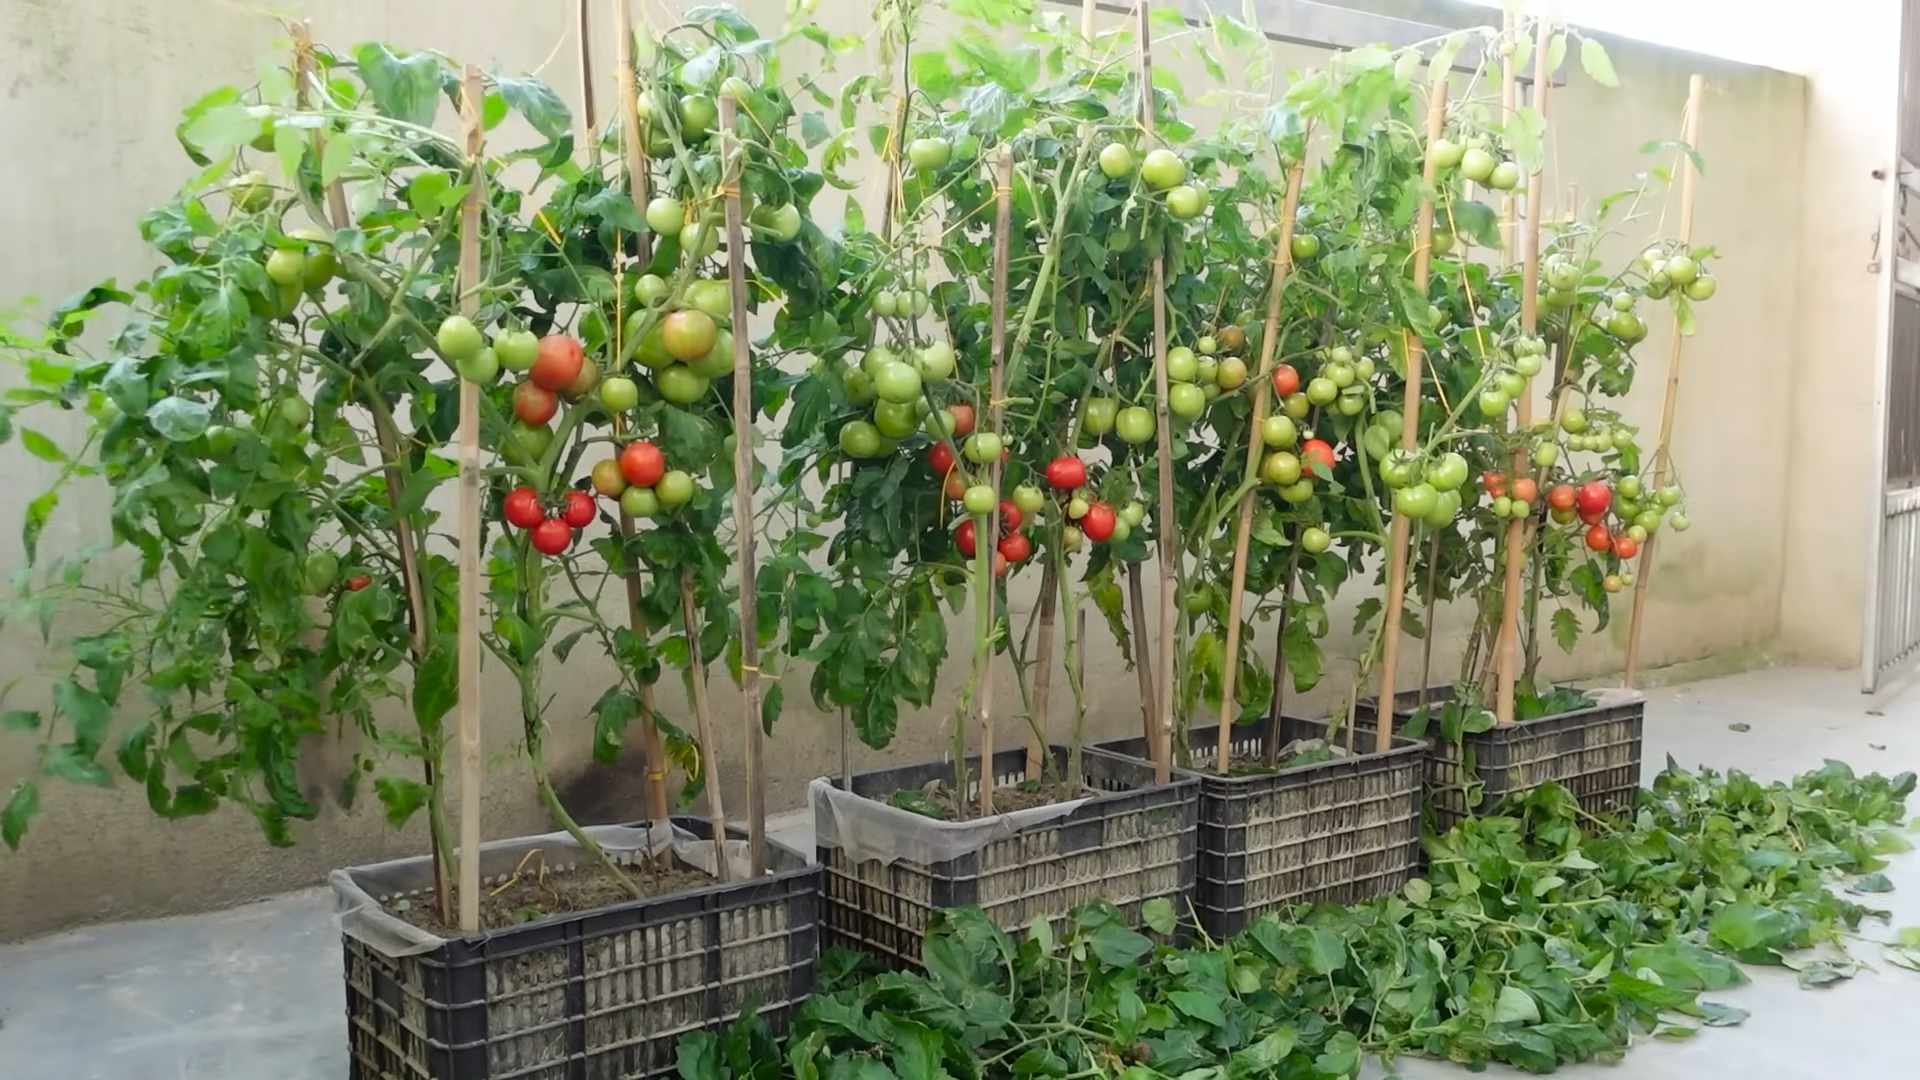
1. **Choose the Right Size Container:** Tomatoes need large containers, at least 18 inches in diameter and 18 inches deep. Larger is always better!
2. **Use a Good Quality Potting Mix:** Don’t use garden soil in containers, as it will compact and not drain well. Use a potting mix specifically designed for containers.
3. **Ensure Drainage:** Make sure your containers have drainage holes.
Transplanting Your Tomato Seedlings
Once the danger of frost has passed and your seedlings are hardened off (or you’ve purchased healthy seedlings), it’s time to transplant them into your garden or containers.
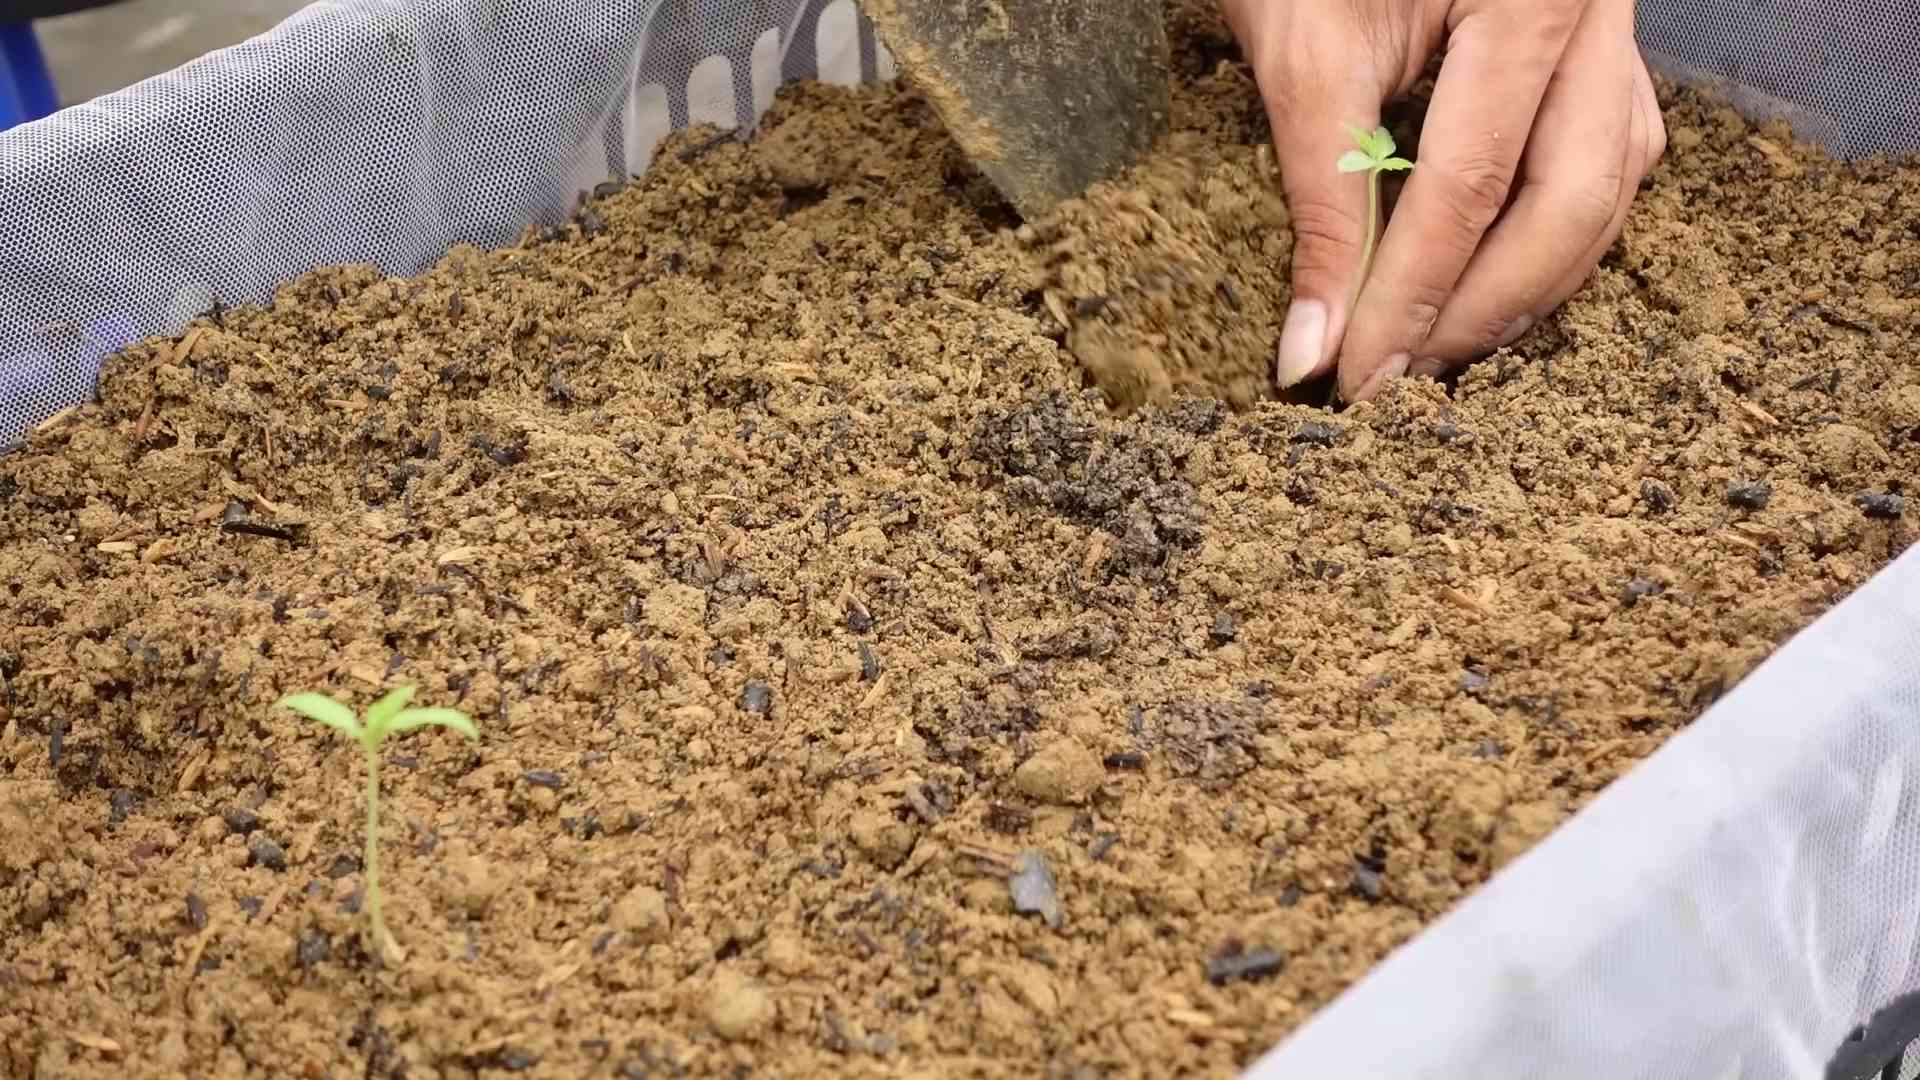
1. **Dig a Hole:** Dig a hole that is deep enough to bury the bottom third of the tomato seedling’s stem. This might seem strange, but tomatoes can grow roots from their stems, so burying part of the stem will encourage a stronger root system.
2. **Add Fertilizer:** Add a handful of slow-release tomato fertilizer to the bottom of the hole.
3. **Plant the Seedling:** Gently remove the seedling from its pot and place it in the hole. Backfill with soil, gently firming it around the base of the plant.
4. **Water Thoroughly:** Water the newly transplanted seedlings thoroughly.
5. **Add Support:** If you’re growing indeterminate tomatoes, install stakes or cages at the time of planting. This will help support the plants as they grow and prevent the fruit from touching the ground. I prefer using tomato cages because they’re easy to install and provide good support.
Caring for Your Tomato Plants
Now that your tomato plants are in the ground, it’s time to give them the care they need to thrive.
1. **Water Regularly:** Tomatoes need consistent watering, especially during hot, dry weather. Water deeply and regularly, aiming for about 1-2 inches of water per week. Avoid watering the foliage, as this can encourage disease. Drip irrigation or soaker hoses are great options for watering tomatoes.
2. **Fertilize Regularly:** Tomatoes are heavy feeders and need regular fertilization. Use a tomato fertilizer according to the package directions. I usually fertilize every 2-3 weeks.
3. **Prune Your Plants:** Pruning can help improve air circulation and encourage fruit production. For indeterminate tomatoes, prune off the “suckers” that grow between the main stem and the branches. These suckers will eventually produce their own stems and fruit, but they will also take energy away from the main plant.
4. **Mulch Around Your Plants:** Mulching helps retain moisture, suppress weeds, and regulate soil temperature. Use organic mulch such as straw, wood chips, or shredded leaves.
5. **Watch Out for Pests and Diseases:** Tomatoes are susceptible to a variety of pests and diseases. Regularly inspect your plants for signs of trouble, such as aphids, whiteflies, tomato hornworms, blight, and blossom end rot. Treat any problems promptly with appropriate organic or chemical controls. I always try organic methods first.
Dealing with Common Tomato Problems
Even with the best care, you might encounter some problems along the way. Here are a few common issues and how to deal with them:
* **Blossom End Rot:** This is a condition where the bottom of the tomato turns black and leathery. It’s caused by a calcium deficiency, usually due to inconsistent watering. To prevent blossom end rot, water your plants regularly and consistently, and consider adding calcium to the soil.
* **Tomato Hornworms:** These large green caterpillars can quickly defoliate your tomato plants. Handpick them off the plants and drop them into a bucket of soapy water.
* **Aphids:** These small, sap-sucking insects can weaken your plants. Spray them off with a strong stream of water or use insecticidal soap.
* **Early Blight:** This fungal disease causes brown spots on the leaves, starting at the bottom of the plant. Remove infected leaves and spray with a fungicide.
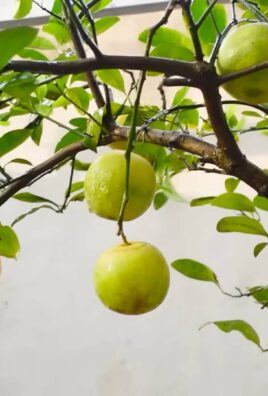
Harvesting Your Tomatoes
The moment we’ve all been waiting for! You’ll know your tomatoes are ripe when they are fully colored, slightly soft to the touch, and easily detach from the vine. Gently twist the tomato off the vine, being careful
Conclusion
So, there you have it! Growing tomatoes at home, especially using our simple DIY trick, is not just a gardening project; it’s an investment in flavor, health, and a deeper connection with your food. Forget those bland, mass-produced tomatoes from the supermarket. Imagine biting into a sun-ripened, juicy tomato, bursting with sweetness and tang, grown right in your own backyard or even on your balcony. That’s the promise of this method.
This DIY approach, focusing on [mention specific DIY trick from the article, e.g., “using coffee grounds as fertilizer” or “creating a self-watering container”], offers several advantages. It’s cost-effective, environmentally friendly, and allows you to control exactly what goes into your tomatoes, ensuring they are free from harmful chemicals. Plus, there’s an undeniable satisfaction in nurturing a plant from seed to fruit.
But the benefits don’t stop there. Growing your own tomatoes encourages you to experiment and discover new varieties. Why not try a vibrant heirloom tomato like Brandywine, a sweet cherry tomato like Sungold, or a robust Roma tomato perfect for sauces? The possibilities are endless!
Don’t be afraid to get creative! You can adapt this method to suit your specific needs and preferences. For example, if you live in a small space, consider growing tomatoes in hanging baskets or vertical planters. If you have limited sunlight, choose tomato varieties that are known to tolerate partial shade. You can also experiment with different types of soil, fertilizers, and companion plants to optimize your tomato growth.
We encourage you to give this DIY tomato growing trick a try. It’s easier than you might think, and the rewards are well worth the effort. Whether you’re a seasoned gardener or a complete beginner, this is a fantastic way to enjoy fresh, delicious tomatoes all season long.
And most importantly, we want to hear about your experiences! Share your photos, tips, and challenges in the comments below. Let’s create a community of tomato enthusiasts who are passionate about growing their own food. What varieties did you choose? What challenges did you face? What successes did you celebrate? Your insights can help others on their tomato-growing journey.
Remember, the best tomatoes are the ones you grow yourself. So, grab your seeds, get your hands dirty, and get ready to enjoy the taste of homegrown goodness! This DIY method for growing tomatoes at home is a game-changer, and we’re confident that you’ll love the results. Happy gardening!
Frequently Asked Questions (FAQs)
Q: What are the best tomato varieties to grow at home?
A: The “best” tomato variety really depends on your personal preferences and growing conditions. For beginners, cherry tomatoes like Sungold or Sweet Million are often recommended because they are relatively easy to grow and produce abundant yields. Roma tomatoes are great for making sauces and pastes. If you’re looking for a larger, more flavorful tomato, consider heirloom varieties like Brandywine or Cherokee Purple. Consider your climate and space limitations when choosing varieties. Determinate varieties are bushier and better suited for containers, while indeterminate varieties require more space and support.
Q: How much sunlight do tomatoes need?
A: Tomatoes need at least 6-8 hours of direct sunlight per day to thrive. If you don’t have a sunny spot in your garden, you can supplement with grow lights. Insufficient sunlight can lead to leggy plants with poor fruit production. If you live in a very hot climate, some afternoon shade can be beneficial to prevent sunscald.
Q: What kind of soil is best for growing tomatoes?
A: Tomatoes prefer well-draining soil that is rich in organic matter. A slightly acidic pH of around 6.0 to 6.8 is ideal. You can amend your soil with compost, aged manure, or other organic materials to improve its fertility and drainage. Avoid heavy clay soils, as they can become waterlogged and suffocate the roots. Consider using raised beds or containers if your native soil is poor.
Q: How often should I water my tomato plants?
A: Water your tomato plants deeply and regularly, especially during hot, dry weather. Aim to keep the soil consistently moist but not waterlogged. Water at the base of the plant to avoid wetting the foliage, which can increase the risk of fungal diseases. Mulching around the plants can help retain moisture and suppress weeds. The frequency of watering will depend on your climate, soil type, and the size of your plants. Check the soil moisture regularly and water when the top inch or two feels dry.
Q: What are some common tomato pests and diseases, and how can I prevent them?
A: Common tomato pests include aphids, whiteflies, tomato hornworms, and spider mites. Common diseases include early blight, late blight, and blossom end rot. To prevent pests and diseases, choose disease-resistant varieties, practice good sanitation (remove diseased leaves and debris), and provide adequate air circulation. You can also use organic pest control methods such as insecticidal soap or neem oil. Blossom end rot is often caused by calcium deficiency, which can be prevented by ensuring your soil has adequate calcium and by watering consistently.
Q: How do I know when my tomatoes are ripe?
A: Tomatoes are typically ripe when they have reached their mature color and are slightly soft to the touch. The color will vary depending on the variety. Gently squeeze the tomato; it should give slightly but not be mushy. Ripe tomatoes will also have a distinct aroma. Avoid picking tomatoes that are still green or hard, as they will not ripen properly off the vine.
Q: Can I grow tomatoes in containers?
A: Yes, you can definitely grow tomatoes in containers! Choose a large container (at least 10-15 gallons) with drainage holes. Use a high-quality potting mix and provide adequate support for the plants, such as a stake or cage. Container-grown tomatoes may require more frequent watering and fertilization than those grown in the ground. Determinate varieties are often better suited for containers than indeterminate varieties.
Q: What is the DIY trick mentioned in the article, and why is it so effective?
A: [This section should be tailored to the specific DIY trick mentioned in the article. For example, if the trick is using coffee grounds as fertilizer:] The DIY trick we highlighted is using coffee grounds as fertilizer. Coffee grounds are rich in nitrogen, which is an essential nutrient for plant growth. They also contain other beneficial nutrients like phosphorus and potassium. Coffee grounds can improve soil drainage, aeration, and water retention. They also help to suppress weeds and deter certain pests. The acidity of coffee grounds can also be beneficial for tomatoes, which prefer slightly acidic soil. By incorporating coffee grounds into your soil, you can provide your tomato plants with a natural and sustainable source of nutrients, leading to healthier plants and more abundant yields.
Q: How can I support my tomato plants as they grow?
A: Tomato plants, especially indeterminate varieties, need support to prevent them from sprawling on the ground and becoming susceptible to diseases. You can use stakes, cages, or trellises to support your plants. Stakes are simple and inexpensive, but they may not provide enough support for large plants. Cages are more sturdy and can support larger plants, but they can be bulky and difficult to store. Trellises are a good option for growing tomatoes vertically, which can save space and improve air circulation. Install the support system early in the growing season, before the plants become too large and unwieldy.
Q: Can I save seeds from my homegrown tomatoes?
A: Yes, you can save seeds from your homegrown tomatoes, but it’s important to note that seeds from hybrid varieties may not produce plants that are true to type. Heirloom varieties are more likely to produce plants that are similar to the parent plant. To save seeds, allow the tomatoes to fully ripen on the vine. Scoop out the seeds and pulp and place them in a jar with a little water. Let the mixture ferment for a few days, stirring occasionally. This process will help to remove the gelatinous coating from the seeds. After fermentation, rinse the seeds thoroughly and spread them out on a paper towel to dry completely. Store the dried seeds in an airtight container in a cool, dark place.
Leave a Comment