

Growing Potatoes at Home can seem daunting, but trust me, it’s one of the most rewarding experiences a home gardener can have! Imagine pulling fresh, earthy potatoes straight from your own backyard – the taste is simply unmatched. For centuries, potatoes have been a staple food source, playing a vital role in cultures around the globe, from the Andes Mountains where they originated to the Irish countryside where they became a dietary cornerstone.
But why should you bother growing your own potatoes? Well, beyond the incredible flavor, it’s about control. You know exactly what’s going into your food, avoiding harmful pesticides and ensuring the freshest possible produce. Plus, it’s a fantastic way to connect with nature and get your hands dirty (literally!).
In this DIY guide, I’m going to share some simple yet effective tricks and hacks that will make growing potatoes at home easier than you ever thought possible. Whether you have a sprawling garden or just a small balcony, I’ll show you how to cultivate a bountiful potato harvest. Get ready to ditch the grocery store spuds and enjoy the satisfaction of homegrown goodness!
Growing Potatoes in Buckets: A Beginner’s Guide
Hey there, fellow gardening enthusiasts! I’m so excited to share my experience with growing potatoes in buckets. It’s a fantastic way to enjoy fresh, homegrown potatoes, even if you don’t have a sprawling garden. Plus, it’s super satisfying to harvest your own spuds! Let’s dive in!
Choosing Your Potatoes and Preparing the Seed Potatoes
Before we get our hands dirty, we need to talk about the stars of the show: the potatoes! Not just any potato from the grocery store will do. We need seed potatoes.
* **What are Seed Potatoes?** These are potatoes specifically grown to be planted and produce new potato plants. They’re certified disease-free, which is crucial for a successful harvest.
* **Where to Get Them:** You can find seed potatoes at your local garden center, nurseries, or online retailers.
* **Choosing the Right Variety:** Consider your climate and taste preferences. Some popular varieties for bucket growing include Yukon Gold, Red Pontiac, and Kennebec. I personally love Yukon Gold for their creamy texture and buttery flavor.
* **”Chitting” Your Potatoes (Optional but Recommended):** This process encourages the seed potatoes to sprout before planting, giving them a head start.
1. A few weeks before planting (about 4-6 weeks), place your seed potatoes in a cool, bright location. An egg carton works perfectly!
2. The potatoes will start to develop “eyes” or sprouts.
3. Once the sprouts are about 1/2 to 1 inch long, you’re ready to move on to the next step.
* **Cutting Larger Seed Potatoes (If Necessary):** If your seed potatoes are large (bigger than an egg), you can cut them into smaller pieces.
1. Make sure each piece has at least 2-3 “eyes” or sprouts.
2. Let the cut pieces “cure” for a day or two before planting. This allows the cut surfaces to dry and prevents rotting. I usually leave them on a paper towel in a cool, dry place.
Preparing Your Buckets and Soil
Now that our seed potatoes are ready, let’s get our buckets and soil sorted.
* **Choosing the Right Buckets:** I recommend using 5-gallon buckets. They’re a good size for growing potatoes and are readily available. You can often find them at hardware stores or even repurpose old buckets.
* Drainage is Key! Make sure your buckets have drainage holes. Drill several holes in the bottom of each bucket to allow excess water to escape. I usually drill about 4-5 holes.
* **Choosing the Right Soil:** Potatoes need well-draining soil that’s rich in organic matter. A good potting mix is essential.
* I like to use a mix of:
* Potting soil
* Compost (for nutrients)
* Perlite or vermiculite (for drainage)
* Avoid using garden soil, as it can be too heavy and compact.
Planting Your Seed Potatoes
Alright, time to get planting!
1. **Add a Base Layer of Soil:** Fill the bottom of each bucket with about 4-6 inches of your soil mixture.
2. **Place the Seed Potatoes:** Place 2-3 seed potato pieces (or one whole small seed potato) on top of the soil, with the sprouts facing upwards. Space them evenly.
3. **Cover with Soil:** Cover the seed potatoes with another 4-6 inches of soil.
4. **Water Thoroughly:** Water the soil well until water drains out of the bottom of the bucket.
“Hilling” Your Potatoes: The Secret to a Bountiful Harvest
This is where the magic happens! “Hilling” is the process of adding more soil to the bucket as the potato plants grow. This encourages the plants to produce more potatoes along the buried stem.
1. **Wait for the Plants to Emerge:** After a week or two, you’ll start to see green shoots emerging from the soil.
2. **First Hilling:** When the plants are about 6-8 inches tall, add more soil to the bucket, burying the stems up to the bottom set of leaves. Leave the top leaves exposed.
3. **Repeat the Process:** Continue hilling every 2-3 weeks as the plants grow, until the bucket is almost full.
4. Water After Hilling: Always water thoroughly after each hilling session.
Caring for Your Potato Plants
Now that your potatoes are planted and hilling is underway, let’s talk about ongoing care.
* **Watering:** Potatoes need consistent moisture, especially during flowering and tuber formation. Water deeply whenever the top inch of soil feels dry. Avoid overwatering, as this can lead to rot.
* **Sunlight:** Potatoes need at least 6-8 hours of sunlight per day. Place your buckets in a sunny location.
* **Fertilizing:** Feed your potato plants every few weeks with a balanced fertilizer. Look for a fertilizer that’s specifically formulated for vegetables. I like to use a liquid fertilizer diluted according to the package instructions.
* **Pest Control:** Keep an eye out for pests like aphids, potato beetles, and flea beetles. You can handpick them off the plants or use an organic insecticide if necessary.
* Disease Prevention: Good air circulation and proper watering can help prevent diseases. Avoid overhead watering, as this can promote fungal growth.
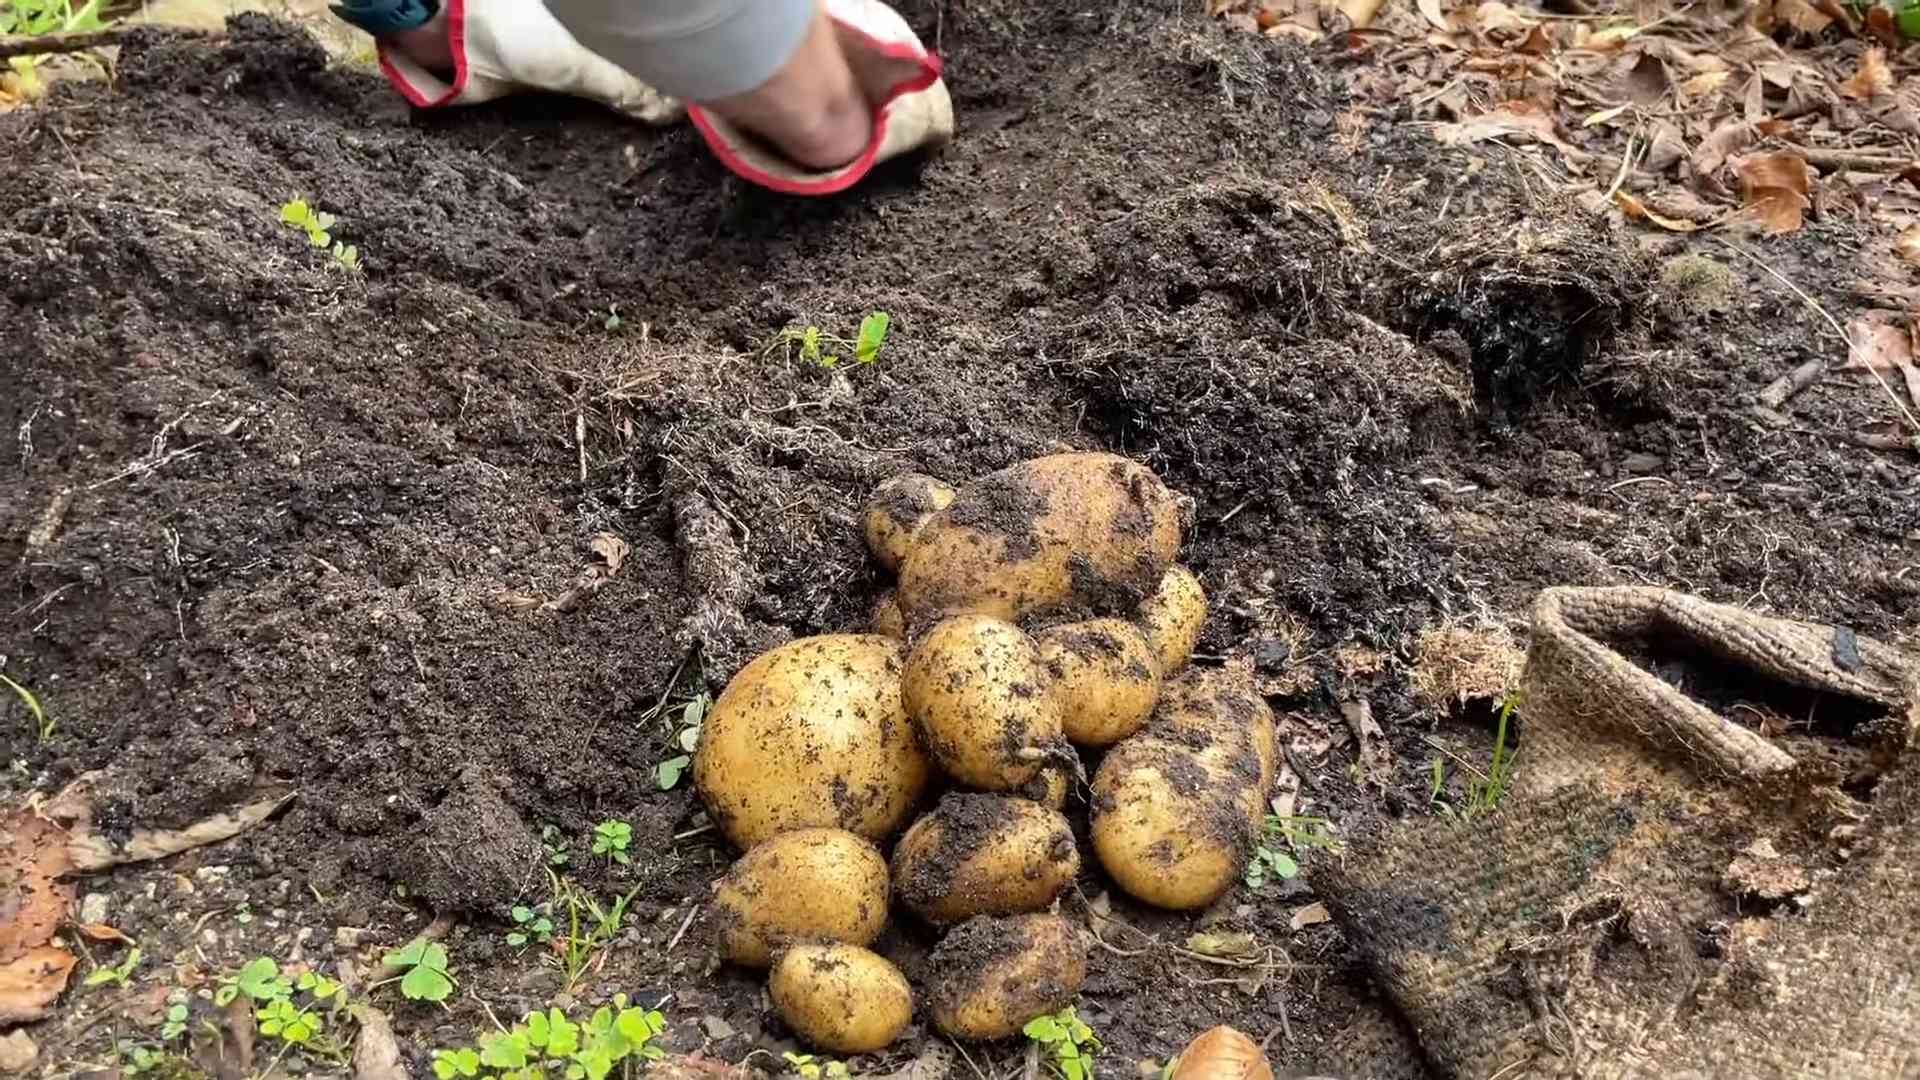
Harvesting Your Potatoes: The Grand Finale!
The moment we’ve all been waiting for! Harvesting your homegrown potatoes is incredibly rewarding.
1. **When to Harvest:** Potatoes are typically ready to harvest about 80-100 days after planting, depending on the variety.
2. **Signs of Readiness:** The foliage will start to turn yellow and die back. This is a sign that the potatoes are mature.
3. **Harvesting:**
* Stop watering a week or two before harvesting to allow the potatoes to dry out slightly.
* Carefully tip the bucket over onto a tarp or piece of cardboard.
* Gently sift through the soil to find your potatoes.
* Be careful not to damage the potatoes during harvesting.
4. **Curing Your Potatoes (Optional but Recommended):** Curing helps to toughen the skin of the potatoes and prolong their storage life.
* Spread the potatoes out in a cool, dark, and well-ventilated place for about a week.
* Avoid direct sunlight, as this can cause the potatoes to turn green.
* Discard any damaged or diseased potatoes.
Storing Your Potatoes
Proper storage is essential to keep your potatoes fresh for as long as possible.
* **Ideal Storage Conditions:** Store your potatoes in a cool, dark, and dry place. A root cellar is ideal, but a basement or garage can also work.
* **Temperature:** The ideal storage temperature is between 40-50°F (4-10°C).
* **Humidity:** Keep the humidity low to prevent sprouting and rotting.
* **Avoid Sunlight:** Sunlight can cause potatoes to turn green and produce solanine, a toxic compound.
* **Don’t Wash Before Storing:** Washing potatoes before storing can promote rotting.
* **Check Regularly:** Check your stored potatoes regularly for signs of sprouting or rotting. Remove any affected potatoes to prevent the spread of spoilage.
Troubleshooting Common Problems
Even with the best care, you might encounter some challenges along the way. Here are a few common problems and how to address them:
* **Green Potatoes:** Green potatoes contain solanine and should not be eaten. This is caused by exposure to sunlight. Make sure to store your potatoes in a dark place.
* **Potato Scab:** This is a common soilborne disease that causes rough, scabby patches on the potatoes. To prevent potato scab, avoid overwatering and maintain a slightly acidic soil pH.
* **Potato Beetles:** These pests can defoliate your potato plants. Handpick them off the plants or use an organic insecticide.
* **Rotting Potatoes:** This can be caused by overwatering or poor drainage. Make sure your buckets have adequate drainage and avoid overwatering.
Enjoying Your Homegrown Potatoes
Now that you’ve harvested and stored your potatoes, it’s time to enjoy the fruits (or rather, vegetables!) of your labor. There are endless ways to prepare potatoes, from simple roasted potatoes to creamy mashed potatoes to crispy french fries. I love to use my homegrown potatoes in potato salad, soups, and stews. The possibilities are endless!
Growing potatoes in buckets is a fun and rewarding experience. With a little bit of care and attention, you can enjoy fresh, homegrown potatoes all season long. Happy gardening!

Conclusion
So, there you have it! Growing potatoes at home, especially using the innovative methods we’ve discussed, is not just a gardening project; it’s a rewarding experience that connects you to your food source in a profound way. Forget the store-bought spuds that have traveled miles and lost their freshness. Imagine the satisfaction of harvesting your own, knowing exactly where they came from and how they were nurtured.
This DIY potato-growing trick is a must-try for several compelling reasons. First, it’s incredibly space-efficient. Whether you have a sprawling garden or just a small balcony, container gardening or using potato bags allows you to cultivate a substantial potato crop in a limited area. Second, it’s a fantastic way to recycle and repurpose materials. Old tires, burlap sacks, or even large plastic bins can be transformed into thriving potato habitats. Third, it’s a learning experience for the whole family. Kids will be fascinated by the process of hilling the soil and watching the plants grow, and they’ll be even more excited to dig up their own potatoes at harvest time.
But the best reason to try this is the taste. Homegrown potatoes, fresh from the earth, have a flavor that simply can’t be matched by commercially grown varieties. The texture is creamier, the taste is earthier, and the satisfaction of eating something you’ve grown yourself is unparalleled.
Don’t be afraid to experiment with variations! Try different potato varieties to find your favorites. Russets are great for baking and frying, Yukon Golds are perfect for mashed potatoes, and red potatoes are delicious boiled or roasted. You can also add companion plants to your potato containers to deter pests and improve soil health. Marigolds, basil, and nasturtiums are all excellent choices. Consider adding a slow-release fertilizer to the soil mix to provide your potatoes with a steady supply of nutrients throughout the growing season. You can also amend the soil with compost or well-rotted manure to improve its fertility and drainage.
We encourage you to embrace this DIY potato-growing adventure. It’s a fun, educational, and ultimately delicious way to connect with nature and enjoy the fruits (or rather, tubers) of your labor. Don’t just take our word for it – try it yourself! We’re confident that you’ll be amazed by the results.
Once you’ve harvested your bounty, we’d love to hear about your experience. Share your photos, tips, and tricks on social media using #HomegrownPotatoes and #DIYGardening. Let’s create a community of potato enthusiasts and inspire others to get their hands dirty and grow their own food. Happy growing!
Frequently Asked Questions (FAQ)
What is the best time of year to start growing potatoes?
The ideal time to plant potatoes depends on your climate. Generally, you should plant seed potatoes a few weeks before the last expected frost in spring. In warmer climates, you can plant a second crop in late summer for a fall harvest. The soil temperature should be at least 45°F (7°C) for optimal germination. Check your local weather forecasts and planting guides for specific recommendations for your region.
What kind of soil is best for growing potatoes?
Potatoes thrive in well-drained, loose soil that is rich in organic matter. A slightly acidic soil pH of 6.0 to 6.5 is ideal. Avoid heavy clay soils, as they can become waterlogged and hinder tuber development. Amend your soil with compost, well-rotted manure, or peat moss to improve drainage and fertility. Raised beds or containers are also excellent options for growing potatoes, as they provide better drainage and allow you to control the soil composition.
How often should I water my potato plants?
Potatoes need consistent moisture, especially during tuber formation. Water deeply whenever the top inch of soil feels dry to the touch. Avoid overwatering, as this can lead to rot. Mulching around the plants can help retain moisture and suppress weeds. During hot, dry weather, you may need to water more frequently. Use a soaker hose or drip irrigation to deliver water directly to the roots and minimize water loss through evaporation.
How do I hill potatoes, and why is it important?
Hilling involves mounding soil around the stems of the potato plants as they grow. This encourages the formation of more tubers along the buried stems, increasing your overall yield. Start hilling when the plants are about 6 inches tall, and repeat every few weeks as they grow. Use soil, compost, or straw to create the hills. Hilling also helps protect the developing tubers from sunlight, which can cause them to turn green and produce solanine, a toxic compound.
What are common potato pests and diseases, and how can I prevent them?
Common potato pests include potato beetles, aphids, and flea beetles. Diseases include early blight, late blight, and scab. To prevent these problems, choose disease-resistant potato varieties, practice crop rotation, and maintain good soil drainage. Inspect your plants regularly for signs of pests or diseases, and take action promptly. Organic pest control methods include handpicking pests, using insecticidal soap, and introducing beneficial insects. For diseases, consider using copper-based fungicides or other organic treatments.
How do I know when my potatoes are ready to harvest?
The timing of harvest depends on the potato variety and your desired use. “New potatoes” can be harvested a few weeks after flowering, when they are small and tender. For mature potatoes, wait until the foliage begins to yellow and die back. This indicates that the tubers have reached their full size and are ready to be harvested. Dig carefully around the plants to avoid damaging the tubers.
Can I grow potatoes in containers? What size container is needed?
Yes, potatoes grow very well in containers. Choose a container that is at least 15 gallons in size and has drainage holes. Potato bags are also a popular option. Fill the container with a well-draining potting mix and plant your seed potatoes. As the plants grow, add more soil to the container, burying the stems to encourage tuber formation.
What are seed potatoes, and where can I get them?
Seed potatoes are potatoes that are specifically grown for planting. They are certified to be disease-free and are more likely to produce a healthy crop than potatoes from the grocery store. You can purchase seed potatoes from garden centers, nurseries, and online retailers. Choose varieties that are well-suited to your climate and growing conditions.
Can I use potatoes from the grocery store as seed potatoes?
While you can technically use potatoes from the grocery store as seed potatoes, it’s not recommended. Grocery store potatoes may be treated with chemicals to prevent sprouting, and they may also carry diseases that can infect your garden soil. Seed potatoes are a safer and more reliable option.
How do I store my harvested potatoes?
Store your harvested potatoes in a cool, dark, and well-ventilated place. The ideal temperature is between 40°F and 50°F (4°C and 10°C). Avoid storing potatoes near apples or other fruits that produce ethylene gas, as this can cause them to sprout prematurely. Properly stored potatoes can last for several months.
Leave a Comment