

Growing Luffa Indoors might seem like a tropical dream best left to sun-drenched fields, but I’m here to tell you that bringing this amazing gourd into your home is totally achievable! Forget those expensive, mass-produced sponges – imagine harvesting your own natural, exfoliating wonders right from your living room.
For centuries, luffa (also spelled loofah) has been a staple in bathing rituals and household chores across Asia and Africa. Its fibrous skeleton, revealed after drying and peeling, offers a gentle yet effective scrubbing power. Think of it as nature’s perfect tool, biodegradable and sustainable. But why limit ourselves to relying on external sources when we can cultivate our own?
In today’s world, where sustainability and self-sufficiency are increasingly important, learning how to grow your own luffa indoors is more relevant than ever. Not only will you reduce your reliance on plastic-based sponges and support a greener lifestyle, but you’ll also gain the immense satisfaction of nurturing a plant from seed to sponge. Plus, it’s a fantastic conversation starter! This DIY guide will provide you with all the essential tips and tricks to successfully growing Luffa Indoors, even if you have limited space or experience. Get ready to embark on a rewarding journey and transform your home into a mini luffa farm!
Growing Luffa Indoors: From Seed to Sponge in Your Living Room!
Hey there, fellow plant enthusiasts! Ever dreamt of growing your own sponges? I know, it sounds a little crazy, but trust me, it’s totally doable, even if you don’t have a sprawling garden. We’re going to dive into the wonderful world of growing luffa gourds indoors. Get ready to have some fun and learn how to cultivate these amazing plants right in your home!
What You’ll Need
Before we get started, let’s gather our supplies. Here’s a list of everything you’ll need to successfully grow luffa indoors:
* Luffa Seeds: You can find these online or at your local garden center. Make sure they are viable seeds.
* Seed Starting Trays or Small Pots: These will be used to germinate the seeds.
* Seed Starting Mix: A light, well-draining mix is crucial for successful germination.
* Larger Pots (at least 5 gallons): Luffa vines get big, so you’ll need a substantial pot for each plant.
* Potting Soil: A good quality potting mix that retains moisture but also drains well.
* Grow Lights: Luffa needs a lot of sunlight, so grow lights are essential for indoor growing.
* Trellis or Support System: Luffa vines are climbers, so they need something to climb on.
* Watering Can or Hose: For watering your plants.
* Liquid Fertilizer: A balanced fertilizer to feed your luffa plants.
* Pruning Shears or Scissors: For pruning the vines.
* Spray Bottle: For misting the plants.
* Patience: Luffa takes time to grow, so be patient!
Phase 1: Germinating Your Luffa Seeds
Okay, let’s kick things off with germination. This is where the magic begins!
1. Soak the Seeds: To help speed up germination, soak your luffa seeds in warm water for 24-48 hours. This softens the seed coat and makes it easier for the seedling to emerge. I usually put them in a small bowl and cover them with water.
2. Prepare Your Seed Starting Trays: Fill your seed starting trays or small pots with seed starting mix. Moisten the mix thoroughly, but don’t let it get soggy.
3. Plant the Seeds: Plant one or two seeds per cell or pot, about 1/2 inch deep. Gently cover the seeds with the seed starting mix.
4. Provide Warmth and Moisture: Luffa seeds need warmth to germinate. Place the trays in a warm location, like on top of your refrigerator or on a heat mat. Keep the soil consistently moist by misting it with a spray bottle.
5. Wait Patiently: Germination can take anywhere from 7 to 21 days, so be patient. Once the seedlings emerge, move them to a location with bright light.
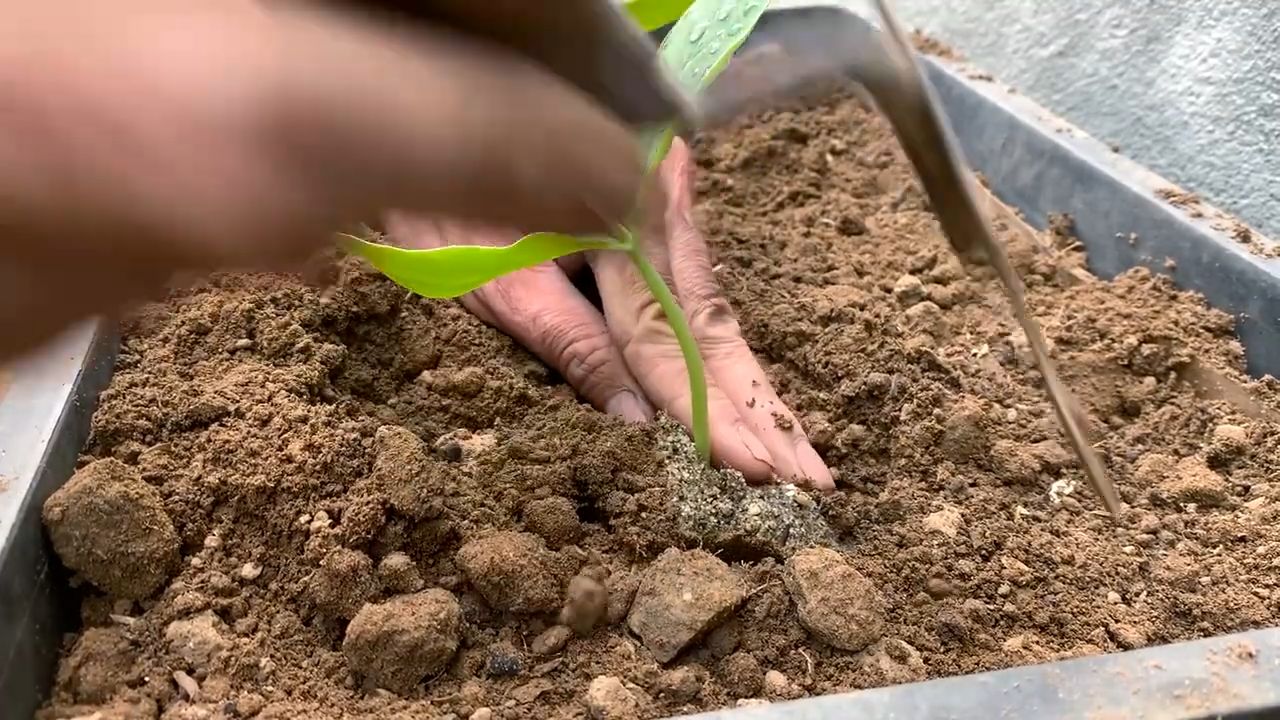
Phase 2: Transplanting and Setting Up Your Luffa Vines
Once your seedlings have a few true leaves, it’s time to transplant them into their larger pots.
1. Prepare Your Large Pots: Fill your 5-gallon (or larger) pots with potting soil. Make sure the pots have drainage holes.
2. Carefully Transplant the Seedlings: Gently remove the seedlings from the seed starting trays, being careful not to damage the roots. Create a hole in the potting soil and place the seedling in the hole. Backfill with soil and gently pat it down.
3. Water Thoroughly: After transplanting, water the seedlings thoroughly.
4. Set Up Your Trellis: Luffa vines need a strong trellis or support system to climb on. You can use a store-bought trellis, or you can create your own using bamboo stakes, rope, or wire. Make sure the trellis is sturdy enough to support the weight of the mature vine and gourds. I’ve used everything from old ladders to repurposed tomato cages!
5. Position Your Grow Lights: Luffa needs at least 6-8 hours of direct light per day. If you don’t have a sunny window, you’ll need to use grow lights. Position the grow lights about 6-12 inches above the plants.
Phase 3: Caring for Your Growing Luffa
Now comes the ongoing care. This is where you’ll nurture your luffa vines and help them thrive.
1. Watering: Luffa needs consistent moisture, especially during hot weather. Water deeply whenever the top inch of soil feels dry to the touch. Avoid overwatering, which can lead to root rot.
2. Fertilizing: Feed your luffa plants with a balanced liquid fertilizer every 2-3 weeks. Follow the instructions on the fertilizer label. I like to use a fertilizer that’s high in phosphorus to encourage flowering and fruit production.
3. Pruning: Pruning is important for controlling the size and shape of your luffa vines. You can prune the vines to encourage branching and to remove any dead or yellowing leaves. I usually prune back the side shoots to encourage the main vine to grow upwards.
4. Pollination: Luffa plants have separate male and female flowers. The female flowers have a small luffa gourd behind them. If you’re growing luffa indoors, you may need to hand-pollinate the flowers. To do this, use a small paintbrush to transfer pollen from the male flowers to the female flowers. You’ll know pollination was successful when the small luffa gourd starts to grow.
5. Pest Control: Keep an eye out for pests like aphids, spider mites, and whiteflies. If you see any pests, you can treat them with insecticidal soap or neem oil. I always prefer to start with the least toxic options first.
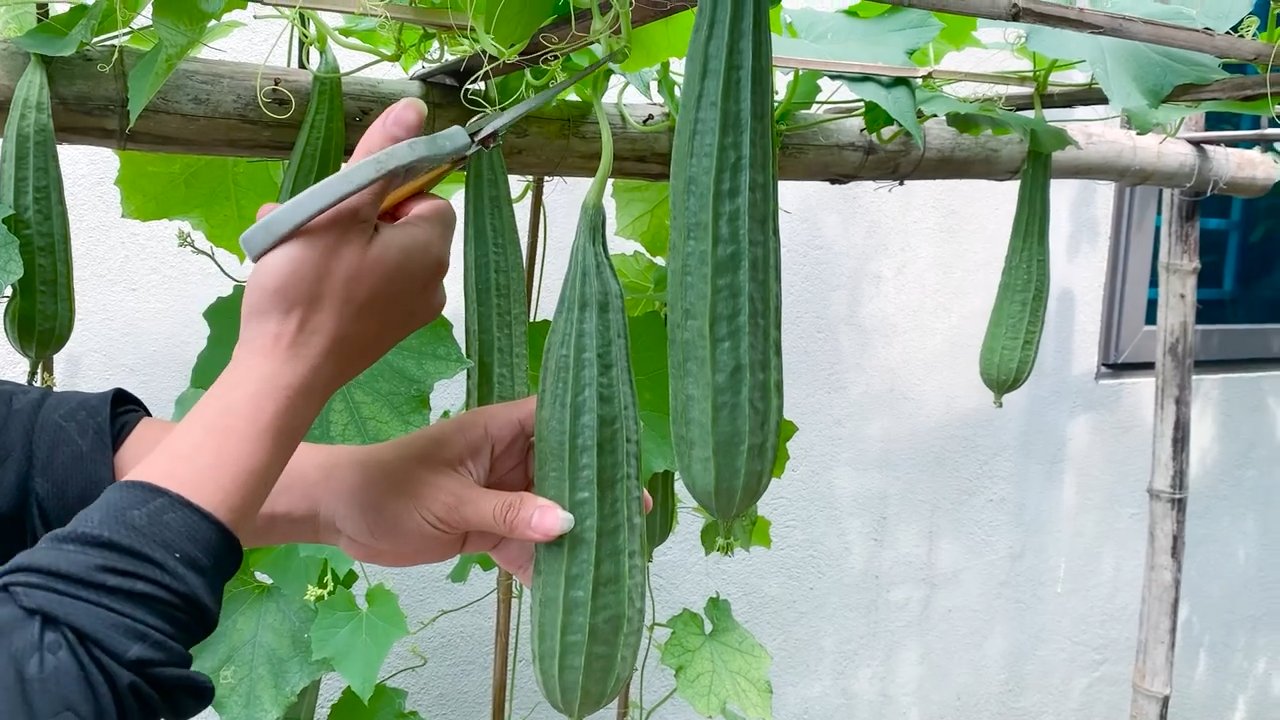
Phase 4: Harvesting and Processing Your Luffa Sponges
This is the most rewarding part! Harvesting your own luffa sponges is incredibly satisfying.
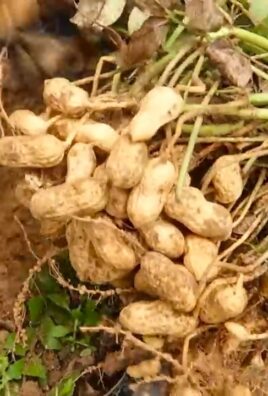
1. Harvesting: Luffa gourds are ready to harvest when they turn yellow or brown and the skin becomes dry and brittle. The gourd should also feel lightweight. It usually takes several months for the gourds to mature.
2. Peeling: To peel the luffa gourd, you can either soak it in water for a few days to soften the skin, or you can simply peel it with your hands. I usually find it easier to peel after soaking.
3. Seed Removal: Once the skin is removed, shake out the seeds. You can save these seeds for planting next year.
4. Washing: Rinse the luffa sponge thoroughly with water to remove any remaining pulp or debris.
5. Drying: Allow the luffa sponge to dry completely in a well-ventilated area. This can take several days.
6. Cutting and Shaping: Once the luffa sponge is dry, you can cut it into smaller pieces and shape it as desired.
Tips for Success
Here are a few extra tips to help you succeed with growing luffa indoors:
* Choose the Right Variety: Some luffa varieties are better suited for indoor growing than others. Look for varieties that are more compact and have a shorter growing season.
* Provide Adequate Ventilation: Good ventilation is important for preventing fungal diseases. Make sure your plants have plenty of air circulation.
* Monitor Soil Moisture: Check the soil moisture regularly and adjust your watering schedule as needed.
* Be Patient: Luffa takes time to grow, so be patient and don’t get discouraged if you don’t see results immediately.
* Don’t Give Up: Growing luffa indoors can be challenging, but it’s also incredibly rewarding. Don’t be afraid to experiment and learn from your mistakes.
Troubleshooting
Even with the best care, you might encounter some problems along the way. Here are a few common issues and how to address them:
* Yellowing Leaves: This could be a sign of overwatering, underwatering, or nutrient deficiency. Check the soil moisture and adjust your watering schedule accordingly. You may also need to fertilize your plants.
* Lack of Flowers: This could be due to insufficient light or a lack of phosphorus. Make sure your plants are getting enough light and fertilize them with a fertilizer that’s high in phosphorus.
* Pest Infestations: Treat pest infestations with insecticidal soap or neem oil.
* Slow Growth: This could be due to insufficient light, water, or nutrients. Make sure your plants are getting enough light, water, and fertilizer.
Growing luffa indoors is a fun and rewarding project that can provide you with your own natural sponges. With a little patience and care, you can successfully grow these amazing plants right in your home. Happy growing!
Conclusion
So, there you have it! Growing luffa indoors might seem like a challenge, but with a little patience, the right setup, and these simple steps, you can cultivate your own sustainable source of natural sponges right in your home. Forget those mass-produced, chemically treated sponges from the store. Imagine the satisfaction of exfoliating with a luffa you nurtured from seed to scrub!
This DIY project isn’t just about saving money; it’s about connecting with nature, reducing your environmental footprint, and enjoying the unique experience of growing your own resources. Plus, it’s a fantastic conversation starter!
Why is this a must-try? Because it empowers you to take control of your consumption, offering a sustainable alternative to commercially produced sponges. You’ll know exactly where your luffa comes from and how it was grown, ensuring a chemical-free and eco-friendly product. Beyond the practical benefits, growing luffa indoors is incredibly rewarding. Watching the vines climb and the gourds develop is a testament to your green thumb and a constant reminder of the power of nature.
But the fun doesn’t stop there! Consider these variations to personalize your luffa-growing experience:
* Vertical Gardening: Maximize your space by training your luffa vines up trellises or along walls. This not only looks beautiful but also provides ample support for the heavy gourds.
* Companion Planting: Plant basil, marigolds, or nasturtiums near your luffa to deter pests and attract beneficial insects.
* Seed Saving: Once your luffa gourds are fully mature, save the seeds for future plantings. This ensures a continuous supply of luffa sponges for years to come.
* Luffa Crafts: Get creative with your harvest! Use dried luffa to make soap dishes, bath mats, or even decorative art pieces. The possibilities are endless!
* Gifting: Share your homegrown luffa with friends and family. It’s a thoughtful and unique gift that promotes sustainability and self-sufficiency.
Don’t be intimidated by the prospect of growing luffa indoors. It’s a surprisingly straightforward process that yields incredible results. The key is to provide your plants with plenty of sunlight, warmth, and support. With a little dedication, you’ll be harvesting your own luffa sponges in no time.
We encourage you to embark on this exciting DIY adventure. Start small, experiment with different techniques, and don’t be afraid to make mistakes. The journey of growing luffa indoors is just as rewarding as the final product.
So, grab your seeds, prepare your pots, and get ready to experience the joy of growing your own luffa. We can’t wait to hear about your experiences! Share your photos, tips, and challenges in the comments below. Let’s create a community of indoor luffa growers and inspire others to embrace sustainable living.
Frequently Asked Questions (FAQ)
What are the ideal conditions for growing luffa indoors?
Luffa plants thrive in warm, sunny environments. To successfully grow luffa indoors, you’ll need to provide them with at least 6-8 hours of direct sunlight per day. If you don’t have a naturally sunny spot, consider using grow lights to supplement the light. The ideal temperature range for luffa is between 70-85°F (21-29°C). Ensure good air circulation to prevent fungal diseases. A well-draining potting mix is also crucial to prevent root rot.
How long does it take to grow luffa indoors?
The time it takes to grow luffa indoors can vary depending on the specific variety, growing conditions, and your climate. Generally, it takes about 90-120 days from planting the seeds to harvesting mature luffa gourds. Be patient and monitor your plants regularly. You’ll know the luffa is ready to harvest when the skin turns brown and dry, and the gourd feels lightweight.
What size pot do I need for growing luffa indoors?
Luffa plants have extensive root systems, so you’ll need a large pot to accommodate their growth. A minimum of 10-15 gallons is recommended. Choose a pot that is at least 12 inches in diameter and 12 inches deep. Make sure the pot has drainage holes to prevent waterlogging. As the plant grows, you may need to transplant it into an even larger container.
How do I pollinate luffa flowers indoors?
Luffa plants produce both male and female flowers. To ensure pollination indoors, you’ll need to hand-pollinate the flowers. Use a small paintbrush or cotton swab to collect pollen from the male flowers (which have a long, thin stem) and transfer it to the female flowers (which have a small, immature luffa gourd at the base). Do this in the morning when the flowers are open. You may need to repeat the process for several days to ensure successful pollination.
What are some common pests and diseases that affect luffa plants, and how can I prevent them indoors?
Common pests that can affect luffa plants include aphids, spider mites, and whiteflies. To prevent infestations, inspect your plants regularly and remove any pests you find. You can also use insecticidal soap or neem oil to control pests. Fungal diseases, such as powdery mildew and downy mildew, can also be a problem. To prevent these diseases, ensure good air circulation, avoid overwatering, and use a fungicide if necessary.
How do I know when my luffa is ready to harvest?
The best time to harvest your luffa is when the skin turns brown and dry, and the gourd feels lightweight. You should also be able to hear the seeds rattling inside when you shake it. If you harvest too early, the luffa will be soft and mushy. If you harvest too late, the fibers will be too coarse.
How do I process my luffa after harvesting?
After harvesting, soak the luffa gourd in water for a few days to loosen the skin. Then, peel off the skin and remove the seeds. Rinse the luffa thoroughly and allow it to dry completely. You can then cut it into smaller pieces or use it whole.
Can I eat luffa?
Young, immature luffa gourds can be eaten like zucchini or squash. They have a mild, slightly sweet flavor. However, mature luffa gourds are too fibrous to eat.
What are the benefits of using homegrown luffa sponges?
Homegrown luffa sponges are a sustainable and eco-friendly alternative to commercially produced sponges. They are biodegradable, chemical-free, and gentle on the skin. They can be used for exfoliating, washing dishes, or cleaning surfaces.
Where can I buy luffa seeds?
Luffa seeds can be purchased online from various seed suppliers or at your local garden center. Make sure to choose a variety that is suitable for your climate and growing conditions.
Can I grow luffa in a greenhouse?
Yes, growing luffa in a greenhouse is an excellent option, as it provides a controlled environment with consistent temperature and humidity. This can help to accelerate growth and increase yields. Ensure adequate ventilation to prevent fungal diseases.
How often should I water my luffa plants indoors?
Water your luffa plants regularly, keeping the soil consistently moist but not waterlogged. The frequency of watering will depend on the size of the pot, the temperature, and the humidity. Check the soil moisture level regularly and water when the top inch of soil feels dry.
What type of fertilizer should I use for growing luffa indoors?
Luffa plants are heavy feeders and require regular fertilization. Use a balanced fertilizer with a ratio of 10-10-10 or 20-20-20. Fertilize every 2-3 weeks during the growing season. You can also supplement with compost or other organic fertilizers.
How do I deal with yellowing leaves on my luffa plant?
Yellowing leaves can be a sign of several problems, including overwatering, underwatering, nutrient deficiency, or pest infestation. Check the soil moisture level and adjust your watering accordingly. Fertilize your plant to provide it with the nutrients it needs. Inspect the leaves for pests and treat them if necessary.
Is growing luffa indoors worth the effort?
Absolutely! While it requires some effort and attention, growing luffa indoors is a rewarding experience that provides you with a sustainable source of natural sponges. It’s a great way to connect with nature, reduce your environmental footprint, and enjoy the unique satisfaction of growing your own resources.
Leave a Comment