

Growing Kale in Plastic Bottles: Sounds a little unconventional, right? But trust me, this DIY gardening trick is a game-changer, especially if you’re short on space or looking for a budget-friendly way to enjoy fresh, homegrown kale. I’m so excited to share this with you!
For centuries, humans have cultivated kale, a nutritional powerhouse, in various ways. From sprawling fields to humble kitchen gardens, this leafy green has nourished communities worldwide. But let’s face it, not everyone has access to vast land or even a traditional garden plot. That’s where this ingenious upcycling method comes in.
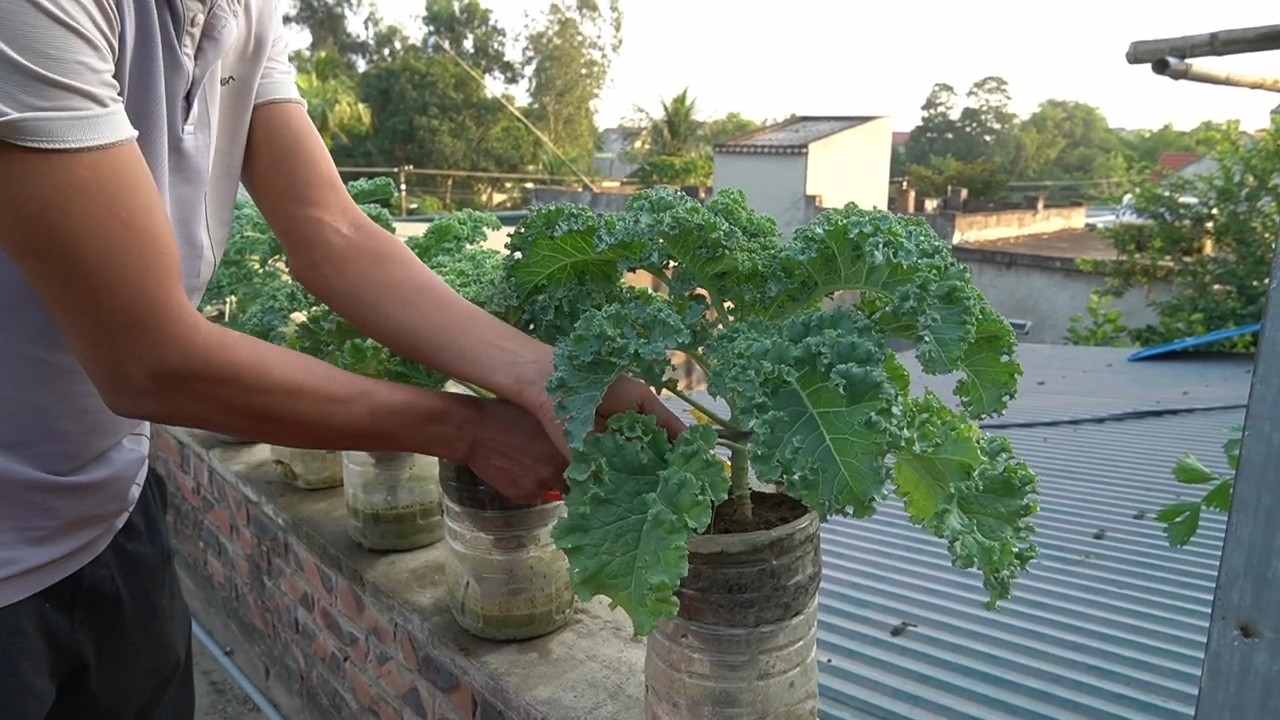
Imagine harvesting crisp, vibrant kale leaves right from your balcony or windowsill. No more trips to the grocery store for wilted greens! Growing Kale in Plastic Bottles allows you to control the growing environment, minimize pests, and maximize your yield, all while reducing plastic waste. It’s a win-win! Plus, it’s incredibly satisfying to nurture your own food from start to finish. So, grab those empty plastic bottles, and let’s get started on this fun and rewarding gardening adventure. I promise, you’ll be amazed at how easy and effective it is!
Kohl Anbauen in Plastikflaschen: Ein DIY-Gartenprojekt für Jedermann
Hallo Gartenfreunde! Habt ihr Lust, euren eigenen frischen Grünkohl anzubauen, auch wenn ihr wenig Platz habt? Dann seid ihr hier genau richtig! Ich zeige euch, wie ihr aus alten Plastikflaschen einen vertikalen Garten für euren Grünkohl zaubern könnt. Das ist nicht nur super nachhaltig, sondern auch kinderleicht und macht richtig Spaß!
Was ihr braucht:
* Plastikflaschen: Am besten eignen sich 1,5-Liter- oder 2-Liter-Flaschen. Je mehr, desto mehr Grünkohl könnt ihr anbauen! Achtet darauf, dass sie sauber und leer sind.
* Grünkohlsamen oder Jungpflanzen: Ihr könnt entweder mit Samen starten oder direkt Jungpflanzen kaufen, wenn ihr es etwas schneller haben wollt.
* Erde: Hochwertige Blumenerde ist ideal. Ihr könnt auch Kompost untermischen, um die Nährstoffversorgung zu verbessern.
* Schere oder Cuttermesser: Zum Zuschneiden der Flaschen.
* Bohrer oder Nagel: Um Löcher für die Entwässerung zu machen.
* Schnur oder Draht: Zum Aufhängen der Flaschen.
* Gießkanne oder Sprühflasche: Zum Bewässern der Pflanzen.
* Optional: Handschuhe, um eure Hände sauber zu halten.
Die Vorbereitung: Die Flaschen werden zu kleinen Gärten
Bevor wir mit dem Bepflanzen loslegen, müssen wir die Plastikflaschen vorbereiten. Das ist eigentlich ganz einfach:
1. Reinigung: Spült die Plastikflaschen gründlich mit Wasser und etwas Spülmittel aus. Entfernt alle Etiketten und Klebereste. Lasst sie gut trocknen.
2. Zuschneiden: Schneidet jede Flasche horizontal in zwei Hälften. Die obere Hälfte (mit dem Flaschenhals) wird später umgedreht und in die untere Hälfte gesteckt. Achtet darauf, dass die Schnittkanten sauber sind, damit ihr euch nicht verletzt. Ich empfehle, eine Schere zu verwenden, da sie sicherer ist als ein Cuttermesser, besonders wenn Kinder mithelfen.
3. Entwässerungslöcher: Bohrt oder stecht mit einem Nagel mehrere kleine Löcher in den Boden der unteren Flaschenhälfte. Diese Löcher sind wichtig, damit überschüssiges Wasser ablaufen kann und die Wurzeln nicht faulen.
4. Aufhängelöcher: Bohrt oder stecht zwei Löcher an den Seiten der oberen Flaschenhälfte (in der Nähe des Schnittrandes). Durch diese Löcher fädeln wir später die Schnur oder den Draht zum Aufhängen. Achtet darauf, dass die Löcher stabil sind und nicht ausreißen.
Das Bepflanzen: Grünkohl zieht ein
Jetzt kommt der spannende Teil: Wir bepflanzen unsere kleinen Flaschen-Gärten mit Grünkohl!
1. Erde einfüllen: Füllt die untere Flaschenhälfte mit Erde. Lasst etwa 2-3 cm Platz bis zum Rand. Drückt die Erde leicht an.
2. Pflanzen oder Säen:
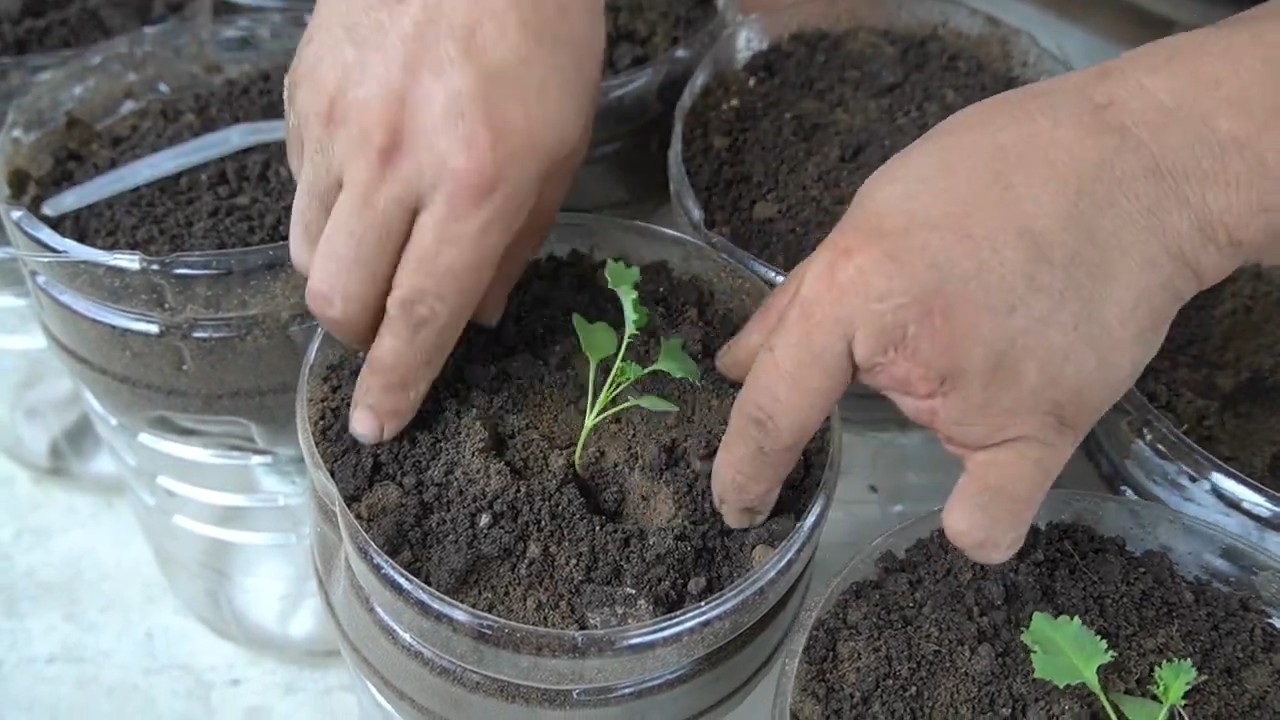
* Jungpflanzen: Macht ein kleines Loch in die Erde und setzt die Grünkohl-Jungpflanze vorsichtig hinein. Füllt das Loch mit Erde auf und drückt sie leicht an.
* Samen: Streut die Grünkohlsamen gleichmäßig auf die Erde. Bedeckt sie mit einer dünnen Schicht Erde (etwa 0,5 cm).
3. Gießen: Gießt die Erde vorsichtig an, bis sie gut durchfeuchtet ist. Vermeidet Staunässe.
4. Obere Hälfte einsetzen: Dreht die obere Flaschenhälfte um und steckt sie in die untere Hälfte. Der Flaschenhals sollte nach unten zeigen. So entsteht ein kleines Gewächshaus, das die Pflanzen vor Wind und Wetter schützt.
Die Aufhängung: Ein vertikaler Garten entsteht
Jetzt müssen wir unsere bepflanzten Flaschen noch aufhängen.
1. Schnur oder Draht befestigen: Fädelt die Schnur oder den Draht durch die Aufhängelöcher an den Seiten der oberen Flaschenhälfte. Verknotet die Enden fest, sodass die Flasche sicher hängt.
2. Aufhängen: Sucht euch einen sonnigen Platz zum Aufhängen eurer Flaschen-Gärten. Ein Balkon, eine Terrasse oder ein Fensterbrett sind ideal. Achtet darauf, dass die Flaschen genügend Licht bekommen (mindestens 6 Stunden Sonne pro Tag).
3. Abstand halten: Hängt die Flaschen mit ausreichend Abstand zueinander auf, damit die Pflanzen genügend Platz zum Wachsen haben.
Die Pflege: Grünkohl will gehegt und gepflegt werden
Damit euer Grünkohl prächtig gedeiht, braucht er regelmäßige Pflege.
1. Gießen: Gießt die Pflanzen regelmäßig, besonders an heißen Tagen. Die Erde sollte immer leicht feucht sein, aber nicht nass. Achtet darauf, dass das Wasser gut ablaufen kann.
2. Düngen: Düngt die Pflanzen alle paar Wochen mit einem organischen Flüssigdünger. Das sorgt für eine gute Nährstoffversorgung und kräftiges Wachstum.
3. Schädlinge kontrollieren: Achtet auf Schädlinge wie Blattläuse oder Raupen. Bei Bedarf könnt ihr natürliche Schädlingsbekämpfungsmittel einsetzen.
4. Ernten: Ihr könnt den Grünkohl ernten, sobald die Blätter groß genug sind. Schneidet die äußeren Blätter ab, die inneren Blätter wachsen weiter. So könnt ihr über einen längeren Zeitraum ernten.
Zusätzliche Tipps und Tricks:
* Verschiedene Sorten: Probiert verschiedene Grünkohlsorten aus, um herauszufinden, welche euch am besten schmecken. Es gibt zum Beispiel den klassischen “Grünkohl Lerchenzungen”, den krausen “Halbhoher Grüner Krauser” oder den dekorativen “Red Russian”.
* Sonniger Standort: Grünkohl braucht viel Sonne, um gut zu wachsen. Wählt einen Standort, der mindestens 6 Stunden Sonne pro Tag bekommt.
* Windschutz: Schützt die Pflanzen vor starkem Wind, da dieser die Blätter beschädigen kann.
* Mulchen: Mulcht die Erde mit Stroh oder Laub, um die Feuchtigkeit zu halten und Unkraut zu unterdrücken.
* Kombination mit anderen Pflanzen: Ihr könnt Grünkohl gut mit anderen Pflanzen wie Ringelblumen oder Kapuzinerkresse kombinieren. Diese Pflanzen halten Schädlinge fern und locken nützliche Insekten an.
* Winterhart: Grünkohl ist sehr winterhart und kann auch bei Frost geerntet werden. Er schmeckt sogar noch besser, wenn er einmal Frost abbekommen hat.
* Upcycling: Nutzt verschiedene Arten von Plastikflaschen, um euren Garten noch bunter und vielfältiger zu gestalten.
* Kinder einbeziehen: Das Projekt ist eine tolle Möglichkeit, Kinder für das Gärtnern zu begeistern und ihnen den Kreislauf der Natur näherzubringen.
Häufige Fehler und wie man sie vermeidet:
* Staunässe: Achtet darauf, dass das Wasser gut ablaufen kann, um Staunässe zu vermeiden. Zu viel Wasser kann zu Wurzelfäule führen.
* Zu wenig Licht: Grünkohl braucht viel Licht. Wenn die Pflanzen zu wenig Licht bekommen, werden sie lang und dünn.
* Schädlinge: Kontrolliert die Pflanzen regelmäßig auf Schädlinge und handelt frühzeitig, um einen Befall zu verhindern.
* Falsche Erde: Verwendet hochwertige Blumenerde oder mischt Kompost unter, um die Nährstoffversorgung zu gewährleisten.
* Zu wenig Platz: Gebt den Pflanzen genügend Platz zum Wachsen. Hängt die Flaschen mit ausreichend Abstand zueinander auf.
Grünkohl in der Küche: Vielseitig und gesund
Grünkohl ist nicht nur einfach anzubauen, sondern auch super gesund und vielseitig in der Küche einsetzbar. Er ist reich an Vitaminen, Mineralstoffen und Antioxidantien.
* Klassisch: Grünkohl mit Pinkel und Kassler ist ein norddeutscher Klassiker.
* Smoothie: Grünkohl im Smoothie ist ein gesunder und leckerer Start in den Tag.
* Chips: Grünkohlchips sind ein knuspriger und gesunder Snack
Conclusion
So, there you have it! Growing kale in plastic bottles isn’t just a quirky gardening experiment; it’s a genuinely effective and rewarding way to cultivate fresh, nutritious greens, even if you’re short on space or resources. We’ve walked through the entire process, from preparing your bottles to harvesting your vibrant kale leaves. The beauty of this method lies in its simplicity, sustainability, and accessibility. You’re not just recycling plastic; you’re transforming it into a mini-ecosystem that provides you with a continuous supply of healthy food.
Why is this DIY trick a must-try? Because it empowers you to take control of your food source, reduces your environmental footprint, and adds a touch of green to even the most urban environments. Imagine stepping outside your door and snipping off a handful of fresh kale for your morning smoothie or a quick salad. The taste is undeniably superior to store-bought kale, and the satisfaction of growing your own food is immeasurable.
But the fun doesn’t stop there! Feel free to experiment with different varieties of kale. Curly kale, Lacinato kale (also known as dinosaur kale), and Red Russian kale all thrive in container gardens. You can also try companion planting by adding herbs like thyme or rosemary to your bottle gardens. These herbs not only add flavor to your cooking but also help deter pests. Consider adding a small amount of worm castings to your soil mix for an extra boost of nutrients.
For those living in colder climates, you can easily move your bottle gardens indoors during the winter months. Place them near a sunny window or supplement with grow lights to ensure a continuous harvest throughout the year. You can also use larger bottles, like those from water coolers, to grow even more kale per container.
We’ve covered all the basics, but the real magic happens when you get your hands dirty and start experimenting. Don’t be afraid to tweak the process to suit your specific needs and environment. The most important thing is to have fun and learn along the way.
Growing kale in plastic bottles is more than just a gardening project; it’s a sustainable lifestyle choice. It’s a way to connect with nature, reduce waste, and nourish your body with fresh, homegrown goodness.
So, what are you waiting for? Gather your plastic bottles, grab some soil, and start growing your own kale today! We’re confident that you’ll be amazed by the results. And most importantly, we want to hear about your experience! Share your photos, tips, and challenges in the comments below. Let’s build a community of bottle-gardeners and inspire others to embrace this simple and sustainable way of growing their own food. Let us know what worked for you, what didn’t, and any creative variations you came up with. Your feedback will help us refine this guide and make it even better for future growers. Happy gardening!
Frequently Asked Questions (FAQ)
What kind of plastic bottles are best for growing kale?
Ideally, you should use food-grade plastic bottles, such as those that previously contained water, juice, or soda. Avoid bottles that held harsh chemicals or cleaning products, as these could contaminate the soil and affect the kale’s growth. PET (polyethylene terephthalate) bottles, commonly used for water and soda, are a good choice. Make sure to thoroughly clean the bottles with soap and water before using them. Also, consider the size of the bottle. Smaller bottles are suitable for individual kale plants, while larger bottles can accommodate multiple plants or larger varieties.
How often should I water my kale plants in plastic bottles?
The watering frequency depends on several factors, including the climate, the size of the bottle, and the type of soil you’re using. Generally, you should water your kale plants when the top inch of soil feels dry to the touch. During hot and dry weather, you may need to water them daily, while in cooler or more humid conditions, you can water them every few days. Avoid overwatering, as this can lead to root rot. Ensure that your bottles have adequate drainage holes to prevent water from pooling at the bottom. A good way to check if your kale needs water is to lift the bottle; if it feels light, it’s likely time to water.
What type of soil is best for growing kale in plastic bottles?
A well-draining potting mix is essential for growing healthy kale in plastic bottles. Avoid using garden soil, as it can be too heavy and compact, hindering drainage and root growth. A good potting mix should contain a blend of peat moss, perlite, and vermiculite. You can also add compost or aged manure to enrich the soil with nutrients. Consider adding a slow-release fertilizer to the potting mix to provide a steady supply of nutrients to your kale plants. The ideal pH for kale is between 6.0 and 7.5, so you may want to test your soil and adjust it accordingly.
How much sunlight does kale need when grown in plastic bottles?
Kale thrives in full sun, which means it needs at least 6 hours of direct sunlight per day. However, it can also tolerate partial shade, especially in hot climates. If you’re growing kale indoors, place your bottle gardens near a sunny window or supplement with grow lights. Rotate the bottles regularly to ensure that all sides of the plants receive adequate sunlight. If your kale plants are not getting enough sunlight, they may become leggy and produce fewer leaves.
How do I fertilize my kale plants in plastic bottles?
Kale is a heavy feeder, so it’s important to fertilize it regularly to ensure healthy growth. You can use a balanced liquid fertilizer, such as a 10-10-10 or 20-20-20, diluted to half strength. Apply the fertilizer every 2-3 weeks, following the instructions on the label. You can also use organic fertilizers, such as compost tea or fish emulsion. Avoid over-fertilizing, as this can burn the roots and damage the plants. A good way to monitor your kale’s nutrient levels is to observe the color of the leaves. Pale or yellow leaves may indicate a nutrient deficiency.
How do I deal with pests and diseases when growing kale in plastic bottles?
Kale can be susceptible to various pests and diseases, such as aphids, cabbage worms, and powdery mildew. To prevent these problems, inspect your plants regularly and take action at the first sign of trouble. You can remove aphids by hand or spray them with a strong stream of water. Cabbage worms can be controlled with Bacillus thuringiensis (Bt), a natural insecticide. To prevent powdery mildew, ensure good air circulation around your plants and avoid overwatering. You can also spray your kale with a solution of baking soda and water. Consider companion planting with herbs like rosemary or thyme, which can help deter pests.
When and how do I harvest kale from my plastic bottle garden?
You can start harvesting kale leaves when they are about 4-6 inches long. Harvest the outer leaves first, leaving the inner leaves to continue growing. This will encourage the plant to produce more leaves. To harvest, simply snip off the leaves with scissors or a knife. Avoid tearing the leaves, as this can damage the plant. You can harvest kale continuously throughout the growing season. After harvesting, wash the leaves thoroughly and store them in the refrigerator.
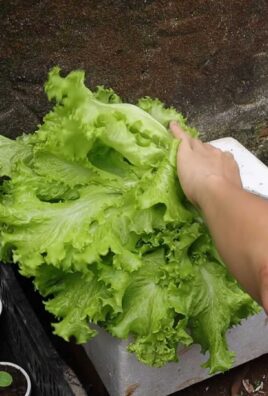
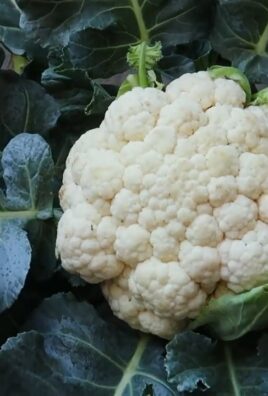
Can I grow other vegetables in plastic bottles besides kale?
Yes, absolutely! The plastic bottle gardening method is versatile and can be used to grow a variety of other vegetables, herbs, and even flowers. Some popular choices include lettuce, spinach, chard, herbs like basil and mint, strawberries, and even small varieties of tomatoes and peppers. The key is to choose plants that are well-suited to container gardening and to provide them with the appropriate soil, water, and sunlight. Experiment with different plants and see what works best for you!
How do I overwinter my kale plants in plastic bottles?
If you live in a region with cold winters, you can overwinter your kale plants in plastic bottles by bringing them indoors. Place them near a sunny window or supplement with grow lights. Water them less frequently during the winter months, as they will not be growing as actively. You can also protect your outdoor kale plants from frost by covering them with a blanket or tarp. In milder climates, kale can often survive the winter outdoors without any special protection.
Is growing kale in plastic bottles truly sustainable?
Yes, growing kale in plastic bottles is a sustainable practice for several reasons. First, it repurposes plastic bottles that would otherwise end up in landfills. Second, it reduces your reliance on commercially grown kale, which often involves transportation and packaging that contribute to environmental pollution. Third, it allows you to grow your own food locally, reducing your carbon footprint. Finally, it encourages a connection with nature and promotes a more mindful approach to food consumption. By growing your own kale in plastic bottles, you’re making a small but significant contribution to a more sustainable future.

Leave a Comment