

Growing Kailan at Home can seem daunting, especially if you’re new to gardening. But trust me, with a few simple tricks and a little bit of know-how, you can enjoy fresh, delicious Kailan straight from your backyard! Imagine stepping outside and harvesting vibrant, leafy greens for your stir-fries or salads – that’s the magic we’re unlocking today.
Kailan, also known as Chinese broccoli, has been a staple in Asian cuisine for centuries. Its slightly bitter, earthy flavor and crisp texture make it a versatile and nutritious addition to any meal. Beyond its culinary appeal, growing your own Kailan connects you to a rich agricultural heritage, allowing you to participate in a tradition passed down through generations.
Why should you bother with this DIY project? Well, for starters, store-bought vegetables often lack the freshness and flavor of homegrown produce. Plus, you have complete control over what goes into your garden, ensuring that your Kailan is free from harmful pesticides and chemicals. More importantly, growing Kailan at home is incredibly rewarding! There’s nothing quite like the satisfaction of nurturing a plant from seed to harvest. So, let’s dive into some easy-to-follow tips and tricks that will have you enjoying a bountiful Kailan harvest in no time!
Growing Kailan at Home: A Beginner’s Guide
Hey there, fellow gardening enthusiasts! Ever wanted to grow your own fresh, delicious kailan right in your backyard or even on your balcony? Well, you’ve come to the right place! I’m going to walk you through everything you need to know to successfully cultivate this leafy green at home. It’s easier than you think, and the reward of harvesting your own homegrown veggies is incredibly satisfying.
What is Kailan?
Kailan, also known as Chinese kale or Chinese broccoli, is a leafy green vegetable similar to broccoli but with larger, flatter leaves and thicker stems. It’s packed with nutrients and has a slightly bitter, earthy flavor that’s absolutely delicious when stir-fried, steamed, or even grilled. Plus, it’s a relatively easy plant to grow, making it perfect for beginner gardeners.
Why Grow Kailan at Home?
* Freshness: Nothing beats the taste of freshly harvested vegetables. You can pick your kailan right before you cook it, ensuring maximum flavor and nutrients.
* Cost-effective: Growing your own kailan can save you money in the long run, especially if you eat it regularly.
* Organic and healthy: You have complete control over what goes into your plants, so you can avoid harmful pesticides and chemicals.
* Therapeutic: Gardening is a great way to relieve stress and connect with nature.
* Impress your friends and family: Imagine serving a dish made with kailan you grew yourself!
Getting Started: What You’ll Need
Before we dive into the step-by-step instructions, let’s gather all the necessary materials. Here’s a list of what you’ll need:
* Kailan seeds: You can find these at most garden centers or online. Look for reputable seed suppliers.
* Seed starting trays or small pots: These are essential for starting your seeds indoors.
* Seed starting mix: This is a light, well-draining soil mix specifically designed for starting seeds.
* Potting soil: Once your seedlings are ready to transplant, you’ll need potting soil for their final containers or garden bed.
* Fertilizer: A balanced fertilizer will provide your kailan plants with the nutrients they need to thrive. I prefer using organic fertilizers.
* Watering can or hose: For watering your plants regularly.
* Gardening gloves: To protect your hands.
* Trowel or small shovel: For transplanting seedlings.
* Optional:
* Grow lights (if starting seeds indoors)
* Row covers (to protect plants from pests)
* Mulch (to retain moisture and suppress weeds)
Phase 1: Starting Your Kailan Seeds
This is where the magic begins! You can either direct sow your kailan seeds into the garden bed, but I prefer starting them indoors for a head start, especially if you live in an area with a shorter growing season.
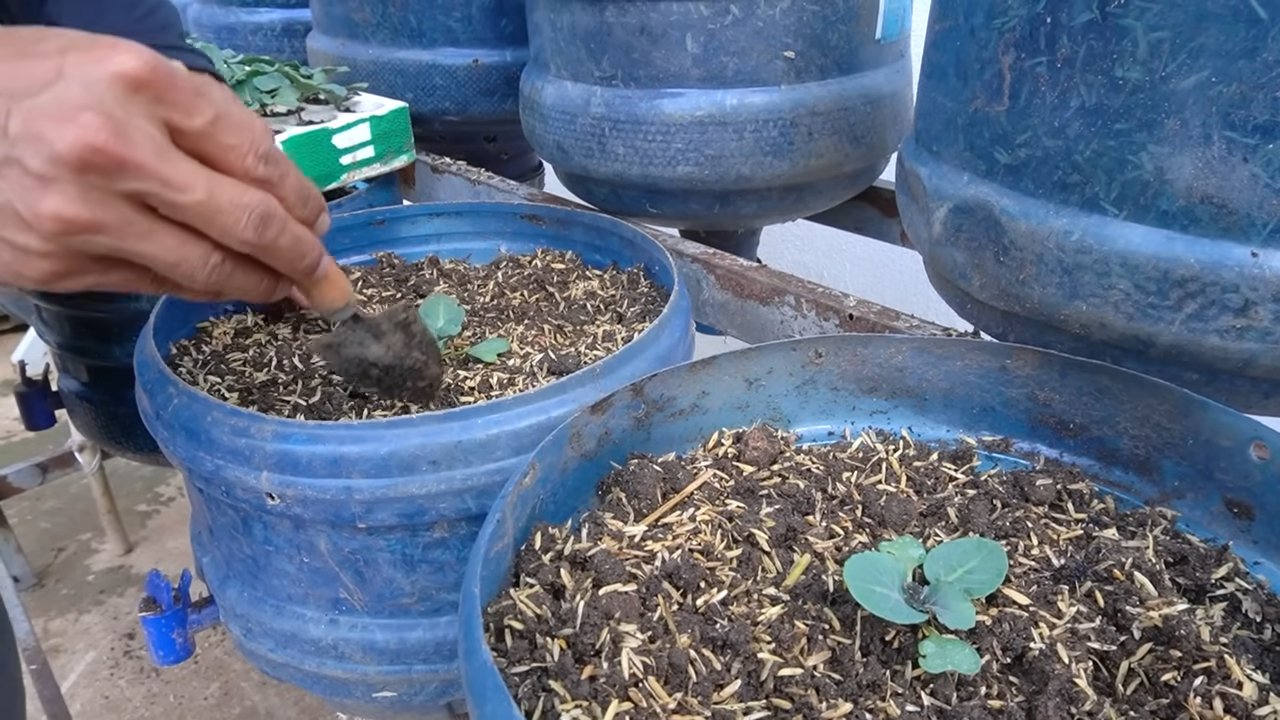
1. Prepare your seed starting trays or pots: Fill your seed starting trays or small pots with seed starting mix. Gently press down the soil to create a firm surface.
2. Sow the seeds: Sow 2-3 kailan seeds per cell or pot, about ¼ inch deep.
3. Water gently: Water the soil gently using a watering can or spray bottle. Make sure the soil is moist but not waterlogged.
4. Provide warmth and light: Place the seed starting trays or pots in a warm location, ideally between 65-75°F (18-24°C). If you don’t have a naturally warm spot, you can use a heat mat. If you’re starting seeds indoors, provide them with plenty of light. A sunny windowsill might work, but grow lights are even better. Aim for 14-16 hours of light per day.
5. Keep the soil moist: Check the soil moisture daily and water as needed to keep it consistently moist.
6. Wait for germination: Kailan seeds typically germinate in 5-10 days.
7. Thin the seedlings: Once the seedlings have emerged and have a couple of true leaves (the second set of leaves), thin them to one seedling per cell or pot. Choose the strongest, healthiest-looking seedling and snip off the others at the soil line.
Phase 2: Transplanting Your Kailan Seedlings
Once your seedlings have developed a few sets of true leaves and are about 3-4 inches tall, they’re ready to be transplanted into their final growing location.
1. Harden off the seedlings: Before transplanting, you need to “harden off” the seedlings. This means gradually exposing them to outdoor conditions to help them adjust to the sun, wind, and temperature changes. Start by placing the seedlings outdoors in a sheltered location for an hour or two each day, gradually increasing the amount of time they spend outside over the course of a week.
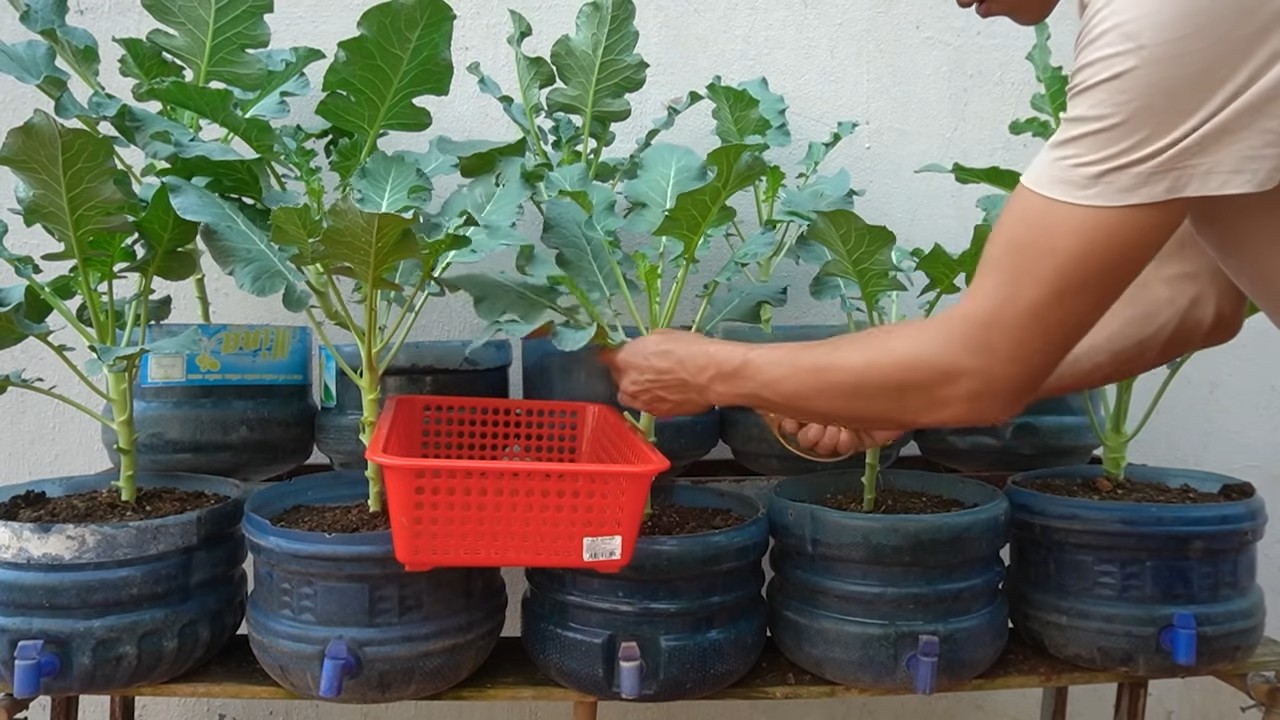
2. Prepare the planting site: Choose a sunny location in your garden or prepare a large container (at least 12 inches in diameter) filled with potting soil. Kailan prefers well-drained soil that is rich in organic matter. Amend the soil with compost or other organic matter if needed.
3. Transplant the seedlings: Dig small holes in the soil, spacing them about 12-18 inches apart. Gently remove the seedlings from their seed starting trays or pots and place them into the holes. Make sure the top of the root ball is level with the surrounding soil.
4. Water thoroughly: Water the newly transplanted seedlings thoroughly to help them settle in.
5. Mulch (optional): Apply a layer of mulch around the plants to help retain moisture and suppress weeds.
Phase 3: Caring for Your Kailan Plants
Now that your kailan plants are in their final growing location, it’s time to provide them with the care they need to thrive.
1. Water regularly: Kailan needs consistent moisture to grow well. Water deeply whenever the top inch of soil feels dry to the touch. Avoid overwatering, as this can lead to root rot.
2. Fertilize: Fertilize your kailan plants every 2-3 weeks with a balanced fertilizer. Follow the instructions on the fertilizer package. I like to use a liquid seaweed fertilizer, which is a great source of nutrients and trace minerals.
3. Weed regularly: Keep the area around your kailan plants free of weeds. Weeds compete with your plants for nutrients and water.
4. Protect from pests: Kailan can be susceptible to pests such as aphids, cabbage worms, and flea beetles. Inspect your plants regularly for signs of pests and take action if necessary. You can use organic pest control methods such as insecticidal soap or neem oil. Row covers can also help protect your plants from pests.
5. Provide support (optional): As your kailan plants grow taller, they may need some support to prevent them from falling over. You can use stakes or cages to provide support.
Phase 4: Harvesting Your Kailan
The best part! You can start harvesting your kailan leaves when they are about 6-8 inches long.
1. Harvesting leaves: Harvest the outer leaves first, leaving the inner leaves to continue growing. You can harvest kailan leaves continuously throughout the growing season.
2. Harvesting the entire plant: If you want to harvest the entire plant, cut it off at the base.
3. Enjoy your harvest: Wash the kailan leaves thoroughly and enjoy them in your favorite dishes. Kailan is delicious stir-fried, steamed, grilled, or added to soups and stews.
Tips for Success
* Choose the right variety: There are several different varieties of kailan available. Some varieties are more heat-tolerant than others. Choose a variety that is well-suited to your climate.
* Provide adequate sunlight: Kailan needs at least 6 hours of sunlight per day.
* Water deeply and regularly: Kailan needs consistent moisture to grow well.
* Fertilize regularly: Kailan is a heavy feeder and needs plenty of nutrients to thrive.
* Protect from pests: Kailan can be susceptible to pests, so take action to protect your plants.
* Succession planting: To ensure a continuous harvest of kailan, sow seeds every few weeks.
Troubleshooting
* Yellowing leaves: This could be a sign of nutrient deficiency or overwatering. Check the soil moisture and fertilize if needed.
* Stunted growth: This could be a sign of pest infestation or poor soil. Inspect your plants for pests and amend the soil with compost or other organic matter.
* Holes in leaves: This is likely caused by pests such as cabbage worms or flea beetles. Use organic pest control methods to get rid of the pests.
Growing kailan
Conclusion
So, there you have it! Growing your own kailan at home is not only achievable, but it’s also incredibly rewarding. From the vibrant green leaves gracing your garden to the fresh, crisp flavor enhancing your meals, the benefits are undeniable. This DIY approach to fresh produce empowers you to control the quality of your food, reduce your carbon footprint, and connect with nature in a tangible way.
But why is this DIY trick a must-try? Simply put, store-bought kailan often lacks the freshness and flavor intensity of homegrown varieties. It may have traveled long distances, losing valuable nutrients and developing a slightly bitter taste along the way. By growing your own, you’re guaranteed the freshest, most flavorful kailan possible, harvested at its peak ripeness. Plus, you’ll avoid the pesticides and herbicides that are sometimes used in commercial farming.
Beyond the basic method outlined, there’s plenty of room for experimentation. Consider these variations to personalize your kailan-growing experience:
* Succession Planting: Plant new seeds every few weeks to ensure a continuous harvest throughout the growing season. This prevents you from being overwhelmed with kailan all at once and ensures a steady supply for your culinary creations.
* Container Gardening: If you lack a traditional garden, don’t despair! Kailan thrives in containers, making it perfect for balconies, patios, or even sunny windowsills. Just be sure to choose a pot that’s at least 12 inches deep and wide to accommodate the plant’s root system.
* Companion Planting: Enhance your kailan’s growth and deter pests by planting it alongside beneficial companions like marigolds, nasturtiums, or dill. These plants attract pollinators and repel common kailan pests, creating a healthier and more productive growing environment.
* Different Varieties: Explore the diverse world of kailan varieties! From the classic Chinese kale to more exotic options, each offers a unique flavor profile and texture. Experiment with different varieties to find your personal favorite.
Growing Kailan at Home is more than just a gardening project; it’s an investment in your health, your well-being, and your connection to the natural world. It’s a chance to savor the simple pleasures of homegrown produce and experience the satisfaction of nurturing a plant from seed to table.
We wholeheartedly encourage you to give this DIY trick a try. Whether you’re a seasoned gardener or a complete beginner, you’ll find the process surprisingly easy and immensely rewarding. And once you’ve harvested your first batch of homegrown kailan, we’d love to hear about your experience! Share your tips, tricks, and culinary creations with us in the comments below. Let’s build a community of kailan enthusiasts and inspire others to embrace the joys of homegrown goodness. Happy gardening!
Frequently Asked Questions (FAQ)
What are the ideal growing conditions for kailan?
Kailan thrives in cool weather, making it an excellent choice for spring and fall gardens. It prefers full sun (at least 6 hours of direct sunlight per day) but can tolerate partial shade, especially in hotter climates. The ideal soil is well-draining, fertile, and rich in organic matter. A slightly acidic to neutral pH (around 6.0 to 7.0) is optimal. Consistent moisture is crucial, so water regularly, especially during dry spells.
How long does it take for kailan to grow from seed to harvest?
Generally, kailan takes about 50 to 70 days to mature from seed to harvest. However, this can vary depending on the variety, growing conditions, and climate. You can start harvesting leaves as soon as they are large enough to eat, typically when they are about 6 to 8 inches long. Regular harvesting encourages continued growth and leaf production.
What are some common pests and diseases that affect kailan, and how can I prevent them?
Kailan can be susceptible to several pests and diseases, including aphids, cabbage worms, flea beetles, and clubroot. To prevent these problems, consider the following:
* Crop Rotation: Avoid planting kailan in the same location year after year, as this can build up pest and disease populations in the soil.
* Companion Planting: As mentioned earlier, planting kailan alongside beneficial companions like marigolds, nasturtiums, or dill can help deter pests.
* Row Covers: Use row covers to physically protect your kailan plants from pests.
* Handpicking: Regularly inspect your plants for pests and handpick them off as needed.
* Organic Insecticides: If pest infestations become severe, consider using organic insecticides like neem oil or insecticidal soap.
* Good Soil Drainage: Ensure your soil is well-draining to prevent fungal diseases like clubroot.
* Proper Spacing: Provide adequate spacing between plants to improve air circulation and reduce the risk of disease.
Can I grow kailan indoors?
Yes, you can grow kailan indoors, but it requires some adjustments. You’ll need a sunny location, preferably a south-facing window, or supplemental lighting, such as a grow light. Use a well-draining potting mix and ensure the container is large enough to accommodate the plant’s root system. Water regularly and fertilize every few weeks with a balanced liquid fertilizer. Keep in mind that indoor-grown kailan may not be as productive as outdoor-grown kailan, but it’s still a viable option for those with limited outdoor space.
How do I harvest kailan, and how should I store it?
Harvest kailan by cutting the outer leaves close to the stem, leaving the inner leaves to continue growing. This allows for continuous harvesting over several weeks. To store kailan, wash the leaves thoroughly and pat them dry. Wrap them in a damp paper towel and store them in a plastic bag in the refrigerator. Properly stored kailan can last for up to a week.
Is kailan nutritious? What are its health benefits?
Yes, kailan is incredibly nutritious and packed with health benefits. It’s an excellent source of vitamins A, C, and K, as well as minerals like calcium, iron, and potassium. Kailan is also rich in antioxidants, which help protect the body against cell damage. Consuming kailan regularly can support immune function, bone health, and cardiovascular health. It’s also a good source of fiber, which aids in digestion and promotes satiety.
Can I eat kailan raw?
While kailan is often cooked, it can also be eaten raw, especially when the leaves are young and tender. Raw kailan has a slightly peppery flavor and can be added to salads, smoothies, or juices. Massaging the leaves with a little olive oil and lemon juice can help soften them and make them more palatable.
What are some delicious ways to cook with kailan?
Kailan is a versatile vegetable that can be used in a variety of dishes. Some popular cooking methods include:
* Stir-frying: Stir-frying kailan with garlic, ginger, and soy sauce is a quick and easy way to prepare it.
* Steaming: Steaming kailan preserves its nutrients and delicate flavor.
* Boiling: Boiling kailan is a simple method, but be careful not to overcook it, as it can become bitter.
* Roasting: Roasting kailan with olive oil and seasonings creates a crispy and flavorful side dish.
* Adding to Soups and Stews: Kailan can be added to soups and stews for added nutrients and flavor.
How do I save kailan seeds for future planting?
Saving kailan seeds requires allowing a plant to bolt (flower and produce seeds). Choose a healthy, vigorous plant and allow it to flower. Once the seed pods have dried and turned brown, harvest them and extract the seeds. Store the seeds in a cool, dry, and dark place until you’re ready to plant them. Keep in mind that kailan is cross-pollinated, so if you’re growing other members of the Brassica family (like broccoli or cabbage) nearby, the seeds may not be true to type.
What if my kailan leaves are turning yellow?
Yellowing leaves on kailan can indicate several issues. Overwatering or poor drainage can lead to root rot, causing leaves to yellow. Nutrient deficiencies, particularly nitrogen, can also cause yellowing. Pests like aphids can suck sap from the leaves, leading to discoloration. Check the soil moisture, ensure proper drainage, and fertilize with a balanced fertilizer if necessary. Inspect the plants for pests and take appropriate action. If the yellowing persists, consider testing your soil to determine if there are any nutrient imbalances.


Leave a Comment