

Growing Grape Tomatoes at Home can be incredibly rewarding, offering a burst of fresh, sweet flavor right from your backyard! Imagine popping sun-ripened grape tomatoes straight into your salad or snacking on them while you tend to your garden. Sounds idyllic, right? But sometimes, getting those tiny, juicy gems to thrive can feel like a challenge. That’s where a few clever DIY tricks come in handy, and I’m here to share my secrets with you.
For centuries, home gardening has been a source of sustenance and joy. From ancient Roman kitchen gardens to the victory gardens of World War II, growing your own food connects us to a rich history of self-sufficiency and resourcefulness. And while the humble grape tomato might seem like a modern convenience, its lineage traces back to the wild tomato varieties of South America, carefully cultivated and improved over generations.
Why do you need these DIY tricks for growing grape tomatoes at home? Well, let’s face it: pests, diseases, and unpredictable weather can wreak havoc on even the most well-intentioned gardener’s efforts. These simple hacks will help you protect your plants, maximize your yield, and ensure you’re enjoying a bountiful harvest of delicious grape tomatoes all season long. I’ll show you how to create the perfect growing environment, deter common pests naturally, and even boost your tomato production with a few easy-to-implement techniques. Get ready to transform your garden into a grape tomato paradise!
DIY: Growing Juicy Cherry Tomatoes Yourself – Guaranteed Success!
Hey everyone, are you tired of watery, tasteless tomatoes from the supermarket? Me too! That’s why today I’m showing you how to easily grow your own super delicious cherry tomatoes at home. It’s easier than you think, and the result is simply unbeatable! Let’s get started!
What you need for growing cherry tomatoes:
- Cherry tomato seeds: Organic quality is best, so you know what you’re getting. You can order them online or buy them at a garden center.
- Seed-starting mix: This is finer and has fewer nutrients than regular potting soil, making it ideal for the delicate seedlings.
- Starter pots or trays: Small pots made of peat or plastic are perfect. You can also use egg cartons or yogurt cups (with holes in the bottom!).
- Spray bottle: For gently watering the seeds and seedlings.
- Mini-greenhouse or clear plastic wrap: To keep humidity high and create an optimal climate for germination.
- Dibber or pencil: For carefully separating the seedlings.
- Larger pots or containers: For the tomato plants when they get bigger.
- Tomato soil: Nutrient-rich soil specifically developed for tomatoes.
- Tomato stakes or a trellis: To support the plants as they grow.
- Liquid fertilizer for tomatoes: For a bountiful harvest.
- Watering can: For watering the plants.
- A sunny spot: Tomatoes love the sun!
Sowing and Starting: The Foundation for a Bountiful Harvest
Starting the seeds is the first and most important step. This is where you determine if your tomato plants will grow strong and healthy. I usually start sowing in March or April so the plants have enough time to grow big before being planted outside.
Step-by-Step Guide to Sowing:
- Prepare the starter pots: Fill the starter pots or trays with seed-starting mix. Press the soil down lightly, but not too firmly.
- Sow the seeds: Place 2-3 seeds per pot on the soil. Cover the seeds with a thin layer of seed-starting mix (about 0.5 cm / 0.2 inches).
- Water: Gently moisten the soil with the spray bottle. The soil should be damp, but not wet.
- Mini-greenhouse effect: Place the starter pots in a mini-greenhouse or cover them with clear plastic wrap. This ensures high humidity and an optimal climate for germination.
- Location: Place the mini-greenhouse in a bright and warm spot (approx. 20-25°C / 68-77°F). Avoid direct sunlight, as the seedlings can get burned.
- Regular checks: Check the soil regularly and moisten it with the spray bottle if needed. Briefly ventilate the mini-greenhouse daily to prevent mold.
- Patience: The first seedlings should appear after about 1-2 weeks.
Pricking Out: Giving the Seedlings More Space
Once the seedlings have developed their first true leaves (after the initial seed leaves), it’s time to prick them out. This means you transplant the small seedlings into larger pots so they have more room to grow.
Step-by-Step Guide to Pricking Out:
- Prepare the pots: Fill larger pots (approx. 8-10 cm / 3-4 inches in diameter) with seed-starting mix.
- Separate the seedlings: Gently loosen the seedlings from the starter pots with a dibber or a pencil. Be careful not to damage the roots.
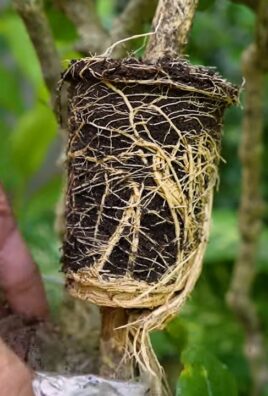
- Place the seedlings: Make a small hole in the soil of the new pots and place the seedlings inside. The seedlings can be planted a bit deeper than before, which encourages root formation.
- Water: Water the seedlings gently.
- Location: Place the pricked-out seedlings in a bright, but not too sunny, location.
Preparing for the Outdoors: Hardening Off the Plants
Before you plant the tomato plants outdoors or in larger containers, you need to harden them off. This means you slowly acclimate them to outdoor conditions, such as temperature differences and sun exposure.
Step-by-Step Guide to Hardening Off:
- Start acclimating: Place the tomato plants outdoors for a few hours during the day in a sheltered spot.
- Increase time: Extend the time they spend outdoors by a few hours each day.
- Direct sun: Slowly get the plants used to direct sunlight.
- Indoors at night: Bring the plants back inside at night as long as temperatures still drop below 10°C (50°F).
Planting Out: Finally, Out into Freedom!
After the last frost date (mid-May in Central Europe), the time has finally come: the tomato plants can be planted outdoors or in larger containers.
Step-by-Step Guide to Planting Out:
- Prepare the location: Choose a sunny and wind-protected spot for the tomato plants.
- Prepare the soil: Loosen the soil and mix it with compost or organic fertilizer.
- Planting holes: Dig planting holes that are slightly larger than the root balls of the tomato plants.
- Place the plants: Place the tomato plants in the holes and fill the holes with soil. Press the soil down lightly.
- Tomato stakes: Place tomato stakes or a trellis next to the plants to support them.
- Water: Water the plants thoroughly.
Care: So the Tomatoes Thrive
Proper care is crucial for a bountiful harvest. Here are a few tips you should follow:
- Watering: Water the tomato plants regularly, especially in dry weather. Avoid waterlogging. It’s best to water in the morning so the leaves can dry during the day.
- Fertilizing: Fertilize the tomato plants regularly with a liquid fertilizer for tomatoes. Start about 2 weeks after planting out.
- Removing suckers: Regularly remove the side shoots (suckers) that grow in the leaf axils. This promotes the growth of the main stems and the formation of fruit.
- Removing leaves: Remove the lower leaves that touch the ground. This helps prevent fungal diseases.
- Protection from rain: If possible, protect the tomato plants from rain, e.g., with a tomato roof. This reduces the risk of fungal diseases.
- Observation: Observe the plants regularly for pests and diseases. If necessary, you can use organic pesticides.
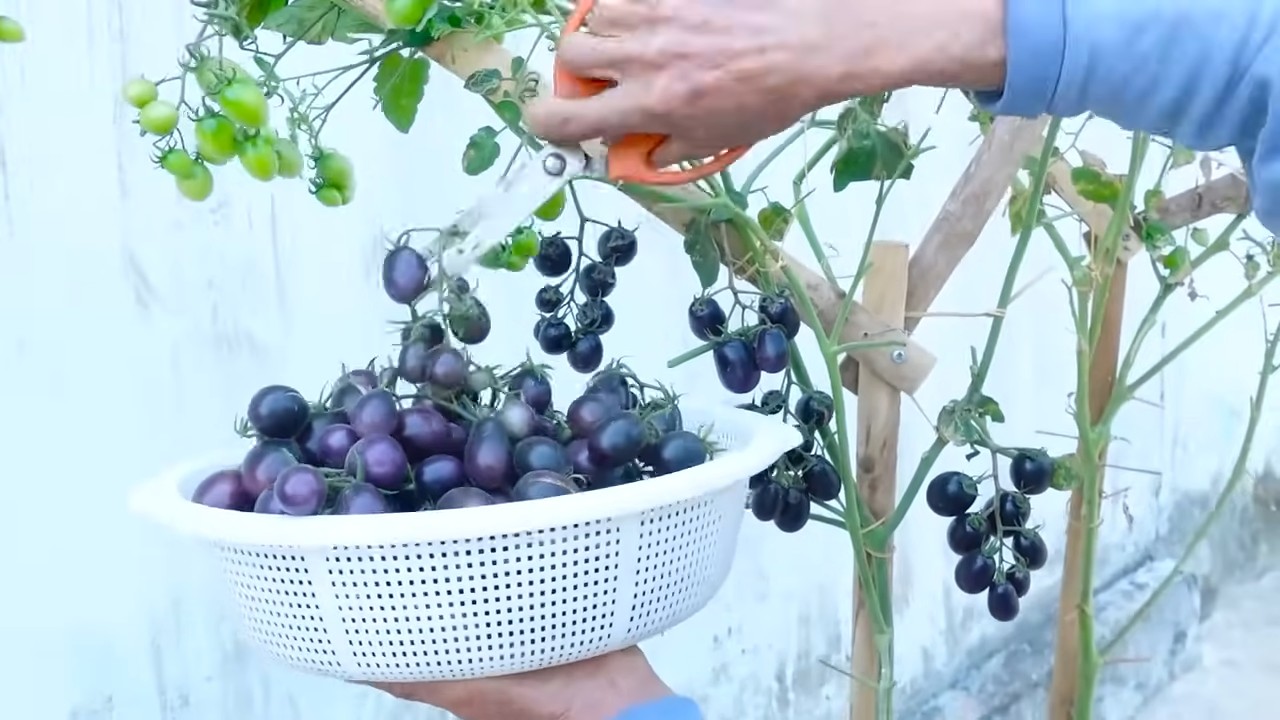
Harvest: The Reward for Your Effort
When the cherry tomatoes are nice and red and plump, it’s time for the harvest! Gently pick the tomatoes and enjoy

Conclusion
So, there you have it! Growing grape tomatoes at home is not only achievable, but it’s also incredibly rewarding. From the vibrant burst of flavor in every tiny tomato to the sheer satisfaction of nurturing your own food, this DIY project offers a multitude of benefits. We’ve walked you through the essential steps, from selecting the right seeds and preparing the soil to providing adequate sunlight and support. But why is this DIY trick a must-try?
Firstly, consider the unparalleled freshness. Store-bought grape tomatoes, while convenient, simply can’t compare to the taste of vine-ripened tomatoes picked straight from your own garden. The flavor is more intense, the texture is firmer, and the nutritional value is at its peak. Secondly, you have complete control over the growing process. You can choose organic methods, avoiding harmful pesticides and herbicides, ensuring that your family is consuming the healthiest possible produce. Thirdly, it’s a fantastic way to connect with nature and learn about the life cycle of plants. Gardening is a therapeutic activity that can reduce stress and improve your overall well-being. Finally, growing your own grape tomatoes can save you money in the long run, especially if you consume them frequently.
But the beauty of this DIY project lies in its adaptability. Feel free to experiment with different varieties of grape tomatoes. ‘Sungold’ offers a particularly sweet and fruity flavor, while ‘Juliet’ is known for its disease resistance and prolific yields. You can also try growing your tomatoes in different types of containers, such as hanging baskets or raised beds, depending on your space and preferences. Consider companion planting with herbs like basil or marigolds to deter pests and enhance the flavor of your tomatoes. Another variation is to try different methods of supporting your plants. While tomato cages are a popular choice, you can also use stakes or trellises to provide vertical support.
Don’t be afraid to get creative and personalize your growing experience. The most important thing is to have fun and learn along the way. Remember to monitor your plants regularly for signs of pests or diseases and take prompt action to address any issues. With a little patience and care, you’ll be rewarded with a bountiful harvest of delicious grape tomatoes that you can enjoy in salads, snacks, sauces, or simply straight from the vine.
We wholeheartedly encourage you to embark on this exciting DIY adventure. Growing grape tomatoes at home is a truly fulfilling experience that will bring joy and flavor to your life. So, grab your seeds, prepare your soil, and get ready to witness the magic of nature unfold in your own backyard. And most importantly, don’t forget to share your experiences with us! We’d love to hear about your successes, challenges, and any unique tips or tricks you discover along the way. Share your photos and stories on social media using #HomeGrownGrapeTomatoes and let’s inspire others to join the movement of growing their own food. Happy gardening!
Frequently Asked Questions (FAQ)
Q: How much sunlight do grape tomatoes need?
A: Grape tomatoes thrive in full sunlight, requiring at least 6-8 hours of direct sunlight per day. Insufficient sunlight can lead to leggy growth, reduced fruit production, and a less intense flavor. If you’re growing your tomatoes indoors, consider using grow lights to supplement natural sunlight. Position the grow lights about 6-12 inches above the plants and adjust the height as they grow.
Q: What kind of soil is best for growing grape tomatoes?
A: Grape tomatoes prefer well-draining soil that is rich in organic matter. A slightly acidic soil pH of 6.0 to 6.8 is ideal. You can improve the soil quality by adding compost, aged manure, or other organic amendments. Avoid heavy clay soils, as they can retain too much water and lead to root rot. If you have clay soil, amend it with plenty of organic matter and consider growing your tomatoes in raised beds or containers.
Q: How often should I water my grape tomato plants?
A: Water your grape tomato plants deeply and regularly, especially during hot and dry weather. Aim to keep the soil consistently moist but not waterlogged. Water at the base of the plants to avoid wetting the foliage, which can increase the risk of fungal diseases. A good rule of thumb is to water when the top inch of soil feels dry to the touch. Mulching around the plants can help retain moisture and suppress weeds.
Q: When should I fertilize my grape tomato plants?
A: Fertilize your grape tomato plants regularly throughout the growing season. Start with a balanced fertilizer (e.g., 10-10-10) when transplanting seedlings. Once the plants start to flower, switch to a fertilizer that is higher in phosphorus and potassium to promote fruit production. Follow the instructions on the fertilizer package carefully to avoid over-fertilizing, which can damage the plants. You can also use organic fertilizers, such as compost tea or fish emulsion.
Q: How do I prevent pests and diseases from affecting my grape tomato plants?
A: Prevention is key when it comes to pests and diseases. Start by choosing disease-resistant varieties of grape tomatoes. Practice good sanitation by removing any dead or diseased leaves and debris from around the plants. Water at the base of the plants to avoid wetting the foliage. Monitor your plants regularly for signs of pests or diseases and take prompt action to address any issues. Common pests that affect grape tomatoes include aphids, whiteflies, and tomato hornworms. You can control these pests with insecticidal soap, neem oil, or by handpicking them off the plants. Common diseases include early blight, late blight, and blossom end rot. You can prevent these diseases by providing good air circulation, avoiding overhead watering, and ensuring that your plants have adequate calcium.
Q: How do I deal with blossom end rot on my grape tomatoes?
A: Blossom end rot is a common problem that affects tomatoes, causing a dark, leathery spot to appear on the bottom of the fruit. It is caused by a calcium deficiency, which can be due to inconsistent watering, poor soil drainage, or a lack of calcium in the soil. To prevent blossom end rot, ensure that your plants receive consistent watering and that the soil is well-draining. You can also add calcium to the soil by amending it with bone meal or crushed eggshells. If you already have blossom end rot, remove the affected fruits and adjust your watering and fertilization practices.
Q: How do I know when my grape tomatoes are ripe?
A: Grape tomatoes are typically ready to harvest when they are fully colored and slightly soft to the touch. The color will vary depending on the variety, but most grape tomatoes will turn red, yellow, or orange when ripe. Gently squeeze the tomato; it should give slightly but not be mushy. The tomatoes should also detach easily from the vine.
Q: Can I grow grape tomatoes in containers?
A: Yes, grape tomatoes are well-suited for container gardening. Choose a container that is at least 12 inches in diameter and has drainage holes. Use a high-quality potting mix and provide adequate support for the plants, such as a tomato cage or stakes. Water and fertilize your container-grown tomatoes regularly, as they will dry out and deplete nutrients more quickly than tomatoes grown in the ground.
Q: What are some good companion plants for grape tomatoes?
A: Companion planting can help deter pests, attract beneficial insects, and improve the flavor of your tomatoes. Some good companion plants for grape tomatoes include basil, marigolds, onions, garlic, and carrots. Basil repels tomato hornworms and whiteflies, while marigolds deter nematodes and other soil pests. Onions and garlic can help repel aphids and other insects. Carrots can improve the soil structure and attract beneficial insects. Avoid planting tomatoes near brassicas (e.g., cabbage, broccoli, cauliflower), as they can compete for nutrients.

Leave a Comment