

Growing chives in the kitchen is easier than you might think, and I’m here to show you how! Forget those sad, wilted bunches from the grocery store – imagine snipping fresh, flavorful chives right from your windowsill whenever you need them. This simple DIY project will not only add a touch of green to your kitchen but also elevate your culinary creations.
For centuries, chives have been a staple in gardens and kitchens worldwide. Originating in Asia, they’ve been cherished for their delicate onion flavor and versatility in dishes. From garnishing soups and salads to adding a zing to omelets and dips, chives are a culinary workhorse. But beyond their flavor, they’re also incredibly easy to grow, making them perfect for even the most novice gardener.
In today’s busy world, having fresh herbs readily available can make all the difference. No more last-minute trips to the store or settling for dried herbs that lack that vibrant, fresh taste. Growing chives in the kitchen provides a sustainable and convenient way to enhance your meals. Plus, it’s a fun and rewarding project that anyone can enjoy. So, let’s dive in and discover the secrets to cultivating your own thriving chive patch indoors!

Chives in der Küche ziehen: Dein DIY-Guide für frische Kräuter
Hey Kräuterfreund! Hast du Lust, immer frische Schnittlauch griffbereit zu haben, ohne ständig zum Supermarkt rennen zu müssen? Dann bist du hier genau richtig! Ich zeige dir, wie du ganz einfach Schnittlauch in deiner Küche ziehen kannst. Es ist super easy und macht richtig Spaß!
Was du brauchst:
* Schnittlauch-Samen oder Schnittlauch-Pflanze: Du kannst entweder mit Samen starten oder eine kleine Pflanze kaufen, um schneller Ergebnisse zu sehen.
* Einen Topf oder Behälter: Wähle einen Topf mit guter Drainage, der mindestens 15 cm Durchmesser hat.
* Hochwertige Blumenerde: Schnittlauch mag nährstoffreiche Erde.
* Wasser: Am besten abgestandenes Leitungswasser oder Regenwasser.
* Einen sonnigen Standort: Schnittlauch liebt Licht! Ein Fensterbrett ist ideal.
* Optional: Anzuchttöpfe, Sprühflasche, Dünger (organisch).
Schnittlauch aus Samen ziehen:
Wenn du mit Samen startest, brauchst du etwas mehr Geduld, aber es ist eine tolle Möglichkeit, den ganzen Prozess von Anfang an zu erleben.
Aussaat vorbereiten:
1. Anzuchttöpfe vorbereiten: Fülle kleine Anzuchttöpfe mit Anzuchterde. Diese ist besonders fein und nährstoffarm, ideal für Keimlinge.
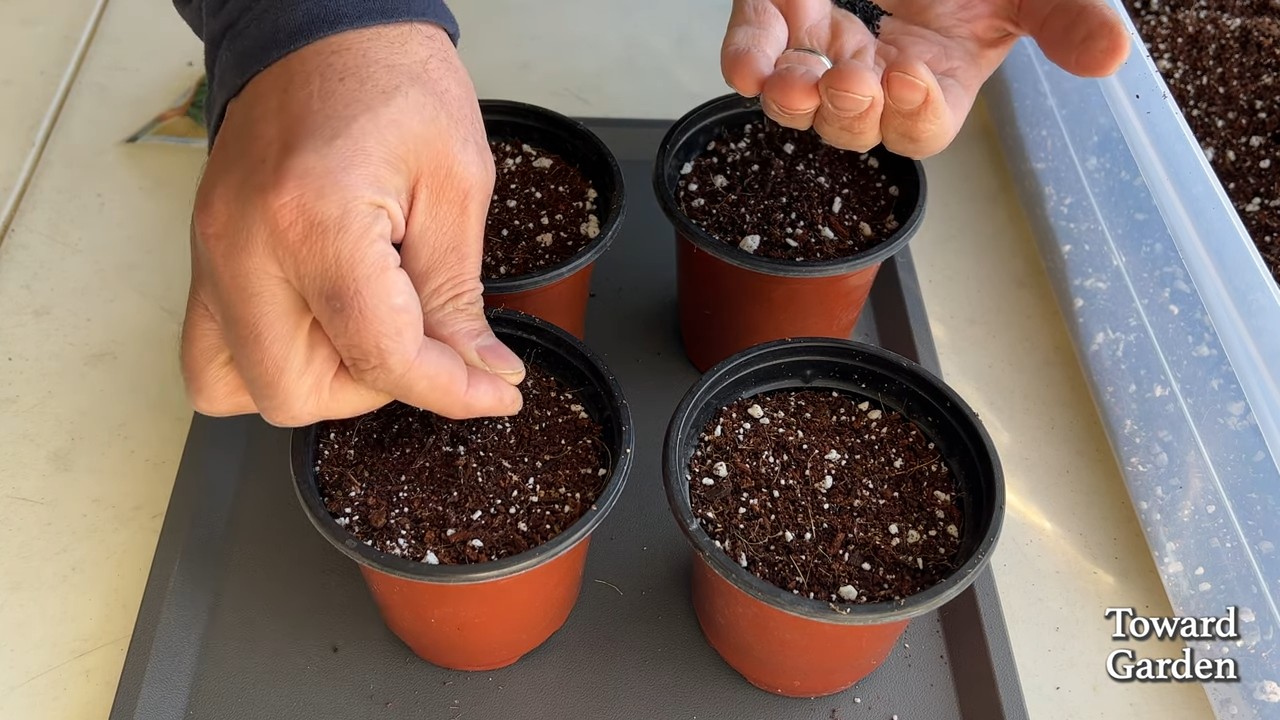
2. Samen aussäen: Verteile 2-3 Samen pro Topf. Drücke sie leicht an und bedecke sie mit einer dünnen Schicht Erde (ca. 0,5 cm).
3. Bewässern: Befeuchte die Erde vorsichtig mit einer Sprühflasche. Sie sollte feucht, aber nicht nass sein.
4. Warm und hell stellen: Stelle die Anzuchttöpfe an einen warmen und hellen Ort. Eine Temperatur von 18-20°C ist ideal. Ein Mini-Gewächshaus oder eine durchsichtige Plastikhaube hilft, die Feuchtigkeit zu halten.
Pflege der Keimlinge:
1. Feuchtigkeit halten: Achte darauf, dass die Erde immer leicht feucht bleibt. Besprühe sie regelmäßig mit Wasser.
2. Lüften: Wenn du ein Mini-Gewächshaus oder eine Plastikhaube verwendest, lüfte es regelmäßig, um Schimmelbildung zu vermeiden.
3. Vereinzeln: Sobald die Keimlinge ein paar Zentimeter groß sind und die ersten richtigen Blätter haben, kannst du sie vereinzeln. Das bedeutet, du entfernst die schwächeren Pflänzchen, sodass nur noch ein kräftiges Pflänzchen pro Topf übrig bleibt.
Umtopfen:
1. Vorbereiten: Fülle den größeren Topf mit Blumenerde.
2. Umpflanzen: Hebe die kleinen Schnittlauchpflanzen vorsichtig aus den Anzuchttöpfen und setze sie in den größeren Topf. Achte darauf, dass die Wurzeln nicht beschädigt werden.
3. Angießen: Gieße die Pflanzen nach dem Umtopfen gut an.
Schnittlauch aus einer Pflanze ziehen:
Wenn du es etwas schneller und einfacher haben möchtest, kannst du eine kleine Schnittlauchpflanze im Gartencenter oder Supermarkt kaufen.
1. Topf vorbereiten: Fülle den Topf mit Blumenerde.
2. Pflanze umtopfen: Hebe die Schnittlauchpflanze vorsichtig aus dem alten Topf und setze sie in den neuen Topf. Achte darauf, dass die Wurzeln nicht beschädigt werden.
3. Angießen: Gieße die Pflanze nach dem Umtopfen gut an.
Die richtige Pflege:
Egal, ob du mit Samen oder einer Pflanze startest, die richtige Pflege ist entscheidend für einen gesunden und üppigen Schnittlauch.
1. Standort: Schnittlauch liebt Sonne! Stelle den Topf an einen sonnigen Standort, z.B. auf ein Fensterbrett. Mindestens 6 Stunden Sonnenlicht pro Tag sind ideal.
2. Bewässerung: Gieße den Schnittlauch regelmäßig, aber vermeide Staunässe. Die Erde sollte immer leicht feucht sein. Im Sommer musst du möglicherweise täglich gießen.
3. Düngung: Dünge den Schnittlauch alle paar Wochen mit einem organischen Dünger. Das sorgt für kräftiges Wachstum und aromatische Blätter.
4. Schneiden: Schneide den Schnittlauch regelmäßig, um das Wachstum anzuregen. Schneide die Halme am besten kurz über dem Boden ab. Keine Sorge, er wächst schnell wieder nach!
5. Blüten entfernen: Wenn der Schnittlauch blüht, solltest du die Blüten entfernen. Das kostet die Pflanze unnötig Kraft und die Blätter werden zäh.
Häufige Probleme und Lösungen:
Auch beim Schnittlauchziehen können mal Probleme auftreten. Hier sind ein paar Tipps, wie du sie lösen kannst:
* Gelbe Blätter: Gelbe Blätter können ein Zeichen für zu viel oder zu wenig Wasser sein. Überprüfe die Feuchtigkeit der Erde und passe die Bewässerung entsprechend an.
* Schimmel: Schimmelbildung kann durch zu hohe Luftfeuchtigkeit entstehen. Lüfte den Raum regelmäßig und vermeide Staunässe.
* Schädlinge: Schnittlauch kann von Blattläusen oder anderen Schädlingen befallen werden. Sprühe die Pflanze mit einer milden Seifenlauge ab oder verwende ein biologisches Schädlingsbekämpfungsmittel.
* Langsames Wachstum: Langsames Wachstum kann an einem Mangel an Nährstoffen liegen. Dünge den Schnittlauch regelmäßig mit einem organischen Dünger.
Schnittlauch ernten und verwenden:
Das Beste am Schnittlauchziehen ist natürlich die Ernte!
1. Ernten: Schneide die Schnittlauchhalme mit einer Schere kurz über dem Boden ab.
2. Verwenden: Schnittlauch ist vielseitig einsetzbar. Er passt hervorragend zu Salaten, Suppen, Eierspeisen, Dips und vielem mehr. Du kannst ihn frisch verwenden oder einfrieren.
3. Aufbewahren: Frischen Schnittlauch kannst du im Kühlschrank in einem feuchten Tuch für ein paar Tage aufbewahren. Zum Einfrieren schneidest du ihn klein und gibst ihn in einen Gefrierbeutel oder eine Eiswürfelform mit Wasser.
Schnittlauch überwintern:
Schnittlauch ist winterhart, aber im Topf braucht er etwas Schutz.
1. Rückschnitt: Schneide den Schnittlauch im Herbst kurz über dem Boden ab.
2. Schutz: Stelle den Topf an einen geschützten Ort, z.B. an eine Hauswand oder in einen Schuppen.
3. Bewässerung: Gieße den Schnittlauch im Winter nur sparsam, damit die Erde nicht austrocknet.
4. Frühjahr: Sobald die Temperaturen steigen, kannst du den Schnittlauch wieder an einen sonnigen Standort stellen und regelmäßig gießen und düngen.
Zusätzliche Tipps und Tricks:
* Schnittlauch vermehren: Du kannst Schnittlauch auch durch Teilung vermehren. Grabe die Pflanze im Frühjahr oder Herbst aus und teile den Wurzelballen in mehrere Stücke. Pflanze die Stücke dann in separate Töpfe.
* Schnittlauch im Freien: Wenn du einen Garten hast, kannst du Schnittlauch auch im Freien anbauen. Wähle einen sonnigen Standort mit gut durchlässigem Boden.
* Schnittlauch als Insektenschutz: Schnittlauch kann helfen, Schädlinge von anderen Pflanzen fernzuhalten. Pflanze ihn einfach in der Nähe von Rosen oder Erdbeeren.
* Schnittlauchblüten: Die Blüten des Schnittlauchs sind essbar und haben einen milden Knoblauchgeschmack. Du kannst sie für Salate oder als Dekoration verwenden.
Ich hoffe, dieser Guide hilft dir dabei, deinen eigenen Schnittlauch in der Küche zu ziehen. Es ist wirklich einfach und macht Spaß! Viel Erfolg und guten Appetit!
Conclusion
So, there you have it! Growing chives in your kitchen is not just a whimsical idea; it’s a practical, economical, and incredibly rewarding experience. We’ve walked you through the simple steps, from choosing the right chives to providing the optimal environment for their growth. But why is this DIY trick a must-try?
Firstly, consider the unparalleled freshness. Imagine snipping vibrant, flavorful chives directly from your kitchen garden to garnish your omelets, salads, soups, or baked potatoes. The difference in taste compared to store-bought chives is remarkable. The intense, oniony zest is simply unmatched, elevating your culinary creations to a whole new level.
Secondly, think about the cost savings. Those little bunches of chives at the grocery store can add up quickly. By growing your own, you’re making a one-time investment that yields a continuous supply of fresh herbs. It’s a sustainable and budget-friendly way to enhance your meals.
Thirdly, and perhaps most importantly, growing chives in your kitchen is incredibly easy and satisfying. Even if you don’t have a green thumb, you can succeed with this project. It’s a low-maintenance plant that thrives indoors with minimal effort. Watching your chives sprout and flourish is a truly rewarding experience, connecting you to the natural world in a small but meaningful way.
But don’t stop there! Feel free to experiment with variations. Try growing different varieties of chives, such as garlic chives, for a slightly different flavor profile. You can also use different types of containers, from terracotta pots to repurposed jars, to add a touch of personality to your kitchen garden. Consider companion planting with other herbs like parsley or basil to create a mini indoor herb garden.
Ready to embark on your chive-growing adventure? We wholeheartedly encourage you to give this DIY trick a try. It’s a simple, affordable, and rewarding way to add fresh flavor to your meals and a touch of green to your kitchen.
And now, we want to hear from you! Share your experiences, tips, and photos of your kitchen-grown chives in the comments below. Let’s create a community of chive enthusiasts and inspire others to discover the joys of growing their own herbs. What are you waiting for? Get planting!
Frequently Asked Questions (FAQ)
What kind of chives should I grow?
There are several varieties of chives available, each with its own unique characteristics. Common chives (Allium schoenoprasum) are the most popular choice, known for their mild onion flavor and delicate green leaves. Garlic chives (Allium tuberosum) offer a stronger, more garlicky taste and have flat, broader leaves. Siberian chives (Allium sibiricum) are larger and more robust than common chives, with a slightly more pungent flavor. Ultimately, the best type of chives to grow depends on your personal preferences and culinary needs. Consider trying a few different varieties to see which ones you enjoy the most.
How much sunlight do chives need?
Chives thrive in bright, indirect sunlight. Ideally, they should receive at least 6 hours of sunlight per day. If you don’t have a sunny windowsill, you can supplement with a grow light. Place the grow light about 6-12 inches above the plants and keep it on for 12-14 hours per day. Insufficient sunlight can lead to leggy growth and a weaker flavor. Rotate your chives regularly to ensure that all sides receive adequate light.
What kind of soil should I use for growing chives?
Chives prefer well-draining soil that is rich in organic matter. A good potting mix specifically formulated for herbs is an excellent choice. You can also create your own potting mix by combining equal parts of potting soil, compost, and perlite or vermiculite. Avoid using heavy clay soil, as it can retain too much moisture and lead to root rot. Ensure that your container has drainage holes to prevent waterlogging.
How often should I water my chives?
Water your chives regularly, keeping the soil consistently moist but not soggy. Check the soil moisture by sticking your finger about an inch into the soil. If it feels dry, it’s time to water. Avoid overwatering, as this can lead to root rot. During the warmer months, you may need to water more frequently. In the winter, when growth slows down, you can reduce watering.
How do I harvest chives?
Harvesting chives is easy and encourages continued growth. Simply snip off the leaves with scissors or kitchen shears, cutting them about an inch above the soil line. Avoid cutting off all the leaves at once, as this can weaken the plant. Harvest regularly to promote new growth and prevent the chives from flowering. Flowering chives can develop a tougher texture and a less desirable flavor.
Can I grow chives from seed?
Yes, you can grow chives from seed. Start seeds indoors 6-8 weeks before the last expected frost. Sow the seeds about ¼ inch deep in a seed-starting mix. Keep the soil moist and warm (around 70-75°F). Once the seedlings have developed a few sets of true leaves, you can transplant them into individual pots or directly into your garden. Alternatively, you can sow chive seeds directly into your garden in the spring after the last frost.
How do I fertilize my chives?
Chives are not heavy feeders, but they benefit from occasional fertilization. Use a balanced liquid fertilizer diluted to half strength every 2-3 weeks during the growing season. Alternatively, you can amend the soil with compost or worm castings to provide a slow-release source of nutrients. Avoid over-fertilizing, as this can lead to excessive foliage growth at the expense of flavor.
Why are my chives turning yellow?
Yellowing chives can be caused by several factors, including overwatering, underwatering, nutrient deficiencies, or pest infestations. Check the soil moisture to ensure that you are watering correctly. If the soil is consistently soggy, reduce watering. If the soil is dry, increase watering. If you suspect a nutrient deficiency, fertilize with a balanced liquid fertilizer. Inspect the plants for pests, such as aphids or spider mites, and treat accordingly.
Can I freeze chives?
Yes, you can freeze chives to preserve them for later use. Wash and dry the chives thoroughly. Chop them into small pieces and spread them out on a baking sheet lined with parchment paper. Freeze for about 2 hours, or until the chives are frozen solid. Transfer the frozen chives to a freezer bag or airtight container and store them in the freezer for up to 6 months. Frozen chives may lose some of their texture, but they will retain their flavor.
My chives are flowering. Should I remove the flowers?
While chive flowers are edible and can add a beautiful touch to salads, they can also detract from the flavor and texture of the leaves. If you prefer a milder flavor, it’s best to remove the flowers as soon as they appear. Simply snip them off with scissors or kitchen shears. Removing the flowers will also encourage the plant to produce more leaves. You can use the flowers as a garnish or add them to vinegars or oils for a subtle onion flavor.

Leave a Comment