

Growing chili peppers from seeds can seem daunting, but trust me, it’s one of the most rewarding experiences a home gardener can have! Imagine biting into a fiery chili you nurtured from a tiny seed – the flavor is simply unmatched. Have you ever wondered how ancient civilizations like the Aztecs and Mayans cultivated these spicy gems? Chili peppers have a rich history, dating back thousands of years, and were even used as currency and medicine.
But beyond the historical significance, why should you embark on this fiery adventure? Well, for starters, store-bought chili peppers can be expensive and often lack the intense flavor of homegrown varieties. Plus, growing chili peppers from seeds allows you to choose from a vast array of unique and exotic peppers that you might never find at your local grocery store.
In this DIY guide, I’m going to share my tried-and-true secrets for successfully germinating chili pepper seeds and nurturing them into thriving plants. We’ll cover everything from seed selection and soil preparation to transplanting and ongoing care. Get ready to unleash your inner chili pepper pro and add some serious spice to your life!
Growing Fiery Chili Peppers From Seed: My Foolproof Guide
Okay, chiliheads, let’s get down to business! I’m going to walk you through my tried-and-true method for starting chili peppers from seed. Trust me, there’s nothing quite like the satisfaction of harvesting peppers you’ve nurtured from tiny specks. This guide is detailed, so even if you’re a complete beginner, you’ll be growing your own spicy bounty in no time.
Choosing Your Chili Pepper Varieties
Before we even think about soil, let’s talk peppers! The world of chili peppers is vast and exciting. Here’s what I consider when choosing my varieties:
* Heat Level: This is the big one! Do you want a gentle warmth, a fiery kick, or something that will melt your face off? Research the Scoville Heat Units (SHU) of different peppers. Jalapeños are mild, habaneros are hot, and ghost peppers are… well, let’s just say they’re not for the faint of heart.
* Flavor Profile: Peppers aren’t just about heat; they have distinct flavors. Some are fruity, some are smoky, and some are earthy. Think about what flavors you enjoy and how you plan to use the peppers.
* Plant Size and Growing Conditions: Consider your space and climate. Some peppers thrive in containers, while others need more room. Some need a long growing season, so you might need to start them indoors earlier.
* Seed Source: Buy your seeds from a reputable source. This ensures you’re getting viable seeds of the correct variety. I’ve had good luck with online seed companies specializing in chili peppers.
Gathering Your Supplies
Alright, now that we’ve chosen our peppers, let’s gather our supplies. Here’s what you’ll need:
* Chili Pepper Seeds: Obviously!
* Seed Starting Trays or Small Pots: I prefer seed starting trays with a humidity dome. They help keep the soil moist and warm. Small pots work too, but you’ll need to find a way to maintain humidity.
* Seed Starting Mix: This is crucial! Don’t use regular potting soil. Seed starting mix is light, airy, and sterile, which is perfect for delicate seedlings.
* Heat Mat (Optional but Recommended): Chili peppers love warmth! A heat mat will significantly improve germination rates.
* Grow Lights (Optional but Recommended): If you’re starting your seeds indoors, grow lights will provide the seedlings with the light they need to grow strong and healthy.
* Spray Bottle: For misting the soil.
* Water: Use distilled or filtered water to avoid introducing harmful chemicals to your seedlings.
* Labels: To keep track of which peppers are which! Trust me, you’ll thank yourself later.
* Small Fan: To provide gentle air circulation and prevent damping-off (a fungal disease).
* Thermometer: To monitor the soil temperature.
* Tweezers: For handling small seeds.
Sowing Your Chili Pepper Seeds
This is where the magic happens! Follow these steps carefully:
1. Hydrate the Seed Starting Mix: Moisten the seed starting mix with water until it’s damp but not soggy. You want it to hold together when you squeeze it, but not drip water.
2. Fill the Seed Starting Trays or Pots: Fill your seed starting trays or pots with the moistened seed starting mix. Gently press down on the soil to remove any air pockets.
3. Sow the Seeds: Make a small indentation in the soil (about 1/4 inch deep) in each cell or pot. Place one or two seeds in each indentation. I usually sow two seeds per cell just in case one doesn’t germinate.
4. Cover the Seeds: Gently cover the seeds with a thin layer of seed starting mix.
5. Mist the Soil: Use a spray bottle to mist the surface of the soil. You want to keep the soil moist but not waterlogged.
6. Label Everything: Label each tray or pot with the variety of chili pepper you’re planting.
7. Place on a Heat Mat (Optional): Place the seed starting trays or pots on a heat mat. The ideal soil temperature for chili pepper germination is between 80-90°F (27-32°C).
8. Cover with a Humidity Dome (If Using): Cover the seed starting trays with a humidity dome. This will help keep the soil moist and warm.
9. Place Under Grow Lights (Optional): If you’re using grow lights, place the seed starting trays or pots under the lights. Position the lights a few inches above the trays.
Germination and Early Seedling Care
Now comes the waiting game! Chili peppers can be slow to germinate, so be patient.
1. Monitor the Soil Moisture: Check the soil moisture daily. Mist the soil as needed to keep it moist but not soggy.
2. Maintain Warmth: Keep the soil temperature consistently warm. Use a heat mat and thermometer to monitor the temperature.
3. Provide Light: If you’re using grow lights, keep them on for 14-16 hours per day.
4. Ventilate (If Using a Humidity Dome): Once the seeds start to germinate, gradually increase the ventilation by opening the vents on the humidity dome. This will help prevent damping-off.
5. Remove the Humidity Dome: Once most of the seeds have germinated, remove the humidity dome completely.
6. Thin the Seedlings: If you planted two seeds per cell and both germinated, thin the seedlings by snipping off the weaker one at the soil line with scissors. This will give the stronger seedling more room to grow.
7. Provide Air Circulation: Place a small fan near the seedlings to provide gentle air circulation. This will help prevent damping-off and strengthen the stems.
Transplanting Your Chili Pepper Seedlings
Once your seedlings have developed a few sets of true leaves (the leaves that look like miniature versions of the adult leaves), it’s time to transplant them into larger pots.
1. Prepare the Pots: Choose pots that are at least 4 inches in diameter. Fill the pots with a good quality potting mix.
2. Gently Remove the Seedlings: Gently remove the seedlings from the seed starting trays or pots. Be careful not to damage the roots. I use a small spoon or fork to help loosen the soil around the seedlings.
3. Plant the Seedlings: Make a hole in the potting mix in each pot. Place the seedling in the hole and gently backfill with potting mix.
4. Water the Seedlings: Water the seedlings thoroughly after transplanting.
5. Harden Off the Seedlings: Before planting your seedlings outdoors, you need to harden them off. This means gradually exposing them to outdoor conditions over a period of 7-10 days. Start by placing the seedlings in a sheltered location outdoors for a few hours each day. Gradually increase the amount of time they spend outdoors each day.
6. Transplant Outdoors: After hardening off the seedlings, you can transplant them into your garden or into larger containers. Choose a sunny location with well-drained soil.
Ongoing Care for Your Chili Pepper Plants
Congratulations! You’ve successfully started your chili pepper plants from seed. Now, here’s how to keep them thriving:
* Watering: Water your chili pepper plants regularly, especially during hot, dry weather. Allow the soil to dry out slightly between waterings.
* Fertilizing: Fertilize your chili pepper plants every 2-3 weeks with a balanced fertilizer.
* Sunlight: Chili peppers need at least 6-8 hours of sunlight per day.
* Pest Control: Keep an eye out for pests such as aphids, spider mites, and whiteflies. Treat infestations promptly with insecticidal soap or neem oil.
* Support: As your chili pepper plants grow, they may need support to prevent them from falling over. Use stakes or cages to support the plants.
* Pruning: Prune your chili pepper plants to encourage bushier growth and more fruit production.
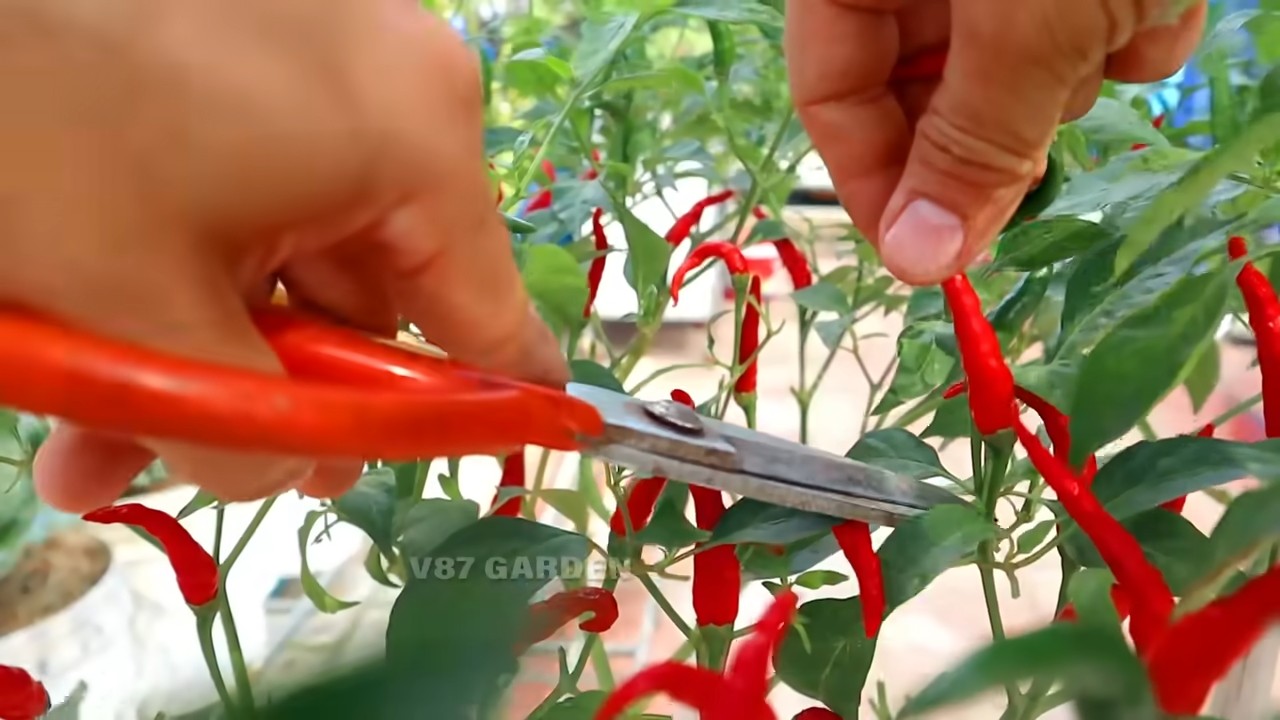
* Harvesting: Harvest your chili peppers when they are fully ripe. The color of the peppers will depend on the variety.
Troubleshooting Common Problems
Even with the best care, you might encounter some problems along the way. Here are a few common issues and how to address them:
* Damping-Off: This fungal disease can kill seedlings quickly. Prevent it by providing good air circulation and avoiding overwatering. If you see signs of damping-off (wilting, browning stems), remove the affected seedlings immediately.
* Leggy Seedlings: Leggy seedlings are tall and spindly with weak stems. This is usually caused by insufficient light. Provide more light by using grow lights or moving the seedlings to a sunnier location

Conclusion
So, there you have it! Growing chili peppers from seeds might seem daunting at first, but with a little patience and the right approach, you can cultivate a thriving chili pepper garden right in your own home or backyard. This DIY trick isn’t just about saving money; it’s about connecting with the food you eat, understanding the growing process, and experiencing the immense satisfaction of nurturing a plant from a tiny seed to a fiery fruit.
Why is this a must-try? Because it empowers you to control the entire process, from seed selection to harvest. You can choose heirloom varieties, experiment with different levels of heat, and even create your own unique chili pepper blends. Plus, you’ll avoid the pesticides and chemicals often used in commercial farming, ensuring you’re consuming the healthiest and most flavorful peppers possible.
Consider these variations to personalize your chili pepper growing journey:
* **Hydroponics:** For a soilless approach, explore hydroponic systems. This method can accelerate growth and maximize yields, especially in limited spaces.
* **Container Gardening:** If you’re short on space, container gardening is your best friend. Choose pots that are at least 5 gallons in size and ensure they have good drainage.
* **Grafting:** For the adventurous gardener, grafting allows you to combine the desirable traits of two different chili pepper plants, such as disease resistance and fruit size.
* **Fermenting:** Once you’ve harvested your bounty, consider fermenting your chili peppers to create delicious and probiotic-rich hot sauces or pastes.
* **Different Varieties:** Don’t limit yourself to just one type of chili pepper! Experiment with a range of varieties, from mild bell peppers to scorching habaneros, to discover your favorites.
We wholeheartedly encourage you to give this DIY trick a try. The rewards are well worth the effort, and you’ll be amazed at what you can achieve with a little dedication. Remember to document your progress, take photos, and most importantly, share your experiences with us! We’d love to hear about your successes, challenges, and any unique tips you discover along the way. Let’s build a community of chili pepper enthusiasts and learn from each other’s journeys. So, grab your seeds, prepare your soil, and get ready to embark on a flavorful adventure! Happy growing!
Frequently Asked Questions (FAQ)
Q: What is the best time of year to start growing chili peppers from seeds?
A: The ideal time to start growing chili peppers from seeds depends on your climate. In general, you should start seeds indoors 6-8 weeks before the last expected frost. This allows the seedlings to develop a strong root system before being transplanted outdoors. If you live in a warmer climate with a longer growing season, you can start seeds directly outdoors after the last frost, but be sure to choose a sunny location with well-draining soil.
Q: What type of soil is best for growing chili peppers?
A: Chili peppers thrive in well-draining, fertile soil with a slightly acidic pH (around 6.0-6.8). A good potting mix for starting seeds should be light and airy, allowing for good root development. When transplanting seedlings, amend the soil with compost or other organic matter to improve drainage and nutrient content. Avoid heavy clay soils, as they can become waterlogged and lead to root rot.
Q: How often should I water my chili pepper plants?
A: Chili pepper plants need consistent moisture, but they don’t like to be waterlogged. Water deeply when the top inch of soil feels dry to the touch. Avoid overwatering, as this can lead to root rot and other fungal diseases. During hot, dry weather, you may need to water more frequently. Mulching around the base of the plants can help retain moisture and suppress weeds.
Q: How much sunlight do chili pepper plants need?
A: Chili peppers need at least 6-8 hours of direct sunlight per day to thrive. Choose a sunny location for your plants, or supplement with grow lights if necessary. Insufficient sunlight can lead to leggy growth, reduced flowering, and smaller fruit.
Q: What are some common pests and diseases that affect chili pepper plants?
A: Common pests that affect chili pepper plants include aphids, spider mites, whiteflies, and pepper weevils. Diseases include fungal diseases like powdery mildew, blossom end rot, and verticillium wilt. Regularly inspect your plants for signs of pests or diseases and take appropriate action. Organic pest control methods, such as insecticidal soap or neem oil, can be effective for controlling many pests. Ensure proper watering and ventilation to prevent fungal diseases.
Q: How do I prevent blossom end rot in my chili peppers?
A: Blossom end rot is a common problem in chili peppers caused by a calcium deficiency. To prevent it, ensure your soil has adequate calcium levels. You can amend the soil with lime or bone meal before planting. Also, maintain consistent watering to prevent fluctuations in soil moisture, which can hinder calcium uptake.
Q: When should I harvest my chili peppers?
A: The timing of harvest depends on the variety of chili pepper and your desired level of ripeness. Most chili peppers will change color as they ripen, from green to red, yellow, or orange. You can harvest them at any stage of ripeness, but the flavor and heat will intensify as they mature. Use pruning shears or scissors to cut the peppers from the plant, leaving a small stem attached.
Q: How can I increase the heat of my chili peppers?
A: Several factors can influence the heat of chili peppers, including genetics, growing conditions, and stress levels. To increase the heat, ensure your plants receive plenty of sunlight and water them consistently. Avoid over-fertilizing, as this can reduce the heat. Some growers believe that stressing the plants slightly by withholding water for short periods can also increase the heat.
Q: Can I save seeds from my chili peppers to grow next year?
A: Yes, you can save seeds from your chili peppers to grow next year, but keep in mind that hybrid varieties may not produce true-to-type offspring. To save seeds, allow the peppers to fully ripen on the plant. Then, carefully remove the seeds and dry them thoroughly. Store the dried seeds in an airtight container in a cool, dark place until you’re ready to plant them.
Q: What are some good companion plants for chili peppers?
A: Companion planting can help improve the health and yield of your chili pepper plants. Good companion plants include basil, tomatoes, carrots, onions, and garlic. Basil repels many common pests, while tomatoes provide shade and support. Carrots and onions deter soil-borne pests, and garlic has antifungal properties. Avoid planting chili peppers near fennel or brassicas (cabbage, broccoli, cauliflower), as they can inhibit growth.

Leave a Comment