

Growing Chili Peppers from Seed can seem daunting, but trust me, it’s one of the most rewarding experiences a home gardener can have! Imagine biting into a fiery chili pepper you nurtured from a tiny seed – the flavor is amplified tenfold knowing you played a part in its creation. For centuries, chili peppers have been prized not only for their culinary kick but also for their medicinal properties, playing a significant role in various cultures around the globe. From ancient Aztec rituals to modern-day spicy food challenges, the chili pepper’s journey is as vibrant as its color.
But let’s be honest, buying chili peppers at the store can be expensive, and you’re often limited to a few common varieties. That’s where the magic of DIY comes in! I’m here to share some simple yet effective tricks and hacks that will empower you to successfully start your own chili pepper plants from seed, right in the comfort of your home. Whether you’re a seasoned gardener or a complete beginner, these tips will help you navigate the process, avoid common pitfalls, and ultimately, harvest a bountiful crop of delicious, homegrown chili peppers. Get ready to unleash your inner chili pepper pro!
Growing Fiery Chili Peppers From Seed: My Foolproof Guide
Okay, chili pepper enthusiasts, gather ’round! I’m going to share my tried-and-true method for starting chili pepper seeds indoors. Trust me, there’s nothing quite like the satisfaction of harvesting peppers you’ve nurtured from tiny seeds. It might seem intimidating, but with a little patience and these simple steps, you’ll be swimming in spicy goodness before you know it!
What You’ll Need: The Chili Pepper Starter Kit
Before we dive in, let’s make sure you have everything you need. This is my go-to list for a successful chili pepper seed starting operation:
* Chili Pepper Seeds: Obviously! Choose varieties you love. I always recommend getting seeds from a reputable source to ensure good germination rates. Experiment! Try a mix of mild, medium, and super-hot peppers.
* Seed Starting Trays or Small Pots: I prefer seed starting trays with a humidity dome. They help maintain consistent moisture and temperature. Small pots (2-3 inches) work great too.
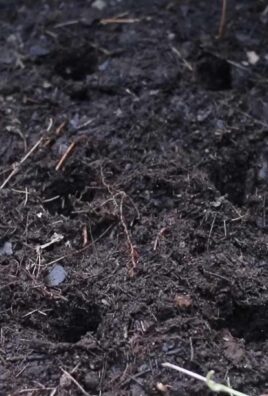
* Seed Starting Mix: This is crucial! Don’t use regular potting soil. Seed starting mix is lighter and provides better drainage, preventing damping-off disease.
* Heat Mat: Chili peppers love warmth! A heat mat placed under your seed starting tray will significantly improve germination rates.
* Grow Lights: Once the seedlings emerge, they’ll need plenty of light. Grow lights prevent them from becoming leggy and weak.
* Spray Bottle: For gently watering the seeds and seedlings.
* Small Labels and a Permanent Marker: To keep track of which peppers are which! Trust me, you’ll thank yourself later.
* Thermometer: To monitor the soil temperature.
* Small Fan: To provide gentle air circulation and prevent fungal diseases.
* Tweezers (Optional): Helpful for handling tiny seeds.
* Small Dibber or Pencil: For making small holes in the seed starting mix.
Phase 1: Sowing the Seeds – Getting Started
This is where the magic begins! We’re going to create the perfect environment for those tiny seeds to sprout.
1. Prepare Your Seed Starting Trays or Pots: Fill your seed starting trays or pots with seed starting mix. Gently tap them to settle the mix, but don’t pack it down too tightly. You want good drainage.
2. Moisten the Seed Starting Mix: Use your spray bottle to thoroughly moisten the seed starting mix. It should be damp, but not soggy. Think of a wrung-out sponge.
3. Sow the Seeds: Now for the fun part! Use your dibber or pencil to make small holes in the seed starting mix, about ¼ inch deep. Place one or two seeds in each hole. I usually do two, just in case one doesn’t germinate.
4. Cover the Seeds: Gently cover the seeds with seed starting mix. Lightly tap the surface to ensure good contact.
5. Label Everything: This is super important! Write the name of the chili pepper variety on a label and place it in the corresponding tray or pot. You’ll be surprised how quickly you forget which is which.
6. Water Gently: Use your spray bottle to gently water the surface of the seed starting mix again. Be careful not to dislodge the seeds.
7. Cover with a Humidity Dome (if using): Place the humidity dome over the seed starting tray. This will help maintain consistent moisture and temperature.
8. Place on a Heat Mat: Place the seed starting tray on a heat mat. Aim for a soil temperature of 80-85°F (27-29°C). Use your thermometer to monitor the temperature.
9. Be Patient: Chili pepper seeds can take anywhere from 7 to 21 days (or even longer!) to germinate, depending on the variety and conditions. Don’t give up!
Phase 2: Nurturing the Seedlings – From Sprout to Strength
Once those little green sprouts emerge, it’s time to provide them with the light and care they need to thrive.
1. Remove the Humidity Dome: As soon as you see the first seedlings emerge, remove the humidity dome. This will help prevent fungal diseases.
2. Provide Light: Place the seed starting tray under grow lights. Position the lights a few inches above the seedlings. Adjust the height as the seedlings grow to keep them close to the light source. I usually keep my grow lights on for 14-16 hours a day.
3. Water Carefully: Water the seedlings when the top inch of soil feels dry to the touch. Use your spray bottle to gently water them, avoiding overwatering. Overwatering can lead to damping-off disease.
4. Provide Air Circulation: Use a small fan to provide gentle air circulation around the seedlings. This will help prevent fungal diseases and strengthen the stems.
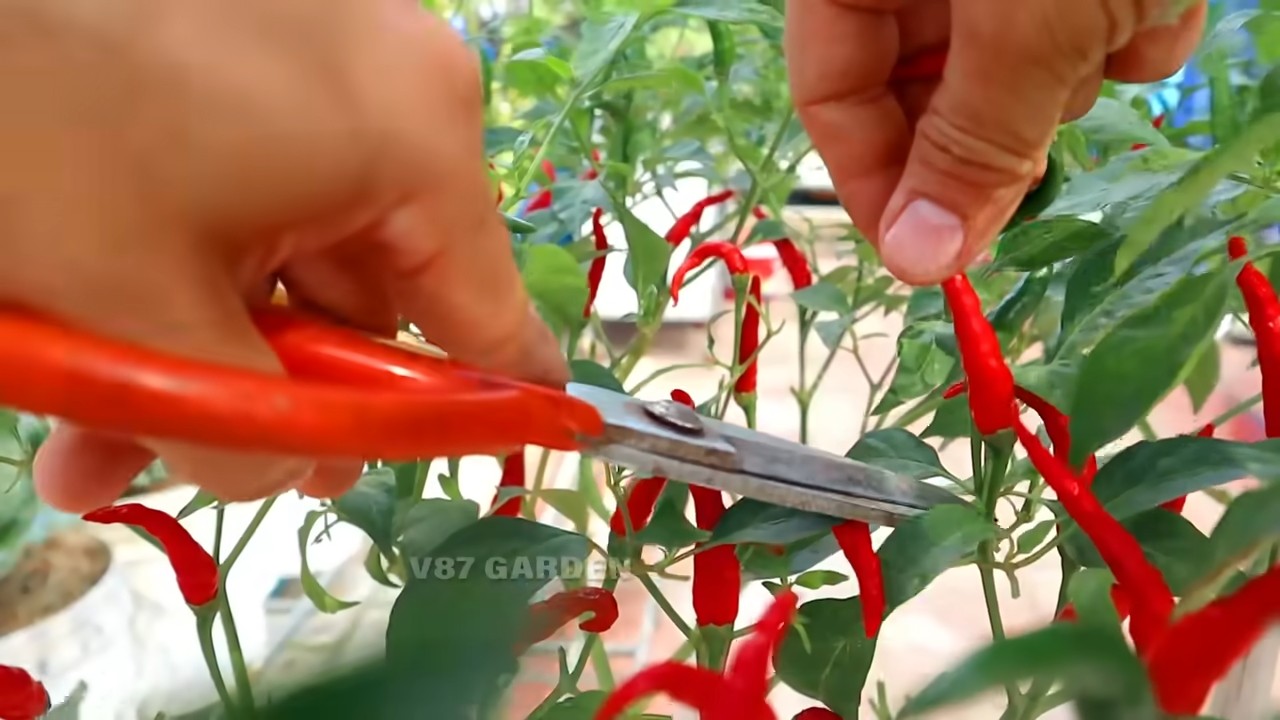
5. Thin the Seedlings (if necessary): If you planted two seeds in each hole and both germinated, you’ll need to thin them out. Choose the strongest seedling and carefully snip off the weaker one at the soil line with scissors. Don’t pull it out, as this can disturb the roots of the remaining seedling.
6. Fertilize (Optional): Once the seedlings have their first set of true leaves (the leaves that look like miniature versions of the adult leaves), you can start fertilizing them with a diluted liquid fertilizer. I use a balanced fertilizer (e.g., 20-20-20) diluted to half strength. Fertilize every 1-2 weeks.
Phase 3: Potting Up – Giving Them Room to Grow
As your seedlings grow, they’ll need more space. This is where potting up comes in.
1. When to Pot Up: You’ll know it’s time to pot up when the seedlings have outgrown their seed starting trays or pots. This usually happens when they have several sets of true leaves and their roots are starting to circle the bottom of the container.
2. Prepare Your Pots: Choose pots that are 3-4 inches in diameter. Fill them with a good quality potting mix.
3. Gently Remove the Seedlings: Carefully remove the seedlings from their seed starting trays or pots. Use a small trowel or spoon to gently loosen the soil around the roots. Be careful not to damage the roots.
4. Plant the Seedlings: Make a hole in the potting mix in the new pot. Place the seedling in the hole and gently fill in around the roots with potting mix.
5. Water Thoroughly: Water the seedlings thoroughly after potting them up.
6. Provide Light and Care: Place the potted-up seedlings under grow lights and continue to provide them with the same care as before.
Phase 4: Hardening Off – Preparing for the Great Outdoors
Before you can plant your chili pepper plants in the garden, you need to harden them off. This process gradually acclimates them to the outdoor environment.
1. Start Slowly: Begin by placing the plants outdoors in a sheltered location for just a few hours each day. Choose a day that is warm and sunny, but not too windy.
2. Gradually Increase Exposure: Gradually increase the amount of time the plants spend outdoors each day. Over the course of a week or two, gradually expose them to more sunlight and wind.
3. Protect from Frost: If there is a risk of frost, bring the plants back indoors.
4. Watch for Signs of Stress: If the plants show signs of stress, such as wilting or leaf burn, reduce the amount of time they spend outdoors.
Phase 5: Planting in the Garden – The Final Step
Once your chili pepper plants are hardened off, they’re ready to be planted in the garden!
1. Choose a Sunny Location: Chili peppers need at least 6-8 hours of sunlight per day.
2. Prepare the Soil: Amend the soil with compost or other organic matter. Chili peppers prefer well-drained soil.
3. Plant the Seedlings: Dig a hole that is slightly larger than the root ball of the seedling. Gently remove the seedling from its pot and place it in the hole. Fill in around the roots with soil.
4. Water Thoroughly: Water the seedlings thoroughly after planting.
5. Mulch: Apply a layer of mulch around the plants to help retain moisture and suppress weeds.
6. Provide Support (if necessary): Some chili pepper varieties can get quite tall and may need support. Use stakes or cages to support the plants.
7. Water and Fertilize Regularly: Water the plants regularly, especially during dry spells. Fertilize them every 2-3 weeks with a balanced fertilizer.
And that’s it! With a little care and attention, you’ll be harvesting your own fiery chili peppers in no time. Good luck, and happy growing! Remember

Conclusion
So, there you have it! Growing chili peppers from seed might seem a little daunting at first, but with a little patience and these simple steps, you’ll be well on your way to harvesting a fiery bounty. This DIY trick isn’t just about saving money; it’s about connecting with your food, understanding the growing process, and experiencing the immense satisfaction of nurturing a plant from a tiny seed to a vibrant, pepper-producing powerhouse.
Why is this a must-try? Because fresh, homegrown chili peppers offer an unparalleled flavor and heat that you simply can’t find in store-bought varieties. Plus, you have complete control over the growing process, ensuring your peppers are free from unwanted chemicals and pesticides. Imagine the burst of flavor in your homemade salsa, the added zing to your stir-fries, or the delightful heat in your chili – all thanks to peppers you grew yourself!
Don’t be afraid to experiment! Once you’ve mastered the basics, explore different varieties of chili peppers. From the mild and fruity poblano to the scorching habanero, the possibilities are endless. You can also try different growing mediums, such as coco coir or hydroponics, to see what works best for you. Consider companion planting with herbs like basil or oregano, which can help deter pests and enhance the flavor of your peppers. Another fun variation is to save seeds from your favorite peppers to continue the cycle year after year, creating your own unique strain adapted to your local climate.
We encourage you to embrace this DIY adventure and discover the joy of growing your own chili peppers from seed. It’s a rewarding experience that will not only enhance your culinary creations but also connect you with the natural world. Give it a try, and don’t forget to share your experiences with us! We’d love to hear about your successes, challenges, and any unique tips you discover along the way. Share your photos and stories in the comments below – let’s build a community of chili pepper enthusiasts! Remember, the key to successful **growing chili peppers from seed** is patience, observation, and a willingness to learn. Happy growing!
Frequently Asked Questions (FAQ)
Q: How long does it take for chili pepper seeds to germinate?
A: Germination time can vary depending on the variety of chili pepper and the environmental conditions. Generally, you can expect to see sprouts within 7-21 days. Maintaining a consistent soil temperature of around 80-85°F (27-29°C) and keeping the soil consistently moist (but not waterlogged) will significantly improve germination rates. Some particularly stubborn varieties might take longer, so don’t give up too soon! Using a heat mat can be extremely helpful in maintaining the optimal soil temperature.
Q: What kind of soil should I use for starting chili pepper seeds?
A: A well-draining seed starting mix is crucial. Avoid using garden soil, as it can be too heavy and may contain pathogens that can harm your seedlings. A mix of peat moss, vermiculite, and perlite is a good option. You can also purchase pre-made seed starting mixes from most garden centers. The key is to ensure the soil is light and airy, allowing for good root development.
Q: How often should I water my chili pepper seedlings?
A: Keep the soil consistently moist, but not waterlogged. Overwatering can lead to damping-off, a fungal disease that can kill young seedlings. Water gently from the bottom by placing the seed tray in a shallow dish of water and allowing the soil to absorb the moisture. This helps prevent disturbing the delicate seedlings and reduces the risk of fungal growth. Check the soil moisture daily and water when the top inch feels dry to the touch.
Q: When should I transplant my chili pepper seedlings?
A: Transplant your seedlings when they have developed their first set of true leaves (the leaves that appear after the initial seed leaves, or cotyledons). This usually happens about 2-3 weeks after germination. Harden off the seedlings by gradually exposing them to outdoor conditions for a week before transplanting them into larger pots or directly into the garden. This helps them acclimate to the sun and wind, reducing transplant shock.
Q: What kind of light do chili pepper seedlings need?
A: Chili pepper seedlings need plenty of light to grow strong and healthy. If you’re starting your seeds indoors, provide them with 14-16 hours of light per day using grow lights. Position the lights a few inches above the seedlings and adjust them as the plants grow. If you’re growing your seedlings near a sunny window, rotate the tray regularly to ensure even light exposure. Insufficient light can lead to leggy, weak seedlings.
Q: What are some common problems when growing chili peppers from seed?
A: Some common problems include damping-off, leggy seedlings, and pest infestations. Damping-off can be prevented by using a sterile seed starting mix and avoiding overwatering. Leggy seedlings are usually caused by insufficient light, so ensure your seedlings are getting enough light. Pests like aphids and spider mites can be controlled with insecticidal soap or neem oil. Regularly inspect your seedlings for any signs of problems and address them promptly.
Q: Can I grow chili peppers from seed indoors year-round?
A: Yes, you can grow chili peppers from seed indoors year-round, provided you have the right conditions. You’ll need to provide adequate light, warmth, and humidity. Grow lights are essential for indoor growing, especially during the winter months. You may also need to use a humidifier to increase the humidity levels. Choose compact chili pepper varieties that are well-suited for container growing.
Q: How do I harden off my chili pepper seedlings before transplanting them outdoors?
A: Hardening off is the process of gradually acclimating your seedlings to outdoor conditions. Start by placing the seedlings outdoors in a sheltered location for a few hours each day, gradually increasing the amount of time they spend outside. Protect them from direct sunlight and strong winds. After about a week, they should be ready to be transplanted into the garden. This process helps prevent transplant shock and ensures your seedlings thrive in their new environment.
Q: What are some good companion plants for chili peppers?
A: Several plants can benefit chili peppers when planted nearby. Basil is a great companion plant as it repels pests like aphids and whiteflies. Marigolds also deter nematodes and other soil pests. Carrots and onions can help improve soil health and attract beneficial insects. Avoid planting chili peppers near fennel, as it can inhibit their growth.
Q: How do I know when my chili peppers are ripe?
A: The color of the chili pepper is a good indicator of ripeness, but it varies depending on the variety. Most chili peppers will turn from green to red, yellow, orange, or brown when ripe. The pepper should also feel firm and slightly heavy for its size. You can also taste a small piece of the pepper to check for heat and flavor. Remember that the heat level of chili peppers can increase as they ripen.
Leave a Comment