

Growing Celery in Containers might seem like a challenge reserved for seasoned gardeners with sprawling plots, but I’m here to tell you it’s totally achievable, even if your “garden” is a sunny balcony or a small patio! Forget those bland, store-bought stalks – imagine crisp, flavorful celery, bursting with freshness, right at your fingertips.
Celery has a fascinating history, dating back to ancient times where it was valued more for its medicinal properties than its culinary uses. The ancient Greeks even crowned athletes with celery leaves! While we might not be handing out celery crowns these days, the satisfaction of harvesting your own is a reward in itself.
Why bother with growing celery in containers? Well, for starters, it gives you control over the growing environment, protecting your precious plants from pests and diseases that might plague a traditional garden. Plus, let’s be honest, who doesn’t love the convenience of snipping off a stalk or two for a healthy snack or a flavorful addition to your soup, without even leaving your home? This DIY guide will provide you with simple, effective tricks and hacks to successfully cultivate this crunchy vegetable, regardless of your space constraints. I’m excited to share these tips with you, so let’s get started and transform your container garden into a celery haven!

Growing Celery in Containers: A Beginner’s Guide
Hey there, fellow gardening enthusiasts! Ever thought about growing your own celery? It’s surprisingly easy, even if you don’t have a sprawling garden. I’m going to walk you through how to grow celery right in containers, bringing fresh, crunchy stalks right to your kitchen. Let’s get started!
Choosing the Right Container and Soil
Before we even think about planting, we need to set the stage for success. This means picking the perfect container and soil.
* Container Size: Celery needs room to grow. I recommend a container that’s at least 12 inches deep and 12 inches in diameter. This gives the roots plenty of space to spread out. You can use a larger container if you want to grow multiple celery plants together.
* Drainage: Drainage is crucial! Celery loves moisture, but soggy roots are a no-no. Make sure your container has drainage holes at the bottom. If it doesn’t, you’ll need to drill some.
* Soil Mix: Celery thrives in rich, well-draining soil. I like to use a mix of equal parts potting soil, compost, and perlite. The potting soil provides a good base, the compost adds nutrients, and the perlite improves drainage and aeration. Avoid using garden soil directly in containers, as it can become compacted and doesn’t drain well.
Starting from Seed vs. Using a Celery Base
You have two main options for starting your celery journey: seeds or a celery base. Each has its pros and cons.
* Starting from Seed: This gives you more control over the variety of celery you grow. However, it takes longer and requires more patience. Celery seeds are tiny and can be a bit tricky to germinate.
* Regrowing from a Celery Base: This is a faster and easier method, especially for beginners. You simply cut off the base of a celery stalk from the grocery store and regrow it.
I’ll cover both methods, so you can choose the one that suits you best.
Starting Celery from Seed (The Patient Gardener’s Route)
If you’re up for a bit of a challenge and want to try growing celery from seed, here’s how:
1. Start Seeds Indoors: Celery seeds need a long growing season, so it’s best to start them indoors about 10-12 weeks before the last expected frost.
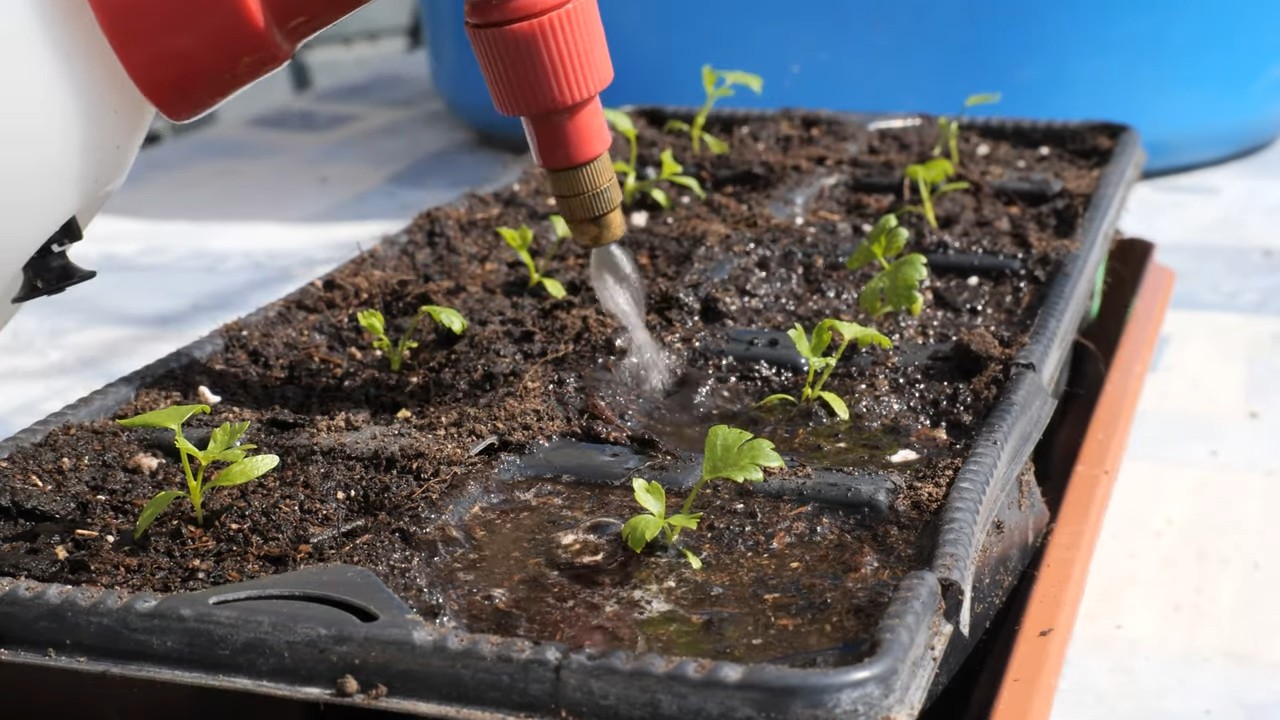
2. Sow the Seeds: Fill a seed tray or small pots with your chosen soil mix. Moisten the soil thoroughly. Sprinkle the celery seeds on the surface of the soil. They are very small, so don’t bury them too deep. Lightly press them into the soil.
3. Provide Light: Celery seeds need light to germinate. Don’t cover them with soil. Instead, gently mist the surface with water and cover the tray with a clear plastic lid or plastic wrap to create a humid environment.
4. Maintain Moisture and Warmth: Place the tray in a warm location (around 70-75°F or 21-24°C) and keep the soil consistently moist. Use a spray bottle to mist the soil regularly.
5. Germination: Germination can take anywhere from 14 to 21 days. Be patient! Once the seedlings emerge, remove the plastic cover and provide them with plenty of light. A grow light works well, or you can place them near a sunny window.
6. Thin the Seedlings: Once the seedlings have a few true leaves, thin them out, leaving only the strongest seedlings in each pot or cell.
7. Harden Off: Before transplanting the seedlings outdoors, you need to harden them off. This means gradually exposing them to outdoor conditions over a period of about a week. Start by placing them in a sheltered spot outdoors for a few hours each day, gradually increasing the amount of time they spend outside.
8. Transplant: Once the seedlings are hardened off and the danger of frost has passed, you can transplant them into your container.
Regrowing Celery from a Base (The Quick and Easy Way)
This method is super simple and rewarding. Here’s how to do it:
1. Cut the Celery Base: Purchase a bunch of celery from the grocery store. Cut off the base of the celery stalk, leaving about 2 inches of the bottom intact.
2. Place in Water: Place the celery base in a shallow dish or glass filled with about an inch of water. Make sure the cut end is facing up.
3. Sunlight and Water Changes: Place the dish in a sunny location, such as a windowsill. Change the water every day or two to prevent bacteria growth.
4. Observe Growth: After a few days, you should start to see new growth emerging from the center of the celery base. Small leaves will begin to sprout.
5. Transplant to Soil: Once the roots are about an inch or two long, it’s time to transplant the celery base into your container.
6. Planting: Dig a hole in the soil that’s large enough to accommodate the celery base. Gently place the base in the hole and cover the roots with soil. Water thoroughly.
Planting and Caring for Your Celery
Whether you started from seed or regrew from a base, the planting and care steps are the same from here on out.
1. Spacing: If you’re planting multiple celery plants in the same container, space them about 6-8 inches apart. This will give them enough room to grow without overcrowding each other.
2. Watering: Celery needs consistent moisture. Water deeply whenever the top inch of soil feels dry to the touch. Avoid letting the soil dry out completely, as this can stress the plants.
3. Fertilizing: Celery is a heavy feeder, meaning it needs plenty of nutrients to grow well. Fertilize your celery plants every 2-3 weeks with a balanced liquid fertilizer. Follow the instructions on the fertilizer label.
4. Sunlight: Celery prefers full sun, but it can tolerate partial shade. Aim for at least 6 hours of sunlight per day. In hot climates, providing some afternoon shade can help prevent the plants from bolting (going to seed prematurely).
5. Blanching (Optional): Blanching is the process of excluding light from the celery stalks to make them paler and milder in flavor. It’s not essential, but it can improve the taste and texture of your celery. To blanch celery, you can wrap the stalks with newspaper or cardboard a few weeks before harvest. Make sure to leave the top of the plant exposed to sunlight.
6. Pest and Disease Control: Celery is relatively pest-resistant, but it can be susceptible to certain pests and diseases, such as aphids, celery leaf tiers, and fungal diseases. Inspect your plants regularly for signs of pests or diseases. If you find any, treat them promptly with an appropriate organic pesticide or fungicide.
7. Mulching: Applying a layer of mulch around your celery plants can help retain moisture, suppress weeds, and regulate soil temperature. Use organic mulch, such as straw, shredded leaves, or wood chips.
Harvesting Your Homegrown Celery
The moment we’ve all been waiting for! Harvesting your own celery is incredibly satisfying.
1. Harvest Time: Celery is typically ready to harvest about 80-100 days after planting from seed, or sooner if you started from a base. The stalks should be at least 6-8 inches long and thick enough to eat.
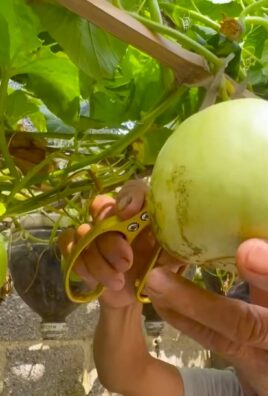
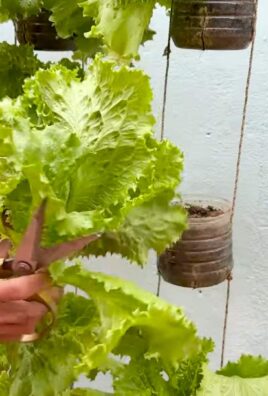
2. Harvesting Method: You can harvest the entire plant at once, or you can harvest individual stalks as needed. To harvest the entire plant, use a sharp knife to cut the stalks at the base of the plant. To harvest individual stalks, simply snap them off from the outside of the plant.
3. Storage: Freshly harvested celery can be stored in the refrigerator for up to 2 weeks. Wrap the stalks in a damp paper towel and place them in a plastic bag.
Troubleshooting Common Celery Problems
Even with the best care, you might encounter a few challenges along the way. Here are some common problems and how to fix them:
* Bolting (Premature Seed Production): Bolting can occur if celery plants are exposed to extreme temperatures or stress. To prevent bolting, provide consistent moisture, avoid temperature fluctuations, and provide some afternoon shade in hot climates.
* Yellowing Leaves: Yellowing leaves can be a sign of nutrient deficiency, overwatering, or underwatering. Check the soil moisture and fertilize your plants if necessary.
* Pests: Aphids and celery leaf tiers are common pests that can damage celery plants. Treat them with an appropriate organic pesticide.
* Diseases: Fungal diseases can also affect celery plants. Prevent fungal diseases by providing good air circulation and avoiding overhead watering. If you see signs of disease, treat your plants with an appropriate organic fungicide.
Enjoying Your
Conclusion
So, there you have it! Growing celery in containers isn’t just a quirky gardening experiment; it’s a genuinely rewarding way to enjoy fresh, crisp celery right at your fingertips. We’ve walked through the entire process, from selecting the right container and soil to nurturing your celery plants and harvesting your bounty. But why is this DIY trick a must-try?
Firstly, consider the unparalleled freshness. Store-bought celery, even when seemingly vibrant, can’t compare to the flavor and texture of celery harvested moments before you use it. The difference is truly remarkable, adding a burst of freshness to your salads, soups, and snacks.
Secondly, growing celery in containers offers incredible convenience, especially for those with limited garden space. Whether you have a sprawling backyard or a small balcony, you can cultivate your own celery patch. This makes fresh, healthy ingredients accessible to everyone, regardless of their living situation.
Thirdly, it’s an incredibly satisfying experience. Nurturing a plant from seedling to harvest is a rewarding process that connects you to nature and provides a sense of accomplishment. Watching your celery stalks grow taller and thicker is a testament to your care and attention.
But the benefits don’t stop there. Growing your own celery allows you to control the growing environment, ensuring that your plants are free from harmful pesticides and chemicals. You can choose organic soil and fertilizers, knowing exactly what’s going into your food.
Looking for variations to spice things up? Consider experimenting with different celery varieties. While the classic Pascal celery is a popular choice, you might also try growing red celery for a unique color and flavor. Or, explore heirloom varieties for a taste of celery’s rich history. You can also companion plant with herbs like parsley or basil in the same container to maximize space and create a thriving mini-ecosystem.
Another fun variation is to focus on growing celery from scraps. Instead of starting with seeds or seedlings, you can simply place the base of a store-bought celery stalk in a shallow dish of water and watch it regrow. This is a fantastic way to reduce food waste and get a head start on your celery crop.
We encourage you to embrace this DIY project and experience the joy of growing your own celery. It’s a simple, rewarding, and delicious way to connect with nature and enhance your culinary creations. Don’t be afraid to experiment, adapt the techniques to your specific environment, and most importantly, have fun!
Now, we want to hear from you! Have you tried growing celery in containers? What tips and tricks have you discovered? Share your experiences, photos, and questions in the comments below. Let’s create a community of celery-growing enthusiasts and learn from each other. Your insights could inspire others to embark on their own celery-growing adventures! Let’s all enjoy the crisp, refreshing taste of homegrown celery!
Frequently Asked Questions (FAQ)
What is the best size container for growing celery?
The ideal container size for growing celery is at least 12 inches in diameter and 12 inches deep. Celery plants have relatively shallow but spreading root systems, so a wider container is generally better than a very deep one. This size allows enough room for the roots to develop properly and provides adequate moisture retention. If you plan to grow multiple celery plants in the same container, opt for a larger container, such as a half-barrel or a large rectangular planter. Remember to ensure the container has drainage holes to prevent waterlogging, which can lead to root rot.
How often should I water my container-grown celery?
Celery is a thirsty plant and requires consistent moisture to thrive. Water your container-grown celery deeply whenever the top inch of soil feels dry to the touch. This usually translates to watering every day or every other day, especially during hot and dry weather. Avoid letting the soil dry out completely, as this can stress the plants and affect their growth. When watering, aim to saturate the soil thoroughly, allowing excess water to drain out of the drainage holes. Mulching around the base of the plants can help retain moisture and reduce the frequency of watering.
What kind of soil is best for growing celery in containers?
Celery prefers rich, well-draining soil that is high in organic matter. A good potting mix for container-grown celery should consist of a blend of peat moss, perlite, and compost. This combination provides excellent drainage, aeration, and nutrient retention. Avoid using garden soil in containers, as it can become compacted and impede drainage. You can also amend your potting mix with slow-release fertilizer to provide a steady supply of nutrients to your celery plants. A slightly acidic to neutral soil pH (around 6.0 to 7.0) is ideal for celery growth.
How much sunlight does celery need when grown in containers?
Celery thrives in full sun, which means it needs at least 6-8 hours of direct sunlight per day. However, in very hot climates, celery can benefit from some afternoon shade to prevent the leaves from scorching. If you’re growing celery indoors or in a shaded area, you may need to supplement with artificial light to ensure adequate growth. Position your container-grown celery in a sunny location, such as a south-facing balcony or patio. Rotate the container regularly to ensure that all sides of the plant receive equal sunlight.
When is the best time to harvest my container-grown celery?
You can begin harvesting celery stalks when they reach a usable size, typically around 6-8 inches tall. The exact time to harvest will depend on the variety of celery you’re growing and the growing conditions. Generally, celery is ready for harvest about 80-100 days after planting. To harvest, simply cut the outer stalks near the base of the plant, leaving the inner stalks to continue growing. This allows you to harvest celery gradually over a period of several weeks. The flavor of celery is best when harvested during cooler weather.
Can I grow celery from scraps in a container?
Yes, growing celery from scraps is a fun and easy way to propagate new plants. To do this, cut off the base of a celery stalk (about 2 inches from the bottom) and place it in a shallow dish of water. Position the dish in a sunny location and change the water every day or two. After a few days, you should see new roots and leaves emerging from the base. Once the roots are well-developed, you can transplant the celery base into a container filled with potting mix. Water thoroughly and care for it as you would any other celery plant.
What are some common pests and diseases that affect container-grown celery?
Celery can be susceptible to several pests and diseases, including aphids, celery leaf tiers, and fungal diseases like early blight and late blight. To prevent pest and disease problems, inspect your plants regularly for signs of infestation or infection. Remove any affected leaves or stalks promptly. You can also use organic pest control methods, such as insecticidal soap or neem oil, to control aphids and other pests. To prevent fungal diseases, ensure good air circulation around your plants and avoid overhead watering. If fungal diseases do occur, treat them with a fungicide labeled for use on celery.
How can I fertilize my container-grown celery?
Celery is a heavy feeder and requires regular fertilization to thrive. Start by incorporating slow-release fertilizer into your potting mix at planting time. Then, supplement with liquid fertilizer every 2-3 weeks during the growing season. Use a balanced fertilizer with equal amounts of nitrogen, phosphorus, and potassium (e.g., 10-10-10). You can also use organic fertilizers, such as compost tea or fish emulsion. Avoid over-fertilizing, as this can lead to excessive vegetative growth and reduced stalk quality.
Can I overwinter my container-grown celery?
In mild climates, you may be able to overwinter your container-grown celery by protecting it from frost and freezing temperatures. Move the container to a sheltered location, such as a garage or greenhouse, or cover it with a frost blanket. In colder climates, celery is typically grown as an annual and will not survive the winter. However, you can save seeds from your celery plants to grow new plants the following spring.
How do I prevent celery from becoming bitter?
Celery can sometimes develop a bitter taste if it is stressed by heat, drought, or nutrient deficiencies. To prevent bitterness, ensure that your celery plants receive consistent moisture, adequate sunlight, and regular fertilization. Mulching around the base of the plants can help retain moisture and regulate soil temperature. Harvesting celery during cooler weather can also help reduce bitterness. If your celery does develop a bitter taste, you can try blanching the stalks by wrapping them in paper or cardboard for a few weeks before harvesting.

Leave a Comment