

Growing Celery From Scraps: Did you know that you can turn that leftover celery base, the part you usually toss in the compost, into a thriving plant? It’s true! I’m here to show you how to unlock the magic of regeneration and enjoy fresh, homegrown celery without constantly buying it from the store.
The practice of propagating plants from scraps isn’t new. For centuries, resourceful gardeners have been finding ways to extend their harvests and minimize waste. Think about it – our grandparents and great-grandparents often relied on these simple techniques to feed their families. It’s a tradition rooted in sustainability and a deep connection to the earth.
In today’s world, where grocery bills are constantly rising and concerns about food waste are growing, learning how to regrow vegetables from scraps is more relevant than ever. Imagine the satisfaction of snipping fresh celery stalks from your own garden, knowing you created something delicious and useful from what would have been discarded. Plus, growing celery from scraps is a fantastic way to introduce kids to the wonders of gardening and teach them about resourcefulness. This DIY project is not only budget-friendly but also environmentally conscious. So, let’s dive in and discover the simple steps to transform your celery scraps into a flourishing garden addition!
Growing Celery From Scraps: A Beginner’s Guide
Hey there, fellow gardening enthusiasts! Ever wondered if you could regrow celery from that leftover base you usually toss in the compost? Well, guess what? You absolutely can! It’s a super easy and rewarding project, perfect for beginners and a fantastic way to reduce food waste. I’m going to walk you through the whole process, step-by-step, so you can have your own little celery patch growing in no time.
What You’ll Need
Before we dive in, let’s gather our supplies. This is a pretty low-key project, so you probably have most of these things already:
* Celery Base: The star of the show! Choose a fresh-looking base with a tightly packed center.
* Shallow Dish or Bowl: Something to hold water and the celery base.
* Water: Tap water is perfectly fine.
* Spray Bottle (Optional): For keeping the leaves moist.
* Potting Soil: Once the roots are established, you’ll need soil for planting.
* Pot with Drainage Holes: A pot that’s at least 6 inches in diameter.
* Sunny Location: Celery loves sunshine!
The Regrowth Process: From Scrap to Stalk
Okay, let’s get started! This is where the magic happens. We’re going to coax that celery base into sprouting new life.
1. Prepare the Celery Base:
* Carefully cut off the celery stalks, leaving about 1-2 inches of the base intact. Don’t worry if it looks a little rough; we’re just focusing on the bottom part.
* Give the base a quick rinse to remove any dirt or debris.
2. Place in Water:
* Fill your shallow dish or bowl with about an inch of water.
* Place the celery base, cut-side up, in the water. Make sure the bottom of the base is submerged, but the top part is exposed to air.
* Important: Don’t completely submerge the entire base, as this can lead to rotting.
3. Find a Sunny Spot:
* Place the dish with the celery base in a bright, sunny location. A windowsill that gets plenty of sunlight is ideal.
* If you don’t have a sunny windowsill, you can use a grow light.
4. Change the Water Regularly:
* This is crucial! Change the water every 1-2 days to prevent bacteria growth and keep the water fresh.
* I usually just dump out the old water and refill the dish with fresh water. It only takes a minute!
5. Observe and Wait:
* Now comes the waiting game. Within a few days, you should start to see small leaves sprouting from the center of the celery base. You’ll also notice roots beginning to grow from the bottom.
* Be patient! It can take up to a week or two for significant growth to occur.
6. Keep it Moist (Optional):
* If you live in a dry climate, you can use a spray bottle to lightly mist the leaves every day or two. This will help keep them hydrated and encourage growth.
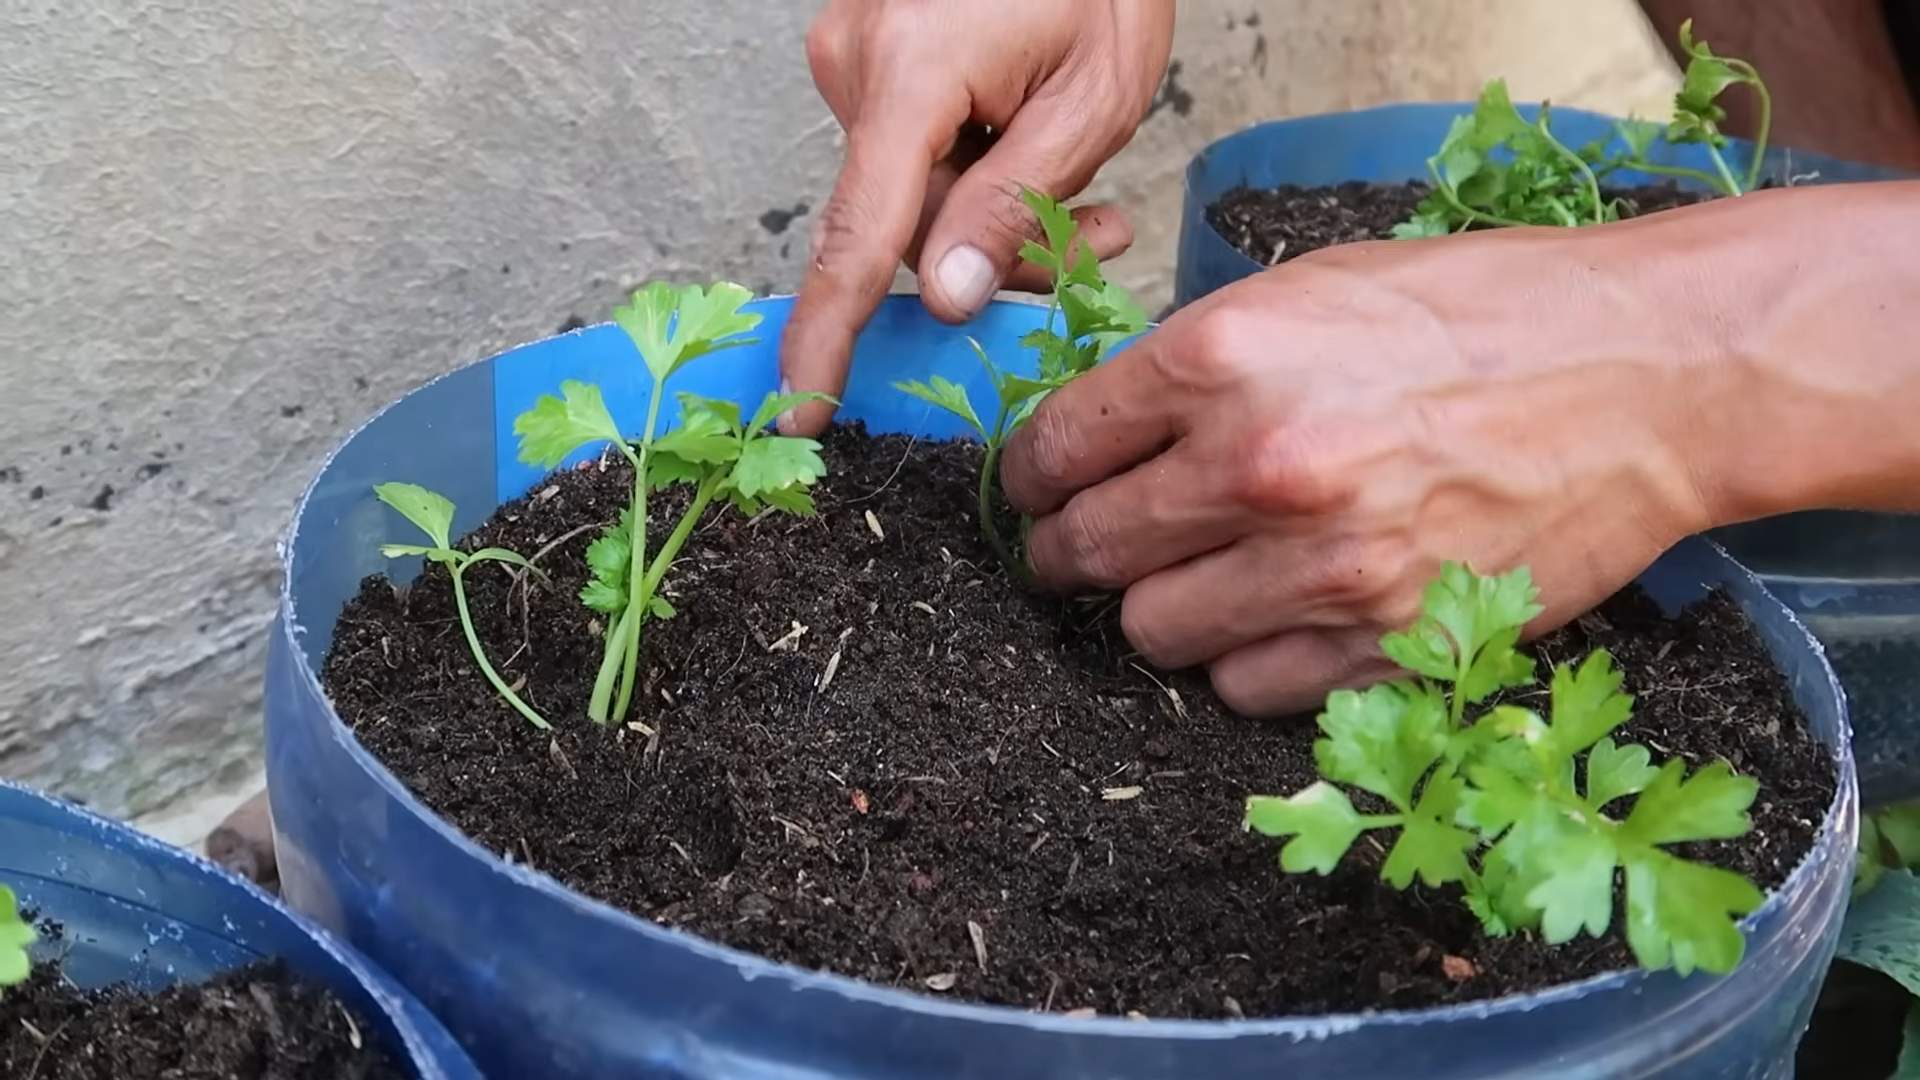
Transplanting to Soil: Giving Your Celery a Home
Once your celery base has developed a good root system (about 2-3 inches long) and has a decent amount of new leaves, it’s time to transplant it to soil. This will give it the nutrients it needs to grow into a full-sized celery plant.
1. Prepare the Pot:
* Fill your pot with good-quality potting soil. Make sure the pot has drainage holes to prevent waterlogging.
* I like to use a potting mix that’s specifically formulated for vegetables.
2. Create a Hole:
* Use your finger or a small trowel to create a hole in the center of the soil, large enough to accommodate the celery base and its roots.
3. Carefully Remove the Celery Base:
* Gently lift the celery base out of the water dish, being careful not to damage the roots.
4. Plant the Celery Base:
* Place the celery base in the hole, making sure the top of the base is level with the soil surface.
* Gently backfill the hole with soil, pressing lightly to secure the base in place.
5. Water Thoroughly:
* Water the newly planted celery thoroughly, until water drains out of the drainage holes. This will help settle the soil and hydrate the roots.
6. Return to a Sunny Location:
* Place the pot in a sunny location, just like before.
Caring for Your Celery Plant: Keeping it Happy and Healthy
Now that your celery is planted in soil, it’s important to provide it with the right care to ensure it thrives.
1. Watering:
* Celery needs consistent moisture, so water it regularly, especially during hot weather.
* Check the soil moisture by sticking your finger into the soil. If the top inch feels dry, it’s time to water.
* Avoid overwatering, as this can lead to root rot.
2. Fertilizing:
* To give your celery a boost, you can fertilize it every 2-3 weeks with a balanced liquid fertilizer.
* Follow the instructions on the fertilizer package for proper dilution.
3. Sunlight:
* Celery loves sunshine, so make sure it gets at least 6 hours of direct sunlight per day.
4. Pest Control:
* Keep an eye out for pests like aphids and slugs. If you spot any, you can try spraying them with insecticidal soap or hand-picking them off the plant.
5. Blanching (Optional):
* If you prefer milder-tasting celery, you can blanch the stalks a week or two before harvesting. This involves excluding light from the stalks to reduce chlorophyll production.
* You can blanch celery by wrapping the stalks with newspaper or cardboard, leaving the top leaves exposed.
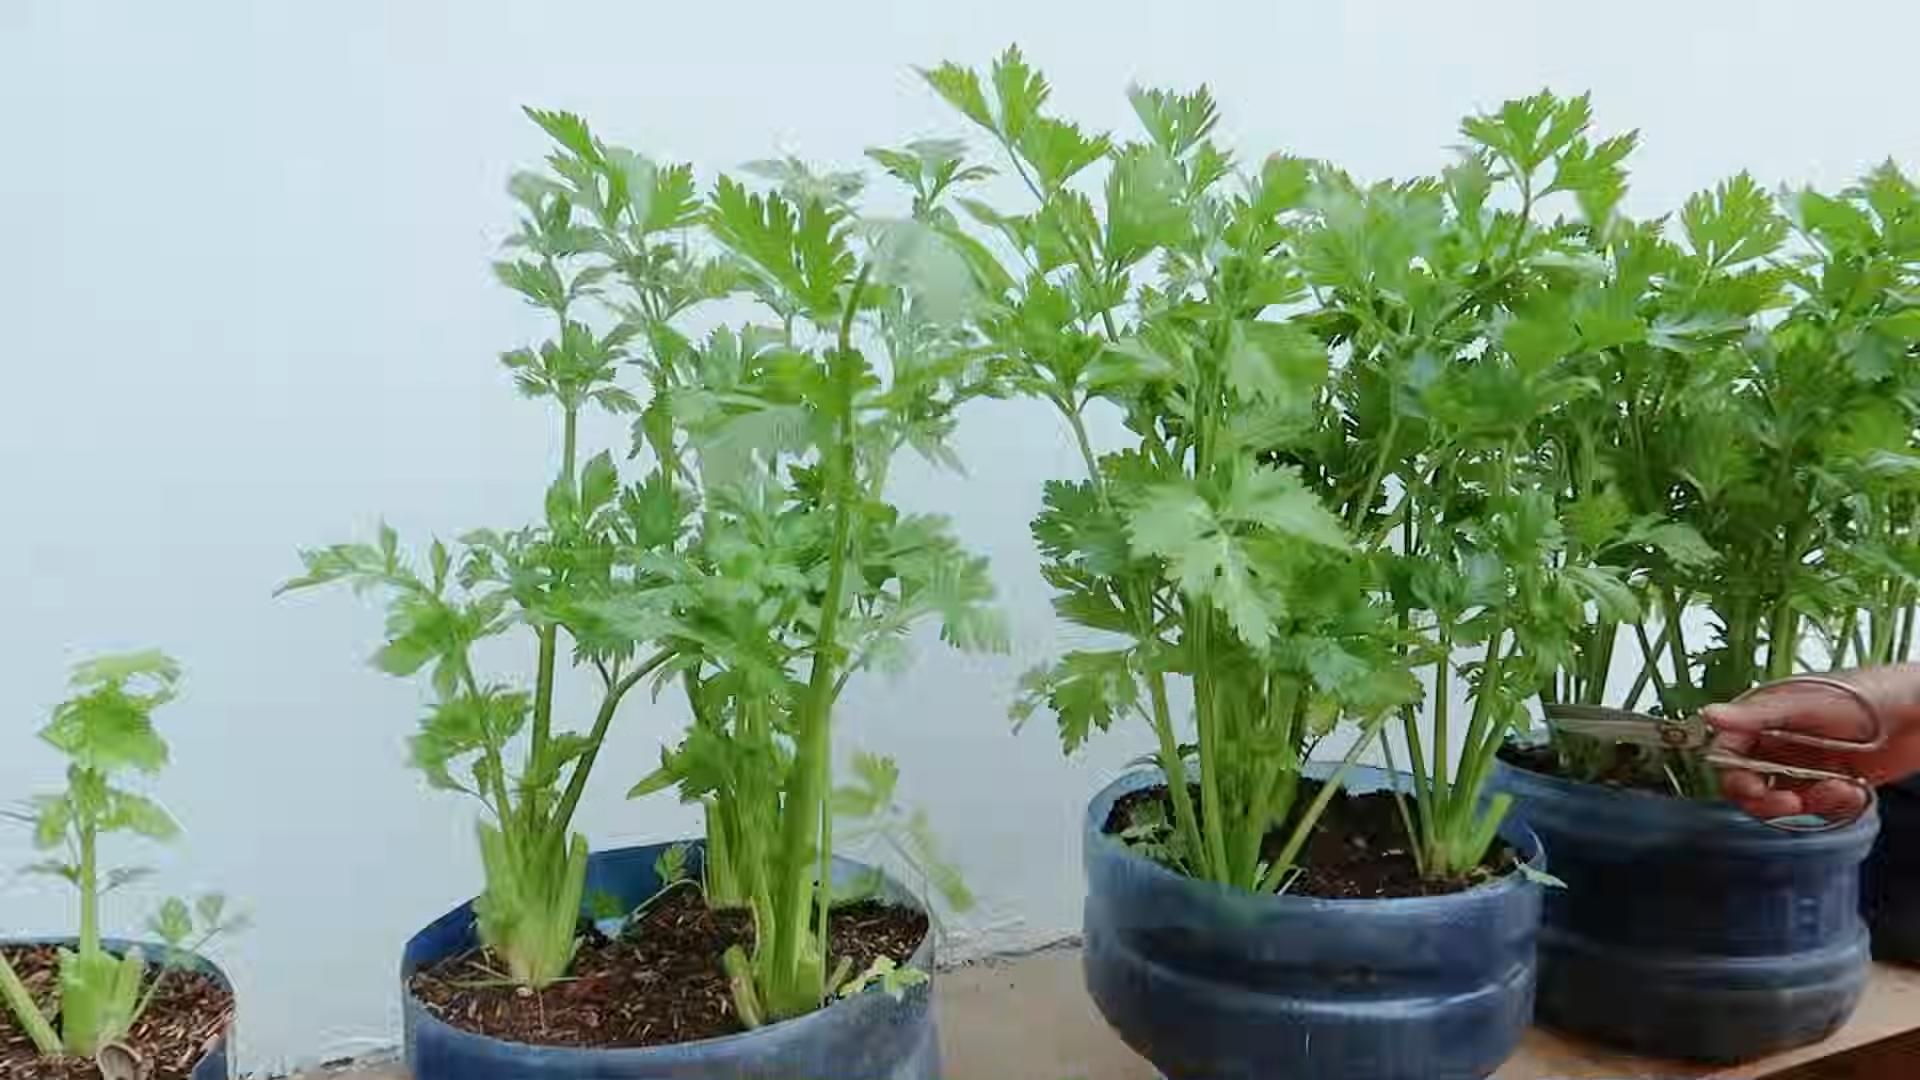
Harvesting Your Celery: Enjoying the Fruits (or Vegetables!) of Your Labor
After a few months of care, your celery plant should be ready to harvest.
1. When to Harvest:
* You can start harvesting celery stalks when they are at least 6-8 inches long.
2. How to Harvest:
* Use a sharp knife to cut the stalks at the base of the plant.
* You can harvest individual stalks as needed, or you can harvest the entire plant at once.
3. Enjoy!
* Wash the harvested celery stalks thoroughly and enjoy them in salads, soups, or as a healthy snack.
Troubleshooting: Common Issues and Solutions
Even with the best care, you might encounter some issues along the way. Here are a few common problems and how to fix them:
* Yellowing Leaves: This could be a sign of overwatering, underwatering, or nutrient deficiency. Adjust your watering schedule and consider fertilizing the plant.
* Slow Growth: This could be due to insufficient sunlight or poor soil. Make sure your celery is getting enough sunlight and consider transplanting it to a larger pot with fresh potting soil.
* Root Rot: This is caused by overwatering. Make sure your pot has drainage holes and allow the soil to dry out slightly between waterings.
* Pests: As mentioned earlier, keep an eye out for pests and take action as soon as you spot them.
Tips and Tricks for Success
Here are a few extra tips to help you succeed with your celery-growing adventure:
* Start with a Healthy Base: Choose a celery base that looks fresh and firm, with no signs of wilting or discoloration.
* Use Filtered Water: If your tap water is heavily chlorinated, consider using filtered water for the initial regrowth process.
* Be Patient: Growing celery from scraps takes time and patience. Don’t get discouraged if you don’t see results immediately.
* Experiment: Try growing different varieties of celery to see which ones you like best.
* Have Fun! Gardening should be enjoyable, so relax and have fun with the process.
Growing celery from scraps is a fun, easy, and rewarding project that anyone can do. With a little bit of care and attention, you can enjoy fresh, homegrown celery all season long. Happy gardening!
Conclusion
So, there you have it! Growing celery from scraps isn’t just a fun gardening experiment; it’s a sustainable way to reduce food waste, enjoy fresh, homegrown celery, and connect with the natural world. It’s a simple process that yields surprisingly rewarding results. Think about it: instead of tossing those celery ends into the compost bin, you’re giving them a second life, transforming them into crisp, flavorful stalks ready for your soups, salads, and snacks.
This DIY trick is a must-try for several compelling reasons. First, it’s incredibly easy and requires minimal effort. You don’t need a green thumb or extensive gardening knowledge to succeed. Second, it’s budget-friendly. You’re essentially getting free celery from something you would normally discard. Third, it’s environmentally conscious. By regrowing celery, you’re reducing your carbon footprint and contributing to a more sustainable lifestyle. Finally, and perhaps most importantly, it’s incredibly satisfying to watch something grow from what was once considered waste.
But the fun doesn’t stop there! Once you’ve mastered the basic technique, you can experiment with different variations. Try growing different varieties of celery, such as Pascal celery or red celery, to see which ones thrive best in your environment. You can also experiment with different growing mediums, such as hydroponics, to see if you can accelerate the growth process. Consider using organic fertilizers to boost growth and enhance the flavor of your celery.
For example, if you live in a particularly hot climate, you might want to provide your celery with some afternoon shade to prevent it from bolting (going to seed prematurely). If you live in a colder climate, you might need to bring your celery indoors during the winter months to protect it from frost. You can also try companion planting. Celery grows well alongside other vegetables like tomatoes, onions, and cabbage.
Another fun variation is to use the regrown celery leaves in different culinary applications. Celery leaves are often overlooked, but they’re packed with flavor and nutrients. You can use them to make pesto, add them to salads, or use them as a garnish for soups and stews. They add a fresh, herbaceous note to any dish.
Don’t be afraid to experiment and adapt the process to suit your specific needs and preferences. The beauty of this DIY trick is that it’s flexible and forgiving. Even if you don’t get perfect results the first time, you’ll learn something valuable along the way.
We wholeheartedly encourage you to give this DIY trick a try. It’s a fun, rewarding, and sustainable way to enjoy fresh, homegrown celery. And once you’ve experienced the joy of growing your own celery from scraps, we’d love to hear about your experience! Share your tips, tricks, and photos with us in the comments below. Let’s build a community of celery-growing enthusiasts and inspire others to embrace this simple yet powerful technique. Let us know if you have any questions about growing celery from scraps, we are here to help!
Frequently Asked Questions (FAQ)
What kind of celery works best for regrowing?
Generally, any store-bought celery stalk with a healthy base will work. Look for celery with a firm, intact base and healthy-looking stalks. Organic celery is often a good choice, as it’s less likely to have been treated with chemicals that could inhibit growth. However, conventional celery can also be successfully regrown. The key is to choose a stalk that looks fresh and vibrant. Avoid celery that is wilted, discolored, or has a mushy base.
How long does it take to regrow celery from scraps?
The time it takes to regrow celery from scraps can vary depending on several factors, including the variety of celery, the growing conditions, and the amount of sunlight it receives. In general, you can expect to see new growth within a week or two of placing the celery base in water. After about 3-4 weeks, you should have a small celery plant that’s ready to be transplanted into soil. It can take several months for the plant to mature and produce full-sized celery stalks. Be patient and provide your celery with the care it needs, and you’ll be rewarded with fresh, homegrown celery in due time.
What kind of soil is best for growing regrown celery?
Celery prefers well-draining, nutrient-rich soil. A good potting mix amended with compost or other organic matter is ideal. The soil should be able to retain moisture without becoming waterlogged. You can also add a slow-release fertilizer to the soil to provide your celery with the nutrients it needs to thrive. Avoid heavy clay soils, as they can become compacted and inhibit root growth.
How much sunlight does regrown celery need?
Celery needs at least 6 hours of sunlight per day to thrive. Choose a sunny location in your garden or place your potted celery plant near a sunny window. If you live in a particularly hot climate, you may want to provide your celery with some afternoon shade to prevent it from bolting. Insufficient sunlight can result in weak, leggy growth.
How often should I water my regrown celery?
Celery needs consistent moisture to thrive. Water your celery regularly, especially during hot, dry weather. The soil should be kept consistently moist but not waterlogged. Check the soil moisture regularly and water when the top inch of soil feels dry to the touch. Avoid letting the soil dry out completely, as this can stress the plant and inhibit growth.
Can I grow celery from scraps indoors?
Yes, you can grow celery from scraps indoors, especially during colder months. Place your potted celery plant near a sunny window that receives at least 6 hours of sunlight per day. You may also need to supplement with artificial light if you don’t have enough natural light. Keep the soil consistently moist and provide your celery with good air circulation.
What are some common problems when growing celery from scraps?
Some common problems when growing celery from scraps include bolting (going to seed prematurely), pest infestations, and diseases. Bolting can be caused by stress, such as hot weather or insufficient watering. Pests, such as aphids and slugs, can damage the leaves and stalks. Diseases, such as celery blight, can cause the leaves to turn yellow or brown. To prevent these problems, provide your celery with the care it needs, monitor it regularly for signs of pests or diseases, and take action promptly if you notice any problems.
Can I eat the celery that I regrow from scraps?
Yes, absolutely! The celery that you regrow from scraps is perfectly safe to eat. In fact, it may even be more flavorful than store-bought celery, as it’s freshly grown and hasn’t been transported long distances. You can use your regrown celery in all the same ways you would use store-bought celery, such as in soups, salads, and snacks.
How do I harvest my regrown celery?
You can harvest your regrown celery when the stalks are at least 6-8 inches tall. To harvest, simply cut the stalks at the base of the plant with a sharp knife. You can harvest individual stalks as needed, or you can harvest the entire plant at once. After harvesting, store your celery in the refrigerator to keep it fresh.
Is growing celery from scraps truly sustainable?
Yes, growing celery from scraps is a sustainable practice. It reduces food waste by giving celery scraps a second life. It also reduces your reliance on commercially grown celery, which can have a significant environmental impact due to transportation, packaging, and the use of pesticides and fertilizers. By growing your own celery from scraps, you’re contributing to a more sustainable food system.

Leave a Comment