

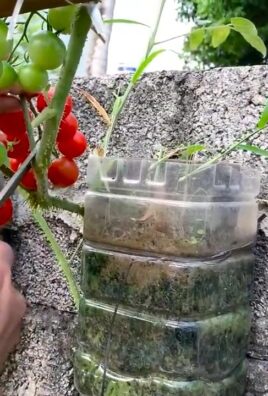
Growing Carrots in Veg Boxes: Unlock the secrets to a bountiful harvest, even without a sprawling garden! Have you ever dreamed of plucking vibrant, sweet carrots straight from your own backyard, but felt limited by space? Well, dream no more! This DIY guide is your passport to carrot-growing success, tailored specifically for the modern gardener with limited space.
For centuries, carrots have been a staple in diets worldwide, with evidence suggesting their cultivation dates back to ancient times. From their humble beginnings as wild, foraged roots to the vibrant orange varieties we know and love today, carrots have nourished and delighted generations. But you don’t need to be an experienced farmer to enjoy the fruits (or rather, roots!) of your labor.
Many people struggle with traditional in-ground gardening due to poor soil quality, pests, or simply a lack of space. That’s where the magic of veg boxes comes in! Growing Carrots in Veg Boxes offers a practical and accessible solution, allowing you to control the growing environment and maximize your yield. I’m going to show you how to create the perfect conditions for these crunchy delights, from choosing the right soil mix to protecting your precious crop from unwanted visitors. Get ready to embark on a rewarding gardening adventure, and enjoy the satisfaction of harvesting your own delicious, homegrown carrots!
Growing Carrots in a Raised Bed: Your DIY Guide for a Bountiful Harvest
Hey fellow gardeners! I love harvesting fresh vegetables directly from my garden, and carrots are no exception. They are crunchy, sweet, and super versatile in the kitchen. If you have limited space or simply want to maintain control over your soil, growing carrots in raised beds is a fantastic option. I’ll show you how you can easily do it yourself!
Why Grow Carrots in a Raised Bed?
- Space-saving: Raised beds are ideal for small gardens, balconies, or patios.
- Soil control: You determine the soil quality and can optimally tailor it to the needs of the carrots.
- Fewer weeds: Raised beds are easier to keep clean than traditional garden beds.
- Pest protection: You can more easily install nets or covers to protect your carrots from pests.
- Better drainage: Raised beds often have better drainage than natural soil, which is important for carrots.
What You Need:
- Raised bed: Choose a bed with a depth of at least 30 cm (12 inches), or even better, 40-50 cm (16-20 inches), so the carrots have enough space to grow.
- Carrot seeds: Buy high-quality seeds, preferably organic. Pay attention to the variety description to find the right one for your needs. There are short, round varieties that are particularly well-suited for growing in pots.
- High-quality soil: Use loose, well-draining soil. A mixture of garden soil, compost, and sand is ideal. Avoid stony or clumpy soil, as this can hinder carrot growth.
- Compost or organic fertilizer: For a good supply of nutrients.
- Watering can or hose: For watering.
- Rake or hand rake: For leveling the soil.
- Dibber or pencil: For thinning out the seedlings.
- Optional: Mulch material (e.g., straw or wood chips) for weed control and moisture retention.
- Optional: A net or fleece cover for pest protection.
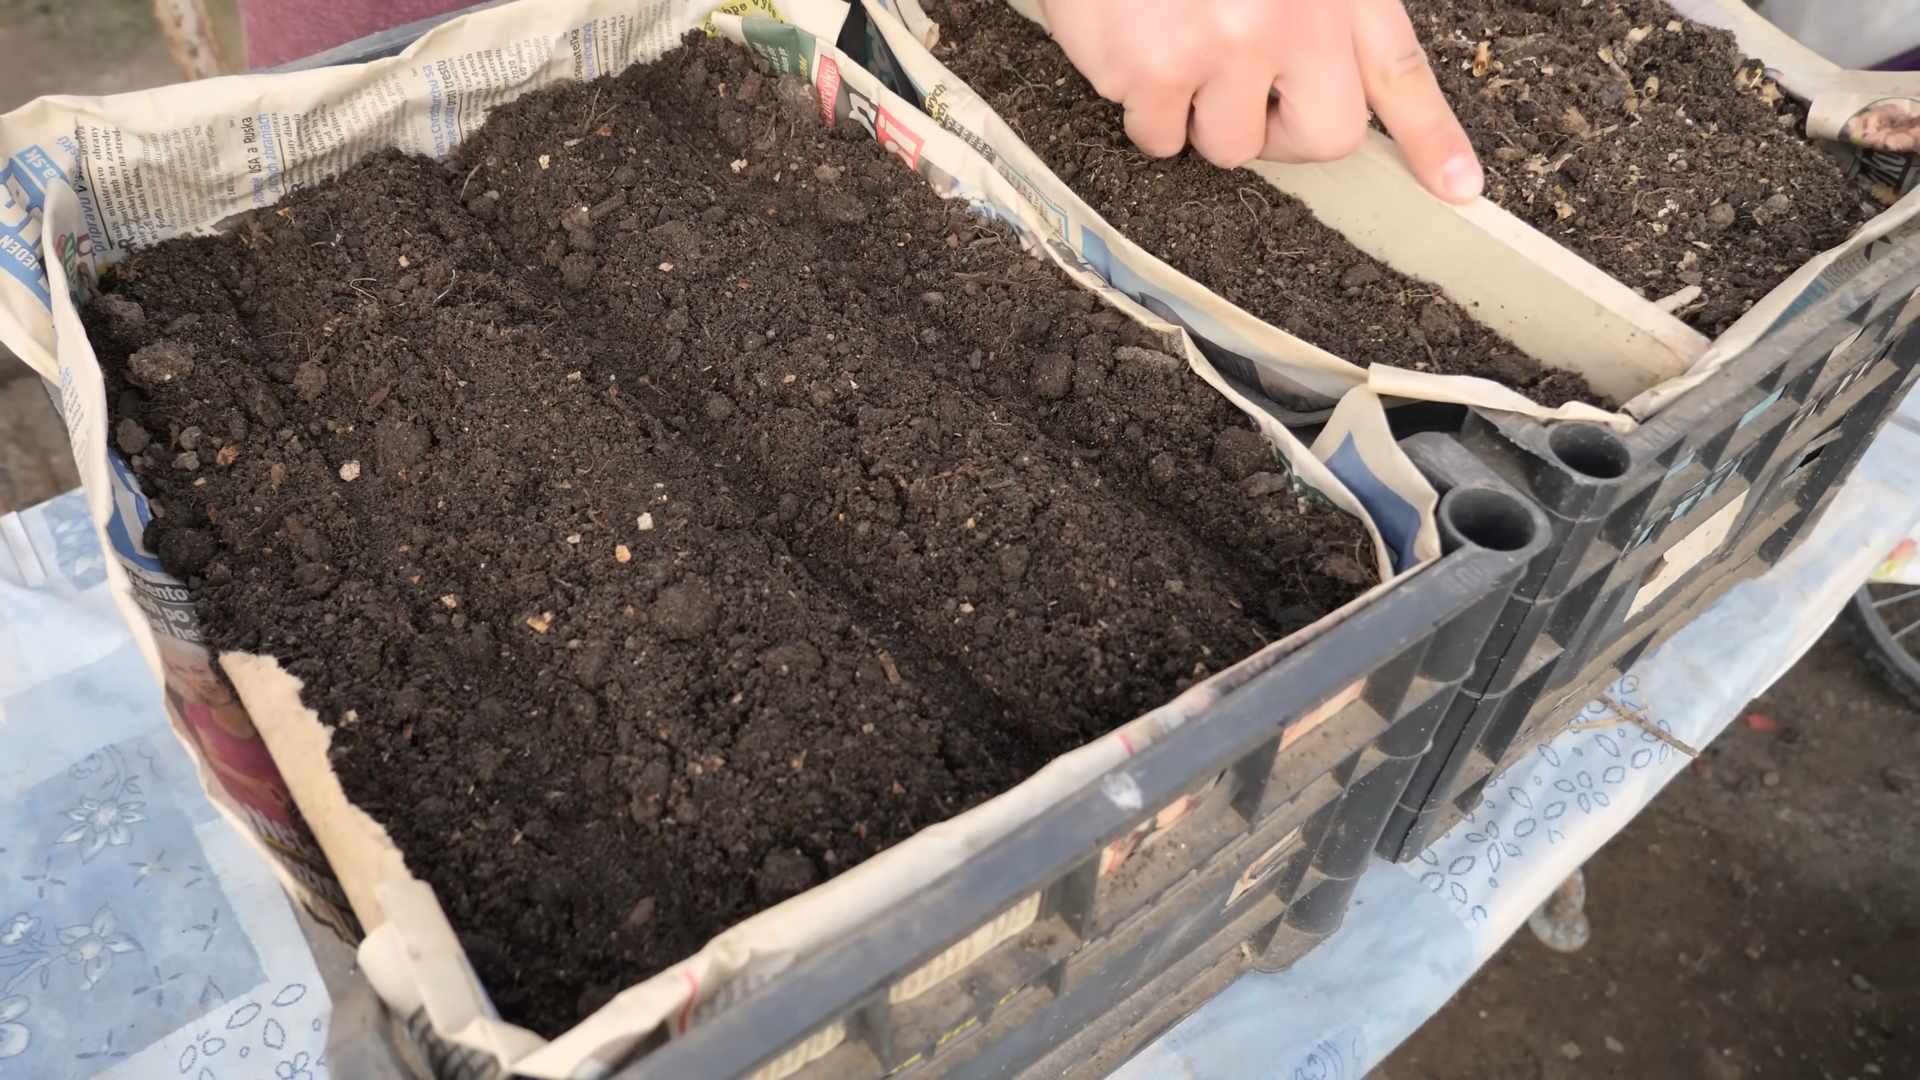
Step-by-Step Guide: Sowing Carrots in a Raised Bed
1. Preparing the Raised Bed:
- Thoroughly clear the raised bed of weeds, stones, and other debris.
- Loosen the soil with a digging fork or a spade.
- Remove all clumps and stones that could hinder the growth of the carrots.
- Rake the surface smooth and level.
- Mix compost or organic fertilizer into the soil to improve the nutrient supply.
2. Sowing the Carrot Seeds:
- Carrots are best sown directly into the raised bed, as they do not tolerate transplanting well.
- Create shallow rows in the soil with a rake. The rows should be about 1-2 cm (0.4-0.8 inches) deep and spaced 5-7 cm (2-3 inches) apart.
- Sow the carrot seeds thinly into the rows. Carrot seeds are very small, so it’s important not to sow them too densely to make thinning easier later.
- Cover the seeds with a thin layer of soil (about 0.5 cm or 0.2 inches).
- Gently press the soil down.
- Water the soil carefully with a watering can or hose. Be careful not to wash the seeds away.
3. Watering and Care:
- Keep the soil evenly moist, but not wet, during germination and growth.
- It’s best to water in the morning so the leaves can dry during the day, preventing fungal diseases.
- Once the seedlings are about 2-3 cm (1 inch) tall, you need to thin them out. This means removing the weakest plants to give the remaining ones more space to grow.
- Thin the seedlings so they are about 3-5 cm (1.2-2 inches) apart.
- Remove weeds regularly to minimize competition for nutrients and water.
- Mulch the soil around the carrots with straw or wood chips to suppress weeds and retain moisture in the soil.
Pest Protection
Carrots can be infested by various pests, such as the carrot fly.
- Carrot fly: The larvae of the carrot fly feed on the carrot roots and can significantly impact the harvest.
- Prevention: Cover the raised bed with a fine-mesh net or fleece cover to keep the carrot fly away. Make sure the net or fleece is well-sealed at the ground level so the flies cannot get underneath.
- Control: If you notice an infestation, you can use beneficial organisms like nematodes, which combat the carrot fly larvae.
- Slugs and Snails: Slugs and snails can eat the young seedlings.
- Prevention: Set up slug traps or sprinkle slug pellets around the raised bed.
- Control: Hand-pick the slugs and snails regularly.
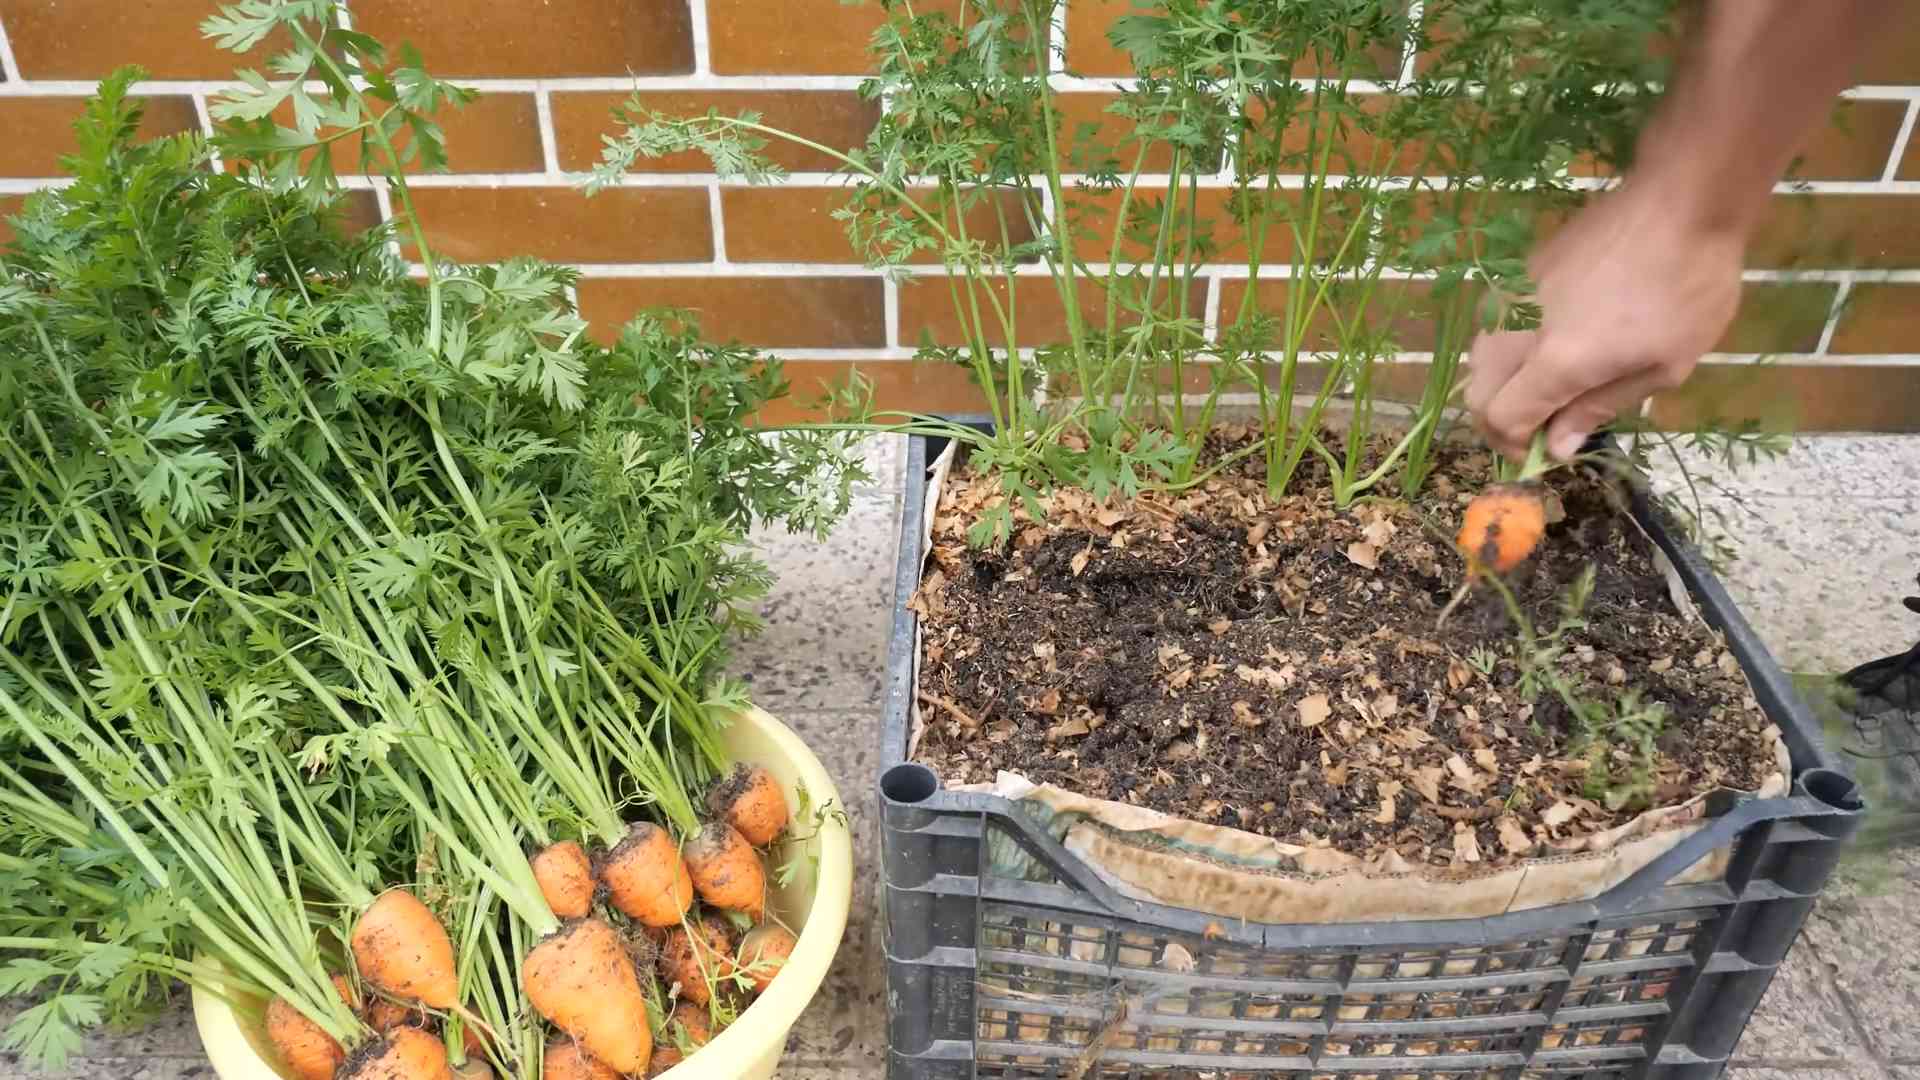
Harvest Time
- Carrots can be harvested as soon as they reach the desired size. The harvest time depends on the variety and growing conditions.
- As a rule, carrots are ready to harvest about 2-3 months after sowing.
- Loosen the soil around the carrots with a digging fork or a spade to make them easier to pull out.
- Carefully pull the carrots out of the soil by their green tops.
- Remove the soil from the carrots and cut off the greens.
- Store the carrots in a cool, dark, and dry place.
Variety Recommendations
There are many different carrot varieties suitable for growing in a raised bed. Here are some of my favorites:
- ‘Nantes’: A classic variety with long, slender carrots. It is sweet and crunchy and is great for eating fresh.
- ‘Amsterdam Forcing’: An early variety with short, round carrots. It is ideal for growing in pots and raised beds.
- ‘Chantenay Red Core’: A robust variety with cone-shaped carrots. It stores well and is suitable for growing in heavier soils.
- ‘Purple Haze’: An unusual variety with purple carrots. It is rich in antioxidants and has a slightly sweet taste.
- ‘Rainbow Mix’: A mix of different carrot varieties in various colors. It is a real eye-catcher in the raised bed and on the plate.
Additional Tips for a Successful Carrot Harvest
Don’t sow too densely: Avoid sowing the seeds too close together to make thinning easier.
*
Observe crop rotation: Do not plant carrots in the same spot every year to prevent diseases and pests.
Companion planting: Plant marigolds or garlic next to the carrots to deter pests.
Soil analysis: Have your soil analyzed to ensure it contains the right nutrients for carrots.
Fertilize regularly: Fertilize the carrots regularly with an organic fertilizer during the growing season.
Conclusion
So, there you have it! Growing carrots in veg boxes isn’t just a gardening trend; it’s a practical, space-saving, and ultimately rewarding way to enjoy fresh, homegrown carrots, even if you’re short on garden space. We’ve walked you through the entire process, from selecting the right box and soil to planting, nurturing, and harvesting your crunchy orange treasures.
But why is this DIY trick a must-try? It boils down to control. You have complete control over the growing environment, minimizing the risk of pests, diseases, and poor soil conditions that can plague in-ground carrot crops. Plus, the convenience of having your carrot patch right on your patio, balcony, or even a sunny windowsill is undeniable. Imagine stepping outside to harvest fresh carrots for your salad, soup, or a healthy snack – the taste is simply unmatched!
Don’t be afraid to experiment with variations! Try different carrot varieties to discover your favorites. Nantes carrots are a classic choice, but consider Chantenay carrots for shorter, sturdier roots, or even rainbow carrots for a vibrant and colorful harvest. You can also companion plant with herbs like rosemary or sage to deter pests and enhance the flavor of your carrots. Another variation is to use different types of containers. While we’ve focused on veg boxes, you can also use large pots, raised beds, or even repurposed containers like old tires or plastic bins, as long as they provide adequate drainage and depth.
Growing carrots in veg boxes is a fantastic way to introduce children to the joys of gardening. It’s a hands-on learning experience that teaches them about where their food comes from and the importance of nurturing plants. Plus, they’ll be much more likely to eat their vegetables when they’ve grown them themselves!
We understand that gardening can sometimes feel daunting, but trust us, this is a project that’s achievable for gardeners of all levels. The key is to start small, be patient, and don’t be afraid to learn from your mistakes. Every carrot you pull from the soil is a victory, a testament to your hard work and dedication.
So, what are you waiting for? Grab a veg box, some carrot seeds, and get planting! We’re confident that you’ll be amazed by the results. And once you’ve harvested your first batch of homegrown carrots, we’d love to hear about your experience. Share your photos, tips, and stories with us in the comments below. Let’s create a community of veg box carrot growers and inspire others to embrace the joys of homegrown produce! Happy gardening!
Frequently Asked Questions (FAQ)
What size veg box is best for growing carrots?
The ideal depth for a veg box to grow carrots is at least 12 inches (30 cm), but 18 inches (45 cm) is even better, especially if you’re growing longer carrot varieties like Nantes. The width and length will depend on the space you have available, but aim for a box that’s at least 24 inches (60 cm) wide and long to allow for adequate spacing between plants. Remember, carrots need room to grow downwards, so depth is more crucial than surface area. A deeper box also helps to retain moisture and regulate soil temperature, which is beneficial for carrot development.
What type of soil should I use in my veg box for carrots?
Carrots thrive in loose, well-draining soil that’s rich in organic matter. Avoid heavy clay soils, as they can hinder root development and result in misshapen carrots. A good mix would be equal parts of compost, potting soil, and sand or perlite. The compost provides essential nutrients, the potting soil retains moisture, and the sand or perlite improves drainage. Before planting, make sure to remove any rocks, stones, or debris from the soil, as these can also interfere with carrot growth. You can also amend the soil with a slow-release fertilizer specifically formulated for root vegetables.
How often should I water my carrots in a veg box?
Carrots need consistent moisture to grow properly, but overwatering can lead to root rot. Water deeply whenever the top inch of soil feels dry to the touch. The frequency of watering will depend on the weather conditions, but generally, you’ll need to water every 2-3 days during warm, dry periods. Avoid watering lightly and frequently, as this encourages shallow root growth. Instead, water deeply and less often to encourage the roots to grow downwards in search of moisture. Using a soaker hose or drip irrigation system can help to deliver water directly to the roots and minimize water waste.
How much sunlight do carrots need in a veg box?
Carrots need at least 6 hours of direct sunlight per day to thrive. Choose a location for your veg box that receives plenty of sunlight throughout the day. If you live in a particularly hot climate, you may need to provide some afternoon shade to prevent the soil from overheating. You can also use shade cloth or move the veg box to a shadier location during the hottest part of the day. Insufficient sunlight can result in stunted growth and smaller carrots.
What are common pests and diseases that affect carrots in veg boxes, and how can I prevent them?
Common pests that affect carrots include carrot rust flies, aphids, and nematodes. Diseases include leaf blight and root rot. To prevent these problems, practice good garden hygiene by removing any dead or diseased plant material from the veg box. Use companion planting to deter pests – for example, planting onions or garlic near your carrots can help to repel carrot rust flies. You can also use row covers to protect your carrots from pests. Ensure good drainage to prevent root rot. If you notice any signs of pests or diseases, treat them promptly with organic pesticides or fungicides. Crop rotation is also a good preventative measure; avoid planting carrots in the same spot year after year.
How long does it take for carrots to grow in a veg box?
Carrots typically take 60-80 days to mature, depending on the variety and growing conditions. You can start harvesting baby carrots as early as 50 days. To check if your carrots are ready to harvest, gently brush away the soil around the base of the plant to expose the top of the root. If the carrot is the desired size, you can carefully pull it from the soil.
Can I grow carrots in a veg box during the winter?
In mild climates, you can grow carrots in a veg box during the winter. Choose a cold-hardy variety and provide protection from frost by covering the veg box with a layer of mulch or a cold frame. In colder climates, you can grow carrots in a greenhouse or indoors under grow lights.
How do I thin my carrot seedlings in a veg box?
Thinning is essential for ensuring that your carrots have enough space to grow properly. Once your seedlings are a few inches tall, thin them to about 1-2 inches apart. When they are a bit bigger, thin them again to 3-4 inches apart. Carefully pull out the excess seedlings, being careful not to disturb the roots of the remaining plants. You can eat the thinned seedlings as microgreens.
Can I reuse the soil in my veg box for growing carrots again?
You can reuse the soil in your veg box, but it’s important to replenish the nutrients and improve the soil structure. After harvesting your carrots, remove any plant debris and amend the soil with compost or other organic matter. You can also add a slow-release fertilizer to provide essential nutrients for the next crop. If you suspect that the soil is contaminated with pests or diseases, you may need to sterilize it before reusing it.
What are some good companion plants for carrots in a veg box?
Good companion plants for carrots include onions, garlic, rosemary, sage, marigolds, and lettuce. Onions and garlic repel carrot rust flies, rosemary and sage deter other pests, marigolds attract beneficial insects, and lettuce provides ground cover that helps to retain moisture and suppress weeds. Avoid planting carrots near fennel, as it can inhibit their growth.
Leave a Comment