

Growing bell peppers indoors might seem like a challenge reserved for seasoned gardeners, but I’m here to tell you it’s absolutely achievable, even if you’re a complete beginner! Imagine plucking fresh, vibrant bell peppers right from your kitchen windowsill, adding a burst of color and flavor to your meals without ever stepping foot in a grocery store. Sounds dreamy, right?
For centuries, humans have cultivated plants indoors, from the elaborate orangeries of European royalty to the humble windowsill herb gardens of everyday homes. This connection to nature, brought inside, offers not only fresh produce but also a sense of tranquility and accomplishment. But let’s be honest, sometimes the dream of a thriving indoor garden clashes with the reality of limited space, sunlight, and, well, let’s face it, gardening know-how.
That’s where these DIY tricks and hacks come in! Many people struggle with growing bell peppers indoors because they lack the right information about lighting, pollination, and soil conditions. This article is your ultimate guide to overcoming those hurdles. I’ll share simple, effective techniques that will transform your indoor space into a productive pepper paradise. Get ready to ditch the store-bought peppers and enjoy the satisfaction of harvesting your own delicious, homegrown bounty!
Growing Peppers Indoors: Your Comprehensive DIY Guide
Hello, dear garden friends! Are you tired of expensive peppers from the supermarket that have hardly any taste? Or do you live in an area with short summers where peppers just don’t ripen properly outdoors? Don’t worry, I’ll show you how you can easily grow your own juicy peppers right inside your home! It’s easier than you think and incredibly fun. Let’s get started!
What you need: The Right Equipment
Before we start growing, we need to make sure we have everything necessary on hand. Here is a list of the things you’ll need:
- Pepper seeds: Choose your favorite varieties! There are countless colors and shapes, from classic red and yellow bell peppers to sweet mini peppers or hot chili varieties. Make sure to buy high-quality seeds from a trusted supplier.
- Seed starting pots or trays: Small pots or trays are ideal for starting the seeds. You can also use special seed starting kits.
- Seed starting mix: This soil is particularly low in nutrients and loose, which is ideal for seed germination. Regular potting soil is often too rich and can burn the seedlings.
- Larger pots: Once the pepper plants get bigger, they need more space. Pots with a diameter of at least 20 cm (8 inches) are ideal.
- Potting soil: Use high-quality potting soil that is well-draining and rich in nutrients.
- Grow light: Peppers need a lot of light to grow well. A grow light is essential, especially in the winter months or in apartments with little daylight. LED grow lights are energy-efficient and emit little heat.
- Fertilizer: Peppers are heavy feeders and need regular applications of fertilizer to grow optimally and produce fruit. Use a special fertilizer for vegetables or tomatoes.
- Spray bottle: For moistening the soil and seedlings.
- Watering can: For watering the plants.
- Plant stakes (optional): To support the plants as they get larger and bear fruit.
- Thermometer: To keep an eye on the temperature. Peppers like it warm!
- Mini-greenhouse or plastic wrap (optional): To increase humidity during germination.
Phase 1: Starting the Seeds – The Start of Your Pepper Journey
Starting the seeds is an important step to get healthy and strong pepper plants. Here’s how to do it:
- Preparation of the starter pots: Fill the starter pots or trays with seed starting mix. Lightly press the soil down.
- Sowing the seeds: Place 2-3 seeds per pot on the soil. Cover the seeds with a thin layer of seed starting mix (approx. 0.5 cm or 1/4 inch).
- Watering: Gently moisten the soil with a spray bottle. The soil should be damp, but not wet.
- Covering (optional): Cover the starter pots with a mini-greenhouse or plastic wrap to increase humidity. Make sure the wrap does not lie directly on the soil.
- Location: Place the starter pots in a warm and bright place. The ideal germination temperature is between 22 and 28 degrees Celsius (72-82°F).
- Patience is required: Germination can take 1-3 weeks, depending on the variety and temperature. Keep the soil moist and ventilate the mini-greenhouse or plastic wrap regularly to prevent mold.
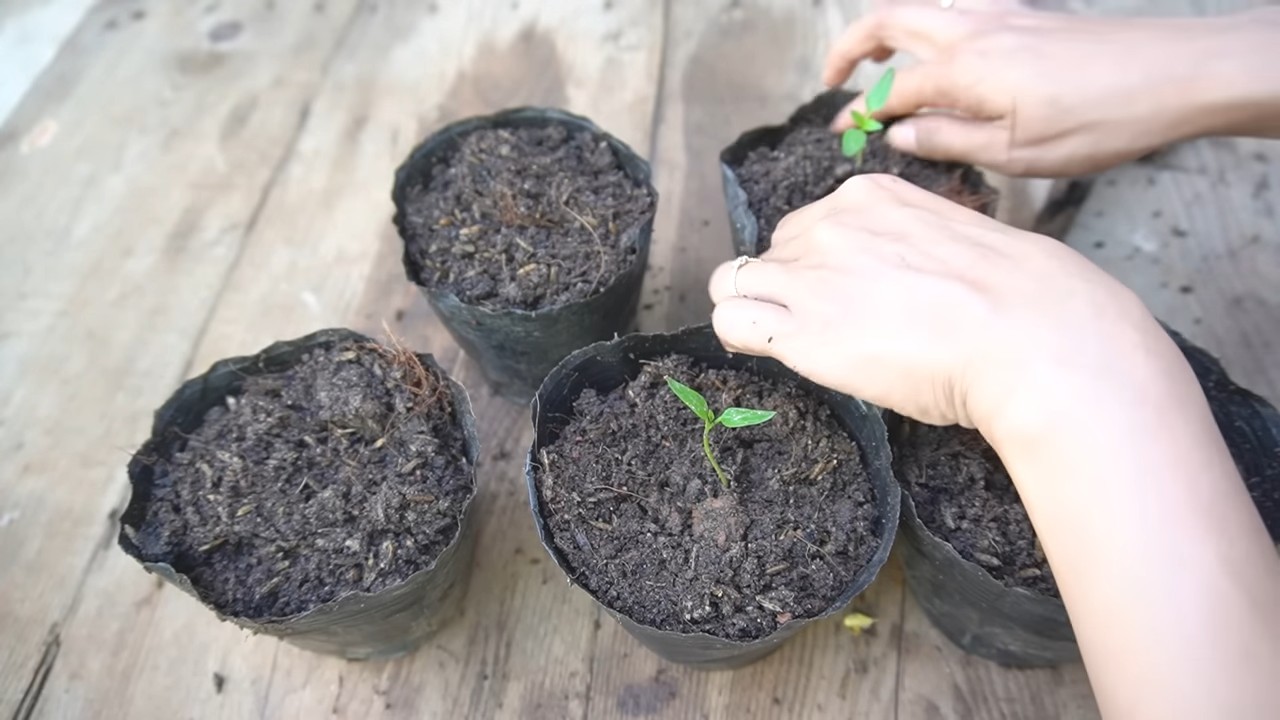
- Pricking out: As soon as the seedlings have developed their first true leaves (after the initial seed leaves), it’s time to prick them out. This means you carefully transplant the strongest seedlings into separate pots. Fill the new pots with potting soil and plant the seedlings deep enough so that the first leaves are just above the soil.
Phase 2: Growth – Care for Healthy Plants
After pricking out, the actual growth phase begins. Here are the most important points to consider:
- Light: Peppers need a lot of light to grow well. Place the plants in the brightest possible location. If you don’t have enough daylight, use a grow light. The grow light should be on for 12-16 hours a day.
- Watering: Water the pepper plants regularly, but avoid waterlogging. The soil should always be slightly moist. Check the soil’s moisture by sticking your finger about 2 cm (1 inch) deep into the soil. If the soil feels dry, it’s time to water.
- Fertilizing: Peppers are heavy feeders and need regular fertilizer applications. Start fertilizing about 2 weeks after pricking out. Use a special fertilizer for vegetables or tomatoes and follow the dosage instructions on the package. Fertilize the plants every 2-3 weeks.
- Temperature: Peppers like it warm. The ideal temperature is between 20 and 25 degrees Celsius (68-77°F). Avoid drafts and sudden temperature changes.
- Repotting: As the plants get larger and the pots become too small, they need to be repotted. Choose a pot that is at least 20 cm (8 inches) in diameter. Fill the pot with potting soil and plant the seedling deep enough so the first leaves are just above the soil.
- Staking: As the plants get larger and bear fruit, they can fall over. Use plant stakes to support the plants.
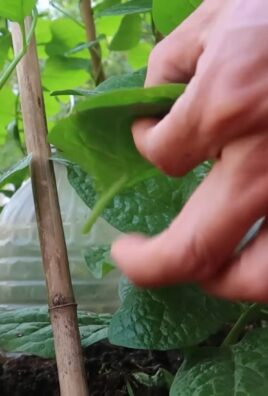
- Pruning suckers (optional): Some pepper varieties form side shoots that do not bear fruit. These side shoots can be pruned to concentrate the plant’s energy on the main stems and the fruit.
- Pollination: Peppers are self-pollinating, but you can assist pollination by gently shaking the plants or by brushing over the flowers with a paintbrush.
Phase 3: The Harvest – The Reward for Your Effort
After a few months of hard work, the time has finally come: the peppers are ripe and can be harvested!
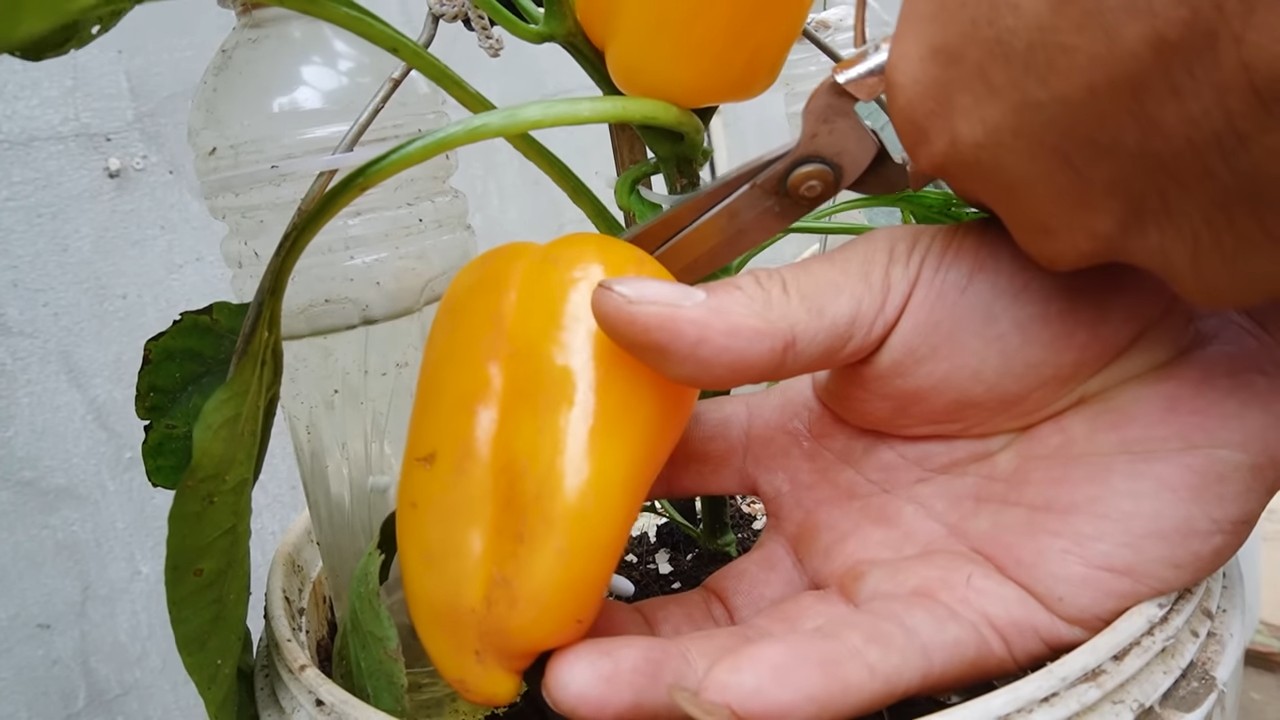
- Recognizing ripeness: You can recognize the ripeness of the peppers by their color and firmness. The peppers should have reached their final color (e.g., red, yellow, orange) and feel firm.
- Harvesting: Cut the peppers from the stem with a sharp knife or scissors. Be careful not to damage the plant.
- Enjoy: Enjoy your homegrown peppers! They taste fresh and aromatic. You can eat them raw, cook them, grill them, or pickle them.
Common Problems and Solutions
Problems can also occur when growing peppers indoors. Here are some common problems and how you can solve them:
Fungal diseases: Fungal diseases can be caused by excessive humidity or waterlogging.
Aphids: Aphids are small, green or black insects that settle on the leaves and stems of the plants. You can rinse them off with a jet of water or combat them with a biological insecticide.
Spider mites: Spider mites are tiny, spider-like pests that form fine webs on the leaves. You can rinse them off with a jet of water or combat them with a biological insecticide.
Conclusion
So, there you have it! Growing bell peppers indoors might seem like a daunting task at first, but with the right knowledge, a little patience, and a touch of green-thumb enthusiasm, you can enjoy fresh, vibrant bell peppers right from the comfort of your home. This DIY approach isn’t just about saving money; it’s about connecting with your food, understanding its journey from seed to table, and experiencing the immense satisfaction of nurturing life.
Why is this a must-try? Because it empowers you to control the growing environment, ensuring your bell peppers are free from harmful pesticides and herbicides. You dictate the quality of the soil, the amount of sunlight, and the overall care, resulting in healthier, tastier produce. Imagine the pride you’ll feel serving a salad featuring bell peppers you grew yourself!
But the benefits extend beyond just the taste and health aspects. Indoor gardening offers a therapeutic escape, a chance to de-stress and reconnect with nature, even in the midst of a bustling city. It’s a rewarding hobby that can bring joy and a sense of accomplishment to your daily life.
Looking for variations? Absolutely! Experiment with different bell pepper varieties. Try growing miniature bell peppers in hanging baskets for a decorative and edible display. Or, if you have limited space, consider using a hydroponic system for efficient and space-saving bell pepper cultivation. You can also explore companion planting, adding herbs like basil or parsley to your bell pepper pots to enhance their flavor and deter pests. Remember to adjust your lighting and watering schedule based on the specific variety you choose.
Don’t be afraid to get creative with your setup. Repurpose old containers, build your own grow lights, and tailor your indoor garden to fit your unique space and style. The possibilities are endless!
We understand that embarking on this journey might seem intimidating, but we encourage you to take the plunge. Start small, learn as you go, and don’t be discouraged by initial setbacks. Every gardener, even the most experienced, has faced challenges along the way. The key is to persevere, adapt, and enjoy the process.
Now, it’s your turn! We’re confident that you can successfully grow bell peppers indoors. We urge you to give this DIY trick a try and witness the magic of indoor gardening firsthand. And most importantly, we want to hear about your experience! Share your tips, triumphs, and tribulations in the comments below. Let’s build a community of indoor bell pepper enthusiasts and learn from each other. Your insights could inspire and help others on their gardening journey. Happy growing! Let us know how your indoor bell pepper growing goes!
Frequently Asked Questions (FAQ)
Q: What is the best time of year to start growing bell peppers indoors?
A: While you can technically start growing bell peppers indoors any time of year, the ideal time is typically late winter or early spring. This allows the seedlings to get a head start before being transplanted outdoors (if you choose to do so) or to mature indoors during the warmer months. Starting in late winter or early spring gives the plants ample time to develop a strong root system and foliage before the peak growing season. If you live in a region with mild winters, you might even be able to start earlier. The key is to ensure you have adequate lighting and temperature control to mimic the conditions of spring and summer.
Q: How much light do bell peppers need when grown indoors?
A: Bell peppers are sun-loving plants and require a significant amount of light to thrive. When growing them indoors, you’ll need to supplement natural light with artificial grow lights. Aim for at least 14-16 hours of light per day. Full-spectrum LED grow lights are an excellent choice as they provide the necessary wavelengths for optimal growth and are energy-efficient. Position the lights close enough to the plants (usually 6-12 inches) to provide adequate intensity, but be careful not to burn the leaves. Monitor your plants closely and adjust the light distance as needed. Insufficient light can lead to leggy growth, weak stems, and poor fruit production.
Q: What type of soil is best for growing bell peppers in containers?
A: Bell peppers thrive in well-draining, nutrient-rich soil. A good potting mix specifically formulated for vegetables is ideal. Avoid using garden soil, as it can be too heavy and compact, hindering drainage and root development. You can also create your own potting mix by combining equal parts of peat moss (or coconut coir), perlite, and compost. This mixture provides good drainage, aeration, and essential nutrients. Ensure the soil pH is slightly acidic, around 6.0 to 6.8. You can test the pH using a soil testing kit and adjust it accordingly.
Q: How often should I water my indoor bell pepper plants?
A: Watering frequency depends on several factors, including the size of the container, the type of soil, the temperature, and the humidity. Generally, you should water your bell pepper plants when the top inch of soil feels dry to the touch. Water deeply until excess water drains out of the bottom of the pot. Avoid overwatering, as this can lead to root rot. During hot and dry periods, you may need to water more frequently. Check the soil moisture regularly and adjust your watering schedule accordingly. Using a moisture meter can help you determine the moisture level accurately.
Q: How do I pollinate bell pepper flowers indoors?
A: Bell peppers are self-pollinating, but they often require assistance when grown indoors due to the lack of wind and insect activity. You can manually pollinate the flowers by gently shaking the plant or using a small paintbrush to transfer pollen from one flower to another. Do this during the warmest part of the day when the pollen is most viable. You can also use a small fan to create a gentle breeze around the plants, which can help with pollination. Repeat the pollination process every few days to ensure successful fruit set.
Q: What are some common pests and diseases that affect indoor bell pepper plants?
A: Common pests that can affect indoor bell pepper plants include aphids, spider mites, whiteflies, and fungus gnats. Regularly inspect your plants for signs of infestation, such as yellowing leaves, sticky residue, or webbing. Treat infestations promptly with insecticidal soap, neem oil, or other organic pest control methods. Common diseases include powdery mildew, blossom end rot, and fungal infections. Ensure good air circulation, avoid overwatering, and remove any infected leaves or fruit. Providing adequate calcium to the plant can help prevent blossom end rot.
Q: How long does it take for bell peppers to mature and be ready for harvest?
A: The time it takes for bell peppers to mature depends on the variety and growing conditions. Generally, it takes about 60-90 days from transplanting to harvest. You can harvest bell peppers at any stage of maturity, depending on your preference. Green bell peppers are typically harvested earlier, while colored bell peppers (red, yellow, orange) are allowed to ripen longer on the plant. The fruit should be firm, glossy, and have a vibrant color. Use pruning shears or a sharp knife to cut the peppers from the plant, leaving a small stem attached.
Q: Can I grow bell peppers indoors year-round?
A: Yes, you can grow bell peppers indoors year-round, provided you have adequate lighting, temperature control, and humidity. You may need to adjust your growing practices based on the season. During the winter months, you may need to increase the amount of artificial light and reduce watering frequency. Maintaining a consistent temperature and humidity level is crucial for year-round success. With proper care and attention, you can enjoy fresh bell peppers from your indoor garden throughout the year.
Leave a Comment