

Grow Taro at Home Organically? Absolutely! Imagine harvesting your own creamy, nutty-flavored taro root right from your backyard. It’s easier than you think, and I’m here to guide you through the process with some simple DIY tricks and hacks.
Taro, also known as Kalo in Hawaiian culture, holds a significant place in history and tradition. For centuries, it has been a staple food in many cultures across the globe, particularly in tropical and subtropical regions. Beyond its nutritional value, taro is often associated with cultural identity and spiritual significance. Think of the Hawaiian poi, a traditional dish made from pounded taro root – a symbol of sustenance and connection to the land.
But why should you bother growing your own taro? Well, for starters, you get to enjoy fresh, organically grown produce free from harmful pesticides. Plus, it’s incredibly rewarding to nurture a plant from start to finish. In today’s world, where we’re increasingly conscious of what we consume, knowing exactly where your food comes from is a huge plus. And let’s be honest, who wouldn’t want to impress their friends and family with their homegrown taro? I’ll show you how to grow taro at home organically, even if you have limited space or experience. Get ready to get your hands dirty and embark on this exciting gardening adventure!
Growing Taro Organically at Home: A Step-by-Step Guide
Hey there, fellow plant enthusiasts! Ever thought about growing your own taro? It’s a fantastic plant, both beautiful and edible, and you can absolutely cultivate it organically right in your backyard or even in containers. I’m going to walk you through everything you need to know to get started and enjoy your own homegrown taro.
Choosing Your Taro Variety
First things first, let’s talk about varieties. There are many different types of taro, each with slightly different characteristics. Some are better suited for certain climates or growing conditions. Do a little research to see what thrives in your area. Local nurseries are a great resource for this! They can tell you which varieties are popular and successful in your region. I personally love the ‘Bun Long’ variety because it’s relatively easy to grow and produces delicious corms.
Preparing for Planting
Before you even think about sticking that taro in the ground, you need to get your ducks in a row. This means preparing your soil, choosing the right location, and getting your hands on some healthy taro corms or cuttings.
Soil Preparation
Taro loves rich, well-draining soil that’s also able to retain moisture. Think of it like a sponge – it needs to hold water but not become waterlogged. Here’s how I prepare my soil:
* Amend with Organic Matter: This is key! I mix in plenty of compost, well-rotted manure, or leaf mold. This adds nutrients and improves drainage. Aim for a soil that’s about 50% native soil and 50% organic matter.
* Check the pH: Taro prefers a slightly acidic to neutral pH, ideally between 5.5 and 6.5. You can test your soil’s pH with a simple soil testing kit from your local garden center. If it’s too alkaline, you can amend it with sulfur or peat moss.
* Ensure Good Drainage: If your soil is heavy clay, consider adding sand or perlite to improve drainage. Raised beds are also a great option for areas with poor drainage.
Choosing the Right Location
Taro needs plenty of sunlight, but it also appreciates some shade, especially during the hottest part of the day. A spot that gets at least 6 hours of sunlight is ideal. Also, consider the water source. Taro loves moisture, so a location near a pond, stream, or even a consistently moist area in your yard is perfect. If you’re growing in containers, you’ll have more flexibility with location, but still aim for a sunny spot with some afternoon shade.
Selecting Healthy Corms or Cuttings
You can start taro from either corms (the underground tubers) or cuttings from the plant. Corms are generally easier for beginners.
* Corms: Look for firm, healthy corms that are free from blemishes or soft spots. They should have some visible “eyes” or buds where new growth will emerge.
* Cuttings: If you’re using cuttings, make sure they’re taken from healthy, mature plants. The cuttings should be at least 6 inches long and have several leaves.
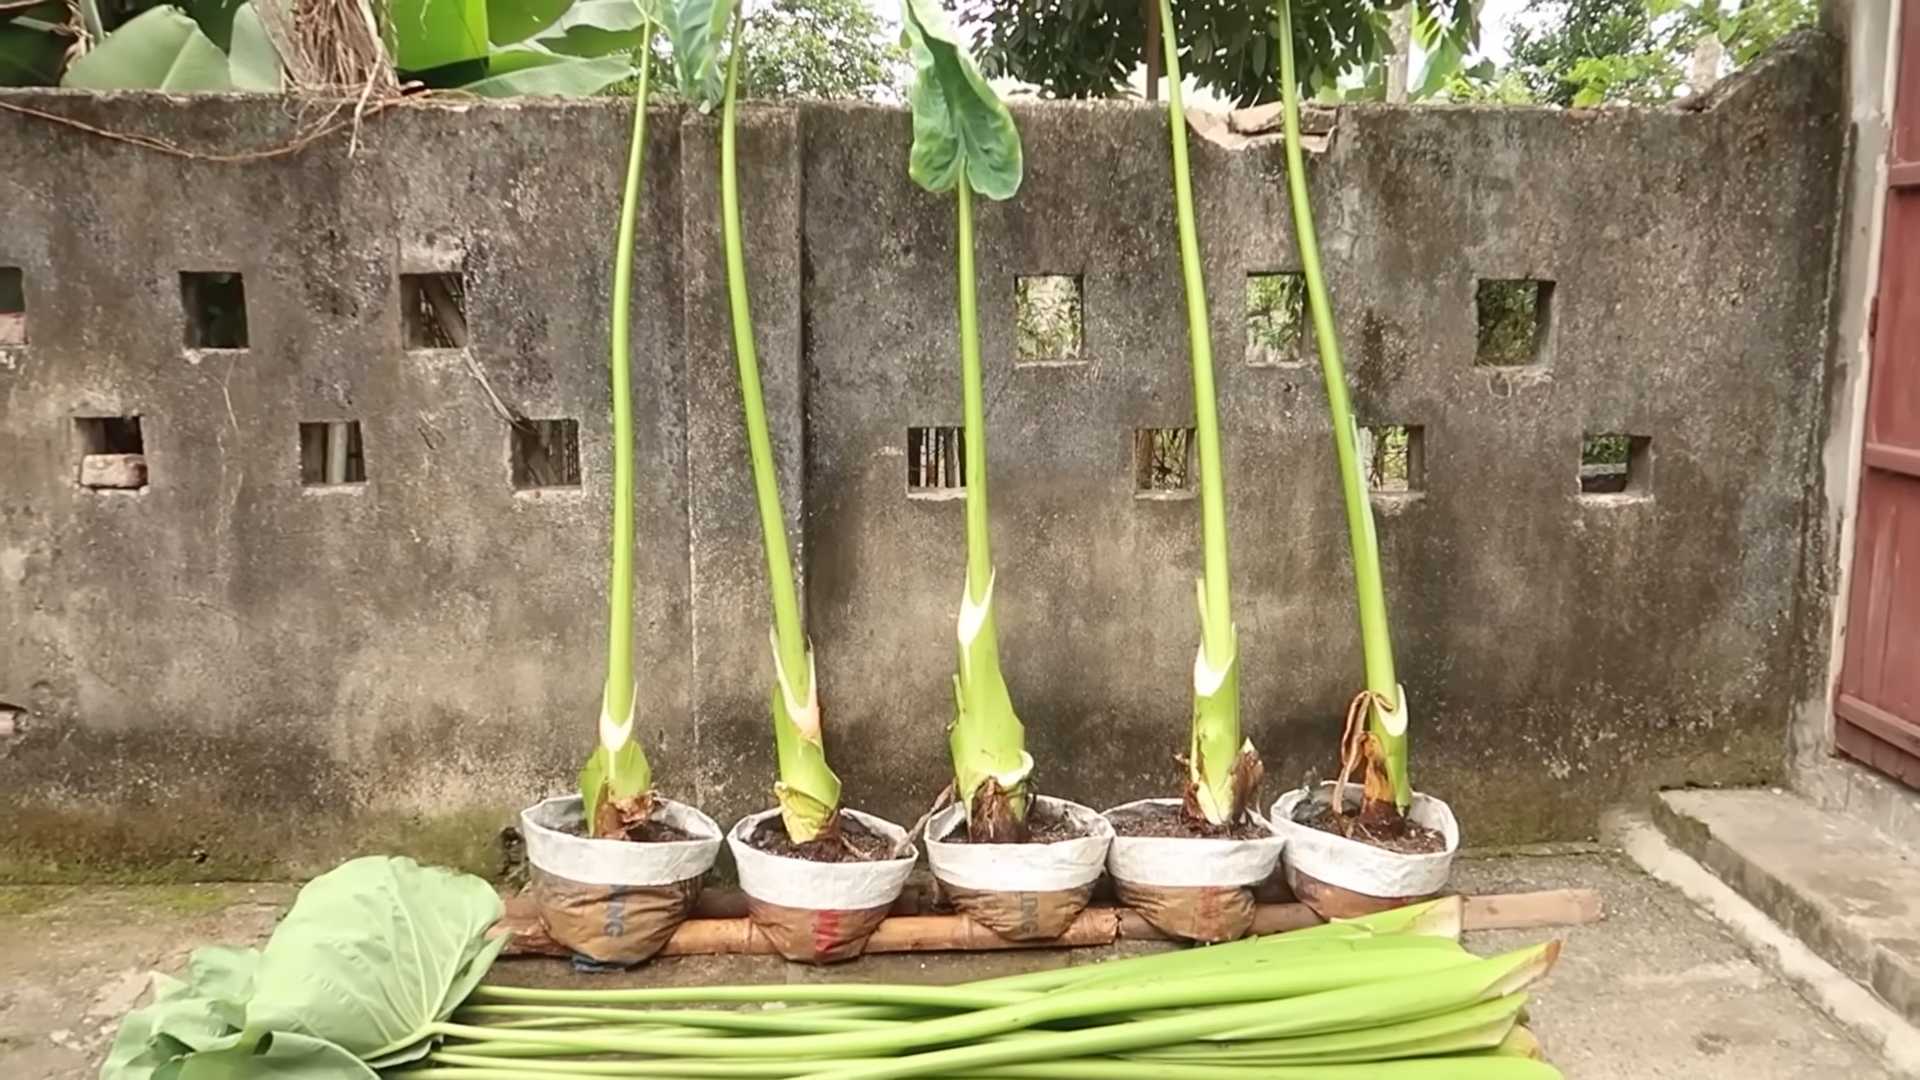
Planting Your Taro
Alright, now for the fun part – getting those taro plants in the ground!
1. Prepare the Planting Hole: Dig a hole that’s about twice as wide as the corm and just deep enough so that the top of the corm will be slightly below the soil surface. If you’re using cuttings, dig a hole deep enough to bury about half of the cutting.
2. Plant the Corm or Cutting: Place the corm in the hole with the “eyes” facing upwards. If you’re using a cutting, make sure the bottom end is buried in the soil.
3. Backfill with Soil: Gently backfill the hole with your prepared soil, making sure to pack it lightly around the corm or cutting.
4. Water Thoroughly: Water the newly planted taro thoroughly to help settle the soil and encourage root growth.
Caring for Your Taro
Once your taro is planted, it’s important to provide it with the right care to ensure it thrives. This includes watering, fertilizing, and protecting it from pests and diseases.
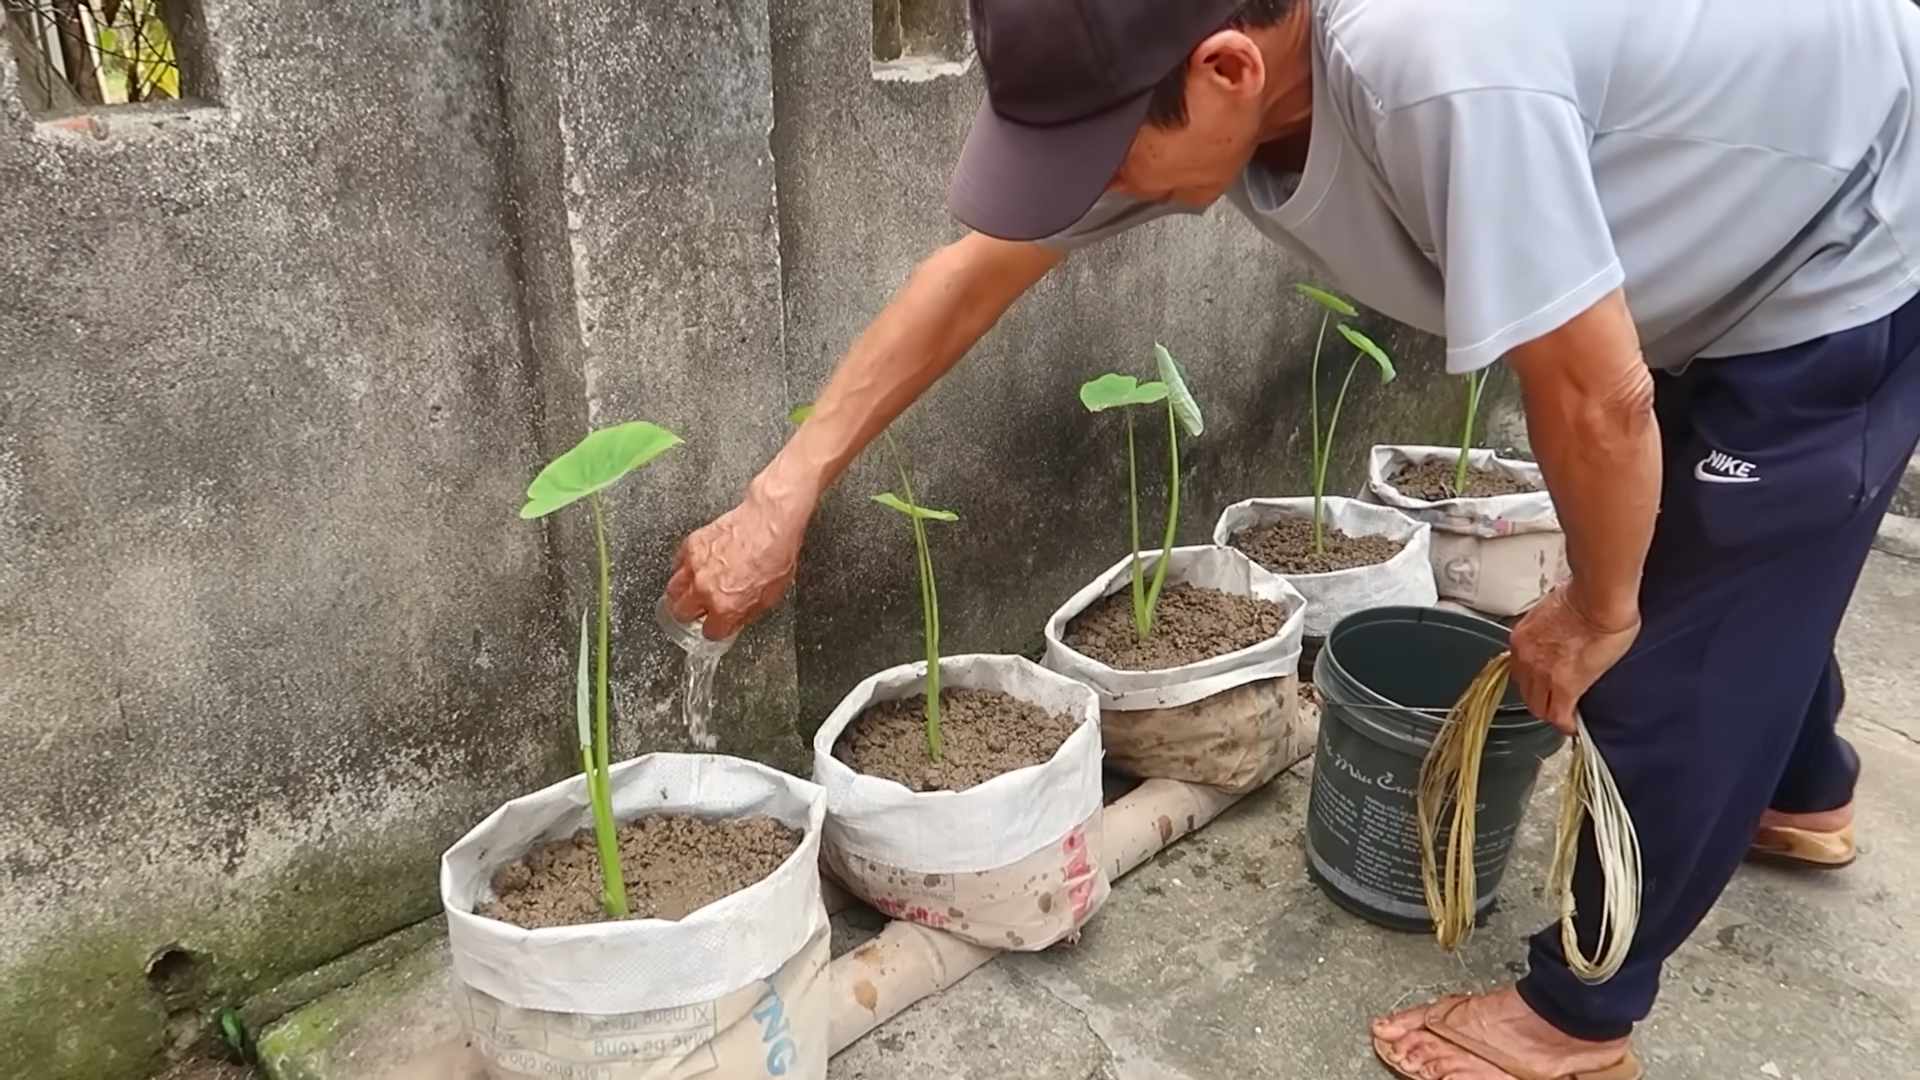
Watering
Taro loves water, so keep the soil consistently moist. Water deeply whenever the top inch of soil feels dry to the touch. During hot, dry weather, you may need to water daily. If you’re growing taro in containers, make sure the pot has drainage holes to prevent waterlogging.
Fertilizing
Taro is a heavy feeder, so it needs regular fertilization to produce healthy growth. I prefer to use organic fertilizers, such as compost tea, fish emulsion, or seaweed extract.
* Compost Tea: Brew your own compost tea by steeping compost in water for a few days. Dilute the tea before applying it to your taro plants.
* Fish Emulsion: Fish emulsion is a great source of nitrogen, which is essential for leafy growth. Follow the instructions on the label for application rates.
* Seaweed Extract: Seaweed extract is rich in micronutrients and helps to improve plant health and disease resistance.
Fertilize your taro plants every 2-3 weeks during the growing season.
Pest and Disease Control
Taro is generally resistant to pests and diseases, but it can be susceptible to certain problems, such as aphids, spider mites, and fungal diseases.
* Aphids: These tiny insects can suck the sap from your taro plants, causing them to become weak and stunted. You can control aphids by spraying them with a strong stream of water or by using insecticidal soap.
* Spider Mites: These tiny pests can cause yellowing and stippling on the leaves of your taro plants. You can control spider mites by spraying them with water or by using horticultural oil.
* Fungal Diseases: Taro can be susceptible to fungal diseases, such as leaf spot and root rot. To prevent fungal diseases, make sure your taro plants have good air circulation and avoid overwatering. If you notice signs of fungal disease, treat your plants with a fungicide.
I always prefer to use organic pest and disease control methods whenever possible. Neem oil is a great all-purpose solution for many common garden pests.
Harvesting Your Taro
The moment you’ve been waiting for! Harvesting your taro is a rewarding experience. You can harvest both the corms and the leaves of the taro plant.
Harvesting Corms
The corms are typically ready to harvest about 6-12 months after planting, depending on the variety and growing conditions. You’ll know the corms are ready when the leaves start to turn yellow and die back.
1. Loosen the Soil: Use a garden fork to gently loosen the soil around the taro plant.
2. Lift the Plant: Carefully lift the plant out of the ground, being careful not to damage the corms.
3. Separate the Corms: Separate the corms from the plant.
4. Clean the Corms: Wash the corms thoroughly to remove any dirt or debris.
Harvesting Leaves
You can harvest the leaves of the taro plant at any time during the growing season. Choose young, tender leaves that are free from blemishes. Simply cut the leaves off the plant with a sharp knife or scissors. Remember to leave enough leaves on the plant to allow it to continue growing.
Cooking with Taro
Taro is a versatile ingredient that can be used in a variety of dishes. The corms can be boiled, baked, fried, or mashed. The leaves can be steamed, sautéed, or added to soups and stews.
Important Note: Raw taro contains calcium oxalate crystals, which can cause irritation to the mouth and throat. It’s important to cook taro thoroughly to break down these crystals.
Here are a few of my favorite ways to cook with taro:
* Taro Chips: Slice the corms thinly and fry them until crispy. Season with salt and pepper.
* Taro Mash: Boil the corms until tender and then mash them with butter, milk, and seasonings.
* Taro Leaf Stew: Sauté the leaves with onions, garlic, and other vegetables. Add broth and simmer until the leaves are tender.
Growing Taro in Containers
If you don’t have a lot of space or live in an area with cold winters, you can still grow taro in containers.
* Choose a Large Container: Select a container that’s at least 18 inches in diameter and 18 inches deep.
* Use a Well-Draining Potting Mix: Use a potting mix that’s rich in organic matter and drains well.
* Water Regularly: Keep the soil consistently moist.
* Fertilize Regularly: Fertilize your taro plants every 2-3 weeks during the growing season.
* Overwintering: In cold climates, you can overwinter your taro plants indoors. Before the first frost
Conclusion
So, there you have it! Growing taro at home organically is not only achievable but also incredibly rewarding. From the satisfaction of nurturing a plant from a humble corm to the delicious, versatile ingredient it becomes, this DIY project offers a unique connection to your food. We’ve walked you through the entire process, from selecting the right corm and preparing the ideal growing environment to providing ongoing care and harvesting your bounty.
Why is this a must-try? Because it empowers you to control the quality of your food, ensuring it’s free from harmful chemicals and pesticides. You’ll know exactly what went into growing your taro, giving you peace of mind and a healthier, more sustainable option. Plus, imagine the bragging rights when you serve a dish featuring taro you grew yourself!
But the journey doesn’t end here. Feel free to experiment with different varieties of taro to discover your favorite flavor profile. Try growing your taro in different types of containers or even directly in your garden if your climate allows. Consider companion planting with other vegetables and herbs to create a thriving, self-sustaining ecosystem. You can even explore different methods of propagation, such as growing taro from stem cuttings, to expand your taro patch.
Don’t be afraid to get your hands dirty and embrace the learning process. Every plant is different, and you’ll undoubtedly encounter challenges along the way. But with patience, observation, and a little bit of love, you’ll be rewarded with a thriving taro plant and a delicious harvest.
We wholeheartedly encourage you to give this DIY trick a try. It’s a fun, educational, and ultimately delicious way to connect with nature and enhance your culinary experience. Once you’ve successfully grown your own taro, we’d love to hear about your experience! Share your photos, tips, and challenges in the comments below. Let’s create a community of home taro growers and learn from each other. Let us know what worked for you, what didn’t, and any creative ways you’ve found to incorporate your homegrown taro into your favorite dishes. Your insights could inspire others to embark on their own taro-growing adventure. Remember, the best way to learn is by doing, and the best way to improve is by sharing. So, get growing and let’s cultivate a world of homegrown goodness together!
Frequently Asked Questions (FAQs)
What is the best time of year to start growing taro?
The ideal time to start growing taro is during the warm months, typically in late spring or early summer. Taro thrives in warm temperatures and requires a long growing season of at least 7-9 months. Starting in the spring allows the plant to establish itself and mature before the cooler months arrive. If you live in a region with mild winters, you may be able to grow taro year-round. However, in colder climates, it’s best to start indoors or in a greenhouse to protect the plant from frost.
How much sunlight does taro need?
Taro prefers partial shade, especially during the hottest part of the day. While it needs sunlight to grow, too much direct sunlight can scorch the leaves. Aim for about 4-6 hours of indirect sunlight per day. If you’re growing taro indoors, place it near a window that receives bright, indirect light. If you’re growing it outdoors, choose a location that is shaded during the afternoon. You can also use shade cloth to protect the plant from excessive sun exposure.
What type of soil is best for growing taro?
Taro thrives in rich, well-draining soil that is high in organic matter. A slightly acidic to neutral pH (6.0-7.0) is ideal. You can improve the soil by adding compost, well-rotted manure, or other organic amendments. Good drainage is essential to prevent root rot, so avoid heavy clay soils that retain too much water. If you’re growing taro in a container, use a high-quality potting mix that is specifically formulated for vegetables or tropical plants.
How often should I water my taro plant?
Taro requires consistent moisture, but it’s important to avoid overwatering. Water the plant deeply whenever the top inch of soil feels dry to the touch. During hot, dry weather, you may need to water more frequently. Ensure that the pot has drainage holes to prevent water from accumulating at the bottom. Taro also benefits from high humidity, so consider misting the leaves regularly or placing the plant near a humidifier.
How do I know when my taro is ready to harvest?
Taro is typically ready to harvest when the leaves start to turn yellow and die back. This usually occurs about 7-9 months after planting. You can also check the size of the corm by gently digging around the base of the plant. The corm should be firm and well-developed. To harvest, carefully dig up the entire plant, being careful not to damage the corm. Cut off the leaves and stems, leaving about an inch or two attached to the corm. Wash the corm thoroughly and store it in a cool, dry place.
Are there any pests or diseases that affect taro?
Taro can be susceptible to certain pests and diseases, such as aphids, spider mites, and root rot. Regularly inspect your plant for signs of infestation or disease. Aphids and spider mites can be controlled with insecticidal soap or neem oil. Root rot is caused by overwatering and poor drainage, so ensure that your plant is growing in well-draining soil and that you’re not overwatering it. If you notice any signs of disease, remove the affected leaves or stems immediately.
Can I eat the leaves of the taro plant?
Yes, the leaves of the taro plant are edible, but they must be cooked thoroughly to remove calcium oxalate crystals, which can cause irritation to the mouth and throat. Boiling the leaves for at least 30 minutes or steaming them for an hour will break down these crystals. Taro leaves are often used in dishes such as laulau (Hawaiian steamed pork and taro leaves) and callaloo (Caribbean stew).
Is growing taro organically difficult?
Not at all! Growing taro organically is quite straightforward. The key is to start with healthy corms, use organic soil amendments, and practice good watering and pest control techniques. Avoid using synthetic fertilizers and pesticides, and instead opt for natural alternatives such as compost, manure, and neem oil. With a little bit of care and attention, you can easily grow taro organically at home.
What are some creative ways to use homegrown taro?
The possibilities are endless! You can use homegrown taro in a variety of dishes, both sweet and savory. Try making taro chips, taro fries, taro soup, taro smoothies, or even taro ice cream. Taro can also be used as a substitute for potatoes in many recipes. Get creative and experiment with different flavors and textures to discover your favorite ways to enjoy your homegrown taro.
How can I encourage others to try growing taro at home organically?
Share your success! Post photos of your taro plants and dishes on social media, and encourage your friends and family to give it a try. Offer to share your corms or provide guidance to those who are interested. By sharing your knowledge and enthusiasm, you can inspire others to embark on their own taro-growing adventure and experience the joy of growing their own food.

Leave a Comment