

Grow Strawberries at Home – imagine plucking juicy, sun-ripened strawberries straight from your own garden! Sounds like a dream, right? Well, it doesn’t have to be! For centuries, cultivating our own food has been a deeply satisfying practice, connecting us to nature and providing fresh, healthy produce. From ancient Roman rooftop gardens to the victory gardens of wartime, growing your own food is a tradition with a rich history.
But let’s be honest, not everyone has acres of land or a green thumb. That’s where our DIY tricks and hacks come in! I’m here to show you that you don’t need a sprawling farm to enjoy the sweet taste of homegrown strawberries. Whether you have a tiny balcony, a sunny windowsill, or a small backyard, I’ll guide you through simple, effective methods to grow strawberries at home, even if you’re a complete beginner.
Why is this so important? Because fresh, store-bought strawberries can be expensive and often lack the intense flavor of homegrown varieties. Plus, you’ll know exactly what’s going into your food – no harmful pesticides or chemicals! So, get ready to roll up your sleeves and discover the joy of growing your own delicious strawberries. Let’s get started!
Grow Your Own Delicious Strawberries: A Beginner’s Guide
Hey there, fellow gardening enthusiasts! Ever dreamt of plucking juicy, sun-ripened strawberries straight from your own backyard? Well, dream no more! Growing strawberries at home is surprisingly easy and incredibly rewarding. I’m going to walk you through everything you need to know, from choosing the right variety to harvesting your sweet bounty. Let’s get started!
Choosing the Right Strawberry Variety
Before you even think about planting, you need to decide which type of strawberry is right for you. There are three main types:
* June-bearing: These produce one large crop of strawberries in late spring or early summer (usually in June, hence the name!). They’re great if you want a big batch for jam-making or freezing.
* Everbearing: Don’t let the name fool you; these don’t produce fruit continuously. Instead, they produce two or three crops throughout the growing season – one in spring, one in late summer/early fall.
* Day-neutral: These are the most consistent producers, yielding smaller crops of strawberries throughout the entire growing season, as long as temperatures are moderate.
Consider your climate, available space, and desired harvest schedule when making your choice. I personally love day-neutral varieties because I enjoy having fresh strawberries all summer long!
Preparing Your Strawberry Patch
Strawberries need a sunny spot and well-drained soil to thrive. Here’s how to get your planting area ready:
1. Choose a Sunny Location: Strawberries need at least 6-8 hours of direct sunlight per day. The more sun, the sweeter the berries!
2. Test Your Soil: A soil test will tell you the pH and nutrient levels of your soil. Strawberries prefer slightly acidic soil with a pH between 5.5 and 6.8. You can buy a soil test kit at most garden centers.
3. Amend the Soil: Based on your soil test results, amend the soil as needed. If your soil is too alkaline, you can add sulfur or peat moss to lower the pH. If it’s lacking in nutrients, incorporate compost or aged manure. I always add plenty of compost to my strawberry patch – it really makes a difference!
4. Ensure Good Drainage: Strawberries hate soggy roots. If your soil is heavy clay, amend it with sand or perlite to improve drainage. You can also consider planting in raised beds.
5. Clear the Area: Remove any weeds, rocks, or debris from the planting area. Weeds compete with strawberries for nutrients and water, so it’s important to get rid of them before planting.
Planting Your Strawberry Plants
Now for the fun part – planting! You can buy strawberry plants as bare-root plants or potted plants. Bare-root plants are typically cheaper, but potted plants are easier to establish.
1. Soak Bare-Root Plants: If you’re using bare-root plants, soak the roots in water for about an hour before planting. This will help rehydrate them.
2. Dig Holes: Dig holes that are large enough to accommodate the roots of your strawberry plants. Space the holes about 12-18 inches apart for June-bearing varieties and 8-12 inches apart for everbearing and day-neutral varieties.
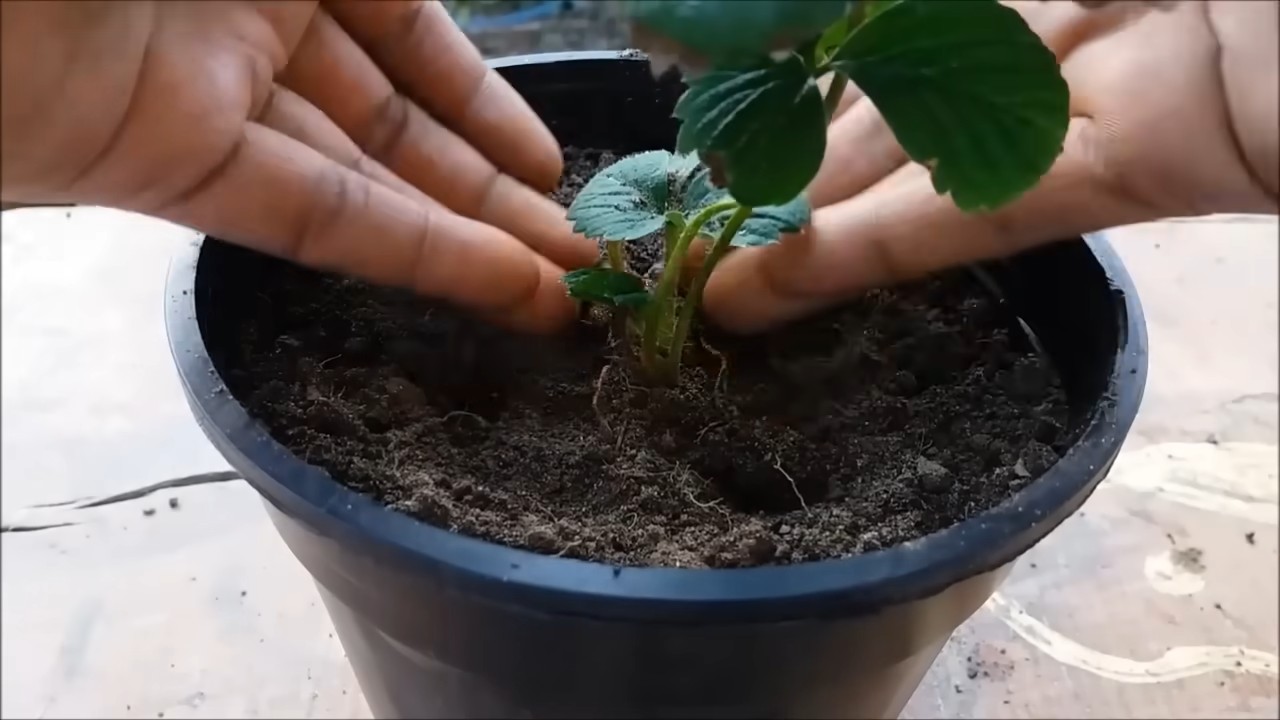
3. Plant the Strawberries: Place the strawberry plants in the holes, making sure that the crown (the point where the roots meet the stem) is level with the soil surface. Don’t bury the crown, as this can cause the plant to rot.
4. Backfill the Holes: Gently backfill the holes with soil, firming it around the roots.
5. Water Thoroughly: Water the newly planted strawberries thoroughly. This will help settle the soil and encourage root growth.
6. Mulch: Apply a layer of mulch around the strawberry plants. Mulch helps retain moisture, suppress weeds, and keep the berries clean. Straw, pine needles, or wood chips are all good choices. I prefer straw because it’s readily available and breaks down over time, adding organic matter to the soil.
Caring for Your Strawberry Plants
Once your strawberries are planted, it’s important to provide them with the care they need to thrive.
1. Watering: Water your strawberry plants regularly, especially during dry periods. Strawberries need about 1 inch of water per week. Water deeply and infrequently, rather than shallowly and frequently. Avoid overhead watering, as this can promote fungal diseases. Drip irrigation is the best way to water strawberries.
2. Fertilizing: Fertilize your strawberry plants in early spring and again after the first harvest. Use a balanced fertilizer that is specifically formulated for strawberries. Follow the instructions on the fertilizer package. I like to use an organic fertilizer, such as fish emulsion or compost tea.
3. Weeding: Keep your strawberry patch free of weeds. Weeds compete with strawberries for nutrients and water. Hand-pull weeds regularly or use a hoe to cultivate the soil. Be careful not to damage the strawberry plants’ roots.
4. Pest and Disease Control: Strawberries can be susceptible to various pests and diseases. Monitor your plants regularly for signs of problems. Common pests include aphids, spider mites, and slugs. Common diseases include gray mold, leaf spot, and powdery mildew. Treat any problems promptly with appropriate pesticides or fungicides. I prefer to use organic pest and disease control methods whenever possible. Neem oil is a great option for controlling many common pests.
5. Renovating June-Bearing Strawberries: After your June-bearing strawberries have finished fruiting, it’s important to renovate the patch. This involves mowing the plants down to about 1 inch above the ground and thinning out the runners. Renovation helps to keep the patch productive for years to come.
6. Protecting from Birds: Birds love strawberries just as much as we do! To protect your berries from birds, you can cover the plants with netting. Make sure the netting is securely anchored to the ground so that birds can’t get underneath it.
Growing Strawberries in Containers
Don’t have a garden? No problem! You can easily grow strawberries in containers.
1. Choose the Right Container: Select a container that is at least 12 inches in diameter and 8 inches deep. Make sure the container has drainage holes.
2. Use a Good Quality Potting Mix: Don’t use garden soil in containers. It’s too heavy and doesn’t drain well. Use a good quality potting mix that is specifically formulated for containers.
3. Plant the Strawberries: Plant the strawberries in the container, following the same instructions as for planting in the ground.
4. Water and Fertilize Regularly: Container-grown strawberries need to be watered and fertilized more frequently than strawberries grown in the ground. Water when the top inch of soil feels dry to the touch. Fertilize every two weeks with a balanced fertilizer.
5. Provide Sunlight: Place the container in a sunny location that receives at least 6-8 hours of direct sunlight per day.
6. Overwintering: In cold climates, container-grown strawberries need to be protected from freezing temperatures. You can move the containers to a sheltered location, such as a garage or shed, or you can wrap the containers in burlap or bubble wrap.
Harvesting Your Strawberries
The moment you’ve been waiting for! Harvesting your own homegrown strawberries is one of the most rewarding experiences.
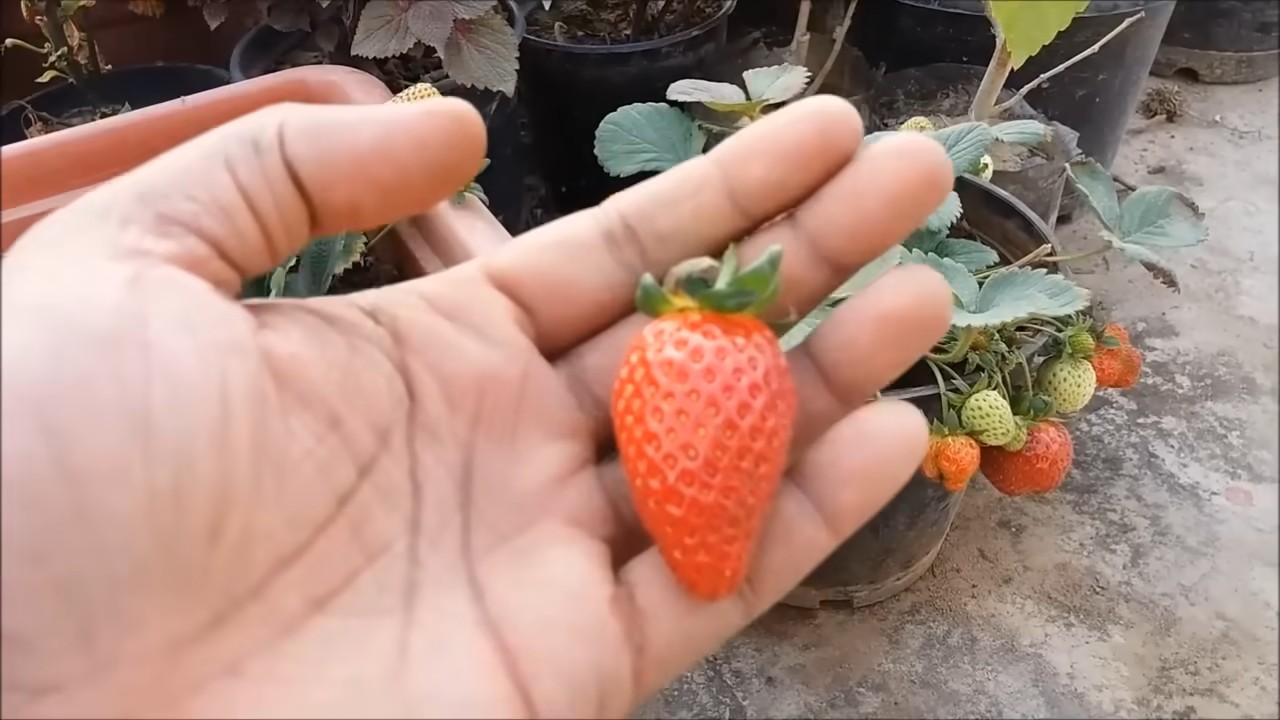
1. When to Harvest: Strawberries are ready to harvest when they are fully red and slightly soft to the touch. The berries should also detach easily from the plant.
2. How to Harvest: Gently grasp the strawberry near the stem and twist it off the plant. Be careful not to bruise the berries.
3. Harvest Frequently: Harvest your strawberries frequently, as they ripen quickly. Check your plants every day or two during peak season.
4. Enjoy Your Harvest: Eat your strawberries fresh, or use them in your favorite recipes. Strawberries are delicious in pies, jams, smoothies, and salads. You can also freeze them for later use.
Troubleshooting Common Strawberry Problems
Even with the best care, you may encounter some problems when growing strawberries. Here are some common issues and how to address them:
* Small Berries: Small berries can be caused by a lack of sunlight, water, or nutrients. Make sure your plants are getting enough sun, water, and fertilizer.
* Rotting Berries: Rotting berries can be caused by fungal diseases, such as gray mold. Improve air circulation around the plants by thinning out the foliage. Avoid overhead watering. Treat with a fungicide if necessary.
* Pest Infestations: Monitor your plants regularly for signs of pests. Treat any infestations promptly with appropriate pesticides.
* Lack of Fruit: A lack of fruit can be caused by a variety of factors, including poor pollination, frost damage, or nutrient deficiencies. Make sure your plants are getting enough sun, water, and fertilizer. Protect them from frost.
Propagating Strawberries
Conclusion
So, there you have it! Growing strawberries at home, especially using this simple DIY trick, is more than just a gardening project; it’s an investment in fresh, flavorful fruit, a sustainable lifestyle, and a rewarding hobby. We’ve walked you through a method that’s accessible, cost-effective, and yields surprisingly bountiful results, even for those with limited space or gardening experience.
Why is this a must-try? Because store-bought strawberries, while convenient, often lack the intense sweetness and vibrant flavor of homegrown berries. Plus, you have complete control over what goes into your strawberries – no harmful pesticides or chemicals necessary! Imagine biting into a sun-ripened strawberry, bursting with juicy goodness, knowing you nurtured it from start to finish. That’s an experience worth pursuing.
But the benefits extend beyond taste. This DIY approach promotes sustainability by reducing your reliance on commercially grown produce, which often travels long distances and contributes to carbon emissions. It’s a small step towards a greener lifestyle that can make a big difference.
Looking for variations? Absolutely! Consider these ideas to personalize your strawberry-growing journey:
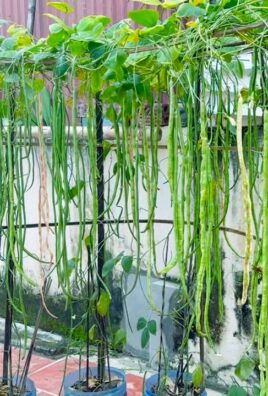
* Vertical Gardening: If space is truly limited, explore vertical strawberry planters. These ingenious designs allow you to grow strawberries upwards, maximizing your yield in a small footprint.
* Companion Planting: Enhance your strawberry patch by planting companion plants like basil, thyme, or marigolds. These herbs and flowers can deter pests and attract beneficial insects, creating a healthier ecosystem for your strawberries.
* Different Strawberry Varieties: Experiment with different strawberry varieties to discover your favorites. Everbearing strawberries produce fruit throughout the growing season, while June-bearing strawberries offer a concentrated harvest in early summer. Alpine strawberries are smaller but incredibly flavorful.
* Container Choices: While we focused on a specific container type, feel free to experiment with other options like hanging baskets, terracotta pots, or even repurposed containers like old tires (cleaned thoroughly, of course!). Just ensure proper drainage.
* Hydroponics: For the more adventurous gardener, consider hydroponic strawberry growing. This soilless method can yield impressive results and is particularly well-suited for indoor environments.
We are confident that you’ll find this DIY trick for growing strawberries at home incredibly rewarding. The satisfaction of harvesting your own delicious berries is unparalleled. Don’t be intimidated – it’s easier than you think!
So, grab your supplies, follow our guide, and get ready to enjoy a summer filled with homegrown strawberry goodness. We can’t wait to hear about your experiences! Share your photos, tips, and questions in the comments below. Let’s build a community of strawberry enthusiasts and inspire others to embrace the joy of homegrown fruit. Happy growing!
Frequently Asked Questions (FAQ)
Q: What is the best time of year to start growing strawberries?
A: The best time to plant strawberries depends on your climate and the type of strawberries you’re growing. Generally, early spring (after the last frost) or early fall are ideal. Planting in the spring allows the plants to establish themselves before the heat of summer, while fall planting gives them a head start for the following spring’s harvest. For everbearing varieties, you can often plant them throughout the growing season, but avoid planting during the hottest periods. Check your local climate and the specific recommendations for the strawberry variety you choose.
Q: What kind of soil is best for growing strawberries?
A: Strawberries thrive in well-draining, slightly acidic soil with a pH between 5.5 and 6.5. Amend your soil with compost or other organic matter to improve drainage and fertility. Avoid heavy clay soils, as they can retain too much water and lead to root rot. If you’re growing in containers, use a high-quality potting mix specifically formulated for fruits and vegetables.
Q: How often should I water my strawberry plants?
A: Strawberries need consistent moisture, especially during fruit development. Water deeply whenever the top inch of soil feels dry to the touch. Avoid overwatering, as this can lead to root rot. During hot, dry weather, you may need to water daily. Use a soaker hose or drip irrigation to water at the base of the plants, avoiding wetting the foliage, which can encourage fungal diseases.
Q: How much sunlight do strawberries need?
A: Strawberries need at least 6-8 hours of direct sunlight per day to produce abundant fruit. Choose a sunny location for your strawberry patch. If you’re growing in containers, you can move them to follow the sun throughout the day.
Q: How do I fertilize my strawberry plants?
A: Fertilize your strawberry plants in early spring, before they start producing fruit, and again after the first harvest. Use a balanced fertilizer specifically formulated for fruits and vegetables. Follow the instructions on the fertilizer package carefully. Avoid over-fertilizing, as this can lead to excessive foliage growth at the expense of fruit production. Organic options like compost tea or fish emulsion are also excellent choices.
Q: How do I protect my strawberries from pests and diseases?
A: Strawberries are susceptible to various pests and diseases, including slugs, snails, aphids, and fungal diseases like gray mold. Regularly inspect your plants for signs of infestation or disease. Remove any affected leaves or fruit promptly. Use organic pest control methods like diatomaceous earth or insecticidal soap to control pests. Ensure good air circulation around your plants to prevent fungal diseases. Consider using netting to protect your berries from birds.
Q: How do I harvest strawberries?
A: Strawberries are ready to harvest when they are fully red, plump, and easily detach from the plant. Gently twist or snip the stem just above the berry. Harvest regularly to encourage continued fruit production. Pick berries in the morning, after the dew has dried, for the best flavor.
Q: How do I overwinter my strawberry plants?
A: In colder climates, protect your strawberry plants from freezing temperatures by mulching them heavily with straw or pine needles. This will insulate the roots and prevent them from being damaged by frost. In milder climates, you may not need to mulch, but you should still protect the plants from extreme cold snaps. Remove the mulch in the spring, after the last frost.
Q: Can I grow strawberries indoors?
A: Yes, you can grow strawberries indoors, but you’ll need to provide them with adequate light and warmth. Use grow lights to supplement natural sunlight, and maintain a consistent temperature between 60-75°F (15-24°C). Choose a self-pollinating strawberry variety, or hand-pollinate the flowers with a small brush.
Q: What are some common problems when growing strawberries, and how can I fix them?
A: Some common problems include:
* Lack of fruit: Ensure your plants are getting enough sunlight, water, and fertilizer. Check for pests or diseases.
* Small berries: This could be due to insufficient watering or fertilization. Thin out the fruit to allow the remaining berries to grow larger.
* Rotting fruit: This is often caused by fungal diseases. Ensure good air circulation and avoid overwatering. Remove any affected fruit promptly.
* Pest infestations: Use organic pest control methods to control pests.
By addressing these common issues promptly, you can ensure a healthy and productive strawberry patch. Remember, patience and observation are key to successful strawberry growing!
Leave a Comment