

Grow Spinach Indoors? Absolutely! Imagine fresh, vibrant spinach leaves gracing your salads and smoothies, even when the snow is falling outside. Forget those limp, pre-packaged greens from the grocery store. This isn’t just a dream; it’s a delicious reality you can create right in your own home with a few simple tricks.
For centuries, cultivating greens indoors has been a way for people to extend the growing season and enjoy fresh produce year-round. From ancient Roman greenhouses to modern-day hydroponic systems, the desire to nurture plants within our living spaces is deeply rooted in our history. But you don’t need to be a seasoned gardener or invest in expensive equipment to enjoy the benefits of homegrown spinach.
Let’s face it, buying fresh spinach can be a gamble. Sometimes it’s wilted before you even get it home! That’s where this DIY guide comes in. I’m going to show you easy, affordable ways to grow spinach indoors, ensuring a constant supply of nutritious and flavorful greens. Whether you have a sunny windowsill, a spare corner, or a dedicated grow light setup, I’ve got tips and tricks to help you succeed. Get ready to ditch the store-bought spinach and embrace the joy of harvesting your own fresh, homegrown goodness!
Spinat im Haus anbauen: Dein umfassender DIY-Leitfaden
Hallo liebe Gartenfreunde! Habt ihr Lust, auch im Winter frischen Spinat zu ernten? Dann seid ihr hier genau richtig! Ich zeige euch, wie ihr ganz einfach Spinat im Haus anbauen könnt. Es ist einfacher als ihr denkt und bringt euch das ganze Jahr über leckeres, gesundes Grün auf den Tisch.
Was du brauchst: Die Einkaufsliste
Bevor wir loslegen, hier eine Liste mit allem, was du für dein Indoor-Spinatprojekt benötigst:
* Spinatsamen: Wähle eine Sorte, die für den Anbau im Haus geeignet ist. “Baby’s Leaf” oder “Winter Giant” sind gute Optionen.
* Behälter: Töpfe, Pflanzkästen oder sogar recycelte Behälter funktionieren prima. Achte darauf, dass sie Abzugslöcher haben.
* Pflanzerde: Eine hochwertige Blumenerde oder spezielle Anzuchterde ist ideal.
* Wasser: Am besten abgestandenes Leitungswasser oder Regenwasser.
* Lichtquelle: Ein sonniges Fensterbrett (Südfenster ist optimal) oder eine Pflanzenlampe.
* Sprühflasche: Zum Befeuchten der Erde.
* Dünger (optional): Flüssigdünger für Blattgemüse.
Die Vorbereitung: Alles bereit machen
Bevor wir mit dem Pflanzen beginnen, müssen wir alles vorbereiten. Das ist wichtig, damit der Spinat sich wohlfühlt und gut wächst.
1. Behälter vorbereiten: Stelle sicher, dass deine Behälter sauber sind und Abzugslöcher haben. Wenn du recycelte Behälter verwendest, reinige sie gründlich mit warmem Seifenwasser.
2. Erde vorbereiten: Fülle die Behälter mit Pflanzerde. Lasse etwa 2-3 cm Platz bis zum Rand. Befeuchte die Erde leicht mit der Sprühflasche. Sie sollte feucht, aber nicht nass sein.
3. Standort wählen: Suche einen sonnigen Platz für deine Spinatpflanzen. Ein Südfenster ist ideal, da es die meiste Sonne abbekommt. Wenn du kein sonniges Fenster hast, kannst du eine Pflanzenlampe verwenden.
Die Aussaat: Spinat säen leicht gemacht
Jetzt kommt der spannende Teil: das Säen der Spinatsamen!
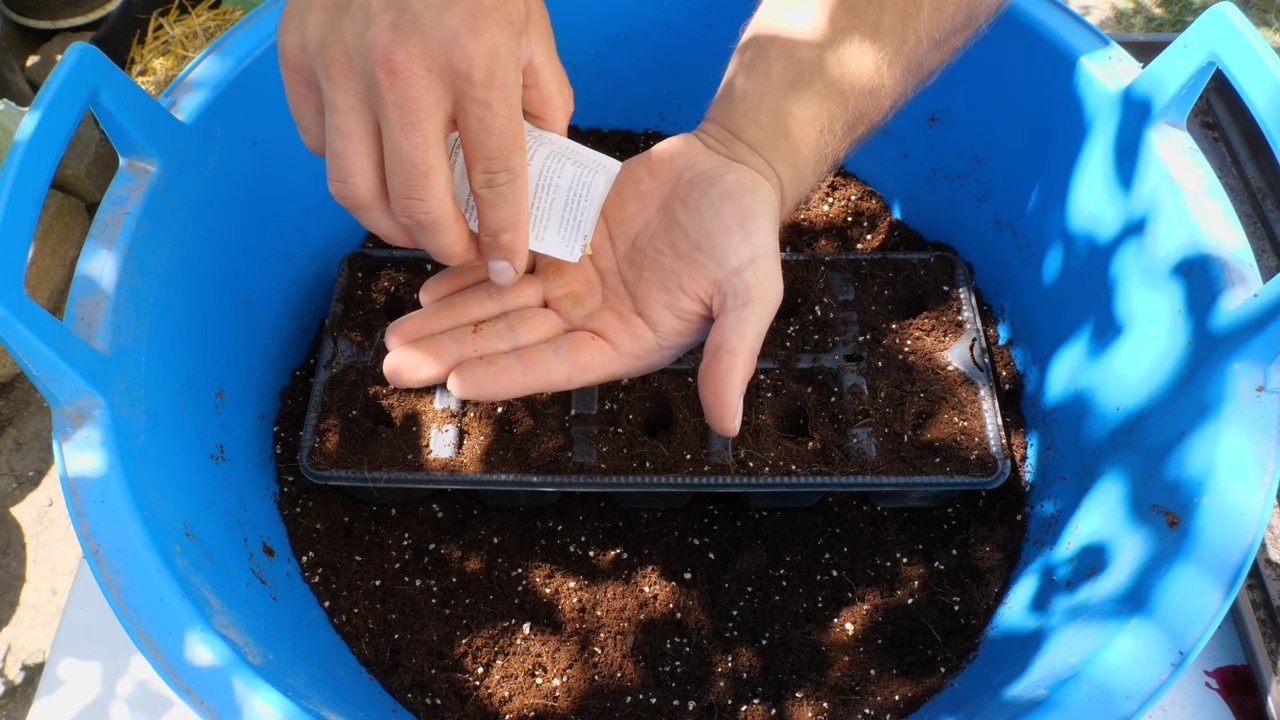
1. Samen säen: Verteile die Spinatsamen gleichmäßig auf der Erde. Drücke sie leicht an, aber bedecke sie nicht zu tief. Eine dünne Schicht Erde (ca. 0,5 cm) reicht aus.
2. Bewässern: Besprühe die Erde vorsichtig mit Wasser, um die Samen zu befeuchten. Achte darauf, dass du sie nicht wegschwemmst.
3. Abdecken (optional): Du kannst die Behälter mit Frischhaltefolie oder einer Plastiktüte abdecken, um die Luftfeuchtigkeit zu erhöhen. Vergiss nicht, ein paar Löcher in die Folie zu stechen, damit die Luft zirkulieren kann.
4. Warten: Stelle die Behälter an einen warmen Ort (ca. 15-20°C) und warte geduldig. Die Samen sollten innerhalb von 7-14 Tagen keimen.
Die Pflege: Spinat glücklich machen
Sobald die Spinatpflanzen gekeimt sind, beginnt die eigentliche Pflege. Hier sind ein paar Tipps, wie du deinen Spinat glücklich machst:
1. Bewässerung: Halte die Erde feucht, aber nicht nass. Gieße regelmäßig, aber vermeide Staunässe. Überprüfe die Erde täglich und gieße, wenn sie sich trocken anfühlt.
2. Licht: Spinat braucht viel Licht, besonders im Winter. Wenn du kein sonniges Fenster hast, verwende eine Pflanzenlampe. Stelle sicher, dass die Lampe ausreichend Licht abgibt und die Pflanzen nicht verbrennt.
3. Temperatur: Spinat mag es kühl. Eine Temperatur zwischen 15 und 20°C ist ideal. Vermeide es, die Pflanzen direkter Hitze (z.B. Heizkörper) auszusetzen.
4. Dünger (optional): Wenn du möchtest, kannst du deine Spinatpflanzen regelmäßig düngen. Verwende einen Flüssigdünger für Blattgemüse und befolge die Anweisungen auf der Verpackung.
5. Ausdünnen: Wenn die Pflanzen zu dicht stehen, solltest du sie ausdünnen. Entferne die schwächsten Pflanzen, um den stärkeren Pflanzen mehr Platz zum Wachsen zu geben.
6. Belüftung: Sorge für eine gute Belüftung, um Schimmelbildung zu vermeiden. Öffne regelmäßig das Fenster oder stelle einen kleinen Ventilator in die Nähe der Pflanzen.
Die Ernte: Endlich frischer Spinat!
Nach etwa 4-6 Wochen kannst du deinen ersten Spinat ernten!
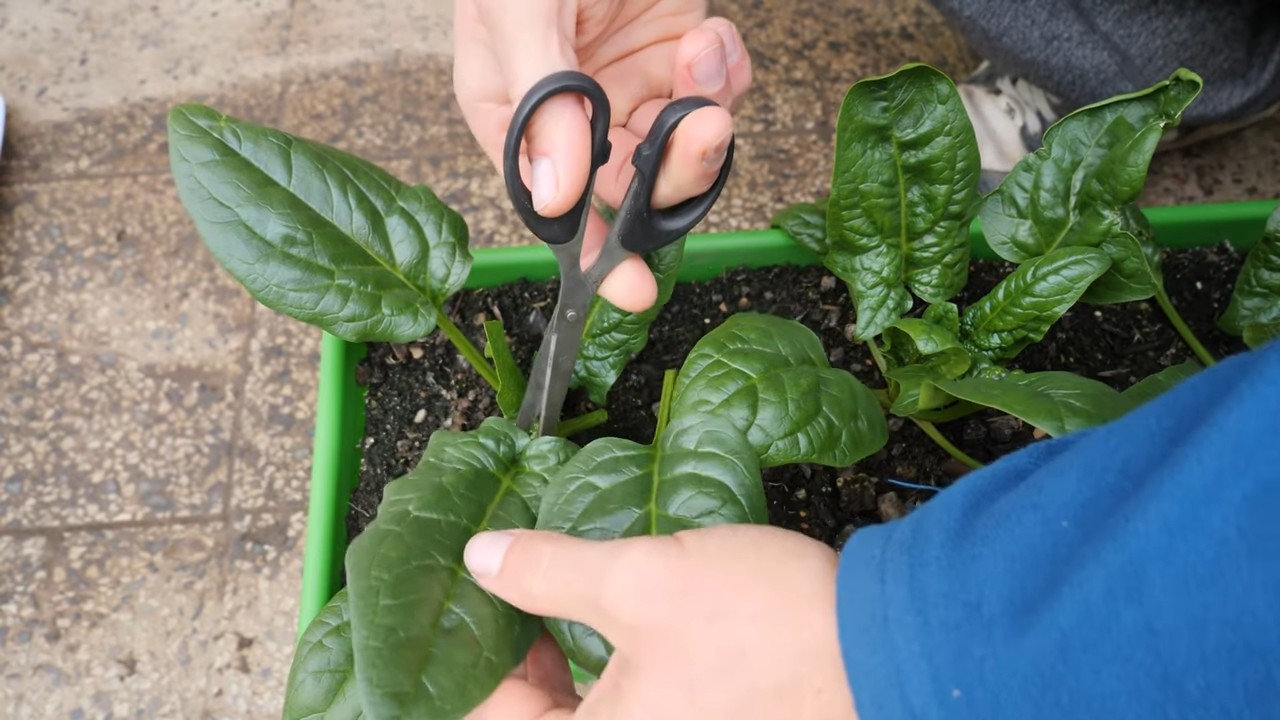
1. Erntezeitpunkt: Ernte den Spinat, wenn die Blätter groß genug sind (ca. 10-15 cm). Du kannst entweder einzelne Blätter abzupfen oder die ganze Pflanze abschneiden.
2. Erntetechnik: Schneide die Blätter mit einer Schere oder einem Messer ab. Lasse die Wurzeln in der Erde, damit die Pflanze weiterwachsen kann.
3. Lagerung: Frischer Spinat ist nicht lange haltbar. Am besten verarbeitest du ihn sofort. Wenn du ihn lagern musst, wickle ihn in ein feuchtes Tuch und bewahre ihn im Kühlschrank auf.
Häufige Probleme und Lösungen
Auch beim Indoor-Spinatanbau können Probleme auftreten. Hier sind ein paar häufige Probleme und wie du sie lösen kannst:
* Gelbe Blätter: Gelbe Blätter können ein Zeichen für Nährstoffmangel sein. Dünge deine Pflanzen mit einem Flüssigdünger.
* Schimmel: Schimmelbildung kann durch zu hohe Luftfeuchtigkeit entstehen. Sorge für eine bessere Belüftung und reduziere die Bewässerung.
* Schädlinge: Blattläuse oder andere Schädlinge können deinen Spinat befallen. Sprühe die Pflanzen mit einer milden Seifenlösung ab.
* Langsames Wachstum: Langsames Wachstum kann durch zu wenig Licht oder zu niedrige Temperaturen verursacht werden. Stelle die Pflanzen an einen helleren Ort oder erhöhe die Temperatur.
Zusätzliche Tipps und Tricks
Hier sind noch ein paar zusätzliche Tipps, die dir beim Indoor-Spinatanbau helfen können:
* Rotation: Pflanze den Spinat nicht immer am selben Ort. Wechsle die Behälter oder die Erde regelmäßig, um Nährstoffmangel zu vermeiden.
* Begleitpflanzen: Pflanze Basilikum oder Knoblauch in die Nähe deines Spinats. Diese Pflanzen können Schädlinge abwehren.
* Komposttee: Gieße deine Pflanzen regelmäßig mit Komposttee. Das stärkt sie und versorgt sie mit wichtigen Nährstoffen.
* Beobachtung: Beobachte deine Pflanzen regelmäßig und achte auf Veränderungen. Je früher du Probleme erkennst, desto besser kannst du sie beheben.
Spinatsorten für den Indoor-Anbau
Nicht alle Spinatsorten sind gleich gut für den Anbau im Haus geeignet. Hier sind ein paar Sorten, die ich empfehlen kann:
* Baby’s Leaf: Diese Sorte ist ideal für den Anbau im Haus, da sie schnell wächst und zarte Blätter produziert.
* Winter Giant: Diese Sorte ist sehr robust und verträgt auch kühlere Temperaturen gut.
* Bloomsdale Long Standing: Diese Sorte ist bekannt für ihre lange Erntezeit und ihre Widerstandsfähigkeit gegen Krankheiten.
* Space: Eine moderne Sorte, die speziell für den Anbau in Containern entwickelt wurde.
Spinat in Hydrokultur anbauen
Wenn du etwas Neues ausprobieren möchtest, kannst du Spinat auch in Hydrokultur anbauen. Dabei werden die Pflanzen nicht in Erde, sondern in einer Nährlösung gezogen. Das hat den Vorteil, dass du die Nährstoffversorgung genau kontrollieren kannst und die Pflanzen schneller wachsen.
Was du brauchst:
* Hydrokultur-System (z.B. Kratky-System oder NFT-System)
* Nährlösung für Blattgemüse
* Spinatsamen
* Anzuchtwürfel oder Steinwolle
So geht’s:
1. Samen keimen lassen: Lasse die Spinatsamen in Anzuchtwürfeln oder Steinwolle keimen.
Conclusion
So, there you have it! Mastering the art of growing spinach indoors is not only achievable but also incredibly rewarding. Forget those limp, pre-packaged greens from the grocery store. Imagine stepping into your kitchen and harvesting fresh, vibrant spinach leaves whenever you need them. The difference in taste and texture is simply undeniable. This DIY trick is a must-try for anyone seeking a healthier, more sustainable lifestyle.
Why is this method so compelling? First, it gives you complete control over the growing environment. You dictate the light, temperature, and soil conditions, ensuring optimal growth and minimizing the risk of pests and diseases. Second, it’s incredibly convenient. No more last-minute trips to the store when you realize you’re out of spinach. Fresh, nutritious greens are always at your fingertips. Third, it’s a fantastic way to reduce your carbon footprint. By growing your own food, you’re cutting down on transportation emissions and supporting a more localized food system. Finally, and perhaps most importantly, it’s incredibly satisfying. There’s something truly special about nurturing a plant from seed to harvest and enjoying the fruits (or rather, the leaves) of your labor.
But don’t stop there! Experiment with different varieties of spinach to find your favorites. Try adding companion plants like basil or chamomile to your indoor garden to enhance flavor and deter pests. Consider using hydroponic systems for an even more efficient and space-saving growing method. You can also explore different lighting options, such as LED grow lights, to optimize growth and energy efficiency.
We’ve provided you with the knowledge and the tools; now it’s time to put them into action. Don’t be intimidated if you’re a beginner. Growing spinach indoors is surprisingly easy, and the rewards are well worth the effort. Start small, be patient, and don’t be afraid to experiment.
We are confident that you’ll be amazed at how easy and rewarding it is to grow your own spinach indoors. So, grab your seeds, prepare your pots, and get ready to enjoy a bounty of fresh, delicious greens.
We encourage you to embark on this exciting journey and share your experiences with us. Let us know what works best for you, what challenges you encounter, and any tips or tricks you discover along the way. Together, we can create a thriving community of indoor gardeners and spread the joy of fresh, homegrown spinach. Share your photos and stories on social media using #IndoorSpinachGarden and inspire others to join the movement! We can’t wait to see your flourishing indoor spinach gardens!
Frequently Asked Questions (FAQ)
What is the best variety of spinach to grow indoors?
While many spinach varieties can be grown indoors, some tend to perform better than others. Baby spinach varieties like ‘Baby’s Leaf Hybrid’ and ‘Space’ are excellent choices because they mature quickly and are well-suited to container gardening. ‘Tyee’ is another good option, known for its disease resistance and adaptability. Ultimately, the best variety depends on your personal preferences and the specific conditions in your indoor growing space. Experiment with a few different types to see which ones thrive in your environment.
How much light does indoor spinach need?
Spinach requires a significant amount of light to grow properly. Ideally, it needs at least 6-8 hours of direct sunlight per day. If you don’t have a sunny windowsill, you’ll need to supplement with artificial lighting. LED grow lights are an excellent option because they are energy-efficient and provide the full spectrum of light that plants need. Position the lights about 6-12 inches above the plants and adjust as needed to prevent burning. Insufficient light can lead to leggy growth and pale leaves.
What type of soil is best for growing spinach indoors?
Spinach prefers well-draining soil that is rich in organic matter. A good potting mix specifically formulated for vegetables is ideal. You can also create your own mix by combining equal parts of potting soil, compost, and perlite or vermiculite. The compost provides essential nutrients, while the perlite or vermiculite improves drainage and aeration. Avoid using garden soil, as it can be too heavy and may contain pests or diseases.
How often should I water my indoor spinach plants?
Water your spinach plants regularly, keeping the soil consistently moist but not waterlogged. Check the soil moisture level daily by sticking your finger about an inch into the soil. If it feels dry, it’s time to water. Water deeply, allowing the excess water to drain out of the bottom of the pot. Avoid overhead watering, as this can promote fungal diseases.
How do I fertilize my indoor spinach plants?
Spinach is a heavy feeder and benefits from regular fertilization. Use a balanced liquid fertilizer, such as a 10-10-10 or 20-20-20, diluted to half strength. Fertilize every 2-3 weeks, following the instructions on the fertilizer label. You can also use organic fertilizers, such as compost tea or fish emulsion. Avoid over-fertilizing, as this can lead to excessive leaf growth and reduced flavor.
What are common pests and diseases that affect indoor spinach?
While indoor spinach is generally less susceptible to pests and diseases than outdoor spinach, it can still be affected by certain problems. Common pests include aphids, spider mites, and whiteflies. These can be controlled with insecticidal soap or neem oil. Fungal diseases, such as powdery mildew and downy mildew, can also occur, especially in humid conditions. Improve air circulation and avoid overhead watering to prevent these diseases. If necessary, use a fungicide specifically labeled for use on vegetables.
When can I harvest my indoor spinach?
You can start harvesting spinach leaves when they are about 4-6 inches long. Harvest the outer leaves first, leaving the inner leaves to continue growing. This cut-and-come-again method allows you to harvest spinach continuously for several weeks. Avoid harvesting more than one-third of the plant at a time.
How do I store harvested spinach?
Store harvested spinach in the refrigerator in a plastic bag or container. It will keep for about a week. Wash the spinach just before using it.
Can I grow spinach indoors year-round?
Yes, you can grow spinach indoors year-round, provided you have adequate light and temperature control. In the winter, you may need to supplement with artificial lighting to ensure sufficient light exposure.
Is growing spinach indoors worth it?
Absolutely! Growing spinach indoors offers numerous benefits, including fresh, nutritious greens, convenience, reduced carbon footprint, and the satisfaction of growing your own food. It’s a rewarding and sustainable way to enjoy delicious spinach year-round.

Leave a Comment