

Grow Snap Peas Kitchen: Imagine plucking fresh, crisp snap peas right from your kitchen, ready to be tossed into a salad or enjoyed as a healthy snack. Sounds dreamy, right? Well, it doesn’t have to be just a dream! For centuries, people have cultivated small gardens in and around their homes, a practice deeply rooted in self-sufficiency and a connection to nature. From ancient Roman courtyards to the window boxes of Victorian England, bringing the garden indoors has always been a way to nourish both body and soul.
But let’s be honest, in today’s busy world, who has the time for a sprawling garden? That’s where these amazing DIY tricks and hacks come in! I’m going to show you how easy it is to grow snap peas kitchen, even if you have limited space or zero gardening experience. This isn’t just about growing food; it’s about adding a touch of green to your life, reducing your grocery bill, and experiencing the joy of nurturing something from seed to harvest. So, grab your gardening gloves (or don’t, it’s that easy!), and let’s get started on this exciting journey to fresh, homegrown snap peas!
Growing Snap Peas Indoors: A Beginner’s Guide
Hey there, fellow plant enthusiasts! Ever dreamt of having fresh, crunchy snap peas right at your fingertips, even when the weather outside is frightful? Well, dream no more! I’m going to walk you through the surprisingly simple process of growing snap peas indoors. It’s a rewarding experience, and trust me, nothing beats the taste of homegrown veggies.
Choosing Your Snap Pea Variety
Before we dive into the nitty-gritty, let’s talk about snap pea varieties. While most snap peas will grow indoors, some are better suited than others. Look for bush varieties, as they tend to be more compact and manageable for indoor spaces.
* ‘Sugar Ann’: This is a super early variety, perfect if you’re impatient like me! It produces sweet, plump pods in about 50-60 days.
* ‘Sugar Snap’: The classic snap pea! It’s known for its thick, juicy pods and vigorous growth.
* ‘Bush Sugar Baby’: As the name suggests, this is a compact bush variety, ideal for containers.
Gathering Your Supplies
Okay, time to gather our tools and materials. Here’s what you’ll need:
* Snap Pea Seeds: Choose your favorite variety!
* Containers: I recommend pots that are at least 6 inches deep and wide. Snap peas need room for their roots to grow.
* Potting Mix: Use a high-quality, well-draining potting mix. Avoid garden soil, as it can compact and hinder drainage.
* Grow Lights: Snap peas need plenty of light, especially indoors. A good grow light is essential.
* Trellis or Support: Even bush varieties benefit from some support. A small trellis, bamboo stakes, or even twigs will do the trick.
* Watering Can or Spray Bottle: For gentle watering.
* Optional: Seed Starting Tray and Dome: For starting seeds indoors before transplanting.
Planting Your Snap Pea Seeds
Now for the fun part – planting! You have two options here: direct sowing into your containers or starting seeds indoors and transplanting later. I personally prefer starting seeds indoors, as it gives them a head start.
Starting Seeds Indoors (Optional but Recommended)
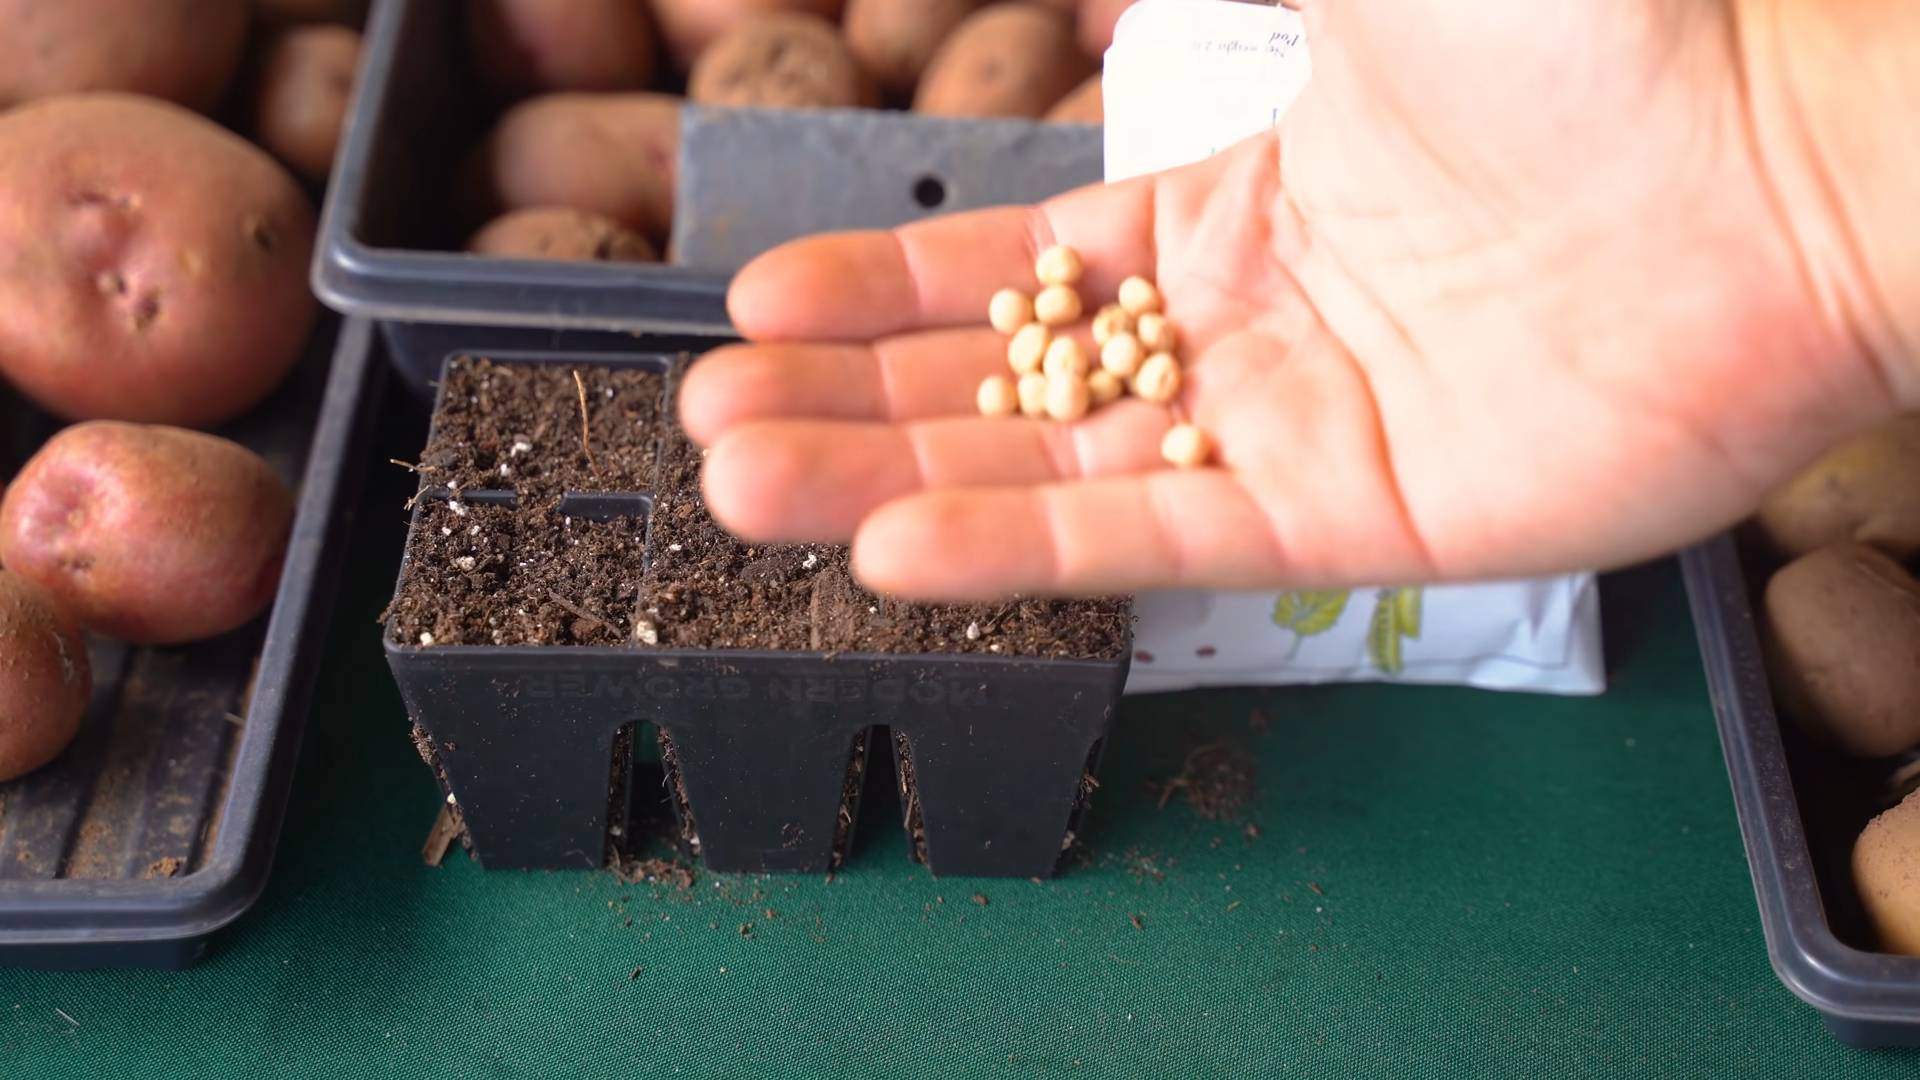
1. Prepare Your Seed Starting Tray: Fill your seed starting tray with moistened potting mix.
2. Sow the Seeds: Plant 2-3 seeds per cell, about 1 inch deep.
3. Cover and Water: Gently cover the seeds with potting mix and water thoroughly.
4. Provide Humidity: Place a humidity dome over the tray to create a warm, moist environment.
5. Place Under Grow Lights: Position the tray under your grow lights.
6. Monitor and Water: Keep the soil consistently moist but not soggy.
7. Transplant Seedlings: Once the seedlings have developed a few sets of true leaves (usually after 2-3 weeks), they’re ready to be transplanted into their final containers.
Direct Sowing into Containers
1. Prepare Your Containers: Fill your containers with moistened potting mix.
2. Sow the Seeds: Plant 3-4 seeds per container, about 1 inch deep. Space them evenly around the container.
3. Cover and Water: Gently cover the seeds with potting mix and water thoroughly.
4. Place Under Grow Lights: Position the containers under your grow lights.
5. Thin Seedlings: Once the seedlings emerge, thin them to 1-2 plants per container, selecting the strongest ones.
Caring for Your Indoor Snap Peas
Once your snap peas are planted, it’s time to provide them with the care they need to thrive.
Light
Snap peas need at least 6-8 hours of direct light per day. If you don’t have a sunny window, a grow light is essential. Position the grow light a few inches above the plants and adjust as they grow. I usually keep my grow lights on for about 14-16 hours a day.
Watering
Keep the soil consistently moist but not soggy. Water when the top inch of soil feels dry to the touch. Avoid overwatering, as this can lead to root rot. I like to use a spray bottle to gently water my seedlings.
Fertilizing
Snap peas are relatively light feeders, but they will benefit from occasional fertilization. Use a balanced liquid fertilizer diluted to half strength every 2-3 weeks. I prefer using an organic fertilizer.
Support
As your snap peas grow, they’ll need some support to climb. Install a small trellis, bamboo stakes, or even twigs in the container. Gently guide the vines onto the support as they grow.
Temperature
Snap peas prefer cooler temperatures, ideally between 60-70°F (15-21°C). Avoid placing them near heat sources, such as radiators or vents.
Pollination
Snap peas are self-pollinating, so you don’t need to worry about hand-pollinating them indoors. However, you can give them a little help by gently shaking the plants occasionally to release pollen.
Dealing with Pests and Diseases
While growing snap peas indoors can minimize pest and disease problems, it’s still important to be vigilant.
* Aphids: These tiny pests can suck the sap from your plants. If you spot aphids, try spraying them off with a strong stream of water or using insecticidal soap.
* Spider Mites: These tiny mites can cause yellowing and stippling on the leaves. Increase humidity and spray the plants with water to deter spider mites.
* Powdery Mildew: This fungal disease can cause a white, powdery coating on the leaves. Improve air circulation and avoid overhead watering to prevent powdery mildew.
Harvesting Your Snap Peas
The moment you’ve been waiting for – harvesting! Snap peas are typically ready to harvest about 50-70 days after planting, depending on the variety.
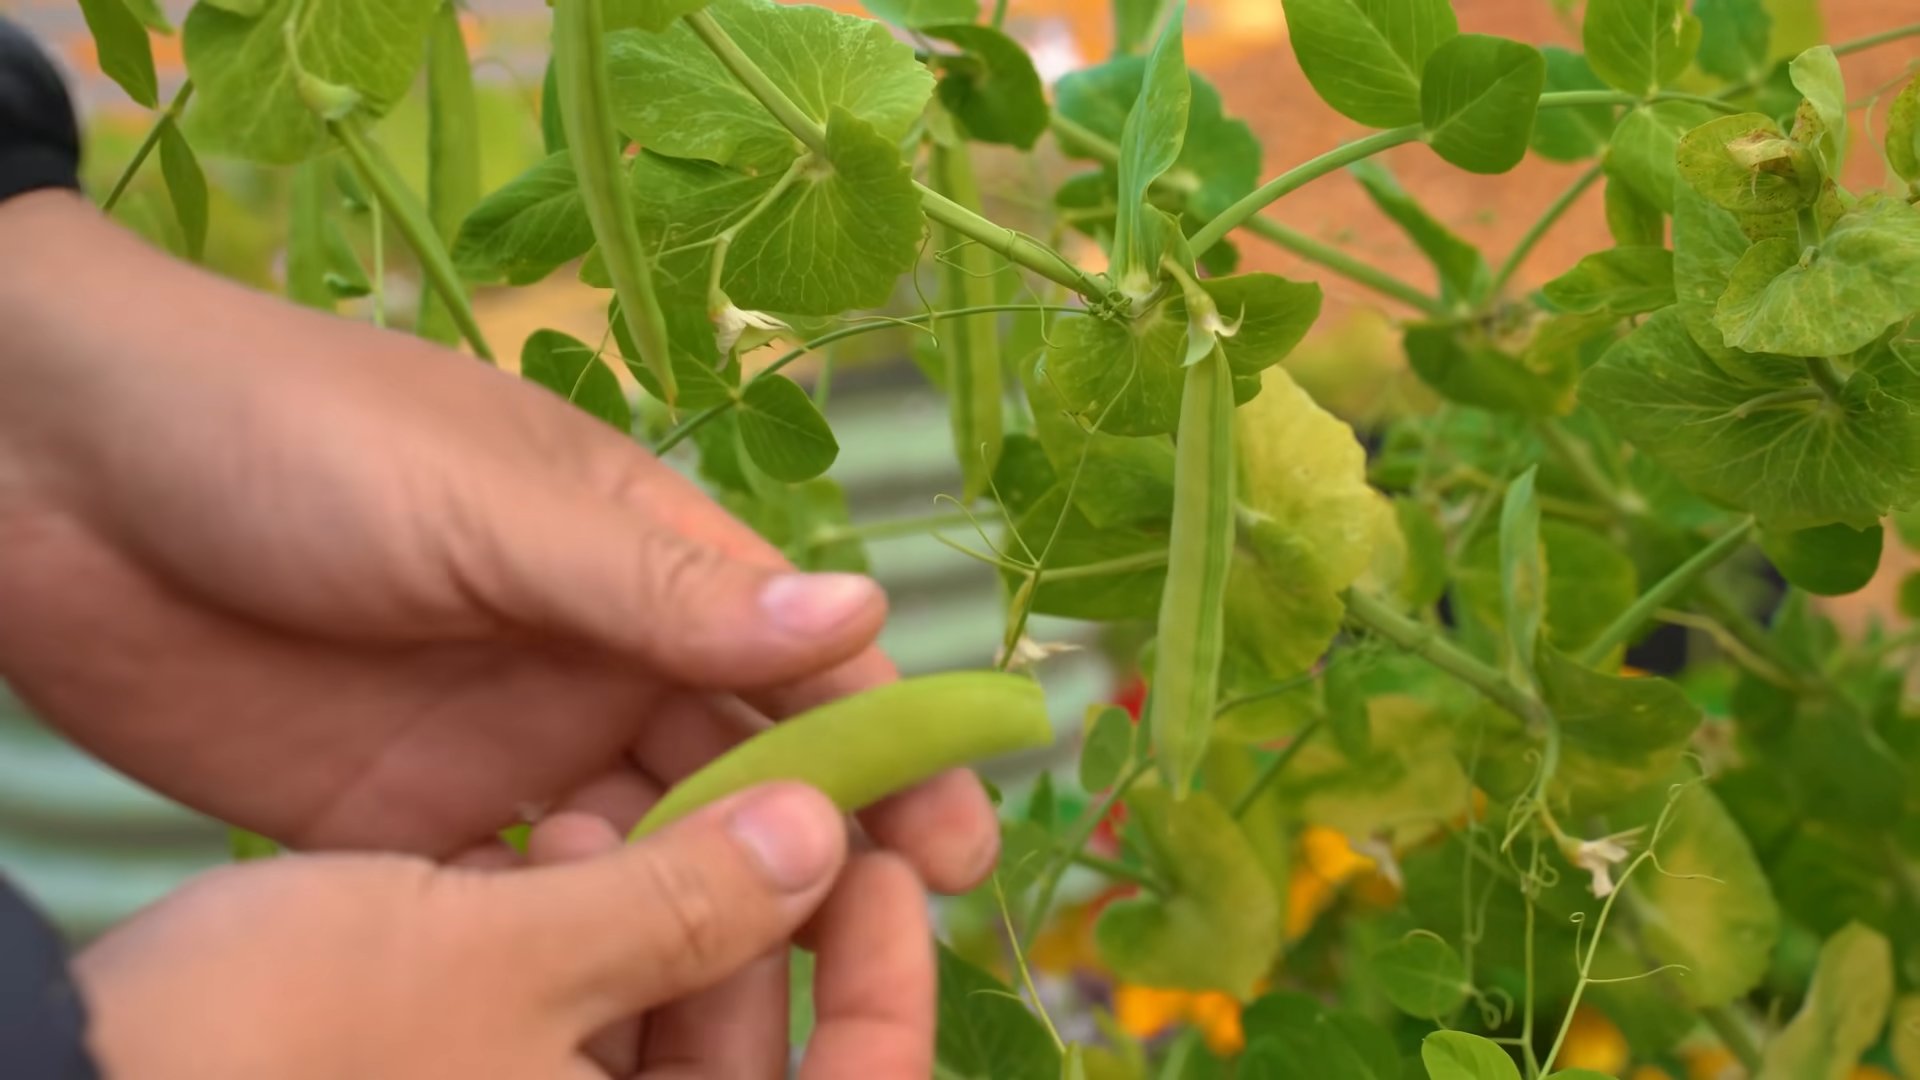
* Harvesting Time: Harvest the pods when they are plump and the peas inside are well-developed but not too large.
* Harvesting Technique: Gently snap the pods off the vine, being careful not to damage the plant.
* Regular Harvesting: Harvest regularly to encourage continued production.
Troubleshooting
Even with the best care, you might encounter some challenges along the way. Here are a few common problems and how to address them:
* Yellowing Leaves: This could be a sign of overwatering, underwatering, nutrient deficiency, or pest infestation. Check the soil moisture, fertilize if necessary, and inspect for pests.
* Leggy Growth: This is usually caused by insufficient light. Make sure your plants are getting enough light, either from a sunny window or a grow light.
* Lack of Pod Production: This could be due to insufficient light, poor pollination, or nutrient deficiency. Ensure adequate light, gently shake the plants to encourage pollination, and fertilize if necessary.
Enjoying Your Harvest
Congratulations! You’ve successfully grown snap peas indoors. Now it’s time to enjoy the fruits (or rather, vegetables) of your labor.
* Eat Them Fresh: Snap peas are delicious eaten fresh, straight from the vine.
* Add Them to Salads: They add a crunchy and sweet element to salads.
* Stir-Fry Them: Snap peas are a great addition to stir-fries.
* Steam or Blanch Them: You can also steam or blanch them for a quick and healthy side dish.
Growing snap peas indoors is a fun and rewarding experience. With a little care and attention, you can enjoy fresh, delicious snap peas all year round. Happy gardening!
Conclusion
So, there you have it! Growing snap peas in your kitchen is not only possible, it’s surprisingly rewarding. We’ve walked you through the simple steps, from sprouting those initial seeds to enjoying the crisp, sweet taste of homegrown goodness. But why is this DIY trick a must-try?
Firstly, it’s incredibly convenient. Imagine having fresh snap peas available whenever you need them, right at your fingertips. No more last-minute trips to the grocery store or settling for less-than-perfect produce. Secondly, it’s a fantastic way to connect with your food. Witnessing the entire life cycle of a plant, from seed to table, is a truly enriching experience, especially for children. It fosters an appreciation for nature and the effort that goes into producing the food we eat. Thirdly, and perhaps most importantly, it’s delicious! Homegrown snap peas, bursting with flavor and nutrients, are simply superior to their store-bought counterparts.
But don’t stop there! Feel free to experiment with different varieties of snap peas. Some are bushier and more compact, ideal for smaller spaces, while others climb and require trellising. You can also try succession planting, sowing new seeds every few weeks, to ensure a continuous harvest. Consider adding companion plants like basil or marigolds to your indoor garden to deter pests and enhance the flavor of your snap peas.
And if you’re feeling adventurous, why not try growing other types of peas indoors? Snow peas and garden peas can also thrive in a controlled environment, offering even more variety to your homegrown harvest. The possibilities are endless!
We truly believe that this DIY trick is a game-changer for anyone who loves fresh produce and enjoys a bit of gardening. It’s a simple, sustainable, and satisfying way to bring a touch of nature into your home. So, what are you waiting for? Grab some seeds, follow our guide, and get ready to enjoy the sweet taste of success.
We’re confident that you’ll be amazed at how easy and rewarding it is to grow snap peas in your kitchen. But don’t just take our word for it. Try it yourself and see the difference! And most importantly, we want to hear about your experience. Share your photos, tips, and stories with us in the comments below. Let’s create a community of indoor gardeners and inspire others to embrace the joy of homegrown produce. Happy growing!
Frequently Asked Questions (FAQ)
What kind of container should I use to grow snap peas indoors?
The ideal container should be at least 6 inches deep and wide to accommodate the root system of the snap peas. A pot made of plastic, terracotta, or even a repurposed container like a bucket will work. Ensure the container has drainage holes to prevent waterlogging, which can lead to root rot. If you’re planning on growing a climbing variety, consider using a taller container and providing a trellis or support structure.
How much sunlight do indoor snap peas need?
Snap peas require at least 6-8 hours of direct sunlight per day to thrive. If you don’t have a sunny windowsill, consider using a grow light. LED grow lights are energy-efficient and provide the full spectrum of light that plants need for photosynthesis. Position the grow light a few inches above the plants and adjust as they grow.
What type of soil is best for growing snap peas indoors?
A well-draining potting mix is essential for growing snap peas indoors. Avoid using garden soil, as it can be too heavy and compact, hindering root growth. A good potting mix will contain a blend of peat moss, perlite, and vermiculite, which provides good drainage and aeration. You can also add compost to the potting mix to provide additional nutrients.
How often should I water my indoor snap peas?
Water your snap peas regularly, keeping the soil consistently moist but not waterlogged. Check the soil moisture by sticking your finger about an inch into the soil. If it feels dry, it’s time to water. Water deeply, allowing the excess water to drain out of the drainage holes. Avoid overwatering, as this can lead to root rot.
Do I need to fertilize my indoor snap peas?
Yes, snap peas benefit from regular fertilization, especially during the growing season. Use a balanced liquid fertilizer, diluted to half strength, every two weeks. Look for a fertilizer with an NPK ratio (nitrogen, phosphorus, potassium) of around 10-10-10. Avoid over-fertilizing, as this can burn the roots.
How long does it take for snap peas to mature and produce pods?
Snap peas typically take 60-70 days to mature and produce pods. However, this can vary depending on the variety, growing conditions, and sunlight exposure. You can start harvesting the pods when they are plump and the peas inside are well-developed.
What are some common pests and diseases that affect indoor snap peas?
Common pests that can affect indoor snap peas include aphids, spider mites, and whiteflies. These pests can be controlled with insecticidal soap or neem oil. Diseases that can affect snap peas include powdery mildew and root rot. Powdery mildew can be prevented by providing good air circulation and avoiding overhead watering. Root rot can be prevented by ensuring good drainage and avoiding overwatering.
Can I grow snap peas indoors year-round?
Yes, you can grow snap peas indoors year-round, provided you have adequate light and temperature control. In the winter months, you may need to supplement with grow lights to provide sufficient light. Maintain a consistent temperature of around 60-70°F (15-21°C) for optimal growth.
How do I support climbing snap pea varieties indoors?
Climbing snap pea varieties require a trellis or support structure to grow properly. You can use a bamboo stake, a small trellis, or even a piece of netting. Secure the vines to the support structure as they grow.
What are some signs that my snap peas are not thriving indoors?
Signs that your snap peas are not thriving indoors include yellowing leaves, stunted growth, and lack of pod production. These problems can be caused by insufficient light, overwatering, underwatering, nutrient deficiencies, or pest infestations. Adjust your growing conditions accordingly to address these issues.
Can I save seeds from my indoor snap peas to plant next year?
Yes, you can save seeds from your indoor snap peas to plant next year. Allow some of the pods to dry completely on the vine. Once the pods are dry and brittle, remove the seeds and store them in a cool, dry place.
Is growing snap peas indoors organic?
Yes, growing snap peas indoors can be organic. Use organic potting mix, organic fertilizer, and organic pest control methods to ensure that your snap peas are grown organically.
What are the benefits of growing snap peas indoors?
The benefits of growing snap peas indoors include having fresh, homegrown produce readily available, connecting with your food, and enjoying the satisfaction of growing your own plants. It’s also a great way to add a touch of greenery to your home and improve air quality.
Leave a Comment