

Grow Sage Indoors? Absolutely! Imagine stepping into your kitchen and snipping fresh, fragrant sage leaves to elevate your culinary creations. No more last-minute grocery store runs or settling for dried herbs that lack that vibrant, earthy flavor. This isn’t just a dream; it’s an achievable reality with a few simple DIY tricks!
Sage, with its velvety leaves and distinctive aroma, has a rich history. For centuries, it’s been revered not only for its culinary uses but also for its medicinal properties. Ancient Romans considered sage a sacred herb, believing it could grant immortality. While we can’t promise eternal life, we can promise a rewarding experience bringing this historical herb into your home.
In today’s fast-paced world, connecting with nature can be a challenge. That’s where the magic of indoor gardening comes in. Learning how to grow sage indoors offers a therapeutic escape, a chance to nurture life, and a sustainable way to access fresh herbs year-round. Plus, it’s incredibly satisfying to watch your little sage plant thrive under your care. I’m excited to share some easy-to-follow DIY hacks that will have you harvesting your own homegrown sage in no time. Let’s get started!
Growing Sage Indoors: A Comprehensive DIY Guide
Hey there, fellow plant enthusiasts! I’m so excited to share my tried-and-true method for growing sage indoors. Fresh sage is a game-changer in the kitchen, and having it readily available is a total win. Plus, the aroma is just divine! Let’s dive into how you can cultivate your own thriving sage plant right inside your home.
Choosing the Right Sage Variety
First things first, not all sage varieties are created equal when it comes to indoor growing. Some get quite large and might outgrow your space quickly. Here are a few of my favorite, more compact varieties that do well indoors:
* **Common Sage (Salvia officinalis):** This is the classic culinary sage, known for its robust flavor and silvery-green leaves. It’s relatively easy to grow and stays a manageable size.
* **Dwarf Sage (Salvia officinalis ‘Nana’):** As the name suggests, this variety is smaller than common sage, making it perfect for smaller pots and limited spaces. It has the same great flavor.
* **Golden Sage (Salvia officinalis ‘Aurea’):** This variety adds a pop of color with its variegated golden and green leaves. It’s just as flavorful as common sage and a beautiful addition to any indoor herb garden.
* **Purple Sage (Salvia officinalis ‘Purpurascens’):** This variety boasts beautiful purple-tinged leaves, adding visual interest to your indoor garden. The flavor is slightly milder than common sage.
Gathering Your Supplies
Before we get our hands dirty, let’s make sure we have everything we need. Here’s a checklist of essential supplies:
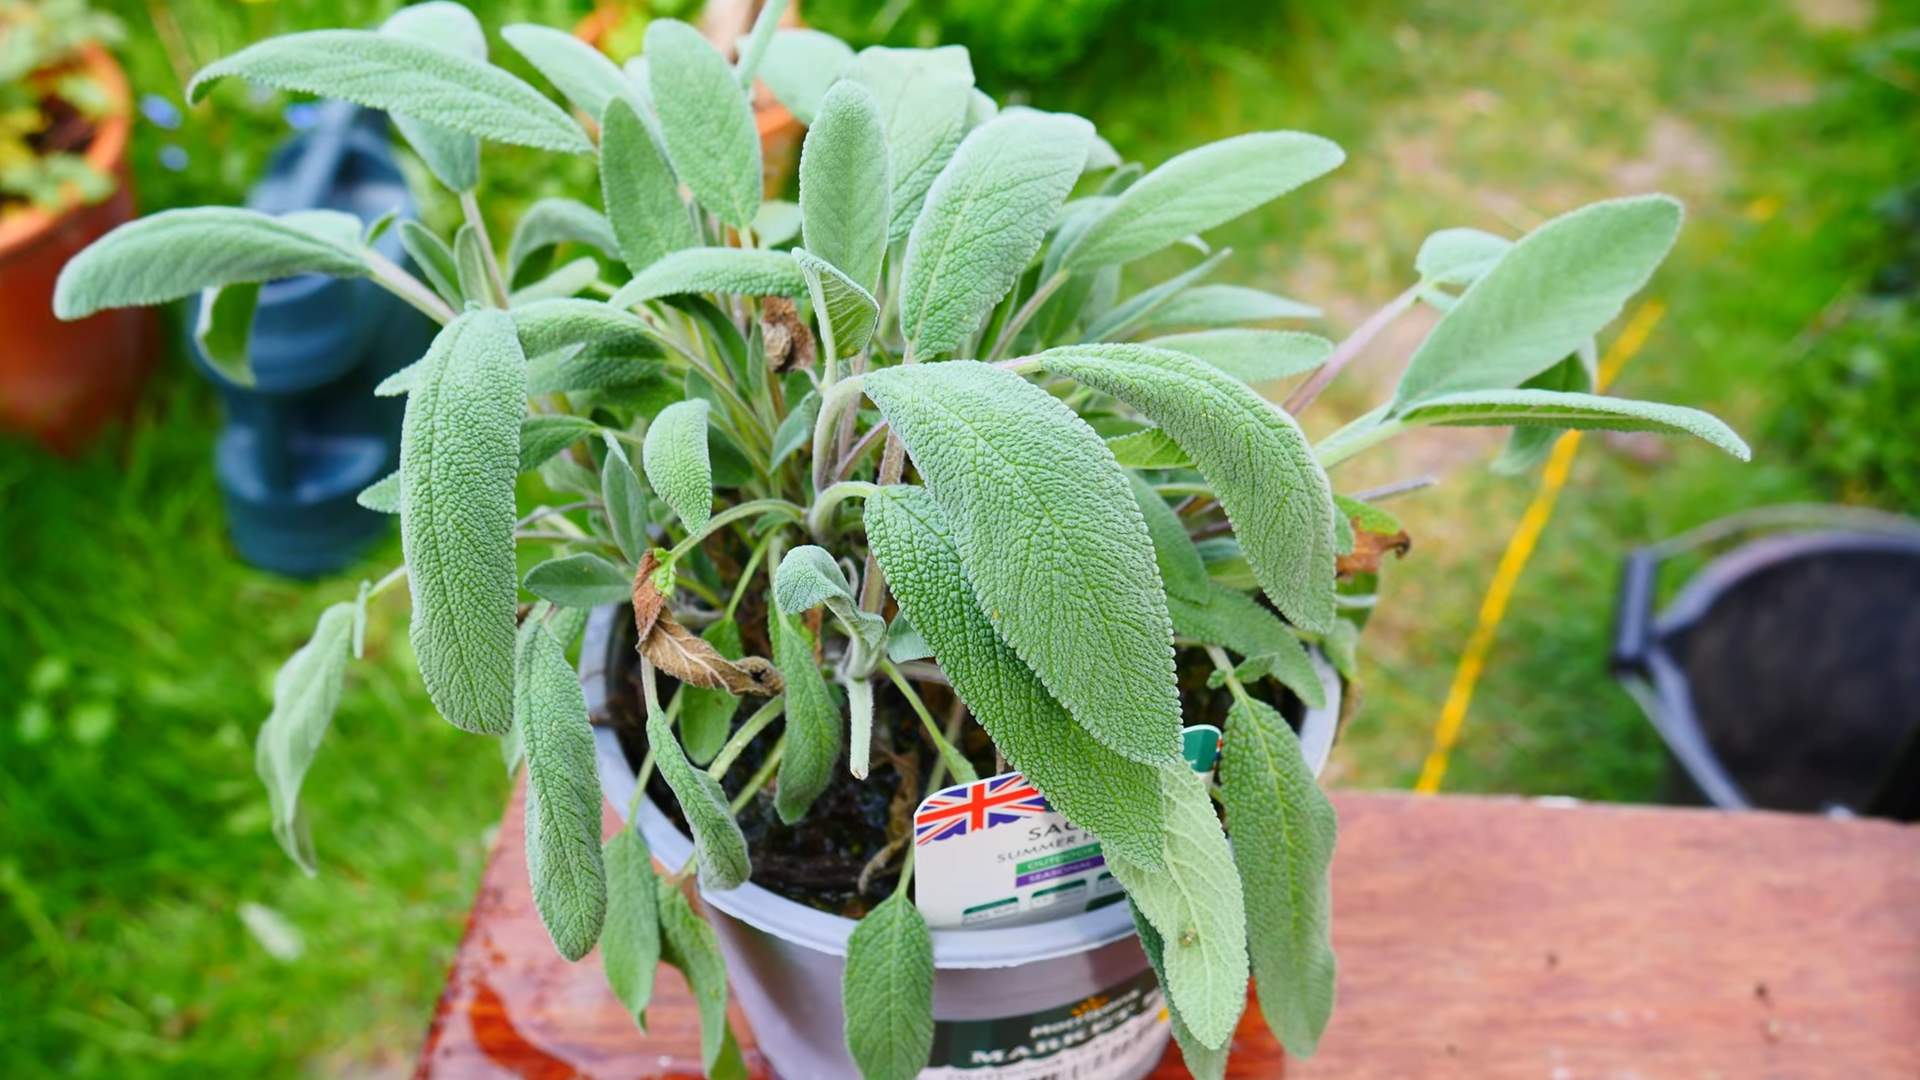
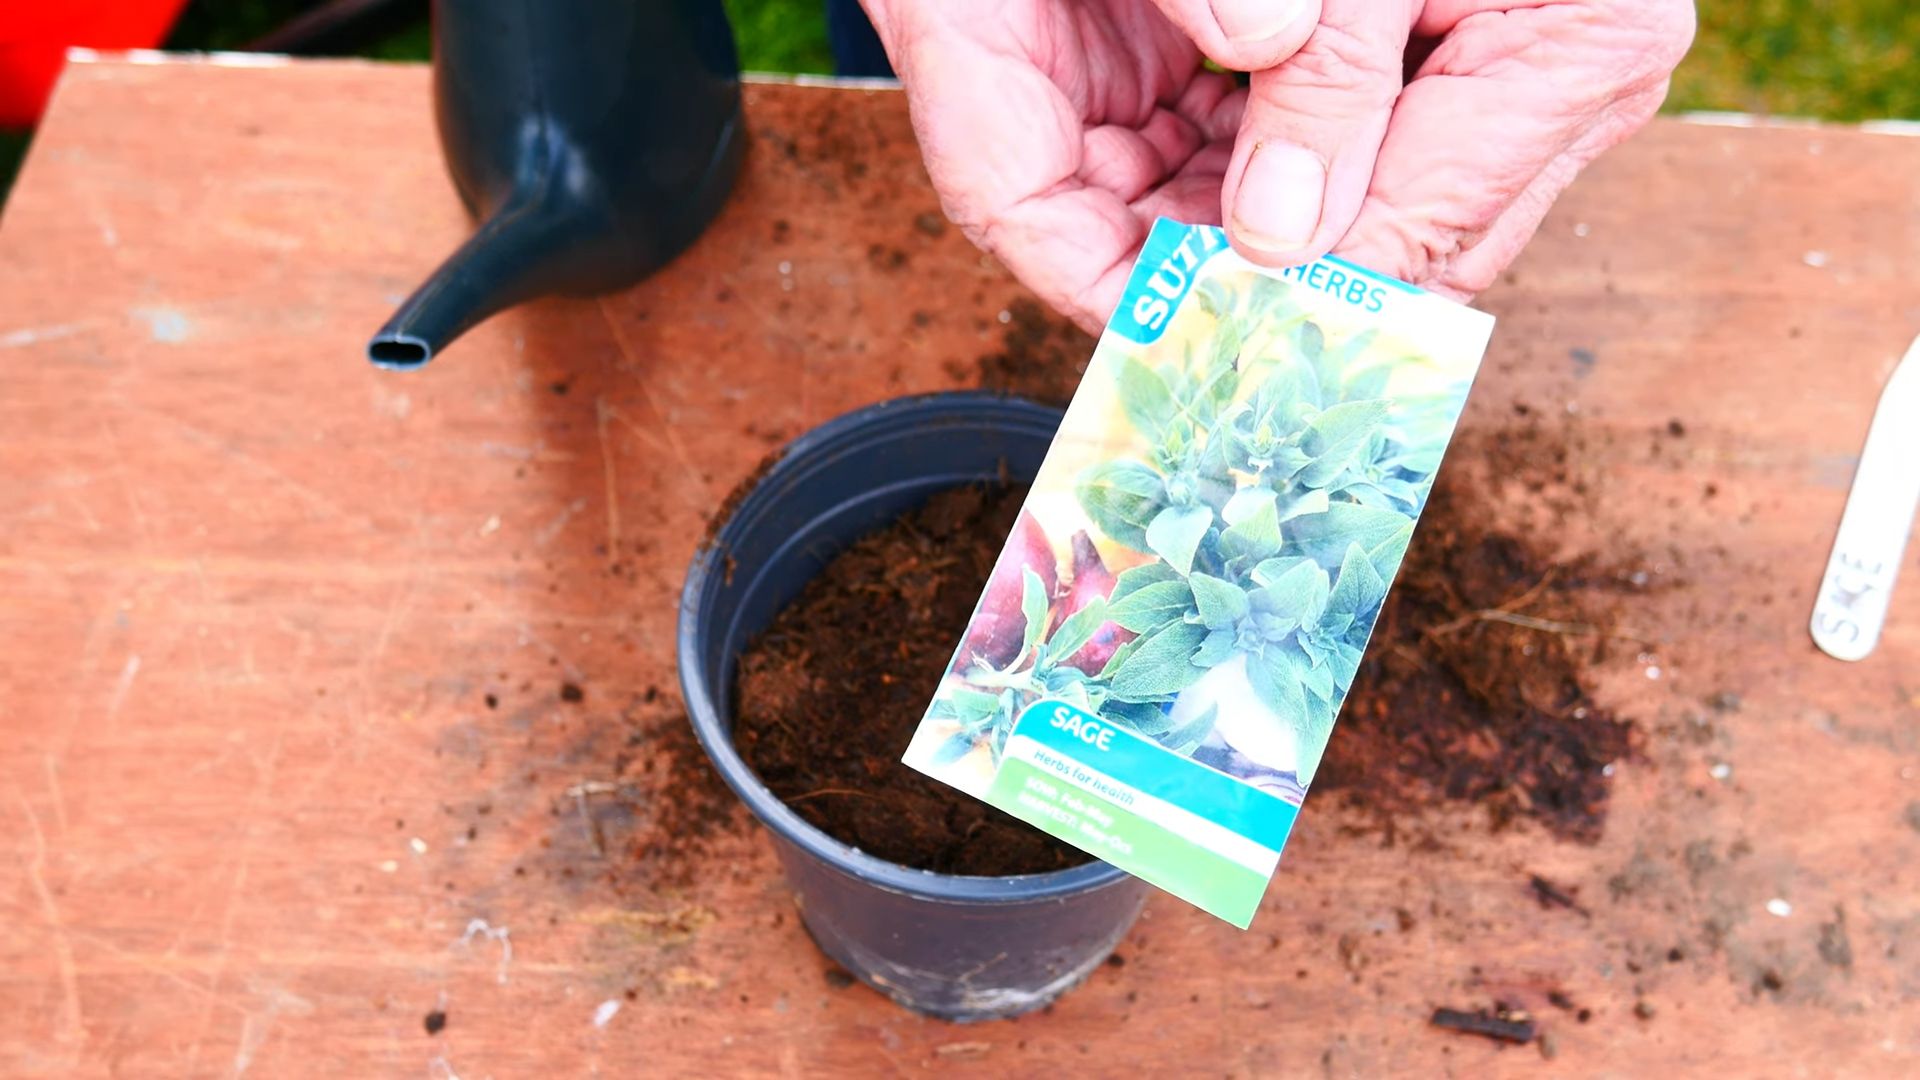
* **Sage Seeds or a Sage Plant:** You can start from seeds or purchase a small sage plant from a local nursery. Starting from seeds takes longer, but it’s a rewarding experience.
* **Potting Mix:** Use a well-draining potting mix specifically formulated for herbs or vegetables. Avoid using garden soil, as it can become compacted and doesn’t drain well in containers.
* **Pot with Drainage Holes:** Choose a pot that’s at least 6 inches in diameter and has drainage holes at the bottom. Good drainage is crucial for preventing root rot.
* **Grow Lights (Optional but Recommended):** Sage needs plenty of sunlight, so if you don’t have a sunny window, invest in a grow light.
* **Watering Can or Spray Bottle:** For gentle watering.
* **Small Shovel or Trowel:** For planting.
* **Pebbles or Gravel (Optional):** To improve drainage in the pot.
* **Seed Starting Tray (If starting from seeds):** For germinating seeds.
Planting Your Sage
Now for the fun part! Let’s get our sage planted.
Starting from Seeds:
1. **Prepare the Seed Starting Tray:** Fill the seed starting tray with moistened potting mix.
2. **Sow the Seeds:** Sprinkle the sage seeds evenly over the surface of the soil. Gently press them into the soil, but don’t bury them too deep. They need light to germinate.
3. **Water Gently:** Mist the soil with a spray bottle to keep it moist.
4. **Cover the Tray:** Cover the seed starting tray with a clear plastic lid or plastic wrap to create a humid environment.
5. **Provide Light:** Place the tray in a warm location with bright, indirect light. If you don’t have enough natural light, use a grow light.
6. **Keep the Soil Moist:** Check the soil daily and mist it with water as needed to keep it moist but not soggy.
7. **Wait for Germination:** Sage seeds typically germinate in 10-21 days.
8. **Transplant Seedlings:** Once the seedlings have developed a few sets of true leaves (the leaves that look like miniature sage leaves), transplant them into individual pots.
Planting a Sage Plant:
1. **Prepare the Pot:** Place a layer of pebbles or gravel at the bottom of the pot to improve drainage (optional).
2. **Fill the Pot:** Fill the pot with potting mix, leaving about an inch of space at the top.
3. **Remove the Sage Plant from its Container:** Gently remove the sage plant from its nursery container. If the roots are tightly bound, gently loosen them with your fingers.
4. **Plant the Sage:** Place the sage plant in the center of the pot. Make sure the top of the root ball is level with the soil surface.
5. **Fill in with Soil:** Fill in the remaining space around the plant with potting mix.
6. **Water Thoroughly:** Water the sage plant thoroughly until water drains out of the drainage holes.
Caring for Your Indoor Sage Plant
Once your sage is planted, it’s time to provide the right care to help it thrive.
Light:
Sage needs at least 6-8 hours of sunlight per day. Place your sage plant in a sunny window that faces south or west. If you don’t have enough natural light, use a grow light. Position the grow light a few inches above the plant and keep it on for 12-14 hours per day. I’ve found that supplementing with a grow light, especially during the winter months, makes a huge difference in the plant’s health and growth.
Watering:
Water your sage plant when the top inch of soil feels dry to the touch. Avoid overwatering, as this can lead to root rot. When you water, water thoroughly until water drains out of the drainage holes. Let the excess water drain away completely. I usually check the soil moisture every few days and water accordingly.
Temperature:
Sage prefers temperatures between 60-70°F (15-21°C). Avoid placing your sage plant near drafts or sources of extreme heat or cold.
Humidity:
Sage prefers relatively low humidity. Avoid misting the leaves, as this can promote fungal diseases. If the air in your home is very dry, you can place a tray of water near the plant to increase humidity.
Fertilizing:
Fertilize your sage plant every 2-4 weeks during the growing season (spring and summer) with a balanced liquid fertilizer diluted to half strength. Avoid fertilizing during the dormant season (fall and winter). I use an organic fertilizer specifically formulated for herbs.
Pruning:
Prune your sage plant regularly to encourage bushier growth and prevent it from becoming leggy. Pinch off the tips of the stems to promote branching. You can also remove any dead or yellowing leaves. Regular pruning also encourages new growth, which means more flavorful leaves for you!
Pest Control:
Inspect your sage plant regularly for pests such as aphids, spider mites, and whiteflies. If you find any pests, treat them with insecticidal soap or neem oil. I prefer to use organic pest control methods whenever possible.
Harvesting Your Sage
You can start harvesting sage leaves once the plant is established and has grown to a reasonable size.
1. **Choose the Leaves:** Select healthy, mature leaves to harvest.
2. **Cut the Stems:** Use sharp scissors or pruning shears to cut the stems just above a leaf node (the point where a leaf grows from the stem).
3. **Harvest Regularly:** Harvest sage leaves regularly to encourage new growth.
4. **Preserve Your Harvest:** You can use fresh sage leaves immediately or dry them for later use. To dry sage leaves, tie them in small bundles and hang them upside down in a cool, dry place until they are completely dry. You can also dry sage leaves in a dehydrator or oven.
Troubleshooting Common Problems
Even with the best care, you might encounter some problems while growing sage indoors. Here are a few common issues and how to address them:
* **Yellowing Leaves:** Yellowing leaves can be caused by overwatering, underwatering, nutrient deficiencies, or pests. Check the soil moisture and adjust your watering accordingly. Fertilize the plant if necessary. Inspect the plant for pests and treat them as needed.
* **Leggy Growth:** Leggy growth (long, spindly stems with few leaves) is usually caused by insufficient light. Move the plant to a sunnier location or use a grow light. Prune the plant to encourage bushier growth.
* **Root Rot:** Root rot is caused by overwatering and poor drainage. Make sure the pot has drainage holes and that the soil is well-draining. Allow the soil to dry out slightly between waterings. If the root rot is severe, you may need to repot the plant with fresh potting mix.
* **Powdery Mildew:** Powdery mildew is a fungal disease that appears as a white, powdery coating on the leaves. Improve air circulation around the plant and treat it with a fungicide.
Enjoying Your Homegrown Sage
Now that you’ve successfully grown your own sage indoors, it’s time to enjoy the fruits (or rather, leaves!) of your labor. Fresh sage adds a wonderful flavor to a variety of dishes, including:
* **Roasted Meats:** Sage is a classic pairing with roasted chicken, turkey, and pork.
* **Stuffing:** Sage is an
Conclusion
So, there you have it! Growing sage indoors is not only achievable, but it’s a rewarding experience that brings the fresh, aromatic essence of this versatile herb right into your home. We’ve walked through the essential steps, from selecting the right container and soil to providing adequate light and water. But why is this DIY trick a must-try?
Firstly, having fresh sage readily available elevates your cooking to a whole new level. Imagine adding freshly snipped sage to your roasted chicken, butternut squash soup, or even a simple brown butter sauce for pasta. The flavor is far superior to dried sage, offering a vibrant, nuanced taste that will impress your family and friends. Secondly, growing sage indoors is incredibly cost-effective. A single sage plant can provide you with a continuous supply of fresh herbs for months, if not years, saving you money on store-bought herbs that often wilt quickly.
Beyond the culinary benefits, growing sage indoors also offers therapeutic advantages. The aroma of sage is known to have calming and mood-boosting properties, creating a more relaxing and inviting atmosphere in your home. Plus, tending to your sage plant can be a therapeutic activity in itself, providing a sense of accomplishment and connection to nature.
Variations and Suggestions:
Don’t be afraid to experiment with different varieties of sage. While common sage (Salvia officinalis) is the most popular choice, there are other cultivars like purple sage, golden sage, and tricolor sage, each offering unique flavors and visual appeal. You can also try propagating sage from cuttings, allowing you to expand your indoor herb garden without spending extra money.
Consider using a self-watering planter to simplify the watering process, especially if you tend to forget. Alternatively, you can create a humidity tray by placing your sage plant on a tray filled with pebbles and water. This will help to increase the humidity around the plant, which is particularly beneficial during dry winter months.
Finally, remember that proper pruning is essential for maintaining a healthy and productive sage plant. Regularly trim back the stems to encourage bushier growth and prevent the plant from becoming leggy. You can use the trimmings to propagate new plants or simply dry them for later use.
We are confident that with a little care and attention, you can successfully grow sage indoors and enjoy all the benefits this wonderful herb has to offer. So, grab a pot, some soil, and a sage seedling, and get started today! We encourage you to try this DIY trick and share your experience with us in the comments below. Let us know what variety of sage you chose, what challenges you faced, and what delicious dishes you created with your homegrown herbs. We can’t wait to hear your stories! Let’s all become indoor sage growing experts together!
Frequently Asked Questions (FAQ)
What kind of soil is best for growing sage indoors?
Sage thrives in well-draining soil that is slightly alkaline. A good mix is equal parts potting soil, perlite, and compost. The perlite ensures good drainage, while the compost provides essential nutrients. Avoid using heavy clay soil, as it can retain too much moisture and lead to root rot. You can also purchase a pre-made herb potting mix from your local garden center. Make sure the pH level is between 6.0 and 7.5 for optimal growth.
How much sunlight does indoor sage need?
Sage requires at least six hours of direct sunlight per day to thrive. If you don’t have a sunny windowsill, you can supplement with a grow light. Place the grow light about 6-12 inches above the plant and keep it on for 12-14 hours per day. Rotate the plant regularly to ensure that all sides receive adequate light. Insufficient light can lead to leggy growth and reduced flavor.
How often should I water my indoor sage plant?
Water your sage plant when the top inch of soil feels dry to the touch. Avoid overwatering, as this can lead to root rot. Ensure that the pot has drainage holes to allow excess water to escape. During the winter months, when the plant is not actively growing, you can reduce watering frequency. A good rule of thumb is to water thoroughly and then allow the soil to dry out slightly before watering again.
How do I prune my indoor sage plant?
Pruning is essential for maintaining a healthy and productive sage plant. Regularly trim back the stems to encourage bushier growth and prevent the plant from becoming leggy. Use sharp, clean scissors or pruning shears to avoid damaging the plant. You can prune your sage plant at any time of year, but it’s best to do a more significant pruning in the spring. Remove any dead or damaged leaves and stems. You can also pinch back the tips of the stems to encourage branching.
Can I propagate sage from cuttings?
Yes, propagating sage from cuttings is a simple and effective way to expand your indoor herb garden. Take a 4-6 inch cutting from a healthy stem, removing the lower leaves. Dip the cut end in rooting hormone and plant it in a small pot filled with well-draining potting mix. Keep the soil moist and place the pot in a warm, bright location. Roots should develop within a few weeks. Once the cutting has established roots, you can transplant it into a larger pot.
What are some common problems when growing sage indoors?
Some common problems when growing sage indoors include overwatering, underwatering, insufficient light, and pests. Overwatering can lead to root rot, while underwatering can cause the leaves to wilt and dry out. Insufficient light can result in leggy growth and reduced flavor. Pests such as aphids, spider mites, and whiteflies can also infest sage plants. Regularly inspect your plant for signs of pests and take appropriate action if necessary. You can use insecticidal soap or neem oil to control pests.
How do I harvest sage leaves?
Harvest sage leaves by snipping them off the stem with scissors or pruning shears. It’s best to harvest in the morning, after the dew has dried. You can harvest leaves at any time of year, but the flavor is most intense in the spring and summer. Avoid harvesting more than one-third of the plant at a time, as this can stress the plant. You can use the fresh sage leaves immediately or dry them for later use.
How do I dry sage leaves?
There are several ways to dry sage leaves. One method is to tie the stems together and hang them upside down in a cool, dry, and well-ventilated place. Another method is to spread the leaves out on a baking sheet and dry them in a low oven (170°F) for a few hours. You can also use a dehydrator to dry sage leaves. Once the leaves are completely dry, store them in an airtight container in a cool, dark place.
Can I grow sage indoors year-round?
Yes, you can grow sage indoors year-round, provided you provide the plant with adequate light, water, and nutrients. During the winter months, when the plant is not actively growing, you may need to reduce watering frequency and supplement with a grow light. Regularly prune your sage plant to encourage bushier growth and prevent it from becoming leggy. With proper care, your indoor sage plant can provide you with fresh herbs for many years to come.
Is growing sage indoors worth the effort?
Absolutely! Growing sage indoors is a rewarding experience that offers numerous benefits. You’ll have access to fresh, flavorful herbs for cooking, enjoy the therapeutic aroma of sage, and save money on store-bought herbs. Plus, tending to your sage plant can be a relaxing and fulfilling activity. So, give it a try and experience the joy of growing your own herbs indoors!


Leave a Comment