

Grow radishes easily? Absolutely! Imagine plucking crisp, peppery radishes straight from your own backyard, adding a zesty crunch to your salads and sandwiches. Forget those bland, store-bought versions – we’re talking about vibrant, flavorful radishes bursting with freshness. This isn’t just about gardening; it’s about connecting with nature and enjoying the fruits (or rather, roots!) of your labor.
Radishes have a surprisingly long and fascinating history, dating back to ancient Egypt and Greece, where they were valued not only for their taste but also for their medicinal properties. They were even used as currency! Today, while we might not be trading them for gold, radishes remain a popular and easy-to-grow vegetable, perfect for beginner gardeners.
But let’s be honest, sometimes even the easiest plants can present challenges. Maybe your radishes are all leaves and no root, or perhaps they’re cracking and splitting before you can even harvest them. That’s where these DIY tricks and hacks come in! I’m going to share my tried-and-true methods to help you grow radishes easily and successfully, no matter your gardening experience. Get ready to transform your garden into a radish haven and enjoy a continuous supply of these delightful little veggies!
Grow Radishes Like a Pro: A Beginner-Friendly Guide
Hey there, fellow gardening enthusiasts! Radishes are one of the most rewarding vegetables to grow, especially if you’re just starting out. They’re quick, easy, and add a peppery zing to salads and snacks. I’m going to walk you through everything you need to know to get a bumper crop of these crunchy delights.
Choosing the Right Radish Variety
First things first, let’s talk about radish varieties. There’s more to radishes than just the classic red globe!
* Cherry Belle: This is your quintessential red radish. It’s round, crisp, and matures super fast (around 22 days). A great choice for beginners!
* French Breakfast: These are elongated, with a red top and white bottom. They have a milder flavor than some other varieties and are ready in about 25 days.
* Easter Egg: A mix of radishes in different colors – red, pink, purple, and white. Adds a fun touch to your garden and matures in about 25 days.
* Black Spanish: For those who like a bit of a kick! These are larger, black-skinned radishes with a strong, pungent flavor. They take a bit longer to mature (around 55 days).
* Daikon: Technically a radish, but much larger and milder in flavor. These are great for Asian cuisine and can be pickled or grated into salads. They take around 60 days to mature.
I usually recommend starting with Cherry Belle or French Breakfast – they’re reliable and quick to produce.
Preparing Your Radish Bed
Radishes aren’t fussy, but they do appreciate a little prep work.
* Sunlight: Radishes need at least 6 hours of sunlight per day. Choose a spot in your garden that gets plenty of sunshine.
* Soil: Well-drained, loose soil is key. Radishes don’t like heavy, compacted soil, as it can lead to misshapen roots. Amend your soil with compost or well-rotted manure to improve drainage and fertility.
* pH: Radishes prefer a slightly acidic to neutral soil pH (around 6.0 to 7.0). You can test your soil pH with a simple soil testing kit.
* Weed Removal: Clear the area of any weeds. Weeds compete with radishes for nutrients and water.
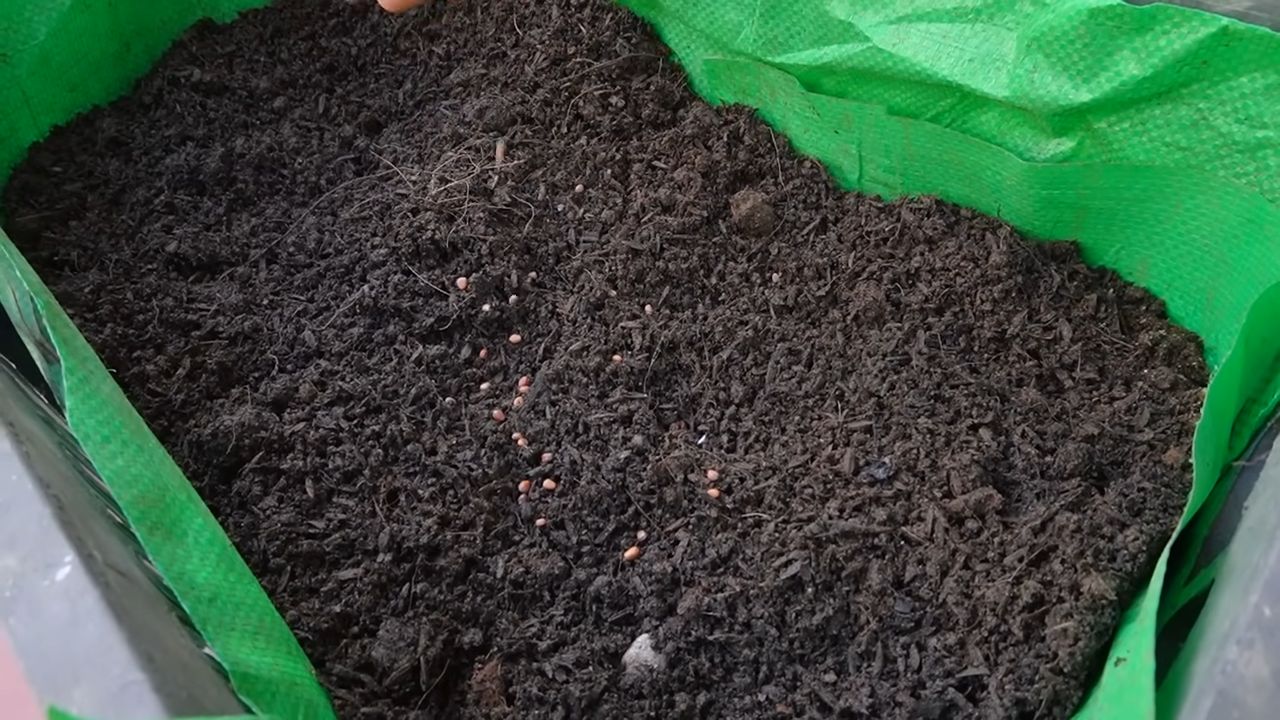
Planting Your Radish Seeds
Now for the fun part – planting!
1. Timing is Everything: Radishes are cool-season crops, meaning they thrive in cooler temperatures. Plant them in early spring or late summer/early fall. Avoid planting during the heat of summer, as they tend to bolt (go to seed) in hot weather. I usually start planting radishes about 4-6 weeks before the last expected frost in spring. For a fall crop, plant them about 4-6 weeks before the first expected frost.
2. Direct Sowing: Radishes are best direct-sown, meaning you plant the seeds directly into the garden soil. They don’t transplant well.
3. Making Furrows: Use a hoe or your finger to create shallow furrows in the soil, about ½ inch deep.
4. Sowing Seeds: Sow the radish seeds about ½ inch apart in the furrows. Don’t overcrowd them, as this can lead to smaller radishes.
5. Covering Seeds: Gently cover the seeds with soil and lightly pat down.
6. Watering: Water the soil thoroughly after planting. Keep the soil consistently moist until the seeds germinate.
Caring for Your Radishes
Radishes are relatively low-maintenance, but here are a few things to keep in mind:
* Watering: Water regularly, especially during dry spells. Radishes need consistent moisture to grow quickly and prevent them from becoming woody or bitter. Aim for about 1 inch of water per week.
* Thinning: Once the seedlings emerge (usually within 4-7 days), thin them to about 1-2 inches apart. This gives the radishes enough space to develop properly. Don’t be afraid to pull out the extra seedlings – you can even eat them as microgreens!
* Weeding: Keep the area around your radishes free of weeds. Weeds compete for nutrients and water.
* Fertilizing: Radishes don’t need a lot of fertilizer. If your soil is poor, you can side-dress them with a balanced fertilizer a few weeks after they emerge. But be careful not to over-fertilize, as this can lead to excessive foliage growth at the expense of root development.
* Pest Control: Radishes are generally pest-resistant, but they can sometimes be bothered by flea beetles or root maggots. Flea beetles chew small holes in the leaves, while root maggots feed on the roots. You can control flea beetles with insecticidal soap or neem oil. To prevent root maggots, practice crop rotation and cover your radish bed with row covers.
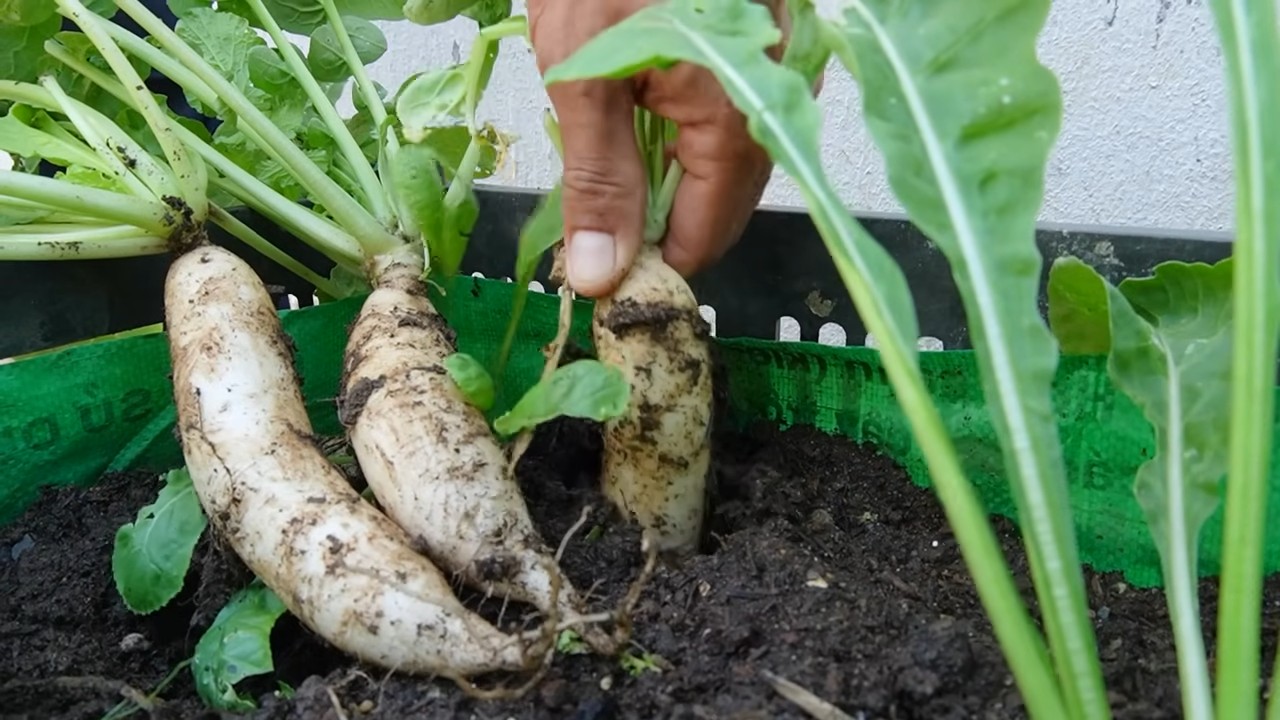
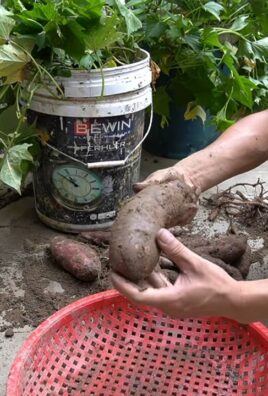
Harvesting Your Radishes
This is the most exciting part! Radishes are ready to harvest when they reach the size specified on the seed packet. This is usually about 3-4 weeks after planting, depending on the variety.
1. Check for Size: Gently brush away the soil around the base of the radish to check its size.
2. Pulling: Grasp the radish by the leaves and gently pull it out of the ground. If it’s difficult to pull, loosen the soil around it with a trowel.
3. Washing: Wash the radishes thoroughly to remove any dirt.
4. Storing: Store radishes in the refrigerator in a plastic bag or container. They will keep for about a week.
Pro Tip: Harvest radishes as soon as they’re ready. If you leave them in the ground too long, they can become woody or bitter.
Succession Planting for Continuous Harvest
Want to enjoy radishes all season long? Try succession planting! This means planting a new batch of radishes every 1-2 weeks. This will ensure a continuous harvest throughout the growing season. I usually plant a small row of radishes every week or two to keep a steady supply coming.
Troubleshooting Common Radish Problems
Even with the best care, you might encounter a few problems along the way. Here are some common issues and how to fix them:
* Radishes are all tops and no roots: This is usually caused by too much nitrogen in the soil or overcrowding. Avoid over-fertilizing and thin your seedlings properly.
* Radishes are woody or bitter: This can be caused by inconsistent watering, hot weather, or leaving the radishes in the ground too long. Water regularly, plant during cooler weather, and harvest promptly.
* Radishes are split or cracked: This is usually caused by uneven watering. Keep the soil consistently moist.
* Radishes have holes in them: This could be caused by root maggots. Practice crop rotation and cover your radish bed with row covers.
Radish Recipes to Enjoy Your Harvest
Now that you’ve got a beautiful harvest of radishes, it’s time to enjoy them! Here are a few of my favorite ways to eat radishes:
* Salads: Slice radishes thinly and add them to salads for a peppery crunch.
* Snacks: Eat radishes raw with a sprinkle of salt or dipped in hummus.
* Radish Butter: Mix grated radishes with softened butter and spread on crackers or bread.
* Roasted Radishes: Toss radishes with olive oil, salt, and pepper and roast them in the oven until tender. Roasting mellows out the radish’s spiciness and brings out its sweetness.
* Pickled Radishes: Quick-pickled radishes are a delicious and tangy condiment.
Radish Seed Saving (Optional)
If you want to save seeds from your radishes, you’ll need to let a few plants bolt (go to seed).
1. Choose Healthy Plants: Select the healthiest and most vigorous plants to save seeds from.
2. Let Them Bolt: Allow the plants to flower and produce seed pods.
3. Harvest Seed Pods: Once the seed pods are dry and brown, harvest them.
4. Dry the Pods: Spread the seed pods out on a tray and let them dry completely.
5. Thresh the Seeds: Once the pods are dry, thresh them to release the seeds. You can do this by rubbing the pods between your hands or by gently crushing them with a rolling pin.
6. Clean the Seeds: Remove any debris from the seeds.
7. Store the Seeds: Store the seeds in an airtight container in a cool, dry place.
Final Thoughts
Growing radishes is a fun and rewarding experience. With a little bit of care and attention, you can enjoy a bountiful harvest of these
Conclusion
So, there you have it! Growing radishes easily doesn’t have to be a daunting task reserved for seasoned gardeners. With this simple DIY trick, you can unlock a bountiful harvest of crisp, peppery radishes right in your own backyard, or even on your balcony. We’ve demystified the process, breaking it down into manageable steps that anyone can follow, regardless of their gardening experience.
But why is this DIY method a must-try? Because it addresses the most common challenges faced when cultivating radishes: inconsistent germination, overcrowding, and poor soil conditions. By using this technique, you’re essentially creating the ideal environment for your radish seeds to thrive. You’ll see a significant improvement in germination rates, resulting in a denser, more productive crop. Plus, the method promotes even spacing, allowing each radish to develop to its full potential without competing for resources.
Beyond the basic method, there’s plenty of room for experimentation and personalization. Consider these variations to tailor the process to your specific needs and preferences:
* Companion Planting: Plant your radishes alongside carrots or lettuce. Radishes help deter pests that might target these other vegetables, and the combination creates a mutually beneficial ecosystem.
* Succession Planting: Sow a new batch of radish seeds every week or two to ensure a continuous harvest throughout the growing season. This way, you’ll always have fresh radishes on hand for salads, snacks, and other culinary creations.
* Container Gardening: If you’re short on space, don’t worry! Radishes are perfectly happy growing in containers. Just make sure to choose a pot that’s at least 6 inches deep and wide, and use a well-draining potting mix.
* Different Varieties: Explore the wide world of radish varieties! From the classic red globe radishes to the elongated French Breakfast radishes and the spicy black Spanish radishes, there’s a radish out there for every palate.
This DIY trick isn’t just about growing radishes; it’s about connecting with nature, learning new skills, and enjoying the satisfaction of harvesting your own food. It’s a simple yet rewarding project that can bring a touch of freshness and flavor to your life.
We wholeheartedly encourage you to give this DIY trick a try. We’re confident that you’ll be amazed by the results. And once you’ve experienced the joy of growing your own radishes easily, we’d love to hear about it! Share your photos, tips, and stories with us in the comments section below. Let’s build a community of radish enthusiasts and inspire others to embark on their own gardening adventures. Happy growing!
Frequently Asked Questions (FAQ)
What kind of soil is best for growing radishes?
Radishes thrive in loose, well-draining soil that is rich in organic matter. Amend heavy clay soil with compost or other organic materials to improve drainage and aeration. A slightly acidic to neutral pH (around 6.0 to 7.0) is ideal. Avoid soils that are compacted or rocky, as these can hinder root development and result in misshapen radishes. Before planting, till the soil to a depth of at least 6 inches to loosen it up and remove any large clumps or stones.
How much sunlight do radishes need?
Radishes need at least 6 hours of direct sunlight per day to grow properly. However, they can tolerate partial shade, especially in hot climates. If you’re growing radishes indoors, place them near a sunny window or use grow lights to provide adequate illumination. Insufficient sunlight can lead to leggy growth and smaller, less flavorful radishes.
How often should I water my radishes?
Radishes need consistent moisture to develop quickly and prevent them from becoming woody or bitter. Water deeply whenever the top inch of soil feels dry to the touch. Avoid overwatering, as this can lead to root rot. A good rule of thumb is to water every 2-3 days, depending on the weather and soil conditions. Mulching around the plants can help retain moisture and suppress weeds.
When is the best time to plant radishes?
Radishes are a cool-season crop, so the best time to plant them is in early spring or late summer/early fall. In most regions, you can start planting radishes as soon as the soil can be worked in the spring. For a fall harvest, sow seeds about 4-6 weeks before the first expected frost. Avoid planting radishes during the hottest months of summer, as they tend to bolt (go to seed) in high temperatures.
How long does it take for radishes to mature?
Radishes are one of the fastest-growing vegetables, typically maturing in just 3-4 weeks. The exact time will depend on the variety and growing conditions. Check the seed packet for specific information on the maturity time for your chosen variety. To harvest, gently pull the radishes from the soil when they reach the desired size.
Why are my radishes cracking?
Cracking in radishes is often caused by inconsistent watering. When the soil dries out and then is suddenly saturated, the radishes can absorb water too quickly, causing them to split. To prevent cracking, water your radishes regularly and consistently, especially during dry spells. Mulching can also help maintain even soil moisture.
Why are my radishes all tops and no bottoms?
If your radishes are producing lots of leafy growth but small or nonexistent roots, it could be due to several factors:
* Overcrowding: Thin your radish seedlings to ensure they have enough space to develop properly.
* Poor Soil: Radishes need loose, well-draining soil to form good roots. Amend heavy soil with compost or other organic matter.
* Too Much Nitrogen: Excessive nitrogen in the soil can promote leafy growth at the expense of root development. Avoid using fertilizers that are high in nitrogen.
* Insufficient Sunlight: Radishes need at least 6 hours of direct sunlight per day to grow properly.
Can I eat radish greens?
Yes, radish greens are edible and nutritious! They have a peppery flavor similar to the roots. You can use them in salads, soups, stir-fries, or as a garnish. Choose young, tender greens for the best flavor and texture. Wash them thoroughly before using.
How do I store radishes after harvesting?
To store radishes, remove the greens (leaving about an inch of stem) and wash the roots. Place them in a plastic bag or container with a damp paper towel and store them in the refrigerator. Radishes stored this way can last for up to 2 weeks.
What are some common pests and diseases that affect radishes?
Some common pests that can affect radishes include flea beetles, root maggots, and aphids. Diseases that can affect radishes include damping-off, white rust, and clubroot. To prevent pest and disease problems, practice good garden hygiene, such as removing plant debris and rotating crops. You can also use organic pest control methods, such as insecticidal soap or neem oil.
Leave a Comment