

Grow Purple Cabbage Indoors? Absolutely! Imagine the vibrant splash of color, the satisfying crunch, and the nutritional powerhouse you can cultivate right in your own home. Forget those bland, store-bought veggies – we’re talking about a DIY project that brings fresh, organic purple cabbage from your windowsill to your plate.
For centuries, cabbage has been a staple in diets across the globe, revered for its hardiness and health benefits. From sauerkraut in Germany to kimchi in Korea, this humble vegetable has nourished generations. While traditionally grown outdoors, the beauty of modern gardening lies in its adaptability. We can now bring the farm indoors, and growing purple cabbage indoors is easier than you might think!
Why should you embark on this indoor gardening adventure? Well, for starters, you gain complete control over the growing environment, shielding your precious cabbage from pests and unpredictable weather. Plus, let’s be honest, there’s something incredibly rewarding about nurturing a plant from seed to harvest. In this article, I’ll share my favorite DIY tricks and hacks to help you successfully grow purple cabbage indoors, even if you have limited space or experience. Get ready to add a touch of purple magic to your home and your meals!
Growing Purple Cabbage Indoors: A Colorful Culinary Adventure!
Hey there, fellow gardening enthusiasts! Ever thought about growing your own vibrant purple cabbage right inside your home? It’s totally doable, and I’m here to guide you through the entire process. Forget those bland grocery store cabbages; let’s cultivate some gorgeous, flavorful purple gems ourselves!
Getting Started: Gathering Your Supplies
Before we dive into the dirt (literally!), let’s make sure we have everything we need. This will make the whole process smoother and more enjoyable.
* Seeds: Obviously! Choose a variety of purple cabbage that you like. ‘Red Acre’ and ‘Ruby Ball’ are popular choices. I personally love ‘Red Acre’ for its deep color and crisp texture.
* Seed Starting Tray or Small Pots: These are perfect for getting your seedlings off to a strong start. I prefer using a seed starting tray with a humidity dome to keep the moisture levels consistent.
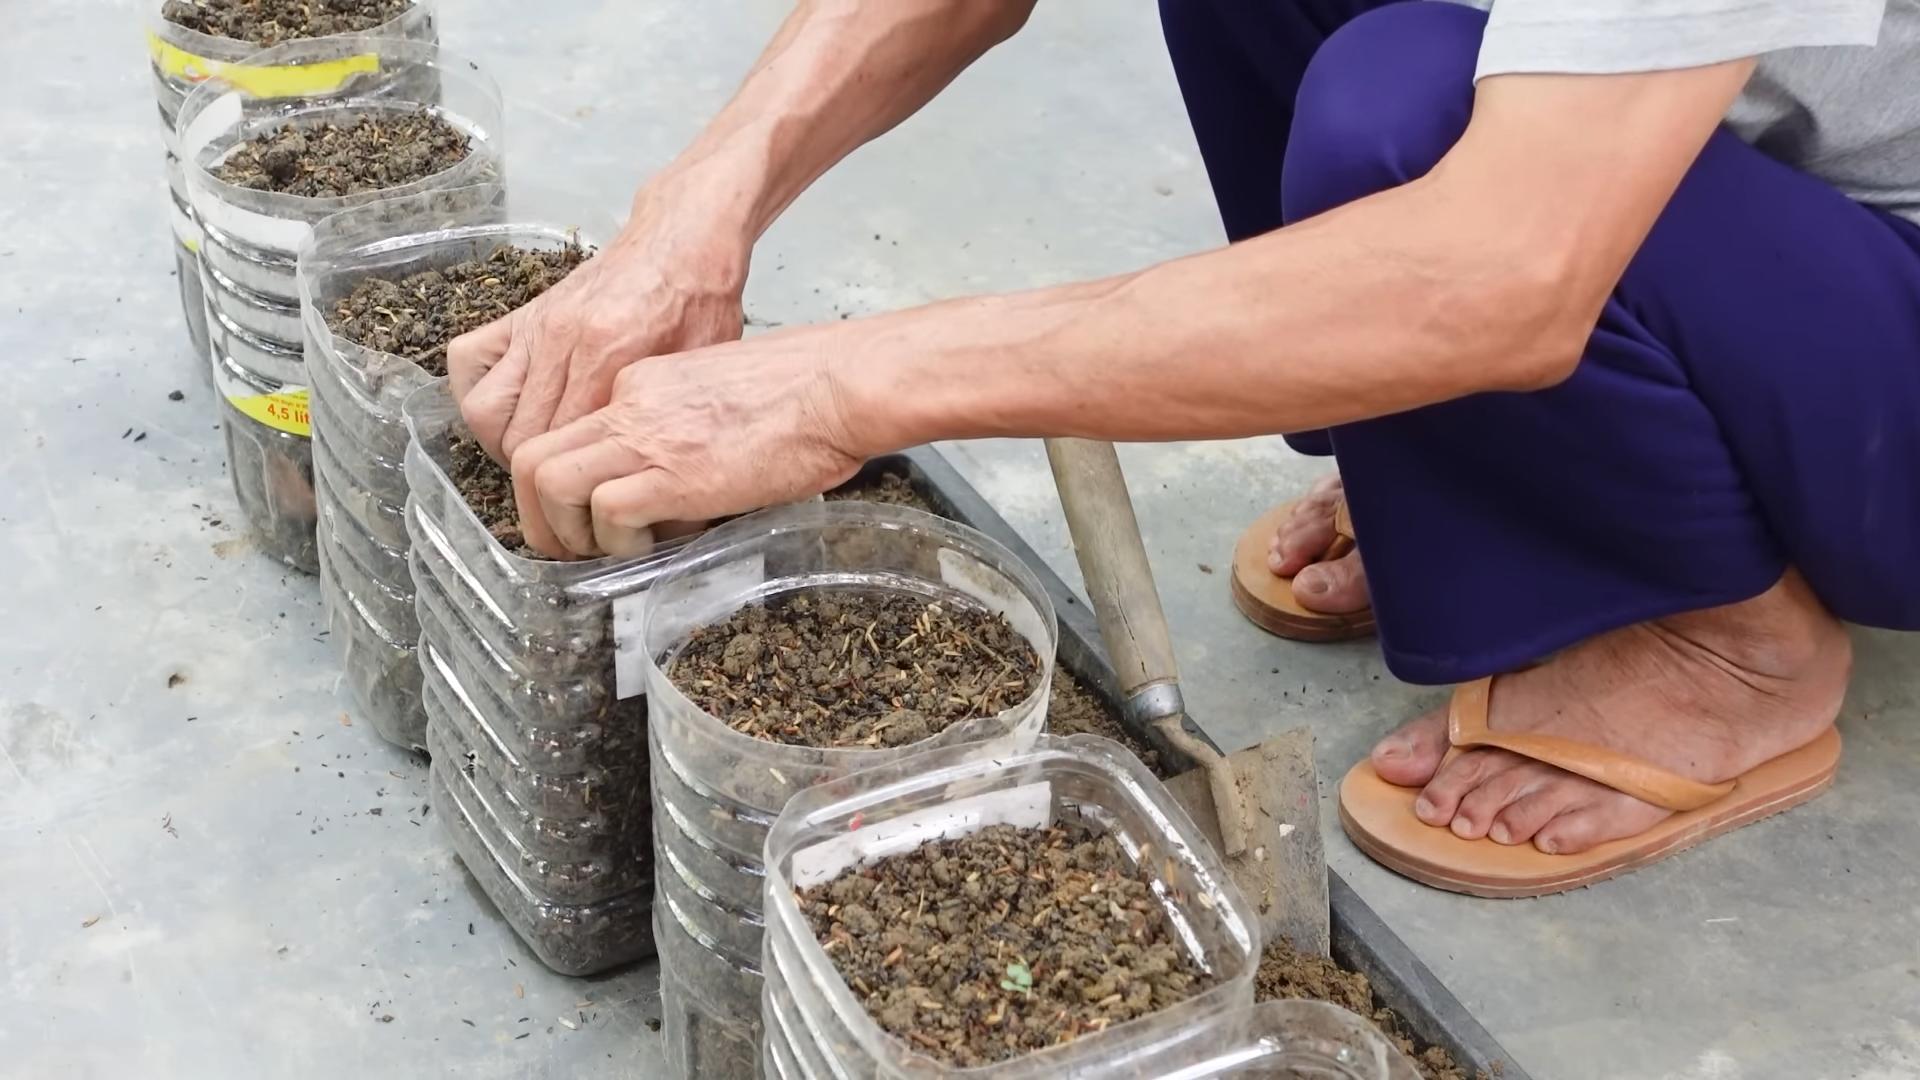
* Seed Starting Mix: This is a light, sterile soil mix specifically designed for seedlings. Don’t use regular garden soil; it’s too heavy and can harbor diseases.
* Larger Pots (at least 12 inches in diameter): Once your seedlings are big enough, they’ll need to be transplanted into larger pots to accommodate their growing roots.
* Potting Mix: A good quality potting mix is essential for healthy cabbage growth. Look for a mix that drains well and contains plenty of organic matter.
* Grow Lights: Cabbage needs a lot of light, especially when grown indoors. A good set of grow lights will ensure your plants get the energy they need to thrive. I recommend LED grow lights as they are energy-efficient and produce very little heat.
* Watering Can or Spray Bottle: For gentle watering, especially when the seedlings are young.
* Fertilizer: A balanced liquid fertilizer will help your cabbage plants grow strong and produce beautiful heads.
* pH Meter (Optional): Cabbage prefers slightly acidic soil (pH 6.0-7.0). A pH meter can help you monitor the soil pH and adjust it if necessary.
* Small Shovel or Trowel: For transplanting seedlings.
Phase 1: Sowing the Seeds
This is where the magic begins! We’re going to start by sowing our purple cabbage seeds and nurturing them into healthy seedlings.
1. Prepare the Seed Starting Tray: Fill your seed starting tray or small pots with seed starting mix. Gently press the mix down to create a firm surface.
2. Sow the Seeds: Sow 2-3 seeds per cell or pot, about ¼ inch deep. I like to make a small indentation with my finger and then drop the seeds in.
3. Cover the Seeds: Gently cover the seeds with more seed starting mix.
4. Water Thoroughly: Water the seed starting mix thoroughly, but be careful not to overwater. You want the mix to be moist, not soggy. A spray bottle is great for this step.
5. Provide Humidity: If you’re using a seed starting tray with a humidity dome, place the dome on top. This will help keep the moisture levels consistent and promote germination. If you’re not using a dome, you can cover the tray with plastic wrap.
6. Place Under Grow Lights: Place the seed starting tray under your grow lights. Keep the lights on for 14-16 hours per day.
7. Maintain Moisture: Check the seed starting mix daily and water as needed to keep it moist.
8. Wait for Germination: The seeds should germinate in 5-10 days. Once the seedlings emerge, remove the humidity dome or plastic wrap.
Phase 2: Nurturing the Seedlings
Now that our seeds have sprouted, we need to provide the seedlings with the care they need to grow strong and healthy.
1. Thin the Seedlings: Once the seedlings have developed their first true leaves (the leaves that look like miniature cabbage leaves), thin them to one seedling per cell or pot. Choose the strongest, healthiest-looking seedling and snip off the others at the soil line. I know it feels cruel, but it’s necessary to give the remaining seedling enough space and resources to thrive.
2. Continue Providing Light: Keep the seedlings under the grow lights for 14-16 hours per day. Adjust the height of the lights as the seedlings grow to keep them close to the light source.
3. Water Regularly: Water the seedlings regularly, but be careful not to overwater. Allow the top inch of soil to dry out between waterings.
4. Fertilize Sparingly: Start fertilizing the seedlings with a diluted liquid fertilizer about once a week. Follow the instructions on the fertilizer label. I usually use a half-strength solution to avoid burning the delicate seedlings.
5. Harden Off the Seedlings (Optional): If you plan to eventually move your cabbage plants outdoors, you’ll need to harden them off before transplanting. This means gradually exposing them to outdoor conditions over a period of 1-2 weeks. Start by placing the seedlings outdoors in a sheltered location for a few hours each day, gradually increasing the amount of time they spend outdoors.
Phase 3: Transplanting to Larger Pots
Once your seedlings have developed several sets of true leaves and are about 4-6 inches tall, it’s time to transplant them into larger pots.
1. Prepare the Larger Pots: Fill your larger pots (at least 12 inches in diameter) with potting mix.
2. Carefully Remove the Seedlings: Gently remove the seedlings from their seed starting cells or pots. Be careful not to damage the roots. I find it helpful to use a small trowel to loosen the soil around the seedlings.
3. Transplant the Seedlings: Make a hole in the potting mix in the larger pot that is large enough to accommodate the seedling’s root ball. Place the seedling in the hole and gently fill in around the roots with potting mix.
4. Water Thoroughly: Water the transplanted seedlings thoroughly.
5. Place Under Grow Lights: Place the transplanted seedlings under your grow lights.
Phase 4: Caring for Your Growing Cabbage
Now that your cabbage plants are in their larger pots, it’s time to provide them with the ongoing care they need to grow into beautiful, healthy heads of purple cabbage.
1. Provide Plenty of Light: Cabbage needs at least 6 hours of direct sunlight per day, or 14-16 hours of light from grow lights.
2. Water Regularly: Water your cabbage plants regularly, especially during hot, dry weather. Cabbage needs consistent moisture to grow properly. Check the soil moisture regularly and water when the top inch of soil feels dry to the touch.
3. Fertilize Regularly: Fertilize your cabbage plants every 2-3 weeks with a balanced liquid fertilizer. Follow the instructions on the fertilizer label.
4. Monitor for Pests and Diseases: Keep an eye out for pests and diseases. Common cabbage pests include aphids, cabbage worms, and flea beetles. Common cabbage diseases include black rot and clubroot. If you notice any signs of pests or diseases, take action immediately to control them. Insecticidal soap and neem oil are effective for controlling many common cabbage pests.
5. Rotate the Pots: Rotate the pots regularly to ensure that all sides of the plant receive equal light. This will help prevent the plant from becoming leggy and lopsided.
6. Maintain Proper Temperature: Cabbage prefers cool temperatures (60-70°F). Avoid exposing your cabbage plants to extreme heat or cold.
7. Consider Air Circulation: Good air circulation is important for preventing fungal diseases. Make sure your cabbage plants have plenty of space around them and that the air is circulating freely. A small fan can help improve air circulation.
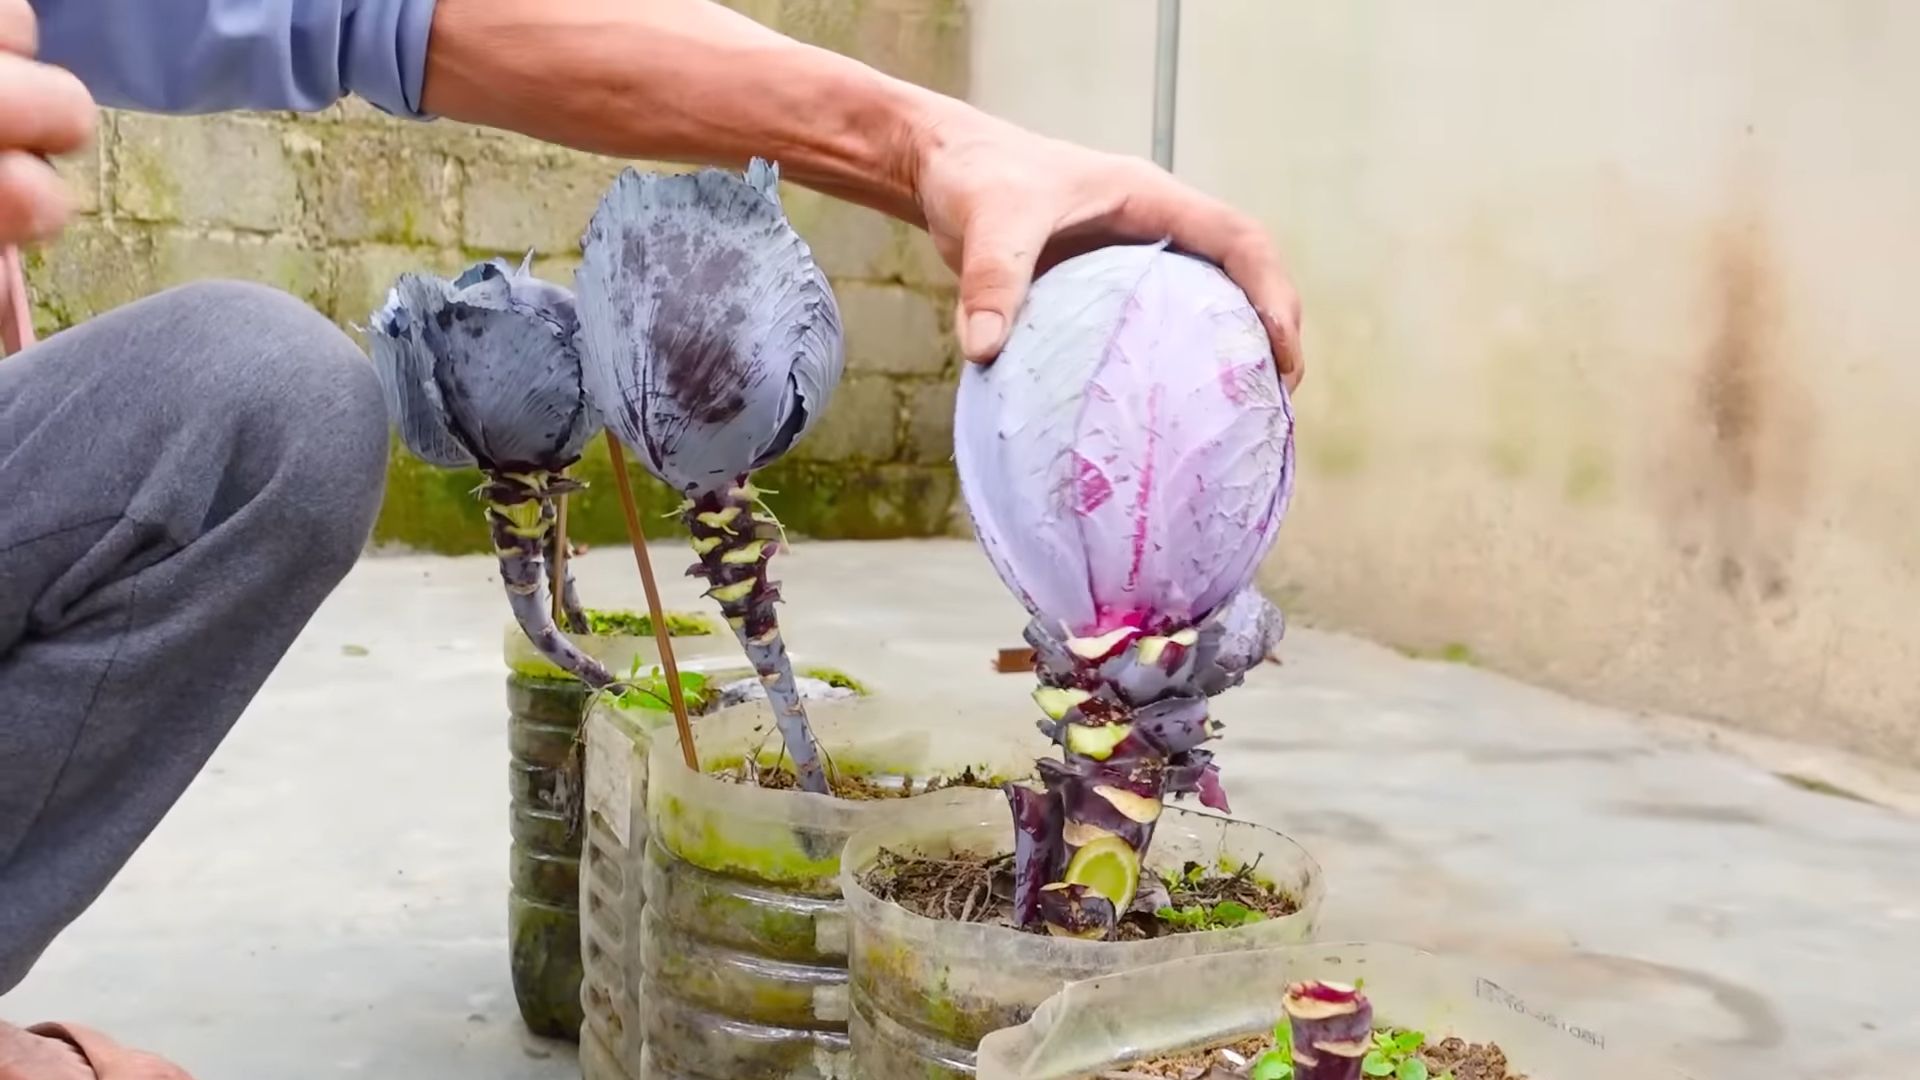
Phase 5: Harvesting Your Purple Cabbage
The moment we’ve all been waiting for! Harvesting your own homegrown purple cabbage is incredibly rewarding.
1. Check for Maturity: Your purple cabbage is ready to harvest when the head is firm and tightly packed. The size of the head will vary depending on the variety, but most purple cabbage heads are ready to harvest when they are about 6-8 inches in diameter.
2. Harvest the Cabbage: Use a sharp knife to cut the cabbage head from the stem. Leave a few outer leaves on the stem to protect the remaining plant.
3. Store the Cabbage: Store your harvested purple cabbage in the refrigerator. It should keep for several weeks.
Troubleshooting Tips
Even with the best care, you might encounter some challenges along the way. Here are a few common problems and how to address them:
* Leggy Seedlings: If your seedlings are tall and spindly, they’re not getting enough light. Move them closer to the grow lights or provide more light.
* Yellowing Leaves: Yellowing leaves can be a sign of overwatering, underwatering,
Conclusion
So, there you have it! Growing purple cabbage indoors might seem like a challenge reserved for seasoned gardeners, but with a little patience, the right setup, and this simple DIY trick, you can cultivate your own vibrant, nutrient-rich purple cabbage right in your home. We’ve walked you through the process, from seed selection to harvesting, highlighting the key steps that will ensure your success.
Why is this DIY method a must-try? Because it offers a level of control and convenience that traditional outdoor gardening simply can’t match. You’re shielded from unpredictable weather patterns, pesky pests, and the limitations of seasonal growing. Plus, there’s something incredibly rewarding about nurturing a plant from seed to harvest, especially when that plant is as visually stunning and nutritionally beneficial as purple cabbage.
But don’t stop there! Feel free to experiment with different varieties of purple cabbage. Some are more compact and better suited for indoor containers, while others offer unique flavor profiles. You could also try companion planting within your container garden. Herbs like rosemary and thyme can help deter pests and even enhance the flavor of your cabbage. Consider adding marigolds to your indoor garden; they are known for their pest-repelling properties and add a splash of color.
Another variation to consider is hydroponic growing. While this guide focuses on soil-based cultivation, purple cabbage can thrive in hydroponic systems, offering even faster growth rates and higher yields. If you’re feeling adventurous, research hydroponic techniques and adapt them to your indoor purple cabbage garden.
Ultimately, the goal is to create a thriving indoor garden that provides you with fresh, healthy purple cabbage whenever you need it. This DIY trick is your starting point, a foundation upon which you can build your own unique gardening experience.
We are confident that you can successfully grow purple cabbage indoors using this method. The key is to pay attention to the details, provide consistent care, and be patient. Remember to monitor your plants regularly for any signs of pests or diseases, and adjust your watering and lighting as needed.
Now, it’s your turn! We encourage you to give this DIY trick a try and experience the joy of growing your own purple cabbage indoors. Don’t be afraid to experiment, adapt, and learn along the way. And most importantly, share your experiences with us! We’d love to hear about your successes, challenges, and any tips you discover along the way. Post photos of your indoor purple cabbage garden on social media and tag us! Let’s create a community of indoor gardeners who are passionate about growing their own food.
Growing your own food, especially something as beautiful and nutritious as purple cabbage, is a truly empowering experience. It connects you to the natural world, provides you with fresh, healthy ingredients, and reduces your reliance on store-bought produce. So, embrace the challenge, get your hands dirty, and enjoy the fruits (or rather, vegetables) of your labor. Happy gardening!
Frequently Asked Questions (FAQ)
What are the best varieties of purple cabbage to grow indoors?
While most purple cabbage varieties can be grown indoors, some are better suited for container gardening due to their size and growth habits. Look for compact varieties like ‘Red Express’ or ‘Ruby Perfection’. These varieties tend to be smaller and mature more quickly, making them ideal for indoor cultivation. Also, consider varieties that are known for their disease resistance, as indoor environments can sometimes be prone to fungal issues. Check seed descriptions carefully for information on size, maturity time, and disease resistance before making your selection.
How much light does purple cabbage need when grown indoors?
Purple cabbage requires a significant amount of light to thrive. Ideally, aim for at least 6-8 hours of direct sunlight per day. If you don’t have access to a sunny window, you’ll need to supplement with grow lights. LED grow lights are a great option because they are energy-efficient and provide the full spectrum of light that plants need for photosynthesis. Position the grow lights a few inches above the plants and adjust the height as they grow. Monitor your plants closely for signs of insufficient light, such as leggy growth or pale leaves.
What type of soil is best for growing purple cabbage in containers?
Purple cabbage prefers well-draining, fertile soil with a slightly acidic pH (around 6.0-6.8). A good potting mix for purple cabbage should contain a blend of peat moss, perlite, and vermiculite. You can also add compost or other organic matter to improve drainage and nutrient content. Avoid using garden soil in containers, as it can become compacted and doesn’t drain well. Ensure your containers have drainage holes to prevent waterlogging, which can lead to root rot.
How often should I water my indoor purple cabbage plants?
Water your purple cabbage plants regularly, keeping the soil consistently moist but not waterlogged. Check the soil moisture level by sticking your finger about an inch into the soil. If it feels dry, it’s time to water. Water deeply, allowing the excess water to drain out of the drainage holes. Avoid overhead watering, as this can increase the risk of fungal diseases. During hot weather, you may need to water more frequently.
How do I fertilize my indoor purple cabbage plants?
Purple cabbage is a heavy feeder and requires regular fertilization. Start fertilizing your plants a few weeks after transplanting them into their final containers. Use a balanced liquid fertilizer diluted to half strength. Fertilize every 2-3 weeks, following the instructions on the fertilizer label. You can also supplement with organic fertilizers like compost tea or fish emulsion. Avoid over-fertilizing, as this can lead to nutrient burn.
How do I deal with pests and diseases on my indoor purple cabbage plants?
Indoor purple cabbage plants can be susceptible to pests like aphids, cabbage worms, and spider mites. Inspect your plants regularly for signs of infestation. If you find pests, you can try washing them off with a strong stream of water or using insecticidal soap or neem oil. For diseases, ensure good air circulation and avoid overwatering. If you notice any signs of fungal diseases, such as powdery mildew or leaf spot, remove the affected leaves and treat the plants with a fungicide.
When is purple cabbage ready to harvest?
Purple cabbage is typically ready to harvest when the head is firm and has reached the desired size. The exact size will depend on the variety, but most purple cabbage heads are ready to harvest when they are about 6-8 inches in diameter. To harvest, use a sharp knife to cut the head from the stem, leaving a few outer leaves intact. You can store harvested purple cabbage in the refrigerator for several weeks.
Can I grow purple cabbage from seed indoors?
Yes, you can absolutely start purple cabbage from seed indoors. This gives you a head start on the growing season and allows you to control the growing environment. Sow the seeds in seed trays or small pots filled with seed-starting mix. Keep the soil moist and warm, and provide plenty of light. Once the seedlings have developed a few sets of true leaves, you can transplant them into larger containers.
What are some common problems when growing purple cabbage indoors and how can I fix them?
Some common problems include:
* **Leggy growth:** Insufficient light. Provide more light, either through a sunnier window or with grow lights.
* **Yellowing leaves:** Overwatering or nutrient deficiency. Adjust watering schedule and fertilize regularly.
* **Pest infestations:** Aphids, cabbage worms, spider mites. Use insecticidal soap or neem oil.
* **Fungal diseases:** Powdery mildew, leaf spot. Ensure good air circulation and treat with a fungicide.
Can I grow purple cabbage indoors year-round?
With the right conditions, especially adequate lighting, you can grow purple cabbage indoors year-round. You may need to adjust your growing schedule depending on the season, providing more light during the winter months. Consider succession planting to ensure a continuous harvest throughout the year. Start new seeds every few weeks to have a steady supply of purple cabbage.

Leave a Comment