

Grow Potatoes Fast? Absolutely! Imagine harvesting a bounty of fresh, earthy potatoes from your own backyard weeks earlier than your neighbors. Sounds like a dream, right? Well, it doesn’t have to be! This article is packed with simple, yet incredibly effective DIY tricks and hacks that will have you enjoying homegrown potatoes in record time.
Potatoes have been a staple food for centuries, with their cultivation dating back to the Inca civilization in South America. They’ve nourished populations and played a vital role in culinary traditions worldwide. But let’s face it, waiting for those spuds to mature can feel like an eternity. That’s where these DIY secrets come in.
I know what you’re thinking: “Gardening is hard work!” And while it can be, it doesn’t have to be a slow process. Whether you’re a seasoned gardener or just starting out, these tips will help you grow potatoes fast and efficiently. We’ll explore everything from pre-sprouting techniques to soil amendments that supercharge growth. Plus, I’ll share some clever DIY solutions to common potato-growing problems. Get ready to ditch the store-bought potatoes and enjoy the satisfaction of harvesting your own delicious crop sooner than you ever thought possible!
Grow Potatoes in a Bag: A DIY Guide for a Bountiful Harvest
Hey there, fellow gardening enthusiasts! I’m so excited to share my favorite method for growing potatoes – in a bag! It’s a fantastic way to maximize space, control the soil conditions, and get a surprisingly large harvest, even if you only have a small balcony or patio. Trust me, once you try this, you’ll be hooked!
Why Grow Potatoes in a Bag?
Before we dive into the how-to, let’s quickly cover why this method is so awesome:
* Space-Saving: Perfect for small gardens, balconies, or patios. You don’t need a huge plot of land.
* Easy to Control Soil: You can create the perfect soil mix for your potatoes, ensuring they get the nutrients they need.
* Pest and Disease Control: Growing in a bag can help minimize soilborne pests and diseases.
* Easy Harvesting: No digging required! Just tip the bag over and collect your potatoes.
* Fun and Educational: It’s a great project for kids and adults alike, teaching about plant growth and food production.
What You’ll Need
Okay, let’s gather our supplies. Here’s what you’ll need to get started:
* A Large Bag: I recommend using a heavy-duty gardening bag, burlap sack, or even a large, sturdy trash bag (make sure it’s dark-colored to block light). The bag should be at least 2 feet in diameter and 2-3 feet tall. You can also use a large, durable plastic container.
* Seed Potatoes: These are potatoes specifically grown for planting. You can find them at your local garden center or online. Choose a variety that suits your taste and climate. I personally love Yukon Gold for their creamy texture.
* Potting Mix: A well-draining potting mix is essential. I like to use a mix of compost, peat moss (or coco coir), and perlite.
* Fertilizer: A balanced fertilizer (e.g., 10-10-10) will provide your potatoes with the nutrients they need to thrive.
* Watering Can or Hose: For regular watering.
* Scissors or Knife: For cutting drainage holes (if needed).
* Optional: Garden gloves, a trowel, and a marker to label your bag.
Step-by-Step Instructions: Planting Your Potatoes
Now for the fun part! Let’s get those potatoes in the ground (or, rather, in the bag!).
1. Prepare the Bag: If you’re using a plastic bag, cut several drainage holes in the bottom to prevent waterlogging. This is crucial! If you’re using a burlap sack, drainage is usually not an issue.
2. Add Soil: Fill the bottom of the bag with about 6-8 inches of potting mix. This will be the initial planting bed for your seed potatoes.
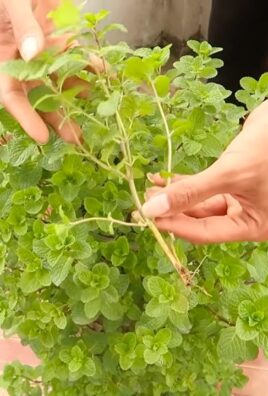
3. Prepare the Seed Potatoes: A week or so before planting, you can “chit” your seed potatoes. This means encouraging them to sprout. Place them in a bright, cool location (but not direct sunlight) until they develop small, green sprouts (eyes). This isn’t strictly necessary, but it can give your potatoes a head start. If your seed potatoes are large, you can cut them into pieces, ensuring each piece has at least one or two “eyes.” Let the cut pieces dry for a day or two to prevent rotting.
4. Plant the Seed Potatoes: Place 3-4 seed potatoes on top of the soil, spacing them evenly. Make sure the sprouts (eyes) are facing upwards.
5. Cover with Soil: Cover the seed potatoes with another 4-6 inches of potting mix.
6. Water Thoroughly: Water the soil well until it’s evenly moist but not soggy.
7. Place in a Sunny Location: Potatoes need at least 6-8 hours of sunlight per day. Choose a sunny spot in your garden, balcony, or patio.
Step-by-Step Instructions: “Hilling” Your Potatoes
This is where the magic happens! “Hilling” is the process of adding more soil to the bag as the potato plants grow. This encourages the plants to produce more potatoes along the buried stem.
1. Wait for Growth: As the potato plants grow, they will emerge from the soil. Wait until the stems are about 6-8 inches tall.
2. Add More Soil: Add another 4-6 inches of potting mix to the bag, covering the stems, leaving only the top few leaves exposed. This is the “hilling” process.
3. Water Again: Water the soil well after adding more soil.
4. Repeat the Process: Continue to add soil as the plants grow, repeating the hilling process every 2-3 weeks until the bag is almost full. This encourages the plant to produce potatoes all along the buried stem.
5. Fertilize Regularly: Feed your potato plants with a balanced fertilizer every 2-3 weeks, following the instructions on the fertilizer package. This will provide them with the nutrients they need to produce a bountiful harvest.
Step-by-Step Instructions: Watering and Maintenance
Consistent watering and a little bit of TLC are key to a successful potato harvest.
1. Water Regularly: Potatoes need consistent moisture, especially during hot weather. Water deeply whenever the top inch of soil feels dry to the touch. Avoid overwatering, as this can lead to rot.
2. Monitor for Pests and Diseases: Keep an eye out for common potato pests like aphids, potato beetles, and blight. If you spot any problems, take action immediately. Organic pest control methods, such as insecticidal soap or neem oil, can be effective.
3. Support the Plants (Optional): As the plants grow taller, they may need some support to prevent them from falling over. You can use stakes or a tomato cage to provide support.
4. Remove Flowers (Optional): Some gardeners believe that removing the flowers from potato plants encourages them to put more energy into producing tubers. This is optional, but it’s worth a try!
Step-by-Step Instructions: Harvesting Your Potatoes
The moment we’ve all been waiting for! Harvesting time!
1. Wait for the Right Time: Potatoes are typically ready to harvest about 80-100 days after planting, depending on the variety. The foliage will start to turn yellow and die back.
2. Stop Watering: A week or two before harvesting, stop watering the plants. This will help the potatoes to dry out and cure.
3. Harvesting: The easiest way to harvest potatoes grown in a bag is to simply tip the bag over and sift through the soil. You’ll be amazed at how many potatoes you find!
4. Curing: After harvesting, cure the potatoes by spreading them out in a cool, dark, and well-ventilated place for about a week. This will help them to develop a thicker skin and store longer.
5. Storing: Store your cured potatoes in a cool, dark, and dry place, such as a root cellar or basement. They should last for several months.
Troubleshooting Tips
Even with the best planning, things can sometimes go wrong. Here are a few common problems and how to fix them:
* Yellowing Leaves: This could be a sign of overwatering, underwatering, nutrient deficiency, or disease. Check the soil moisture and adjust your watering accordingly. Fertilize regularly and monitor for pests and diseases.
* Small Potatoes: This could be due to insufficient sunlight, poor soil, or overcrowding. Make sure your plants are getting enough sunlight and fertilize regularly. If you planted too many seed potatoes in the bag, you may need to thin them out.
* Rotting Potatoes: This is usually caused by overwatering or poor drainage. Make sure your bag has adequate drainage holes and avoid overwatering.
* Pests: Regularly inspect your plants for pests and take action immediately if you spot any problems.
Choosing the Right Potato Variety
The type of potato you choose to grow will influence the taste, texture, and storage life of your harvest. Here are a few popular varieties to consider:
* Yukon Gold: These are my personal favorite! They have a creamy texture and a buttery flavor. They’re great for boiling, mashing, and roasting.
* Red Potatoes: These have a waxy texture and a slightly sweet flavor. They’re great for boiling, salads, and roasting.
* Russet Potatoes: These are the classic baking potatoes. They have a fluffy texture and a mild flavor.
* Fingerling Potatoes: These are small, elongated potatoes with a firm texture and a nutty flavor. They’re great for roasting and salads.
Final Thoughts
Growing potatoes in a bag is a rewarding and fun experience. With a little bit of effort, you
Conclusion
So, there you have it! The secret to accelerating your potato harvest and enjoying fresh, homegrown spuds weeks, even months, earlier than you thought possible. This DIY trick to grow potatoes fast isn’t just about speed; it’s about maximizing your garden’s potential, extending your growing season, and experiencing the unparalleled satisfaction of nurturing your own food from seed (or, in this case, seed potato) to table.
Think of the possibilities! Imagine serving up a side of creamy, buttery new potatoes at your next summer barbecue, knowing you cultivated them yourself, bypassing the grocery store entirely. Or perhaps you’re eager to experiment with different potato varieties – Yukon Golds, Russets, fingerlings – and compare their growth rates using this accelerated method.
Don’t be afraid to get creative! While we’ve outlined a simple and effective approach, there’s always room for personalization. For example, if you live in a particularly cold climate, consider using a dark-colored container to absorb more sunlight and further warm the soil. You could also experiment with different types of soil amendments to see which combination yields the best results for your specific potato variety. Some gardeners swear by adding bone meal to the soil to promote strong root development, while others prefer a balanced organic fertilizer.
Another variation to consider is the “potato tower” method. This involves layering soil and seed potatoes in a tall container as the plants grow, encouraging them to produce potatoes along the entire stem. It’s a fantastic way to maximize space and potentially increase your yield.
The key takeaway is that growing potatoes doesn’t have to be a long, drawn-out process. With a little ingenuity and this simple DIY trick, you can significantly speed things up and enjoy the fruits (or rather, vegetables) of your labor much sooner.
We wholeheartedly encourage you to give this method a try. It’s a rewarding experience that connects you to the natural world and provides you with delicious, homegrown food. And most importantly, don’t keep your success a secret! Share your experiences, tips, and photos with us and the wider gardening community. Let us know what worked for you, what challenges you encountered, and any variations you tried. Your insights could help other gardeners achieve their potato-growing dreams.
So, grab your seed potatoes, prepare your soil, and get ready to witness the magic of accelerated potato growth. Happy gardening!
Frequently Asked Questions (FAQ)
Q: What exactly does this DIY trick entail to grow potatoes fast?
A: The core of the trick involves pre-sprouting your seed potatoes indoors before planting them in the ground or a container. This gives them a head start, allowing them to develop roots and shoots before facing the challenges of the outdoor environment. We also emphasize using well-draining, nutrient-rich soil and providing consistent moisture and sunlight. Essentially, it’s about creating optimal conditions for rapid potato growth from the very beginning.
Q: How long does it take to pre-sprout seed potatoes?
A: Typically, pre-sprouting takes about 4-6 weeks. You’ll know they’re ready to plant when the sprouts are about 1-2 inches long and have developed small roots. The exact time can vary depending on the potato variety and the ambient temperature. Warmer temperatures will generally speed up the sprouting process.
Q: What kind of container is best for growing potatoes using this method?
A: A container with good drainage is crucial. A 5-10 gallon container is generally sufficient for one or two seed potatoes. You can use plastic pots, fabric grow bags, or even repurposed containers like buckets or barrels. Make sure the container has drainage holes to prevent waterlogging, which can lead to root rot. Dark-colored containers can help warm the soil, especially in cooler climates.
Q: What type of soil is recommended for growing potatoes fast?
A: Potatoes thrive in well-draining, slightly acidic soil (pH 6.0-6.8). A mix of equal parts garden soil, compost, and peat moss or coco coir is a good starting point. You can also add perlite or vermiculite to improve drainage. Amending the soil with organic matter like compost or well-rotted manure will provide essential nutrients for healthy growth. Avoid heavy clay soils, as they can become waterlogged and hinder potato development.
Q: How often should I water my potatoes?
A: Potatoes need consistent moisture, especially during tuber formation. Water deeply whenever the top inch of soil feels dry to the touch. Avoid overwatering, as this can lead to rot. The frequency of watering will depend on the weather conditions, the type of container you’re using, and the soil’s drainage capacity. Mulching around the plants can help retain moisture and reduce the need for frequent watering.
Q: How much sunlight do potatoes need to grow fast?
A: Potatoes need at least 6-8 hours of direct sunlight per day to thrive. Choose a location that receives plenty of sunlight throughout the growing season. If you’re growing potatoes in containers, you can move them around to ensure they get adequate sunlight.
Q: What are some common problems I might encounter when growing potatoes, and how can I address them?
A: Common problems include pests like potato beetles and aphids, diseases like early blight and late blight, and nutrient deficiencies. Regularly inspect your plants for signs of pests or diseases and take appropriate action. Organic pest control methods like hand-picking pests or using insecticidal soap can be effective. Ensure your plants receive adequate nutrients by amending the soil with compost or using a balanced fertilizer. Proper watering and good air circulation can help prevent fungal diseases.
Q: Can I use this method to grow potatoes in a small space, like a balcony or patio?
A: Absolutely! This method is particularly well-suited for small-space gardening. Growing potatoes in containers allows you to control the soil conditions and move the plants around to maximize sunlight exposure. The potato tower method is also a great option for maximizing space and increasing your yield.
Q: What are some signs that my potatoes are ready to harvest?
A: The timing of harvest depends on the potato variety and your desired size. For new potatoes, you can start harvesting when the plants begin to flower. These potatoes will be small and tender. For larger, mature potatoes, wait until the foliage starts to die back. At this point, stop watering the plants and allow the potatoes to cure in the ground for a week or two before harvesting.
Q: Is it really worth the effort to grow potatoes fast using this DIY trick?
A: Absolutely! While it requires a little extra effort upfront, the rewards are well worth it. You’ll enjoy fresh, homegrown potatoes weeks or even months earlier than you would with traditional methods. You’ll have greater control over the growing process, ensuring your potatoes are free from harmful chemicals. And you’ll experience the satisfaction of nurturing your own food from seed to table. Plus, the taste of freshly harvested, homegrown potatoes is simply unbeatable! This method to grow potatoes fast is a game changer.
Leave a Comment