

Grow Potatoes Fast? Absolutely! Imagine harvesting a bounty of fresh, earthy potatoes from your own backyard, weeks before your neighbors even think about planting. Sounds like a dream, right? Well, it doesn’t have to be! This article is packed with simple, yet incredibly effective DIY tricks and hacks to help you achieve exactly that.
Potatoes have been a staple food for centuries, with their cultivation dating back to the Inca civilization in South America. They’ve nourished populations and played a vital role in food security throughout history. But let’s be honest, waiting for those spuds to mature can feel like an eternity! That’s where these DIY secrets come in.
In today’s fast-paced world, who has time to wait? We all crave instant gratification, and gardening is no exception. Plus, growing your own food is not only incredibly rewarding but also ensures you know exactly what’s going into your meals. No more worrying about harmful pesticides or questionable farming practices. I’m going to show you how to grow potatoes fast and efficiently, maximizing your yield and minimizing your wait time. Get ready to roll up your sleeves and discover the secrets to a potato harvest that will make you the envy of every gardener on the block!
Grow Potatoes in a Bag: A DIY Guide for a Bountiful Harvest
Hey there, fellow gardening enthusiasts! I’m so excited to share my favorite method for growing potatoes – in a bag! It’s a fantastic way to maximize space, control the soil conditions, and harvest a ton of delicious potatoes, even if you only have a small balcony or patio. Trust me, once you try this, you’ll be hooked!
What You’ll Need
Before we get started, let’s gather our supplies. This is a pretty straightforward project, so you probably have a lot of this stuff already.
* A Large, Sturdy Bag: Think burlap sacks, heavy-duty garbage bags (the kind contractors use), or even those reusable shopping bags with reinforced handles. The bag should be at least 2 feet wide and 2 feet tall. The bigger, the better, as it allows for more potato growth.
* Seed Potatoes: These are potatoes specifically grown for planting. You can find them at your local garden center or online. Look for varieties that are suited to your climate. I personally love Yukon Gold for their creamy texture and reliable yields.
* Potting Mix: Avoid using garden soil directly in the bag. It’s often too heavy and doesn’t drain well. A good quality potting mix is essential for healthy potato growth.
* Compost: Compost adds nutrients and improves soil structure. Mix it in with your potting mix for an extra boost.
* Water: Potatoes need consistent moisture, so make sure you have a reliable water source.
* Fertilizer (Optional): A balanced, slow-release fertilizer can help your potatoes thrive, but it’s not strictly necessary if your potting mix and compost are nutrient-rich.
* Scissors or a Knife: For cutting the seed potatoes (if needed) and making drainage holes in the bag.
* Trowel or Shovel: For scooping and moving the potting mix.
Preparing Your Seed Potatoes
This step is crucial for getting a head start on your potato crop.
1. Chitting (Sprouting): A few weeks before planting, place your seed potatoes in a cool, bright location (but not in direct sunlight). This encourages them to sprout “eyes,” which will become the stems of your potato plants. You can use an egg carton or a shallow tray to hold them.
2. Cutting (Optional): If your seed potatoes are large (bigger than an egg), you can cut them into smaller pieces. Each piece should have at least 2-3 “eyes.” Let the cut pieces dry for a day or two to callous over. This helps prevent rot. I usually only cut the really big ones; smaller ones I plant whole.
Planting Your Potatoes
Now for the fun part – getting those potatoes in the bag!
1. Prepare the Bag: If you’re using a plastic bag, poke several drainage holes in the bottom. This is super important to prevent waterlogging, which can rot your potatoes.
2. Add the Initial Soil Layer: Pour about 4-6 inches of potting mix into the bottom of the bag. Mix in a generous amount of compost.
3. Plant the Seed Potatoes: Place the seed potatoes on top of the soil layer, with the “eyes” facing upwards. Space them about 8-12 inches apart. If you’re only planting one or two seed potatoes, place them in the center of the bag.
4. Cover with Soil: Cover the seed potatoes with another 4-6 inches of potting mix and compost.
5. Water Thoroughly: Water the soil well until it’s evenly moist but not soggy.
“Hilling” Your Potatoes
This is the secret to getting a huge potato harvest! “Hilling” encourages the potato plants to produce more tubers along their stems.
1. Wait for Growth: As the potato plants grow, they’ll start to emerge from the soil. Wait until the stems are about 6-8 inches tall.
2. Add More Soil: Add another layer of potting mix and compost, burying the stems up to their top leaves. This is the “hilling” process.
3. Repeat: Continue to add soil as the plants grow, always burying the stems up to their top leaves. You’ll be filling the bag almost to the top over time. This encourages the plant to produce potatoes all along the buried stem.
4. Water Regularly: Keep the soil consistently moist, especially during hot weather. Potatoes need a lot of water to thrive.
Caring for Your Potato Plants
A little TLC goes a long way in ensuring a successful potato harvest.
1. Sunlight: Potatoes need at least 6-8 hours of sunlight per day. Place your bag in a sunny location.
2. Watering: Water deeply whenever the top inch of soil feels dry to the touch. Avoid overwatering, as this can lead to rot.
3. Fertilizing (Optional): If you’re using fertilizer, follow the instructions on the package. A balanced fertilizer applied every few weeks can help boost growth.
4. Pest Control: Keep an eye out for pests like aphids, potato beetles, and flea beetles. You can control them with insecticidal soap or neem oil. I prefer organic methods whenever possible.
5. Disease Prevention: Good air circulation and proper watering can help prevent diseases like blight. Avoid overhead watering, which can spread fungal spores.
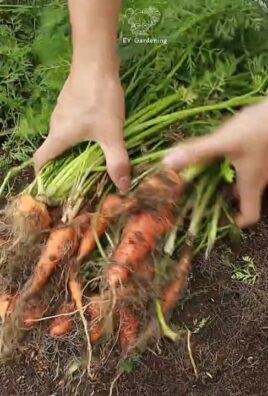
Harvesting Your Potatoes
The moment we’ve all been waiting for!
1. When to Harvest: Potatoes are typically ready to harvest about 80-100 days after planting, depending on the variety. You’ll know they’re ready when the plants start to flower and the foliage begins to die back.
2. Harvesting: The easiest way to harvest potatoes from a bag is to simply dump the bag out onto a tarp or other clean surface. Then, carefully sift through the soil and collect your potatoes!
3. Storing: Store your potatoes in a cool, dark, and dry place. A root cellar is ideal, but a basement or garage will also work. Avoid storing them in the refrigerator, as this can cause them to develop a sweet taste.
Troubleshooting
Even with the best planning, things can sometimes go wrong. Here are a few common problems and how to fix them.
* Yellowing Leaves: This can be a sign of overwatering, underwatering, or nutrient deficiency. Check the soil moisture and adjust your watering accordingly. If the soil is dry, water deeply. If it’s soggy, let it dry out before watering again. You can also try adding a balanced fertilizer.
* Potato Blight: This fungal disease can cause brown spots on the leaves and stems. Remove infected foliage immediately and dispose of it properly (don’t compost it). You can also try spraying with a fungicide.
* Pests: As mentioned earlier, keep an eye out for pests and treat them promptly with insecticidal soap or neem oil.
Tips for Success
Here are a few extra tips to help you grow the best potatoes ever!
* Choose the Right Variety: Select potato varieties that are well-suited to your climate and growing conditions.
* Use High-Quality Potting Mix: Don’t skimp on the potting mix. A good quality mix will provide the nutrients and drainage that your potatoes need.
* Water Consistently: Potatoes need consistent moisture, especially during hot weather.
* Hill Regularly: “Hilling” is the key to getting a large potato harvest.
* Don’t Overcrowd: Give your potato plants enough space to grow.
* Be Patient: Growing potatoes takes time. Don’t get discouraged if you don’t see results immediately.
I hope this guide has inspired you to try growing potatoes in a bag. It’s a fun, rewarding, and easy way to grow your own delicious potatoes, even if you have limited space. Happy gardening!
Conclusion
So, there you have it! Growing potatoes fast isn’t just a pipe dream; it’s an achievable reality with a little planning and the right techniques. We’ve explored the magic of pre-sprouting, the strategic advantage of choosing early-maturing varieties, and the power of proper soil preparation and consistent watering. But the real game-changer, the secret weapon in your potato-growing arsenal, is the method of “chitting” your seed potatoes.
Why is this DIY trick a must-try? Because it dramatically shortens the time it takes to harvest those delicious, homegrown potatoes. By giving your potatoes a head start indoors, you’re essentially fast-forwarding the germination process, allowing them to establish strong roots and foliage before they even hit the ground. This translates to earlier harvests, bigger yields, and a significantly reduced risk of your precious spuds succumbing to late-season pests or diseases.
Think of it this way: you’re giving your potatoes a VIP pass to the growing season, bypassing the long lines and getting them straight to the front of the stage. And who doesn’t want that?
But the beauty of this method lies in its adaptability. Feel free to experiment with different potato varieties to discover which ones thrive best in your local climate. Consider using different types of containers for pre-sprouting, from egg cartons to seed trays, to find what works best for you. You can even try different light sources, comparing the results of natural sunlight versus artificial grow lights.
Don’t be afraid to get creative and personalize the process to suit your specific needs and preferences.
And speaking of personalization, consider these variations to further enhance your potato-growing experience:
* **Vertical Potato Towers:** If space is limited, explore vertical potato towers. These ingenious structures allow you to grow a significant number of potatoes in a small footprint.
* **Straw Bale Gardening:** For a no-dig approach, try growing your potatoes in straw bales. This method provides excellent drainage and aeration, leading to healthier and more productive plants.
* **Companion Planting:** Surround your potato plants with beneficial companion plants like marigolds, basil, or nasturtiums to deter pests and attract pollinators.
Ultimately, the goal is to find what works best for you and your garden. The most important thing is to give it a try!
We’re confident that once you experience the satisfaction of harvesting your own homegrown potatoes weeks ahead of schedule, you’ll be hooked. So, grab some seed potatoes, gather your supplies, and get ready to embark on a rewarding gardening adventure.
We encourage you to try this DIY trick for growing potatoes fast and share your experiences with us! Let us know what varieties you’re growing, what techniques you’re using, and what challenges you’re overcoming. Your insights could help other gardeners achieve their potato-growing dreams. Share your photos and stories on social media using [Your Hashtag Here] and let’s create a community of thriving potato growers! Happy gardening!
Frequently Asked Questions (FAQ)
What exactly does “chitting” mean, and why is it important for growing potatoes fast?
Chitting, also known as pre-sprouting, is the process of encouraging seed potatoes to develop sprouts before planting them in the ground. This is crucial for growing potatoes fast because it gives the plants a significant head start. Instead of waiting for the potato to sprout underground, which can take several weeks depending on soil temperature and moisture, you’re essentially jumpstarting the process indoors. This allows the plants to establish themselves more quickly once planted, leading to earlier harvests and potentially larger yields. The potato plant is already actively growing when it goes into the ground, giving it a competitive edge.
How long should I chit my seed potatoes before planting?
Generally, you should aim to chit your seed potatoes for about 4-6 weeks before your anticipated planting date. This allows sufficient time for the sprouts to develop into strong, healthy shoots. However, the ideal duration can vary depending on the variety of potato and the ambient temperature. Keep an eye on the sprouts; you want them to be sturdy and green, not long, spindly, and white. If the sprouts become too long, they can be easily damaged during planting.
What’s the best way to store seed potatoes while they’re chitting?
The ideal storage conditions for chitting seed potatoes are cool, bright, and well-ventilated. A temperature range of 50-60°F (10-15°C) is generally recommended. Avoid storing them in direct sunlight, as this can cause them to dry out or overheat. A cool garage, shed, or even a spare room with a bright window can work well. Arrange the potatoes in a single layer in egg cartons or seed trays, with the “eyes” (the small indentations where sprouts emerge) facing upwards. This will encourage the sprouts to grow upwards towards the light.
Can I use potatoes from the grocery store as seed potatoes?
While it’s technically possible to grow potatoes from grocery store potatoes, it’s generally not recommended. Grocery store potatoes are often treated with sprout inhibitors to prevent them from sprouting on the shelves. This can significantly reduce their ability to germinate and grow. Additionally, grocery store potatoes may carry diseases that could contaminate your garden soil. It’s always best to use certified seed potatoes from a reputable supplier. These potatoes are specifically grown for seed and are guaranteed to be disease-free and have good sprouting potential.
What if my seed potatoes start to rot while chitting?
If you notice any signs of rot or mold on your seed potatoes, it’s important to remove them immediately to prevent the spread of disease to other potatoes. Rotting can be caused by excessive moisture or poor ventilation. Ensure that your potatoes are stored in a well-ventilated area and avoid overcrowding them. If only a small portion of the potato is affected, you may be able to cut away the rotten part, ensuring you leave a generous margin of healthy tissue. However, if the rot is extensive, it’s best to discard the potato altogether.
What kind of soil is best for growing potatoes fast?
Potatoes thrive in well-drained, loose soil that is rich in organic matter. Avoid heavy clay soils, as they can become waterlogged and inhibit root growth. Amend your soil with compost, well-rotted manure, or other organic materials to improve drainage and fertility. A slightly acidic soil pH of 6.0-6.5 is ideal.
How often should I water my potato plants?
Water your potato plants regularly, especially during dry periods. Aim to keep the soil consistently moist, but avoid overwatering, as this can lead to root rot. The frequency of watering will depend on the weather conditions and the type of soil. Check the soil moisture regularly by inserting your finger into the soil a few inches deep. If the soil feels dry to the touch, it’s time to water.
When is the best time to harvest my potatoes?
The timing of your potato harvest will depend on the variety of potato you’re growing and whether you’re harvesting “new potatoes” or mature potatoes. New potatoes are small, tender potatoes that are harvested early in the season. They typically mature in about 60-80 days. Mature potatoes are harvested later in the season, after the foliage has begun to die back. They typically mature in about 90-120 days. To harvest new potatoes, gently dig around the base of the plant and remove a few potatoes at a time. To harvest mature potatoes, wait until the foliage has completely died back, then carefully dig up the entire plant.
Can I grow potatoes in containers?
Yes, growing potatoes in containers is a great option, especially if you have limited garden space. Choose a large container with good drainage holes. Fill the container with a well-draining potting mix and plant your seed potatoes about 4-6 inches deep. As the plants grow, gradually add more soil to the container, burying the stems. This encourages the formation of more potatoes along the buried stems.
What are some common pests and diseases that affect potato plants?
Some common pests that affect potato plants include potato beetles, aphids, and flea beetles. Common diseases include blight, scab, and verticillium wilt. Monitor your plants regularly for signs of pests or diseases and take appropriate action if necessary. Organic pest control methods, such as hand-picking pests or using insecticidal soap, can be effective. Choose disease-resistant potato varieties to minimize the risk of disease.
Leave a Comment