

Grow Okra in Containers and unlock a world of homegrown goodness, even if you’re short on space! Have you ever dreamt of plucking fresh, vibrant okra right from your own patio? Well, dream no more! This DIY guide is your ticket to a bountiful okra harvest, no sprawling garden required.
Okra, with its fascinating history tracing back to ancient Ethiopia, has nourished communities for centuries. It’s a staple in Southern cuisine and a beloved ingredient in dishes around the globe. But you don’t need to live in the South to enjoy this versatile vegetable.
In today’s fast-paced world, finding time and space for a traditional garden can be a challenge. That’s where container gardening comes in! Growing okra in containers allows you to enjoy fresh, healthy produce regardless of your living situation. Plus, it’s incredibly rewarding to nurture a plant from seed to harvest. I’m going to show you how easy it is to grow okra in containers, providing you with a sustainable source of delicious okra right at your fingertips. Get ready to roll up your sleeves and let’s get planting!
Growing Okra in Containers: A Complete DIY Guide
Okra, also known as lady’s fingers, is a warm-season vegetable that’s surprisingly easy to grow, even if you don’t have a sprawling garden. I’ve had great success growing okra in containers, and I’m excited to share my tips and tricks with you so you can enjoy a bountiful harvest of your own! This guide will walk you through everything you need to know, from choosing the right container to harvesting your delicious okra pods.
Choosing the Right Container and Soil
Before we dive into the planting process, let’s talk about the essentials: the container and the soil. These are crucial for a healthy and productive okra plant.
* Container Size: Okra plants need room to grow, both above and below the soil. I recommend using a container that’s at least 12 inches in diameter and 12 inches deep. A 5-gallon bucket or a large planter pot works perfectly. Bigger is generally better, as it gives the roots more space to spread out.
* Drainage: This is non-negotiable! Make sure your container has adequate drainage holes at the bottom. Okra doesn’t like soggy roots, and poor drainage can lead to root rot. If your container doesn’t have enough holes, you can easily drill a few more.
* Material: The material of the container is less critical, but I prefer using plastic or terracotta pots. Plastic pots are lightweight and retain moisture well, while terracotta pots are more breathable and help prevent overwatering.
* Soil: Okra thrives in well-draining, fertile soil. I always use a high-quality potting mix specifically formulated for vegetables. Avoid using garden soil, as it can be too heavy and compact for container gardening. You can also amend your potting mix with compost or aged manure to boost its nutrient content. I usually add about 25% compost to my potting mix.
Planting Your Okra Seeds
Now that you have your container and soil ready, it’s time to plant your okra seeds!
1. Soaking the Seeds (Optional): Soaking okra seeds in warm water for 12-24 hours before planting can help improve germination rates. I’ve found that it speeds up the sprouting process. Just place the seeds in a bowl of warm water and let them soak.
2. Filling the Container: Fill your container with the potting mix, leaving about an inch or two of space at the top. Gently pat down the soil to remove any air pockets.
3. Planting the Seeds: Sow the okra seeds about 1/2 inch deep and 2-3 inches apart. I usually plant 2-3 seeds per spot and then thin them out later, keeping the strongest seedling.
4. Watering: After planting, water the soil thoroughly until it’s evenly moist. Be careful not to overwater, as this can cause the seeds to rot.
5. Placement: Place the container in a sunny location that receives at least 6-8 hours of direct sunlight per day. Okra loves the sun!
6. Germination: Okra seeds typically germinate in 5-14 days, depending on the temperature and moisture levels. Keep the soil consistently moist during this time.
Caring for Your Okra Plants
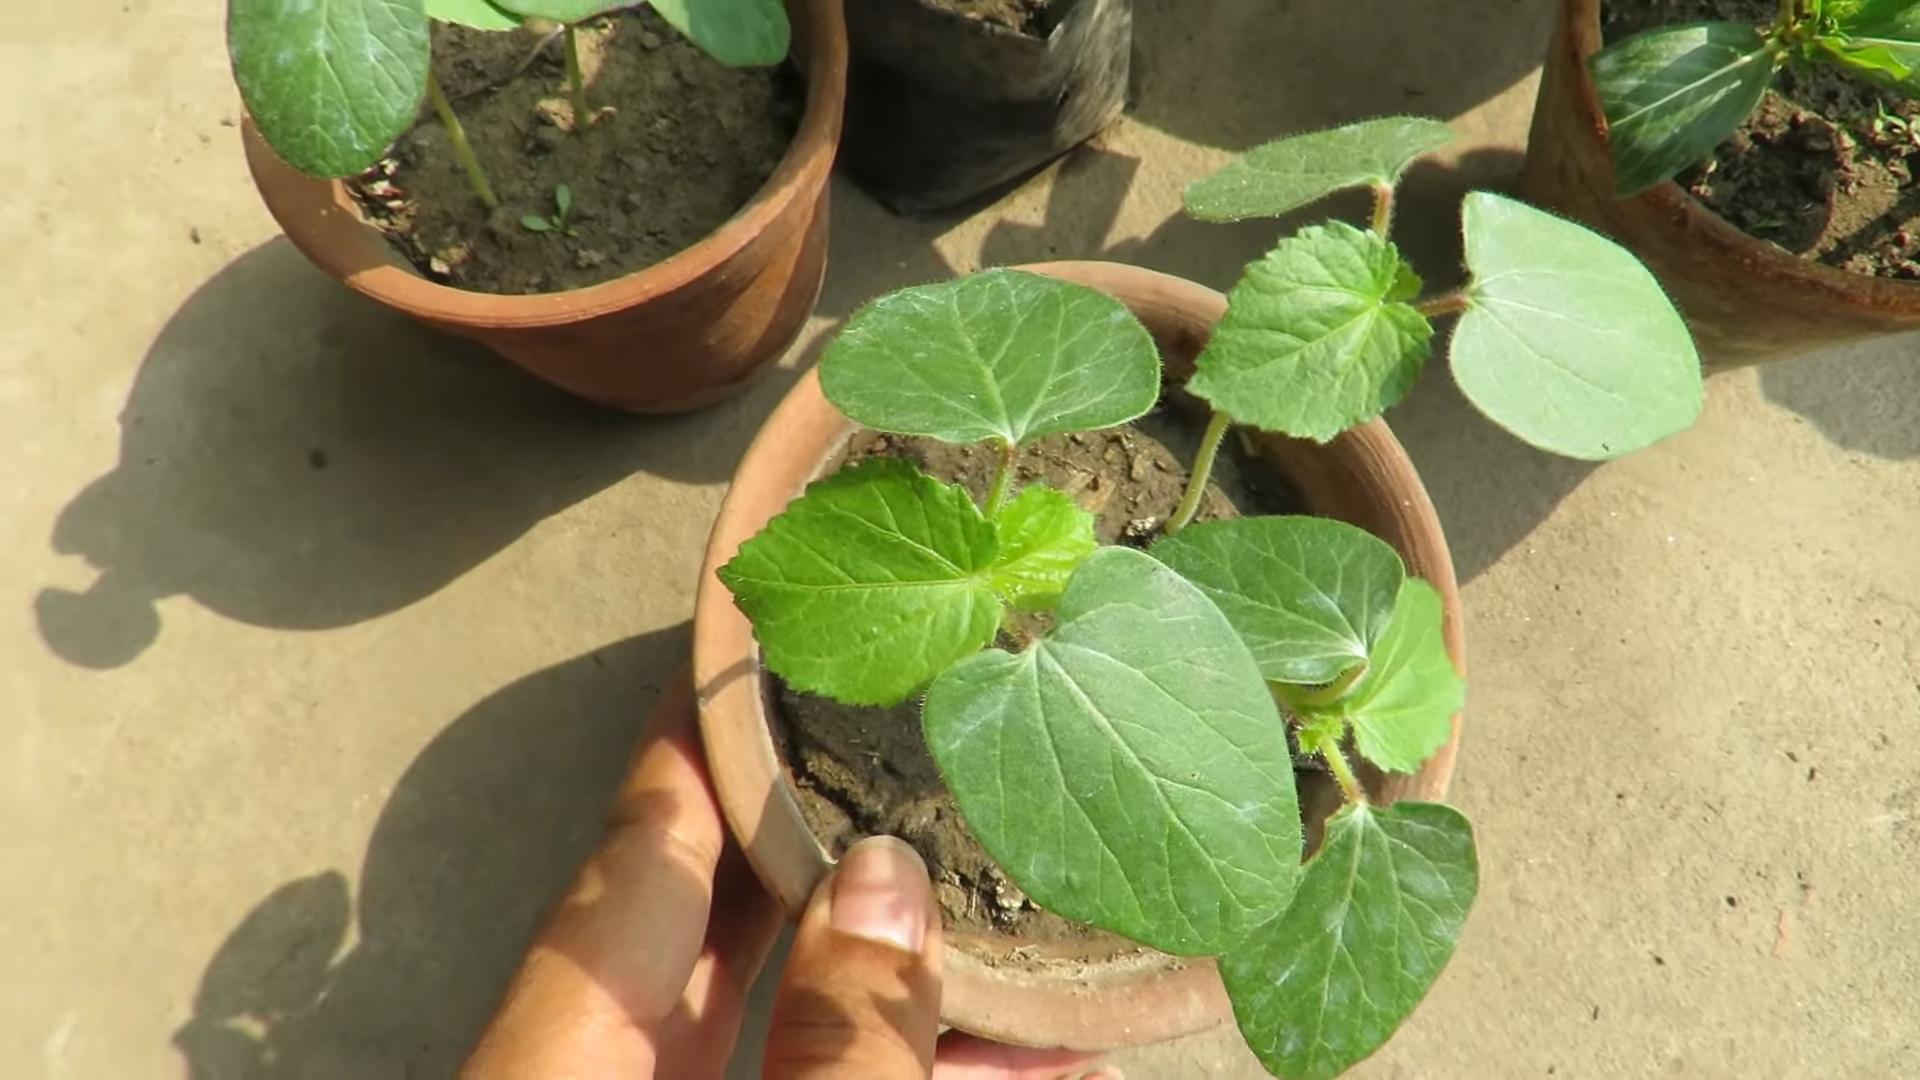
Once your okra seedlings emerge, it’s important to provide them with proper care to ensure healthy growth and a good harvest.
* Watering: Water your okra plants regularly, especially during hot and dry weather. I usually water them deeply whenever the top inch of soil feels dry to the touch. Avoid overwatering, as this can lead to root rot.
* Fertilizing: Okra plants are heavy feeders, so it’s important to fertilize them regularly. I like to use a balanced liquid fertilizer, such as a 10-10-10 or 20-20-20, diluted to half strength. Fertilize every 2-3 weeks during the growing season. You can also use a slow-release fertilizer at planting time.
* Thinning: If you planted multiple seeds per spot, thin out the seedlings to one plant per spot once they are a few inches tall. Choose the strongest and healthiest seedling and remove the others.
* Mulching: Applying a layer of mulch around your okra plants can help retain moisture, suppress weeds, and regulate soil temperature. I like to use organic mulches, such as straw, wood chips, or shredded leaves.
* Pruning: While not essential, pruning can help improve air circulation and encourage bushier growth. You can remove any yellowing or damaged leaves. I also sometimes pinch off the top of the plant to encourage side branching.
* Pest and Disease Control: Okra plants can be susceptible to certain pests and diseases, such as aphids, spider mites, and fungal diseases. Inspect your plants regularly for any signs of problems. If you notice any pests, you can try spraying them with insecticidal soap or neem oil. For fungal diseases, you can use a fungicide. I prefer to use organic pest and disease control methods whenever possible.
Harvesting Your Okra Pods
Harvesting okra at the right time is crucial for getting the best flavor and texture. Overripe okra pods can become tough and fibrous.
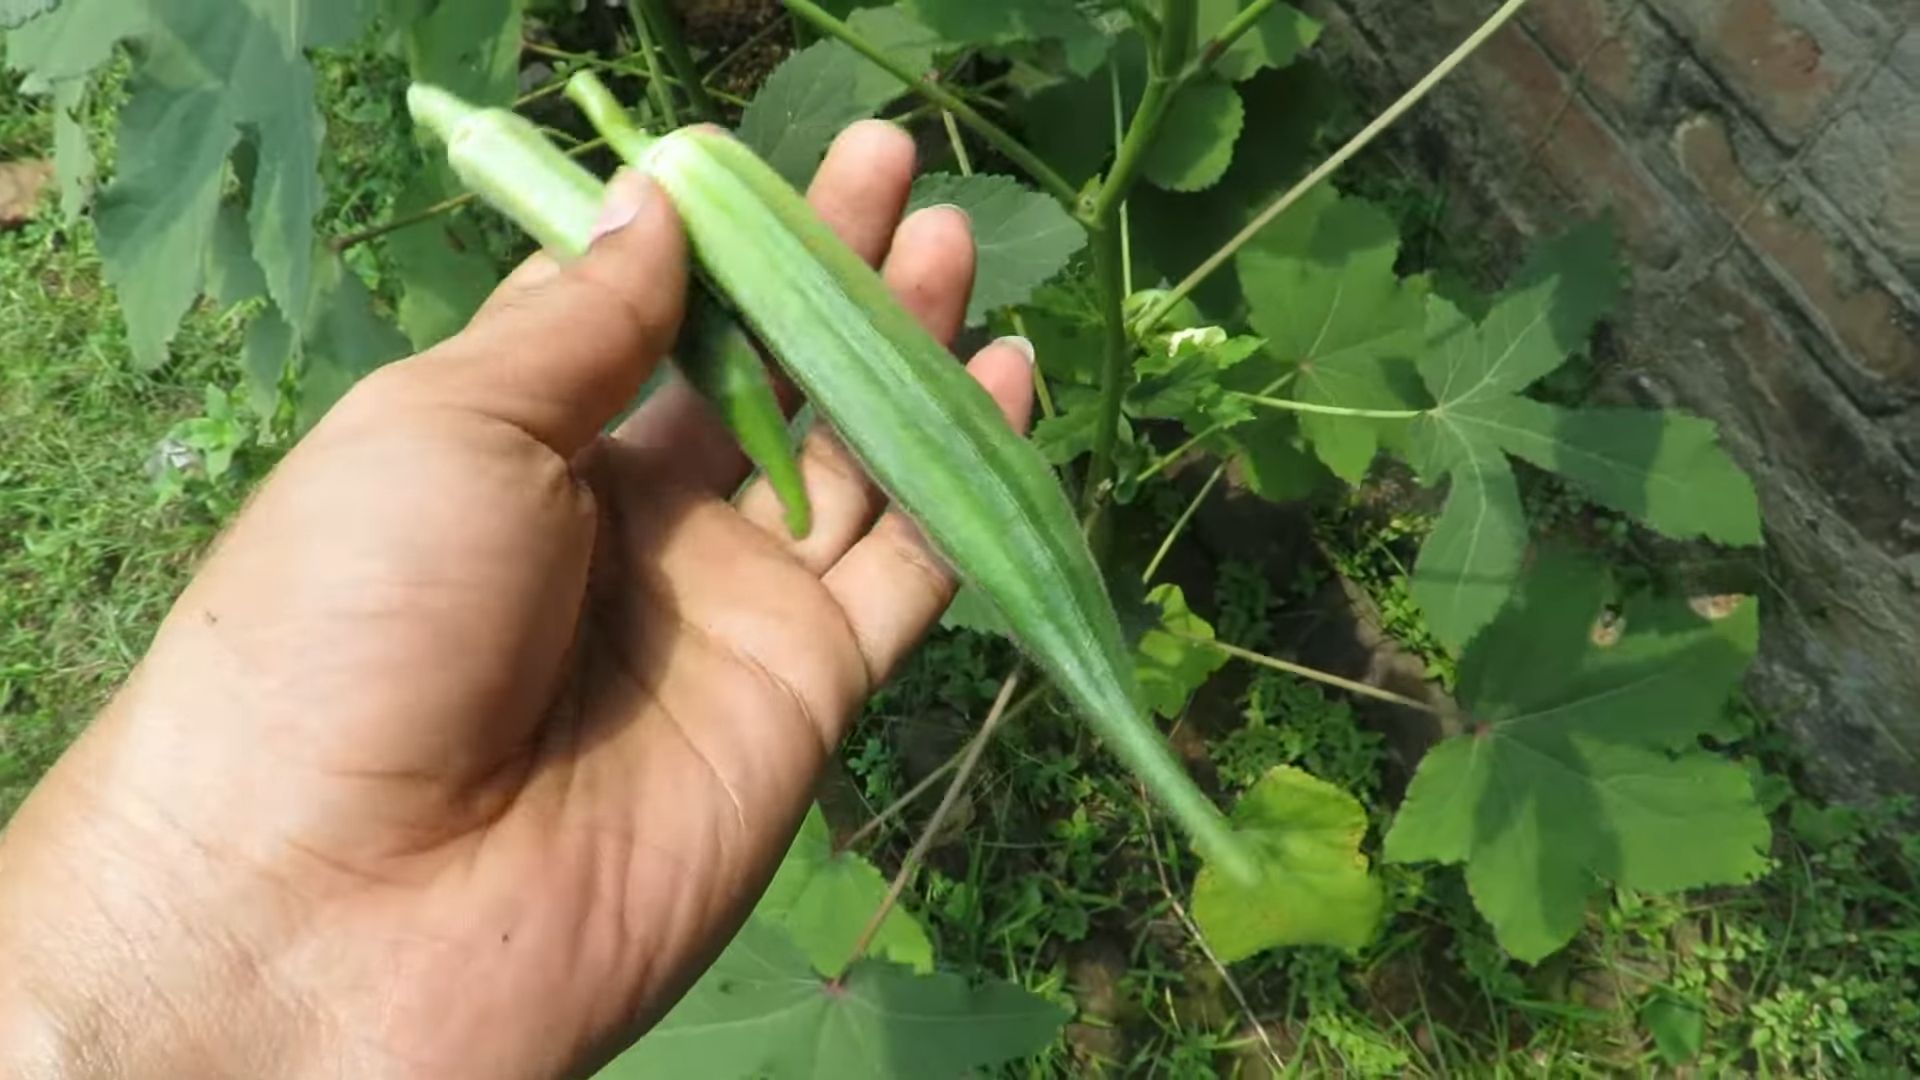
1. Timing: Okra pods are typically ready to harvest about 50-60 days after planting. The ideal time to harvest is when the pods are 2-4 inches long and still tender.
2. Checking for Tenderness: To check for tenderness, gently squeeze the pod. If it feels firm but not hard, it’s ready to harvest. If it feels hard, it’s likely overripe.
3. Harvesting Technique: Use a sharp knife or pruning shears to cut the pods from the plant. Be careful not to damage the plant. Okra plants have prickly hairs, so I recommend wearing gloves when harvesting.
4. Frequency: Harvest okra pods every 1-2 days to encourage continuous production. The more you harvest, the more the plant will produce.
5. Post-Harvest Handling: Okra pods are best used fresh, but they can also be stored in the refrigerator for a few days. To store them, wrap them in a paper towel and place them in a plastic bag.
Troubleshooting Common Problems
Even with the best care, you might encounter some problems while growing okra. Here are some common issues and how to address them:
* Yellowing Leaves: Yellowing leaves can be caused by a variety of factors, such as nutrient deficiencies, overwatering, or pests. Check the soil moisture and nutrient levels, and inspect the plant for any signs of pests.
* Lack of Pod Production: If your okra plant isn’t producing pods, it could be due to insufficient sunlight, poor soil fertility, or lack of pollination. Make sure the plant is getting enough sunlight, fertilize it regularly, and consider hand-pollinating the flowers.
* Stunted Growth: Stunted growth can be caused by a variety of factors, such as poor soil, lack of water, or pests. Check the soil quality, water the plant regularly, and inspect it for any signs of pests.
* Pest Infestations: Okra plants can be susceptible to various pests, such as aphids, spider mites, and flea beetles. Inspect your plants regularly for any signs of pests and take appropriate action.
Choosing Okra Varieties for Containers
While most okra varieties can be grown in containers, some are better suited than others due to their size and growth habit. Here are a few of my favorite varieties for container gardening:
* ‘Baby Bubba’: This is a compact variety that’s perfect for small containers. It produces small, tender pods.
* ‘Clemson Spineless’: This is a popular variety that’s known for its spineless pods, making harvesting easier. It grows to a manageable size in containers.
* ‘Emerald’: This variety produces dark green, tender pods and is relatively compact.
* ‘Dwarf Green Long Pod’: As the name suggests, this is a dwarf variety that’s well-suited for containers. It produces long, slender pods.
Extending the Growing Season
If you live in a cooler climate, you can extend the okra growing season by starting the seeds indoors a few weeks before the last expected frost. You can also use row covers or a cold frame to protect the plants from frost. I’ve even brought my containers indoors during unexpected cold snaps to keep my okra plants happy and producing.
Enjoying Your Harvest
Once you’ve harvested your okra pods, there are countless ways to enjoy them! You can fry them, grill them, add them to soups and stews, or pickle them. Okra is a versatile vegetable that’s packed with nutrients and flavor. I love to slice them and add them to my gumbo.
Growing okra in containers is a rewarding experience that anyone can enjoy. With a little bit of planning and care, you can have a bountiful harvest of delicious okra pods right on your patio or balcony. I hope this guide has
Conclusion
So, there you have it! Growing okra in containers is not only achievable, but it’s also a remarkably rewarding experience. We’ve walked through the steps, from selecting the right container and soil to nurturing your plants and harvesting those delicious pods. But why is this DIY trick a must-try?
Firstly, container gardening opens up the possibility of enjoying fresh, homegrown okra even if you lack a traditional garden space. Apartment dwellers, balcony enthusiasts, and anyone with limited yard access can now partake in the joy of cultivating their own vegetables. Secondly, growing okra in containers offers greater control over the growing environment. You can easily move your plants to optimize sunlight exposure, protect them from harsh weather conditions, and manage soil conditions more effectively. This translates to healthier plants and a more bountiful harvest.
Furthermore, this method allows for experimentation and customization. Want to try a different variety of okra? Go for it! Container gardening makes it easy to switch things up and discover your favorite cultivars. Consider trying dwarf varieties specifically bred for container growing, such as ‘Baby Bubba’ or ‘Cajun Jewel,’ for even better results. You can also experiment with companion planting. Try adding marigolds to your okra container to deter nematodes, or basil to repel aphids. These natural pest control methods can significantly improve the health and yield of your okra plants.
Don’t be afraid to get creative! You can even build a small trellis within the container to support taller okra varieties and maximize vertical space. This is especially useful if you’re growing okra on a balcony or in a small patio.
Beyond the practical benefits, growing your own okra is simply a fulfilling activity. There’s something incredibly satisfying about nurturing a plant from seed to harvest and then enjoying the fruits (or in this case, the pods) of your labor. Plus, you’ll have access to fresh, organic okra that tastes far superior to anything you can buy in the store.
We strongly encourage you to give this DIY trick a try. It’s a relatively simple and inexpensive project that can bring a wealth of benefits to your life. Imagine the delicious gumbo, stews, and fried okra dishes you can create with your homegrown harvest!
But the journey doesn’t end here. We want to hear about your experiences! Share your tips, tricks, and triumphs in the comments below. Let us know what varieties you’re growing, what challenges you’ve faced, and what successes you’ve achieved. Your insights can help other aspiring okra growers and contribute to a thriving community of container gardening enthusiasts. So, grab your containers, soil, and okra seeds, and let’s get growing! Remember, the key to successful container gardening is observation, patience, and a willingness to learn. Happy gardening!
Frequently Asked Questions (FAQ)
What is the best size container for growing okra?
The ideal container size for growing okra is at least 10 gallons, but 15-20 gallons is even better. Okra plants have deep taproots, and a larger container provides ample space for root development, which is crucial for healthy growth and abundant pod production. Smaller containers may restrict root growth, leading to stunted plants and reduced yields. If you’re limited on space, opt for the largest container you can comfortably accommodate. Ensure the container has adequate drainage holes to prevent waterlogging, which can lead to root rot.
What type of soil is best for growing okra in containers?
Okra thrives in well-draining, fertile soil with a slightly acidic to neutral pH (6.0-7.0). A good potting mix specifically formulated for vegetables is an excellent choice. Avoid using garden soil in containers, as it tends to compact and doesn’t provide adequate drainage. You can also create your own potting mix by combining equal parts of compost, peat moss (or coconut coir), and perlite or vermiculite. Compost provides essential nutrients, peat moss or coconut coir helps retain moisture, and perlite or vermiculite improves drainage and aeration. Adding a slow-release fertilizer to the potting mix at planting time will provide a steady supply of nutrients throughout the growing season.
How much sunlight does okra need when grown in containers?
Okra requires at least 6-8 hours of direct sunlight per day to thrive. Choose a location for your container that receives ample sunlight throughout the day. If you live in a particularly hot climate, providing some afternoon shade can help prevent the plants from overheating. If you’re growing okra indoors, supplement with grow lights to ensure they receive sufficient light. Rotate the container regularly to ensure all sides of the plant receive equal sunlight exposure.
How often should I water okra plants in containers?
Water okra plants deeply and regularly, especially during hot, dry weather. Check the soil moisture regularly by sticking your finger about an inch deep into the soil. If the soil feels dry to the touch, it’s time to water. Water thoroughly until water drains out of the drainage holes. Avoid overwatering, as this can lead to root rot. During cooler weather, you may need to water less frequently. Mulching around the base of the plant can help retain moisture and reduce the need for frequent watering.
What are some common pests and diseases that affect okra, and how can I prevent them?
Common pests that affect okra include aphids, flea beetles, and nematodes. Aphids can be controlled with insecticidal soap or neem oil. Flea beetles can be deterred by using row covers or applying diatomaceous earth around the plants. Nematodes can be a more challenging problem, but planting marigolds as companion plants can help repel them. Common diseases that affect okra include powdery mildew and root rot. Powdery mildew can be prevented by ensuring good air circulation and avoiding overhead watering. Root rot can be prevented by using well-draining soil and avoiding overwatering. Regularly inspect your plants for signs of pests or diseases and take action promptly to prevent them from spreading.
When and how should I harvest okra pods?
Okra pods are typically ready to harvest 50-65 days after planting. Harvest the pods when they are 2-4 inches long and still tender. Use a sharp knife or pruning shears to cut the pods from the plant. Wear gloves when harvesting okra, as the pods can be prickly and irritating to the skin. Harvest okra pods regularly, every 1-2 days, to encourage continued production. If you allow the pods to grow too large, they will become tough and fibrous.
Can I grow okra in containers indoors?
Yes, you can grow okra in containers indoors, but it requires providing adequate light and warmth. Place the container near a sunny window that receives at least 6-8 hours of direct sunlight per day. Supplement with grow lights if necessary. Maintain a consistent temperature of 70-85掳F (21-29掳C). Ensure good air circulation to prevent fungal diseases. Pollinate the flowers manually using a small brush to transfer pollen from one flower to another.
How do I fertilize okra plants in containers?
Okra plants are heavy feeders and require regular fertilization. Use a balanced fertilizer (e.g., 10-10-10) every 2-3 weeks. You can also use a liquid fertilizer diluted according to the package instructions. Avoid over-fertilizing, as this can lead to excessive foliage growth and reduced pod production. Supplement with compost tea or worm castings to provide additional nutrients and improve soil health.
Can I save okra seeds from my container-grown plants?
Yes, you can save okra seeds from your container-grown plants. Allow a few pods to mature fully on the plant until they turn brown and dry. Once the pods are completely dry, harvest them and remove the seeds. Store the seeds in a cool, dry place in an airtight container. Okra seeds can remain viable for several years if stored properly.
What are some good companion plants for okra in containers?
Good companion plants for okra include basil, marigolds, peppers, and tomatoes. Basil repels aphids and other pests. Marigolds deter nematodes. Peppers and tomatoes can benefit from the shade provided by okra plants. Avoid planting okra near beans or cabbage, as they can compete for nutrients.

Leave a Comment