

Grow Malabar Spinach Quickly and effortlessly? Absolutely! Imagine harvesting vibrant, leafy greens from your own backyard, ready to add a nutritious and delicious boost to your meals. Forget those wilted, overpriced bunches at the grocery store – with a few simple tricks, you can cultivate a thriving Malabar spinach patch that will keep you in fresh greens all season long.
Malabar spinach, also known as Ceylon spinach or vine spinach, isn’t actually a true spinach, but it boasts a similar flavor profile and is packed with vitamins and minerals. Originating in tropical Asia, it has been cultivated for centuries for its culinary and medicinal properties. In some cultures, it’s even considered a symbol of good luck and prosperity!
But why should you learn how to grow Malabar Spinach Quickly? Well, for starters, it’s incredibly easy to grow, even for beginners. Plus, it’s a heat-tolerant alternative to traditional spinach, meaning you can enjoy fresh greens even during the hottest summer months. I’m going to share some of my favorite DIY tricks and hacks that will help you get a head start and maximize your harvest. Get ready to transform your garden into a lush, green oasis and enjoy the satisfaction of growing your own food!
Grow Malabar Spinach Like a Pro: A DIY Guide to Speedy Success
Hey there, fellow gardening enthusiasts! I’m so excited to share my secrets for growing Malabar spinach, also known as Basella alba, quickly and abundantly. This leafy green is a fantastic addition to any garden, offering a mild, spinach-like flavor that’s perfect for salads, stir-fries, and soups. Plus, it’s incredibly easy to grow, especially if you follow my tips and tricks. Let’s dive in!
What You’ll Need
Before we get started, let’s gather all the necessary materials. Having everything on hand will make the process smooth and enjoyable.
* Malabar Spinach Seeds or Cuttings: You can purchase seeds online or at your local garden center. Alternatively, if you know someone who already grows Malabar spinach, ask for cuttings. Cuttings root very easily!
* Seed Starting Tray or Small Pots: If you’re starting from seeds, you’ll need a tray or individual pots.
* Seed Starting Mix: A light, well-draining mix is essential for successful germination.
* Gardening Gloves: Protect your hands from dirt and potential irritants.
* Trowel or Small Shovel: For transplanting seedlings or planting cuttings.
* Well-Draining Soil: Malabar spinach thrives in rich, well-draining soil. Amend your garden soil with compost or aged manure for best results.
* Trellis or Support Structure: Malabar spinach is a vine, so it needs something to climb on. A trellis, fence, or even a sturdy stake will work.
* Watering Can or Hose: For regular watering.
* Liquid Fertilizer (Optional): To give your plants an extra boost. I prefer a balanced organic fertilizer.
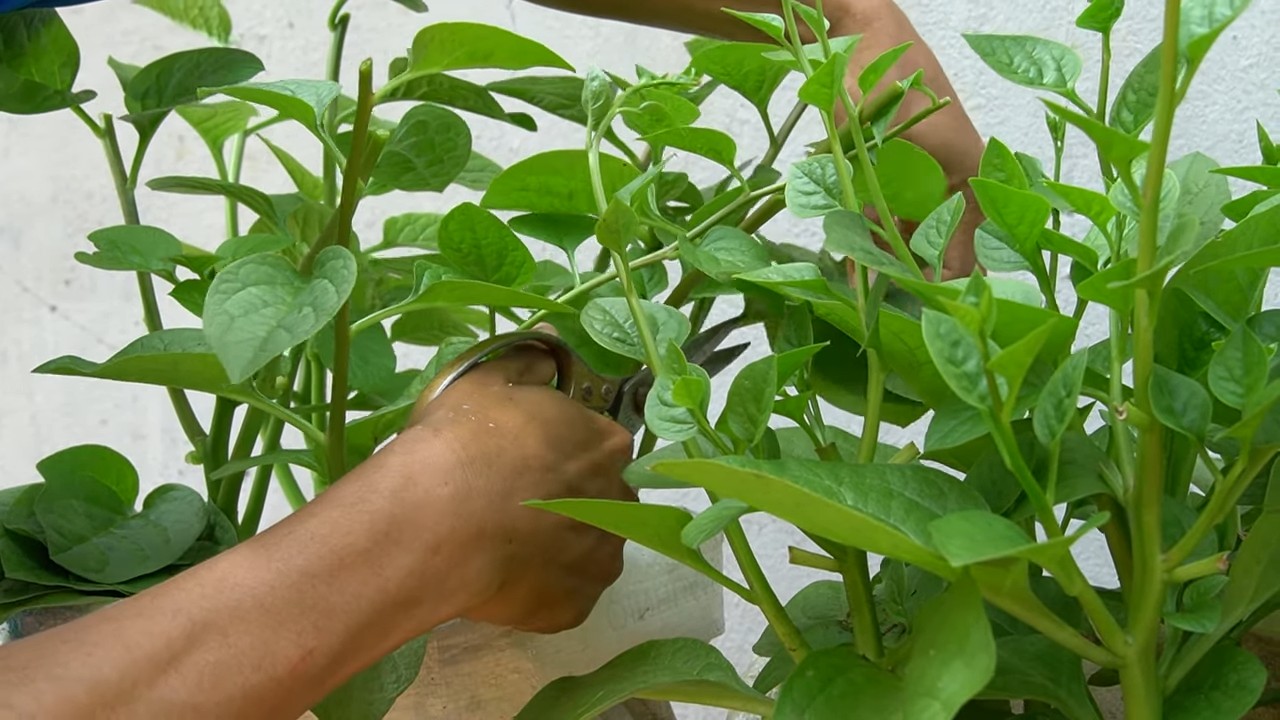
* Pruning Shears or Scissors: For harvesting and pruning.
* Sunny Location: Malabar spinach needs at least 6 hours of sunlight per day.
Starting from Seeds: A Step-by-Step Guide
If you’re starting from seeds, here’s how to get them germinating and growing strong:
1. Soak the Seeds: Malabar spinach seeds have a hard outer shell, so soaking them in warm water for 24 hours will significantly improve germination rates. I usually put them in a small bowl and cover them with water.
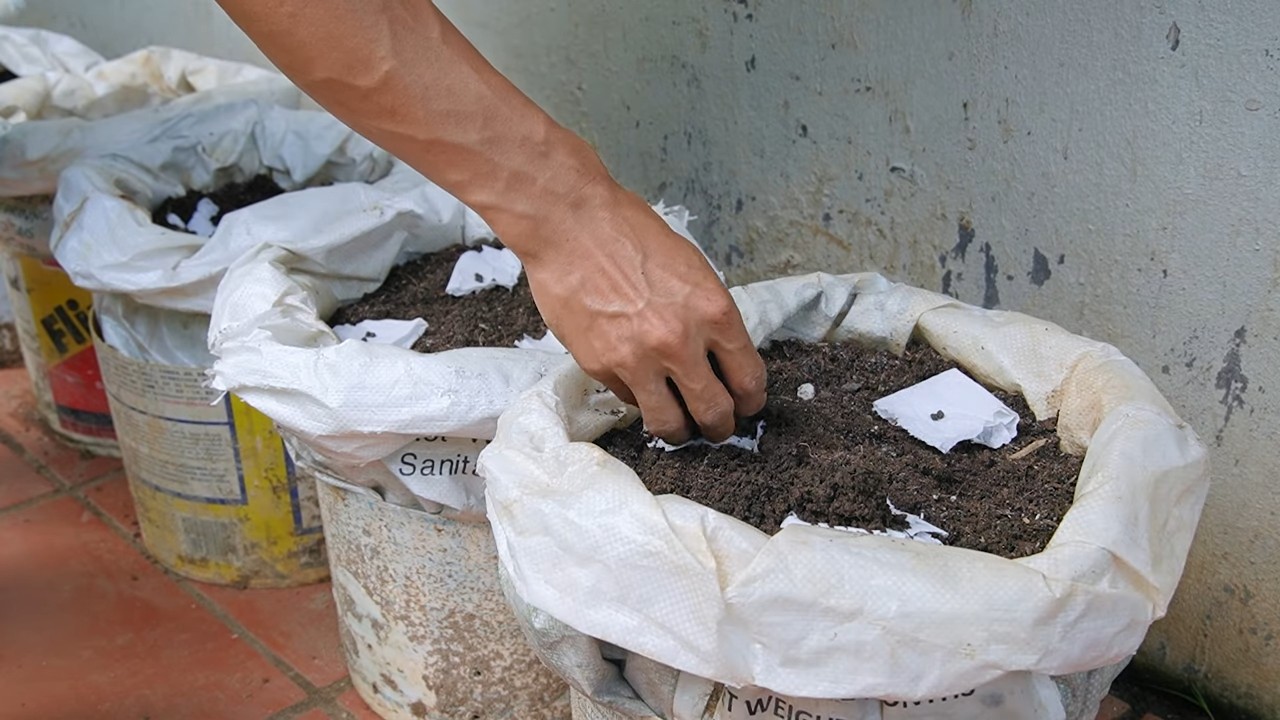
2. Prepare the Seed Starting Tray: Fill your seed starting tray or small pots with seed starting mix. Gently press the mix down to create a firm surface.
3. Sow the Seeds: Make a small indentation (about 1/4 inch deep) in the soil and place one or two seeds in each indentation. Cover the seeds with a thin layer of seed starting mix.
4. Water Gently: Water the soil gently using a watering can or spray bottle. Avoid overwatering, as this can lead to rot. The soil should be moist but not soggy.
5. Provide Warmth and Light: Place the seed starting tray in a warm, sunny location or under grow lights. The ideal temperature for germination is between 70-80°F (21-27°C).
6. Keep the Soil Moist: Check the soil moisture daily and water as needed to keep it consistently moist.
7. Wait for Germination: Germination typically takes 7-21 days, depending on the temperature and moisture levels. Be patient!
8. Thin Seedlings (If Necessary): Once the seedlings have emerged and have a few sets of true leaves, thin them out if you planted more than one seed per pot. Choose the strongest seedling and gently remove the others.
Propagating from Cuttings: A Quick and Easy Method
Propagating Malabar spinach from cuttings is even faster than starting from seeds. Here’s how:
1. Take Cuttings: Select healthy stems from an existing Malabar spinach plant. Cut 4-6 inch sections just below a node (the point where leaves emerge from the stem).
2. Remove Lower Leaves: Remove the leaves from the bottom 2 inches of the cutting. This will encourage root development.
3. Rooting in Water (Optional): You can root the cuttings in water before planting them in soil. Place the cuttings in a glass of water, ensuring that the bottom nodes are submerged. Change the water every few days. Roots should start to appear within a week or two.
4. Plant the Cuttings: Whether you rooted them in water or not, plant the cuttings directly into small pots filled with well-draining soil. Bury the bottom 2 inches of the cutting.
5. Water Gently: Water the soil gently to moisten it.
6. Provide Humidity: To help the cuttings root, create a humid environment by covering the pots with a plastic bag or placing them in a humidity dome.
7. Keep in a Shady Location: Place the cuttings in a shady location for the first few days to prevent them from drying out.
8. Wait for Rooting: Rooting typically takes 1-2 weeks. You’ll know the cuttings have rooted when you see new growth.
Transplanting Seedlings or Cuttings to the Garden
Once your seedlings or cuttings have developed a strong root system, it’s time to transplant them to the garden.
1. Choose a Sunny Location: Select a location in your garden that receives at least 6 hours of sunlight per day.
2. Prepare the Soil: Amend the soil with compost or aged manure to improve drainage and fertility.
3. Dig Holes: Dig holes that are slightly larger than the root balls of your seedlings or cuttings. Space the holes about 12-18 inches apart.
4. Transplant Carefully: Gently remove the seedlings or cuttings from their pots and place them in the holes. Be careful not to damage the roots.
5. Backfill with Soil: Fill the holes with soil and gently press down to secure the plants.
6. Water Thoroughly: Water the plants thoroughly after transplanting.
7. Install Trellis or Support: Install a trellis or other support structure near the plants. Malabar spinach is a vine and needs something to climb on.
Caring for Your Malabar Spinach Plants
Once your Malabar spinach plants are established, here’s how to keep them healthy and productive:
* Water Regularly: Malabar spinach needs consistent moisture, especially during hot weather. Water deeply whenever the top inch of soil feels dry.
* Fertilize (Optional): Fertilize your plants every 2-3 weeks with a balanced liquid fertilizer. This will encourage vigorous growth and abundant leaf production.
* Prune Regularly: Pruning encourages branching and keeps the plants from becoming too leggy. Pinch off the tips of the vines to promote bushier growth.
* Control Pests and Diseases: Malabar spinach is relatively pest-resistant, but keep an eye out for aphids, spider mites, and snails. Treat any infestations promptly with organic pest control methods.
* Harvest Frequently: The more you harvest, the more the plants will produce. Harvest leaves regularly by snipping them off with pruning shears or scissors. You can harvest individual leaves or entire stems.
Harvesting and Using Your Malabar Spinach
Harvesting Malabar spinach is easy and rewarding!
1. When to Harvest: You can start harvesting leaves as soon as the plants are large enough to support it, usually about 6-8 weeks after planting.
2. How to Harvest: Use pruning shears or scissors to snip off individual leaves or entire stems.
3. Storage: Freshly harvested Malabar spinach leaves can be stored in the refrigerator for up to a week. Wrap them in a damp paper towel and place them in a plastic bag.
4. Culinary Uses: Malabar spinach can be used in a variety of dishes. It can be eaten raw in salads, cooked in stir-fries, added to soups and stews, or used as a substitute for spinach in any recipe. It has a slightly mucilaginous texture, similar to okra, which can help thicken sauces and soups.
Troubleshooting Common Problems
Even with the best care, you might encounter a few challenges. Here are some common problems and how to address them:
* Slow Germination: If your seeds are slow to germinate, try soaking them for a longer period (up to 48 hours) or scarifying them by gently rubbing them with sandpaper.
* Yellowing Leaves: Yellowing leaves can indicate a nutrient deficiency. Fertilize your plants with a balanced fertilizer to provide them with the nutrients they need.
* Pest Infestations: If you notice pests on your plants, try spraying them with insecticidal soap or neem oil. You can also handpick pests off the plants.
* Disease Problems: Malabar spinach is generally disease-resistant, but fungal diseases can sometimes occur. Ensure good air circulation around the
Conclusion
So, there you have it! Growing Malabar Spinach quickly isn’t just a gardener’s dream; it’s an achievable reality with these simple yet effective techniques. We’ve explored the secrets to optimizing your growing environment, from selecting the perfect sunny spot to enriching your soil with the nutrients this leafy green craves. We’ve delved into the art of seed starting and transplanting, ensuring your seedlings get the best possible head start. And we’ve uncovered the importance of consistent watering and strategic pruning to encourage vigorous growth and abundant harvests.
But why is this DIY trick a must-try? Because it empowers you to take control of your food source, providing you with fresh, nutritious, and delicious Malabar Spinach right from your backyard. Imagine the satisfaction of harvesting your own vibrant green leaves, knowing exactly where they came from and how they were grown. Think of the culinary possibilities – adding them to stir-fries, soups, salads, or even using them as a healthy and flavorful wrap.
Beyond the practical benefits, growing Malabar Spinach quickly offers a rewarding connection to nature. It’s a chance to learn about plant life cycles, to nurture something from seed to harvest, and to appreciate the abundance that the earth provides. It’s a therapeutic activity that can reduce stress, improve your mood, and connect you to the rhythms of the natural world.
Variations and Suggestions:
Don’t be afraid to experiment with different growing methods. If you’re short on space, consider growing Malabar Spinach in containers or hanging baskets. This allows you to enjoy fresh greens even on a small balcony or patio. You can also try different soil amendments to see what works best for your specific growing conditions. Compost, aged manure, and worm castings are all excellent options for enriching your soil and providing your plants with the nutrients they need.
Another variation is to experiment with different trellising methods. Malabar Spinach is a vining plant, so it needs support to climb. You can use a traditional trellis, a fence, or even a repurposed ladder. Get creative and find a trellising solution that fits your space and aesthetic.
Consider companion planting to further enhance your Malabar Spinach growing experience. Planting basil, marigolds, or nasturtiums nearby can help deter pests and attract beneficial insects. These companion plants can also add beauty and fragrance to your garden.
Finally, don’t forget to save seeds from your most successful plants. This will allow you to continue growing Malabar Spinach year after year, and it’s a great way to share your bounty with friends and neighbors.
We wholeheartedly encourage you to try this DIY trick for growing Malabar Spinach quickly. It’s a rewarding and delicious experience that will transform your garden and your meals. We’re confident that you’ll be amazed by the results.
Now, we want to hear from you! Share your experiences, tips, and photos in the comments below. Let’s create a community of Malabar Spinach enthusiasts and learn from each other. What challenges did you face? What successes did you achieve? What variations did you try? Your feedback is invaluable and will help us all become better gardeners. Happy growing!
Frequently Asked Questions (FAQ)
What is the ideal climate for growing Malabar Spinach?
Malabar Spinach thrives in warm, humid climates. It’s a tropical plant that prefers temperatures between 70°F and 90°F (21°C and 32°C). It can tolerate some heat, but it’s sensitive to frost. If you live in a cooler climate, you can still grow Malabar Spinach, but you’ll need to start it indoors and provide it with extra protection during cooler periods. Greenhouses or hoop houses can extend the growing season.
How often should I water my Malabar Spinach plants?
Consistent watering is crucial for growing Malabar Spinach quickly. The soil should be kept consistently moist, but not waterlogged. Water deeply whenever the top inch of soil feels dry to the touch. During hot, dry weather, you may need to water daily. Mulching around the plants can help retain moisture and reduce the need for frequent watering.
What kind of soil is best for Malabar Spinach?
Malabar Spinach prefers well-drained, fertile soil that is rich in organic matter. Amend your soil with compost, aged manure, or other organic materials before planting. A slightly acidic to neutral soil pH (6.0 to 7.0) is ideal. If your soil is heavy clay, consider adding sand or perlite to improve drainage.
How much sunlight does Malabar Spinach need?
Malabar Spinach needs at least 6 hours of direct sunlight per day to thrive. Choose a sunny location in your garden where your plants will receive ample sunlight. If you’re growing Malabar Spinach indoors, place it near a south-facing window or use grow lights to supplement natural light.
When is the best time to harvest Malabar Spinach?
You can start harvesting Malabar Spinach leaves as soon as the plants are established and have reached a reasonable size. Harvest the young, tender leaves regularly to encourage continued growth. Avoid harvesting more than one-third of the plant at a time. Regular harvesting will also prevent the plants from becoming too leggy.
How do I deal with pests and diseases on my Malabar Spinach plants?
Malabar Spinach is generally resistant to pests and diseases, but it can occasionally be affected by aphids, spider mites, or fungal diseases. Inspect your plants regularly for signs of infestation or disease. If you find any pests, try spraying them off with a strong stream of water or using insecticidal soap. For fungal diseases, improve air circulation around the plants and avoid overhead watering. You can also use a fungicide if necessary.
Can I grow Malabar Spinach in containers?
Yes, Malabar Spinach can be successfully grown in containers. Choose a large container (at least 12 inches in diameter) with good drainage. Use a high-quality potting mix that is rich in organic matter. Water regularly and fertilize every few weeks with a balanced fertilizer. Provide a trellis or other support for the vines to climb.
How do I save seeds from my Malabar Spinach plants?
To save seeds from your Malabar Spinach plants, allow some of the flowers to mature and form berries. The berries will turn dark purple or black when they are ripe. Harvest the berries and allow them to dry completely. Once the berries are dry, crush them to release the seeds. Store the seeds in a cool, dry place until you are ready to plant them.
Is Malabar Spinach the same as regular spinach?
No, Malabar Spinach is not the same as regular spinach. While both are leafy green vegetables, they belong to different plant families. Malabar Spinach has a slightly different flavor and texture than regular spinach. It’s also more heat-tolerant and less prone to bolting in hot weather.
How can I encourage faster growth of my Malabar Spinach?
To encourage faster growth, ensure your plants receive adequate sunlight, water, and nutrients. Fertilize regularly with a balanced fertilizer or compost tea. Prune the plants regularly to encourage branching and new growth. Provide a trellis or other support for the vines to climb. Protect the plants from pests and diseases. And most importantly, be patient! With proper care, your Malabar Spinach plants will thrive and provide you with a bountiful harvest.

Leave a Comment