

Grow Lemons Indoors? Absolutely! Imagine plucking a sun-ripened lemon, bursting with flavor, right from a tree in your living room. Sounds like a dream, right? Well, it doesn’t have to be! For centuries, citrus trees have been cherished symbols of prosperity and good fortune, gracing courtyards and gardens across the Mediterranean and beyond. Now, you can bring that same zest and vibrancy into your home, regardless of your climate or outdoor space.
But why bother with the hassle, you might ask? Well, beyond the sheer joy of nurturing your own citrus tree, growing lemons indoors offers a unique solution for those of us who live in colder climates where outdoor lemon trees simply wouldn’t survive. Plus, think of the endless possibilities: fresh lemonade on a whim, zesty additions to your favorite recipes, and the delightful fragrance that fills your home. I’m here to guide you through some simple, yet effective, DIY tricks and hacks that will transform your indoor space into a thriving lemon grove. Get ready to learn how to grow lemons indoors successfully, even if you don’t have a green thumb! Let’s get started!
Growing Lemons Yourself: Your Indoor Garden Guide
Hello, fellow gardeners! Have you ever imagined harvesting your own sun-ripened lemons, right in the middle of winter, directly in your apartment? Sounds crazy, right? But I’m telling you, it’s absolutely doable! I’ve tried it myself and I’m thrilled. In this article, I’ll show you how you can grow your own lemon trees indoors. It’s a bit of work, but the reward—fresh, aromatic lemons—is well worth it.
What You Need: The Right Equipment
Before we get started, we’ll obviously need the right equipment. Don’t worry, it’s nothing super fancy.
- Lemon seeds: Preferably from organic lemons, as these are generally not treated.
- Starter pots: Small pots or seed trays are ideal for the beginning.
- Seed-starting mix: This is low in nutrients and loose, perfect for germination.
- A larger pot: For later, when the small lemon tree needs to be repotted.
- Citrus potting mix: Specially formulated for the needs of citrus plants.
- Spray bottle: For moistening the soil.
- Plastic bag or mini-greenhouse: To create high humidity.
- Sunlight: A bright location is crucial.
- Grow light (optional): For darker months or locations.
- Fertilizer for citrus plants: For later nutrient supply.
- Patience: Lemon trees take time to grow and bear fruit.
Phase 1: The Germination of Lemon Seeds
Germination is the first and perhaps most exciting step. This is where we awaken the life in the small seeds.
- Prepare the seeds: First, you need to get the seeds out of the lemon. It’s important to thoroughly clean them of any fruit pulp. The best way to do this is to rinse them under running water. The pulp can cause mold and hinder germination.
- Soak: Place the cleaned seeds in a glass of lukewarm water for 24 hours. This helps to soften the hard outer shell and speed up germination.
- Sow: Fill the starter pots with seed-starting mix. Make a small hole in each pot, about 1-2 cm (0.5 inches) deep. Place 2-3 seeds in each hole. This increases the probability that at least one will germinate. Gently cover the seeds with soil and press down lightly.
- Moisten: Spray the soil with the spray bottle so that it is well-moistened, but not wet.
- Mini-greenhouse effect: Place a plastic bag over the pots or put them in a mini-greenhouse. This ensures high humidity, which is ideal for germination. Make sure the bag does not lie directly on the soil.
- Location: Place the pots in a warm, bright spot, but not in direct sun. A temperature between 20 and 25 degrees Celsius (68-77°F) is optimal.
- Test of patience: now you have to wait. It can take 2-4 weeks for the first seedlings to appear. Make sure the soil always remains slightly moist. Ventilate the bag or greenhouse regularly to prevent mold.
Phase 2: The First Weeks and Repotting
When the first small seedlings sprout, it’s a great feeling! Now it’s about providing them with the best possible conditions for healthy growth.
- Select the strongest plant: If several seeds have germinated in one pot, choose the strongest plant and carefully remove the others. This gives the remaining plant enough space and nutrients.
- Ventilate: Gradually remove the plastic bag or greenhouse to accustom the plants to normal humidity. Start by opening the bag for a few hours a day and then slowly increase the time.
- Water: Water the plants regularly, but not too much. The soil should always be slightly moist, but waterlogging should be strictly avoided.
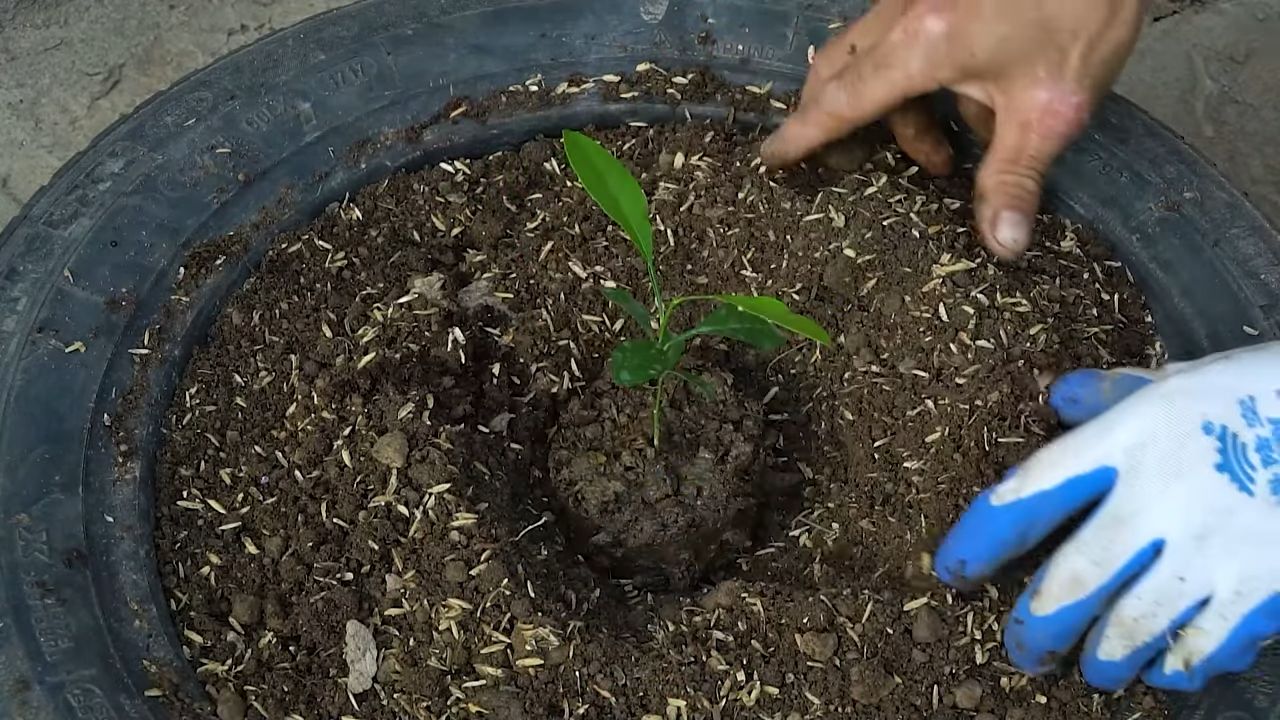
- Repot: When the plants are about 10-15 cm (4-6 inches) tall and the roots are growing out of the drainage holes of the starter pot, it’s time to repot. Choose a slightly larger pot (about 15-20 cm / 6-8 inches in diameter) and fill it with citrus potting mix.
- Careful transplanting: Carefully remove the plant from the starter pot and place it in the new pot. Be careful not to damage the roots. Fill the pot with soil and press down lightly.
- Water in: Water the plant well after repotting.
Phase 3: Care and Growth of the Lemon Tree
Now that your lemon tree is in its new home, it’s time to care for it optimally so that it grows splendidly and perhaps even bears fruit.
- Location: Lemon trees love light! Place your tree in the brightest possible location. A south-facing window is ideal. If that’s not possible, you can use a grow light in winter to compensate for the lack of light.
- Watering: Water your lemon tree regularly, but not too much. The soil should always be slightly moist, but waterlogging must be strictly avoided. In winter, the tree needs less water than in summer.
- Fertilizing: Citrus plants are heavy feeders and require regular fertilizing. Use a special fertilizer for citrus plants and follow the dosage instructions. Fertilize about every two weeks during the growing season (spring to autumn). No fertilization is necessary in winter.
- Humidity: Lemon trees prefer high humidity. You can increase the humidity by regularly spraying the tree with water or placing it near a humidifier. A bowl of water near the tree can also help.
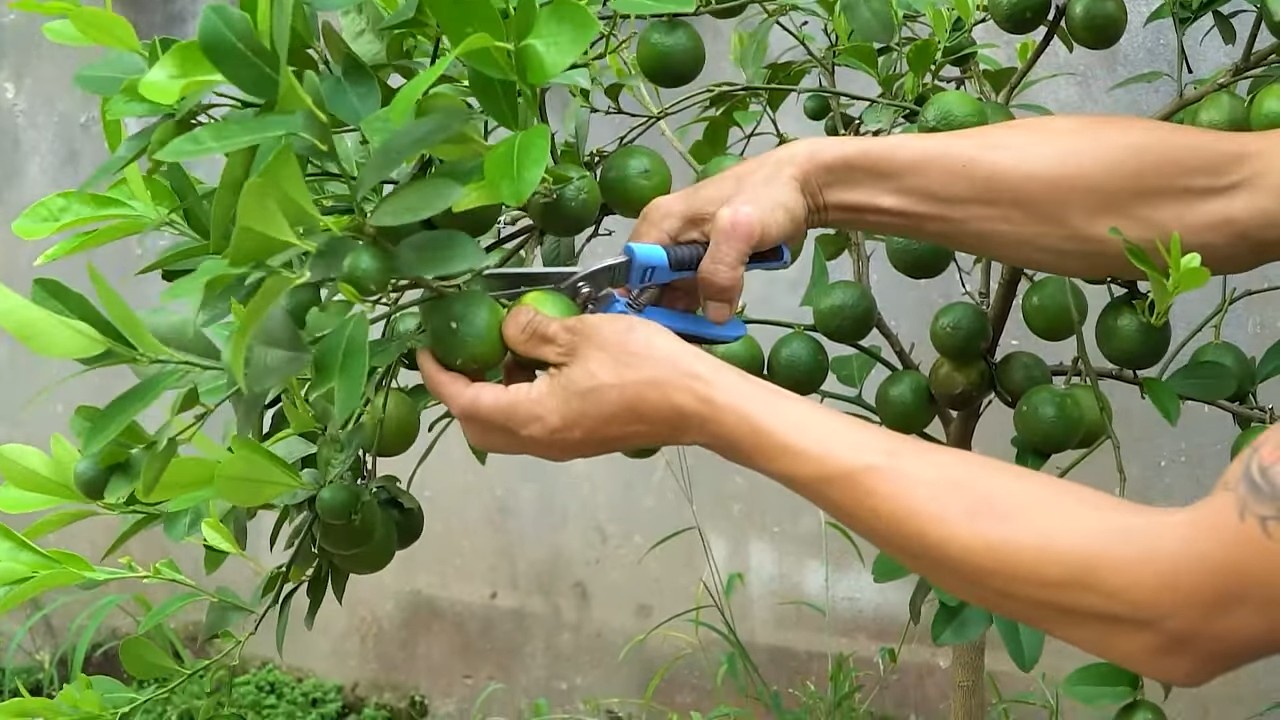
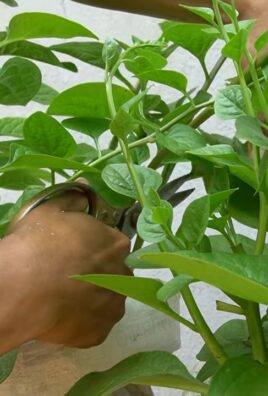
- Pruning: Regular pruning promotes growth and fruit production. Remove dead or diseased branches and trim back long shoots to maintain the shape of the tree. The best time for pruning is in the spring.
- Overwintering: Lemon trees are not hardy and must be overwintered in a frost-free place. Place the tree in a cool, bright spot (about 5-10 degrees Celsius / 41-50°F). Water it sparingly during the winter dormancy and do not fertilize it.
- Pests: Watch out for pests like aphids, spider mites, or scale insects. If infested, you can treat the tree with a biological pesticide.
Phase 4: The Harvest – Patience Pays Off
It can take several years for your lemon tree to bear fruit for the first time. But when it does, it’s an indescribable feeling!
Harvest time: The lemons are ripe when they have a bright yellow color and can be easily detached from the tree.
Flowers: The first flowers appear in the spring. They smell wonderful and are a sign that there will soon be lemons.
Fruit formation: After flowering, small green fruits form. These grow slowly and turn yellow over time.
Conclusion
So, there you have it! Growing lemons indoors might seem like a daunting task reserved for seasoned horticulturalists, but with a little patience, the right knowledge, and this simple DIY trick, you can bring the sunshine of homegrown citrus right into your living room. We’ve demystified the process, breaking down the essential steps and providing you with a foolproof method to nurture your own lemon tree, even without a sprawling outdoor garden.
Why is this DIY trick a must-try? Because it empowers you to enjoy the unparalleled freshness and flavor of homegrown lemons, free from the waxes and preservatives often found on store-bought varieties. Imagine zesting a lemon you nurtured from a tiny seedling, its aroma filling your kitchen with a vibrant, citrusy scent. Think of the delicious lemonades, pies, and culinary creations you can whip up, all featuring the star ingredient grown with your own two hands. Beyond the culinary benefits, growing a lemon tree indoors is a rewarding experience that connects you with nature, adds a touch of greenery to your home, and provides a fascinating glimpse into the life cycle of a plant.
But the beauty of this DIY approach lies in its adaptability. Feel free to experiment with different varieties of dwarf lemon trees, such as Meyer lemons, which are known for their sweeter flavor and suitability for indoor growing. You can also explore different potting mixes, adding amendments like perlite or vermiculite to improve drainage and aeration. Consider using a self-watering pot to simplify the watering process, especially if you tend to forget. And don’t be afraid to get creative with your lighting setup. If you don’t have a naturally sunny spot, invest in a grow light to ensure your lemon tree receives the necessary energy for healthy growth and fruit production.
Remember, growing lemons indoors is a journey, not a destination. There will be challenges along the way, but with persistence and a willingness to learn, you can overcome them and reap the rewards of your efforts. Don’t be discouraged if your tree doesn’t produce fruit immediately. It takes time and patience for a lemon tree to mature and bear fruit. Just keep providing it with the right conditions, and eventually, you’ll be rewarded with a bountiful harvest.
We are confident that this DIY trick will set you on the path to success. So, gather your supplies, follow our instructions, and embark on this exciting adventure. We encourage you to try this DIY trick for growing lemons indoors and share your experiences with us! Let us know how your lemon tree is thriving, what challenges you’ve encountered, and what delicious recipes you’ve created with your homegrown lemons. Share your photos and stories on social media using [Your Hashtag Here], and let’s create a community of indoor lemon growers! We can’t wait to see your success stories and learn from your experiences. Happy growing!
Frequently Asked Questions (FAQ)
What type of lemon tree is best for growing indoors?
The best lemon trees for indoor growing are dwarf varieties, specifically Meyer lemons. Meyer lemons are naturally smaller than other lemon varieties, making them well-suited for container growing. They also tend to be more tolerant of indoor conditions and produce sweeter, less acidic fruit. Other good options include ‘Improved Meyer,’ ‘Ponderosa,’ and ‘Lisbon’ lemons, but be sure to choose a dwarf or semi-dwarf variety to ensure it stays manageable indoors.
How much sunlight does my indoor lemon tree need?
Lemon trees need a significant amount of sunlight to thrive and produce fruit. Ideally, they should receive at least 6-8 hours of direct sunlight per day. If you don’t have a spot that receives that much natural light, you’ll need to supplement with a grow light. Place the grow light a few inches above the tree and keep it on for 12-14 hours per day. Rotate the tree regularly to ensure all sides receive adequate light.
What kind of soil should I use for my indoor lemon tree?
Lemon trees need well-draining soil that is slightly acidic. A good potting mix for indoor lemon trees is a combination of potting soil, perlite, and peat moss. The perlite helps to improve drainage, while the peat moss helps to retain moisture. You can also add some compost to the mix to provide additional nutrients. Avoid using garden soil, as it can be too heavy and may not drain well.
How often should I water my indoor lemon tree?
Water your lemon tree when the top inch of soil feels dry to the touch. Water thoroughly until water drains out of the bottom of the pot. Avoid overwatering, as this can lead to root rot. During the winter months, when the tree is not actively growing, you may need to water less frequently. Check the soil moisture regularly and adjust your watering schedule accordingly.
How often should I fertilize my indoor lemon tree?
Lemon trees are heavy feeders and need regular fertilization to thrive. Fertilize your tree every 2-3 weeks during the growing season (spring and summer) with a citrus-specific fertilizer. Follow the instructions on the fertilizer label carefully. Reduce fertilization during the winter months when the tree is dormant.
How do I pollinate my indoor lemon tree?
Indoor lemon trees may need help with pollination, as there are no bees or other insects to do the job. You can hand-pollinate your tree by using a small paintbrush to transfer pollen from one flower to another. Gently brush the pollen from the stamen (the male part of the flower) onto the pistil (the female part of the flower). Repeat this process for all of the flowers on your tree.
Why are the leaves on my lemon tree turning yellow?
Yellowing leaves can be a sign of several problems, including overwatering, underwatering, nutrient deficiency, or pest infestation. Check the soil moisture to determine if you are watering too much or too little. If the soil is consistently wet, you may be overwatering. If the soil is dry, you may be underwatering. If you suspect a nutrient deficiency, fertilize your tree with a citrus-specific fertilizer. Inspect the leaves for signs of pests, such as spider mites or aphids.
How do I deal with pests on my indoor lemon tree?
Common pests that can affect indoor lemon trees include spider mites, aphids, and scale. You can control these pests by spraying your tree with insecticidal soap or neem oil. Be sure to follow the instructions on the product label carefully. You can also try wiping the leaves with a damp cloth to remove pests. For severe infestations, you may need to use a stronger insecticide.
How do I prune my indoor lemon tree?
Pruning helps to maintain the shape of your tree, remove dead or diseased branches, and encourage fruit production. Prune your lemon tree in late winter or early spring, before new growth begins. Remove any dead, damaged, or crossing branches. You can also prune to shape the tree and encourage branching. Avoid pruning too heavily, as this can reduce fruit production.
How long does it take for an indoor lemon tree to produce fruit?
It can take several years for a lemon tree to produce fruit, even under ideal conditions. Grafted trees typically produce fruit sooner than trees grown from seed. Be patient and continue to provide your tree with the right conditions, and eventually, you will be rewarded with a bountiful harvest. Remember that proper care, including adequate sunlight, watering, and fertilization, is crucial for fruit production.


Leave a Comment