

Grow Leeks at Home, even if you think you don’t have a green thumb! Have you ever admired those elegant, towering leeks at the farmer’s market and wished you could harvest your own? Well, I’m here to tell you that it’s easier than you think! For centuries, leeks have been a culinary staple, gracing tables from ancient Egypt, where they were revered, to medieval Europe, where they were a symbol of Welsh pride.
But beyond their rich history, leeks offer a delicious and versatile flavor that can elevate any dish. From hearty soups and stews to delicate tarts and quiches, the possibilities are endless. The best part? You don’t need acres of land to enjoy fresh, homegrown leeks. With a few simple tricks and a little bit of patience, you can grow leeks at home, even in a small garden or container on your balcony.
This DIY guide is packed with easy-to-follow instructions and helpful tips to ensure your leek-growing journey is a success. Imagine the satisfaction of harvesting your own flavorful leeks, knowing exactly where they came from and how they were grown. Plus, growing your own produce is a fantastic way to save money, reduce your carbon footprint, and connect with nature. So, let’s get started and transform your space into a thriving leek patch!
Growing Delicious Leeks Yourself: Your DIY Guide for Your Own Garden
Hey garden friends! Do you fancy growing your own leeks? It’s easier than you think, and the result is super fresh, aromatic leeks that taste much better than those from the supermarket. I’ll show you how you can easily do it yourself. Let’s get started!
What you need for growing leeks
Before we begin, here is a list of everything you’ll need:
- Leek seeds: Choose a variety that you like and that is suitable for your climate. There are different varieties, from mild to savory.
- Seed starting trays or pots: For starting the seeds indoors.
- Seed starting mix: Special soil for starting seeds that is low in nutrients and loose.
- Garden soil: For the garden bed or container where the leeks will later grow.
- Compost or organic fertilizer: to enrich the soil.
- Watering can or garden hose: For watering.
- Dibber or pricking-out tool: For separating the seedlings.
- Garden tools: Spade, rake, possibly a trowel.
- Labels and a pen: To label the varieties (optional, but helpful).
The Preparation: How to Start Right
The key to success lies in proper preparation. Here are the steps you should follow:
- Determine the sowing time: Leeks are usually started indoors in February or March. This gives the plants enough time to become strong before being planted out in May or June.
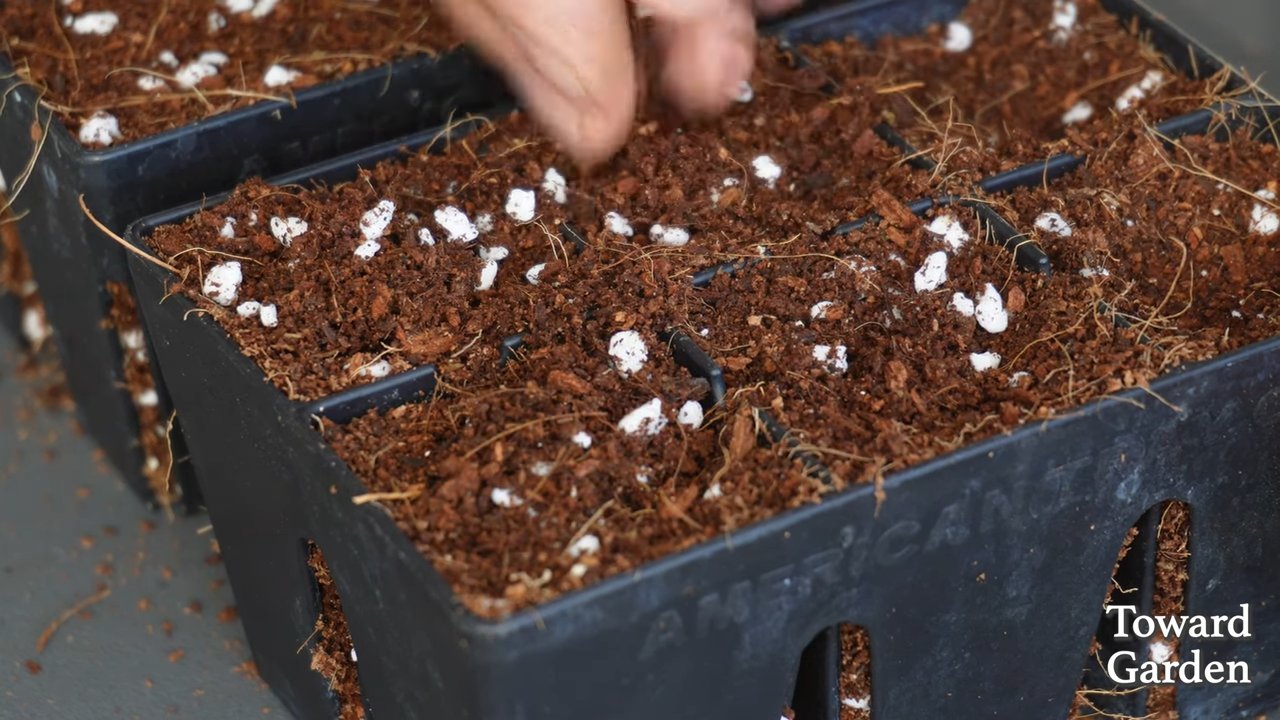
- Prepare the seed starting trays: Fill the seed starting trays or pots with seed starting mix. Lightly press the soil down.
- Sowing: Distribute the leek seeds evenly on the soil. Cover the seeds only lightly with soil (approx. 0.5 cm). Leeks are light germinators, so don’t sow them too deep.
- Watering: Gently moisten the soil with a spray bottle or a watering can with a fine rose attachment. The soil should be damp, but not wet.
- Location: Place the seed starting trays in a bright and warm place (approx. 18-20°C / 64-68°F). A windowsill is ideal.
- Maintain humidity: Cover the seed starting trays with clear plastic wrap or a lid to increase humidity. Ventilate the trays regularly to prevent mold growth.
Raising the Seedlings: From Seed to Small Plant
Now it’s time to be patient and care for the little leek plants:
- Watch for germination: After about 10-14 days, the first seedlings should be visible.
- Ventilate and water: As soon as the seedlings are there, remove the plastic wrap or lid. Water the plants regularly, but avoid waterlogging.
- Pricking out (Thinning): When the leek plants are about 5-7 cm tall and have their first true leaves, it’s time to prick them out. This means you transplant the plants into individual pots or at greater distances in the seed starting tray.
- Fill small pots with seed starting mix.
- Carefully loosen the soil around the leek plants with a pricking-out tool or a fork.
- Gently lift the plants out of the soil, being careful not to damage the roots.
- Place each plant in its own pot and lightly press the soil down.
- Water the plants gently.
- Hardening off: Before you plant the leeks outdoors, you should harden them off. This means you place them outdoors during the day for a few days to get them used to the sun and temperatures. Start with a few hours and slowly increase the time.
Planting Out: Off to the Garden Bed!
When the leek plants are strong enough and the weather cooperates, they can go into the garden bed or container:
- Prepare the bed: Choose a sunny location for the leeks. Loosen the soil thoroughly and remove weeds. Work compost or organic fertilizer into the soil to enrich it.
- Plant spacing: Plant the leeks at a distance of about 15-20 cm (6-8 inches) from each other. The rows should be about 30-40 cm (12-16 inches) apart.
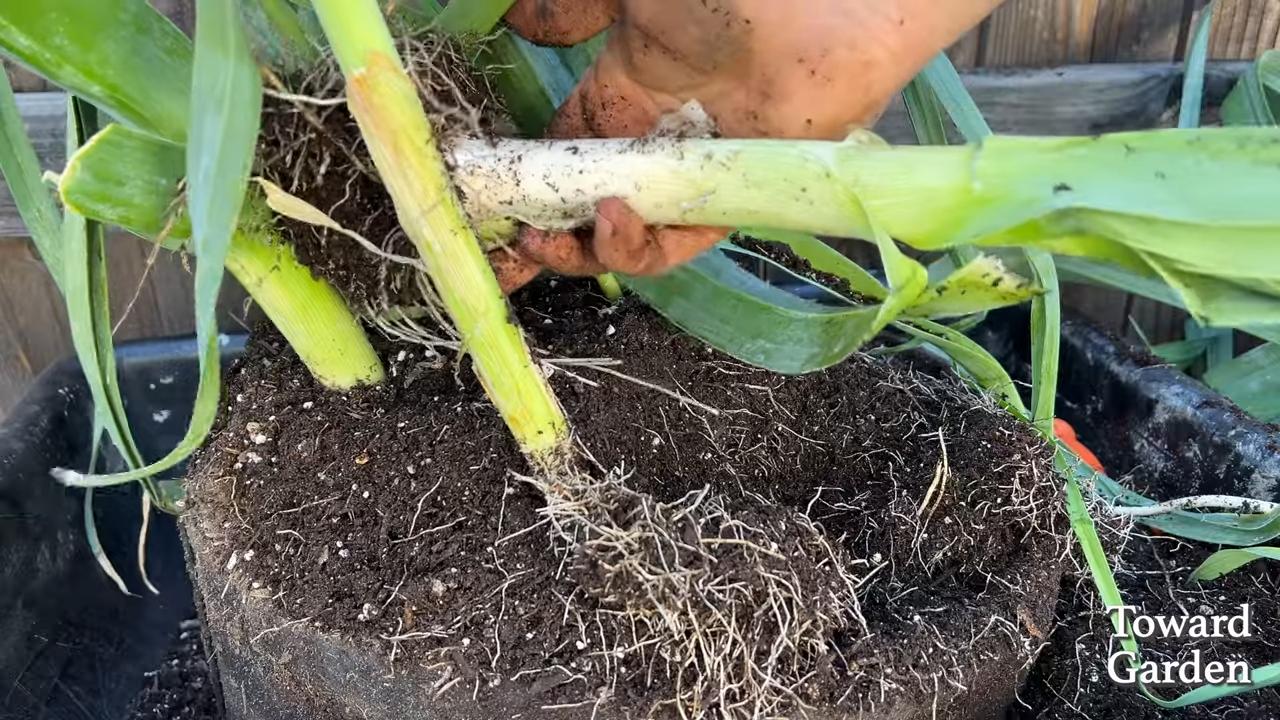
- Dig planting holes: Dig planting holes deep enough for the root balls of the leek plants to fit.
- Planting: Place the leek plants in the planting holes and fill the holes with soil. Lightly press the soil down.
- Watering in: Water the plants thoroughly.
- Hilling up: Mound the soil up around the leek plants. This encourages the formation of a long, white shaft.
Care: Keeping Your Leeks Healthy and Strong
For your leeks to grow well, regular care is important:
- Watering: Water the leeks regularly, especially during dry periods. The soil should always be slightly moist.
- Remove weeds: Keep the bed free of weeds so the leeks are not overgrown.
- Fertilizing: Fertilize the leeks regularly with compost or organic fertilizer.
- Hilling up: Regularly mound the soil up around the leek plants to lengthen the white shaft.
- Pest protection: Regularly check the leeks for pests like the leek moth or onion fly. If necessary, you can use biological pesticides.
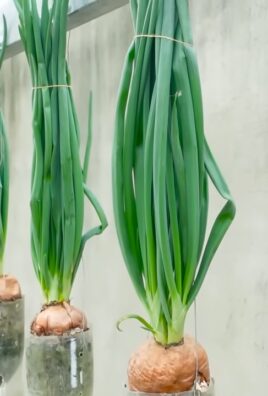
The Harvest: Finally, Fresh Leeks!
Depending on the variety and sowing time, you can harvest the leeks starting in late summer or fall.
- Harvest time: The leeks are ready to harvest when they have reached a sufficient size. The exact size depends on the variety.
- Harvesting: Carefully pull the leeks out of the ground. You can also harvest only parts of the leek by cutting it just above the ground. The plant will then regrow.
- Cleaning: Remove the outer leaves and clean the leeks thoroughly under running water.
Tips and Tricks for Successful Leek Cultivation
- Companion planting: Leeks get along well with carrots, celery, and tomatoes.
- Crop rotation: Do not grow leeks in the same spot every year to prevent diseases and pests.
- Winter protection: In cold regions, you should cover the leeks with brushwood or fleece in winter to protect them from frost.
- Blanching leeks: For an especially long, white shaft, you can blanch the leeks. This means you cover them with soil or special blanching sleeves to protect them from light.
Common Problems and Solutions
Onion fly: The onion fly lays its eggs on the leek plants. The larvae eat their way into the plants and cause damage. Protect your plants with a crop net or use nematodes.
Leek moth: The leek moth can cause great damage. Protect your plants with a crop net or use beneficial insects like parasitic wasps.
Conclusion
So, there you have it! Growing leeks at home, while it might seem daunting at first, is surprisingly achievable and incredibly rewarding. We’ve walked you through the process, from seed to harvest, highlighting the key steps and offering tips to ensure your success. But why should you bother with this DIY project?
Firstly, the taste. Forget the bland, often bruised leeks you find at the supermarket. Homegrown leeks offer a freshness and vibrancy of flavor that is simply unmatched. Imagine adding them to your soups, stews, and quiches, knowing that you nurtured them from tiny seeds. The difference is truly remarkable.
Secondly, the cost savings. While the initial investment in seeds and perhaps some potting mix might seem like a small expense, consider the long-term benefits. Leeks can be quite pricey, especially organic varieties. By growing your own, you’re essentially cutting out the middleman and enjoying fresh produce at a fraction of the cost.
Thirdly, the satisfaction. There’s something deeply fulfilling about nurturing a plant from seed to harvest. It’s a connection to nature, a reminder of the simple pleasures in life, and a tangible accomplishment that you can be proud of. Plus, it’s a fantastic way to reduce your carbon footprint by minimizing your reliance on commercially grown produce.
But the benefits don’t stop there. Growing leeks at home allows you to control the growing environment, ensuring that your leeks are free from harmful pesticides and herbicides. You can choose organic methods and rest assured that you’re providing your family with healthy, wholesome food.
Ready to take your leek growing to the next level? Consider these variations:
* Experiment with different varieties: From the mild ‘American Flag’ to the robust ‘Giant Musselburgh,’ there’s a leek variety to suit every taste. Try growing a few different types to discover your favorites.
* Succession planting: Plant seeds every few weeks to ensure a continuous harvest throughout the growing season. This way, you’ll always have fresh leeks on hand whenever you need them.
* Companion planting: Plant leeks alongside carrots, onions, or celery to deter pests and improve growth. These plants work synergistically to create a healthier garden environment.
* Blanching for milder flavor: For a milder, sweeter flavor, blanch your leeks by mounding soil around the stems as they grow. This prevents sunlight from reaching the stems, resulting in a more delicate taste.
We’re confident that you’ll find growing leeks at home to be a rewarding and enjoyable experience. Don’t be afraid to experiment, learn from your mistakes, and most importantly, have fun!
Now, we encourage you to give this DIY trick a try. Start small, perhaps with just a few seeds, and see how it goes. We’re eager to hear about your experiences. Share your photos, tips, and challenges in the comments below. Let’s create a community of home leek growers and learn from each other. Happy gardening!
Frequently Asked Questions (FAQ)
1. How long does it take to grow leeks from seed?
Growing leeks from seed typically takes around 120 to 150 days from sowing to harvest. This timeframe can vary depending on the variety of leek, the growing conditions, and your local climate. You’ll need to start seeds indoors about 8-10 weeks before the last expected frost in your area. Once the seedlings are large enough, they can be transplanted outdoors. Remember to be patient, as leeks are slow growers, but the wait is well worth it for the delicious, homegrown flavor.
2. What are the best growing conditions for leeks?
Leeks thrive in well-drained soil that is rich in organic matter. They prefer full sun, meaning at least 6 hours of direct sunlight per day. However, they can tolerate partial shade, especially in hotter climates. The ideal soil pH for leeks is between 6.0 and 7.0. Before planting, amend the soil with compost or well-rotted manure to improve drainage and fertility. Consistent watering is crucial, especially during dry periods. Avoid overwatering, as this can lead to root rot.
3. How do I prevent pests and diseases from affecting my leeks?
Several pests and diseases can affect leeks, but with proper preventative measures, you can minimize the risk. Common pests include onion thrips, leek moths, and onion maggots. To deter these pests, consider using row covers or companion planting with carrots, which repel leek moths. Diseases such as white rot and downy mildew can also be problematic. Ensure good air circulation around your plants and avoid overhead watering to prevent these diseases. If you notice any signs of pests or diseases, treat them promptly with organic pest control methods or fungicides.
4. How do I harvest leeks?
Leeks can be harvested at any size, but they are typically ready when the stems are about 1-2 inches in diameter. To harvest, gently loosen the soil around the base of the leek with a garden fork or trowel. Then, carefully pull the leek out of the ground. If the soil is dry, you may need to water it beforehand to make the leeks easier to pull. After harvesting, trim the roots and the top of the green leaves. Leeks can be stored in the refrigerator for several weeks.
5. Can I grow leeks in containers?
Yes, you can absolutely grow leeks in containers, making it a great option for those with limited garden space. Choose a container that is at least 8-12 inches deep and wide to accommodate the leek’s root system. Use a well-draining potting mix and ensure that the container has drainage holes. Water regularly and fertilize every few weeks with a balanced fertilizer. Container-grown leeks may require more frequent watering than those grown in the ground, especially during hot weather.
6. What are some common mistakes to avoid when growing leeks?
Several common mistakes can hinder your success when growing leeks. One of the most frequent errors is planting the seedlings too shallowly. Make sure to bury the seedlings deep enough so that only the top inch or two of the leaves are visible. Another mistake is neglecting to water the leeks regularly, especially during dry periods. Leeks need consistent moisture to thrive. Overcrowding the plants can also be a problem, so be sure to space them adequately to allow for proper growth. Finally, failing to protect the leeks from pests and diseases can lead to significant losses.
7. How do I blanch leeks for a milder flavor?
Blanching leeks is a simple technique that results in a milder, sweeter flavor. As the leeks grow, gradually mound soil around the stems, covering them up to the base of the leaves. This prevents sunlight from reaching the stems, which inhibits chlorophyll production and results in a whiter, more tender stem. You can also use cardboard tubes or plastic pipes to blanch the leeks. Simply place the tubes around the stems and fill them with soil. Blanching typically takes about 2-3 weeks.
8. Can I save leek seeds for future planting?
Yes, you can save leek seeds, but it requires allowing some of your leeks to overwinter and flower in their second year. Leeks are biennials, meaning they complete their life cycle in two years. In the first year, they produce edible stems, and in the second year, they flower and produce seeds. To save seeds, select healthy, disease-free leeks and allow them to remain in the ground over the winter. In the spring, they will send up tall flower stalks. Once the flowers have dried and the seed pods have turned brown, you can harvest the seeds. Store the seeds in a cool, dry place until you are ready to plant them.
9. What are some delicious ways to use homegrown leeks?
Homegrown leeks are incredibly versatile and can be used in a wide variety of dishes. They are delicious in soups, stews, quiches, and gratins. You can also sauté them with butter or olive oil and serve them as a side dish. Leeks pair well with potatoes, carrots, and other root vegetables. They can also be used to flavor stocks and sauces. Try adding them to your favorite recipes for a boost of flavor and nutrition.
10. Is growing leeks at home organically possible?
Absolutely! Growing leeks organically is not only possible but also highly recommended. Start by using organic seeds and potting mix. Amend the soil with compost or well-rotted manure to provide essential nutrients. Use organic pest control methods, such as neem oil or insecticidal soap, to manage pests. Avoid using synthetic fertilizers and pesticides. By following organic gardening practices, you can grow healthy, delicious leeks without harming the environment.


Leave a Comment