

Grow Fennel at Home: Imagine stepping into your garden and snipping fresh, fragrant fennel fronds to add a burst of anise-like flavor to your salad or grilled fish. Sounds idyllic, right? Well, it’s absolutely achievable, even if you don’t have acres of land! For centuries, fennel has been cherished not only for its culinary uses but also for its medicinal properties. Ancient Romans believed it promoted longevity, and it’s been a staple in Mediterranean cuisine for generations.
But why should *you* bother learning to grow fennel at home? In today’s world, where we’re increasingly conscious of where our food comes from, having a readily available source of fresh herbs and vegetables is incredibly empowering. Plus, store-bought fennel often lacks the vibrant flavor of homegrown varieties. This DIY guide will walk you through everything you need to know to successfully grow fennel at home, from selecting the right variety to harvesting your bounty. I’ll share my favorite tips and tricks to ensure you have a thriving fennel plant, even if you’re a complete beginner. Get ready to unlock the secrets to fresh, flavorful fennel right outside your door!
Growing Fennel at Home: A Beginner’s Guide
Hey there, fellow gardening enthusiasts! I’m so excited to share my experience with growing fennel at home. It’s surprisingly easy, and the reward of fresh, flavorful fennel bulbs and fronds is totally worth it. Plus, the feathery foliage is just gorgeous in the garden. Let’s dive in!
Choosing Your Fennel Variety
Before we get our hands dirty, let’s talk about fennel varieties. There are two main types: bulb fennel (also called Florence fennel) and herb fennel.
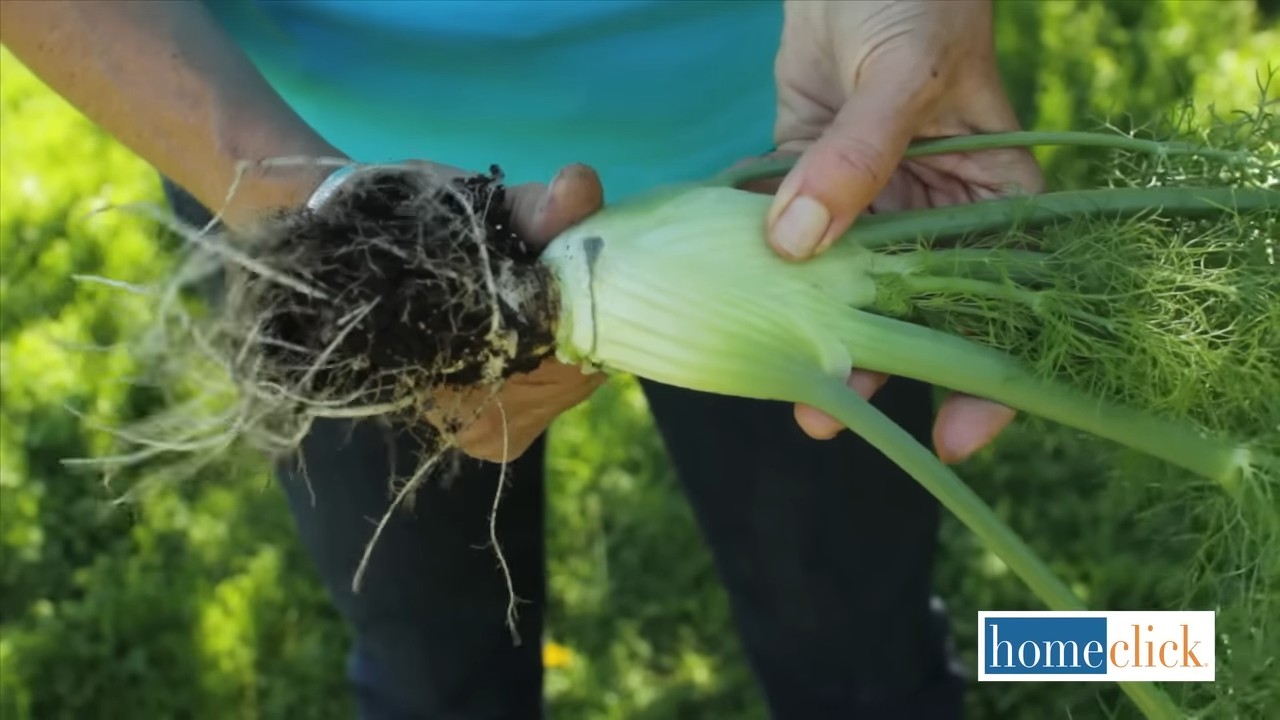
* **Bulb Fennel:** This is what you’ll typically find in the grocery store. It forms a swollen, bulb-like base that you can slice and roast, grill, or eat raw. Popular varieties include ‘Florence’, ‘Perfection’, and ‘Rondo’.
* **Herb Fennel:** This type is grown primarily for its leaves and seeds. It doesn’t form a bulb. ‘Bronze Fennel’ is a beautiful variety with dark, coppery foliage that adds a dramatic touch to your garden.
For this guide, I’ll focus on growing bulb fennel, but many of the principles apply to herb fennel as well.
Getting Started: Seeds vs. Transplants
You have two options for starting your fennel: seeds or transplants.
* **Seeds:** Starting from seed is the most economical option, and it gives you more control over the entire growing process. However, it requires a bit more patience and attention.
* **Transplants:** Buying transplants from a nursery is a quicker way to get started. Just make sure the transplants look healthy and aren’t root-bound.
I personally prefer starting from seed because I find it more rewarding, but either method works!
Step-by-Step Guide to Growing Fennel from Seed
Here’s my tried-and-true method for starting fennel from seed:
1. **Timing is Key:** Fennel is a cool-season crop, so the best time to plant it is in early spring or late summer. In the spring, sow seeds 2-3 weeks before the last expected frost. For a fall harvest, sow seeds 8-10 weeks before the first expected frost. I usually start my seeds indoors about 4-6 weeks before the last frost to get a head start.
2. **Prepare Your Seed Starting Mix:** Use a well-draining seed starting mix. You can buy a pre-made mix or make your own by combining equal parts peat moss, vermiculite, and perlite. I like to moisten the mix before filling my seed trays or pots.
3. **Sow the Seeds:** Sow the seeds about ¼ inch deep in the seed starting mix. I usually sow 2-3 seeds per cell or pot, just in case some don’t germinate.
4. **Provide Warmth and Light:** Place the seed trays or pots in a warm location, ideally around 70-75°F (21-24°C). A heat mat can help speed up germination. You’ll also need to provide plenty of light. If you don’t have a sunny windowsill, use a grow light. I keep my grow lights on for about 14-16 hours per day.
5. **Keep the Soil Moist:** Water the seed starting mix regularly to keep it consistently moist, but not soggy. I use a spray bottle to gently mist the soil.
6. **Thin the Seedlings:** Once the seedlings emerge (usually in 7-14 days), thin them to one plant per cell or pot. Choose the strongest, healthiest-looking seedling and snip off the others at the soil line.
7. **Harden Off the Seedlings:** Before transplanting the seedlings outdoors, you’ll need to harden them off. This means gradually exposing them to outdoor conditions over a period of 7-10 days. Start by placing the seedlings in a sheltered location for a few hours each day, gradually increasing the amount of time they spend outdoors.
Transplanting Fennel Seedlings Outdoors
Once your seedlings are hardened off, it’s time to transplant them into the garden.
1. **Choose the Right Location:** Fennel needs at least 6 hours of sunlight per day. It also prefers well-drained soil that is rich in organic matter.
2. **Prepare the Soil:** Before transplanting, amend the soil with compost or other organic matter. This will improve drainage and provide essential nutrients. I also like to add a slow-release fertilizer to the planting hole.
3. **Space the Plants Properly:** Space bulb fennel plants about 12-18 inches apart. This will give them enough room to grow and develop their bulbs.
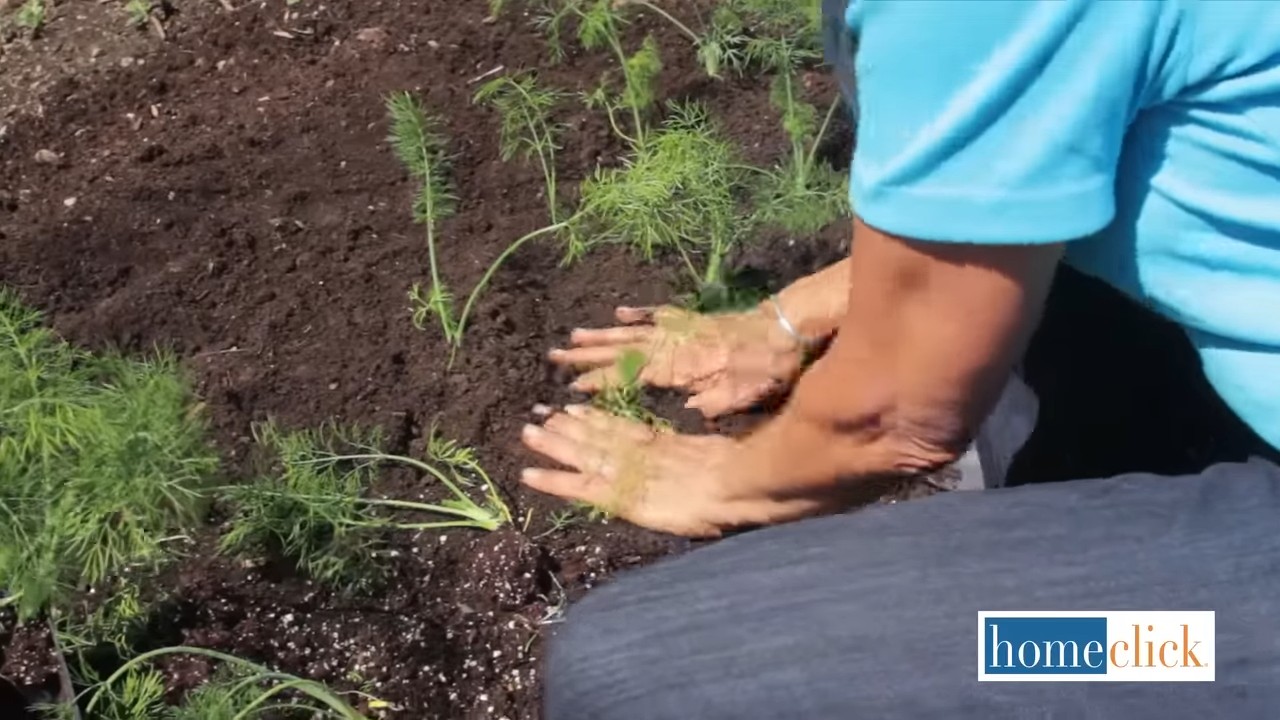
4. **Transplant Carefully:** Gently remove the seedlings from their pots and plant them at the same depth they were growing in the pots. Water them thoroughly after transplanting.
5. **Mulch Around the Plants:** Apply a layer of mulch around the plants to help retain moisture, suppress weeds, and regulate soil temperature. I like to use straw or shredded leaves.
Caring for Your Fennel Plants
Once your fennel plants are in the ground, here’s how to keep them happy and healthy:
1. **Water Regularly:** Fennel needs consistent moisture, especially during hot, dry weather. Water deeply whenever the top inch of soil feels dry.
2. **Fertilize as Needed:** If your soil is poor, you may need to fertilize your fennel plants periodically. Use a balanced fertilizer or a fertilizer specifically formulated for vegetables. I usually fertilize every 4-6 weeks.
3. **Weed Regularly:** Keep the area around your fennel plants free of weeds. Weeds compete with fennel for water and nutrients.
4. **Pest and Disease Control:** Fennel is generally pest-resistant, but it can be susceptible to aphids and slugs. Check your plants regularly for signs of pests and take action if necessary. You can use insecticidal soap or horticultural oil to control aphids. For slugs, try using beer traps or diatomaceous earth.
5. **Blanching (Optional):** To get whiter, more tender bulbs, you can blanch them by mounding soil around the base of the plants a few weeks before harvest. This blocks sunlight and prevents the bulbs from turning green.
Harvesting Your Fennel
The moment we’ve all been waiting for! Here’s how to harvest your fennel:
1. **Harvest Time:** Bulb fennel is usually ready to harvest about 80-100 days after planting. The bulbs should be about the size of a tennis ball or softball.
2. **Harvesting the Bulb:** To harvest the bulb, use a sharp knife to cut it off at the base of the plant.
3. **Harvesting the Fronds:** You can harvest the fronds (leaves) at any time. Just snip them off with scissors or pruning shears.
4. **Harvesting the Seeds:** If you want to harvest the seeds, let the flower heads dry on the plant. Once they are dry, you can shake the seeds out.
Using Your Homegrown Fennel
Now for the fun part: using your homegrown fennel!
* **Bulb:** The bulb can be eaten raw in salads, roasted, grilled, or braised. It has a mild anise flavor that pairs well with fish, chicken, and vegetables.
* **Fronds:** The fronds can be used as a garnish, added to salads, or used to flavor soups and sauces. They have a similar flavor to the bulb, but more delicate.
* **Seeds:** The seeds can be used as a spice in cooking or baking. They have a stronger anise flavor than the bulb or fronds. I love using them in Italian sausage and breads.
Troubleshooting Common Fennel Problems
Even with the best care, you might encounter some problems while growing fennel. Here are a few common issues and how to address them:
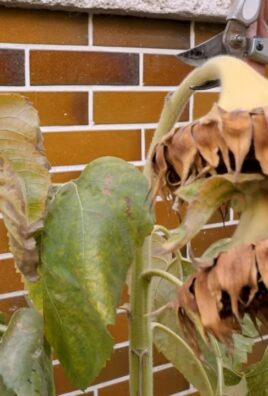
* **Bolting:** Bolting is when the plant prematurely flowers and goes to seed. This can happen if the weather is too hot or if the plant is stressed. To prevent bolting, plant fennel in the cool season and provide consistent moisture.
* **Aphids:** Aphids are small, sap-sucking insects that can weaken your fennel plants. You can control aphids with insecticidal soap or horticultural oil.
* **Slugs:** Slugs can damage fennel leaves and bulbs. You can control slugs with beer traps or diatomaceous earth.
* **Yellowing Leaves:** Yellowing leaves can be a sign of nutrient deficiency or overwatering. Make sure your soil is well-drained and fertilize as needed.
Enjoying the Fruits (and Bulbs!) of Your Labor
Growing fennel at home is a rewarding experience that allows you to enjoy fresh, flavorful produce right from your own garden. With a little bit of care and attention, you can have a bountiful harvest of fennel bulbs, fronds, and seeds. So get out there and start planting! Happy gardening!
Conclusion
So, there you have it! Growing fennel at home is not only achievable, but it’s also a rewarding experience that brings fresh, aromatic flavors right to your fingertips. Forget relying solely on grocery store produce, often wilted and lacking the vibrant intensity of freshly harvested herbs. This DIY approach empowers you to control the quality, freshness, and even the specific variety of fennel you enjoy.
Why is this a must-try? Because the difference between store-bought fennel and home-grown fennel is truly remarkable. The anise-like flavor is more pronounced, the texture is crisper, and the satisfaction of nurturing your own food is unparalleled. Plus, you’re reducing your carbon footprint by minimizing transportation and packaging. It’s a win-win!
But the benefits don’t stop there. Growing your own fennel allows for exciting culinary experimentation. Try different varieties like ‘Florence’ fennel for its bulb or ‘Bronze’ fennel for its feathery foliage and striking visual appeal. The bulb can be thinly sliced into salads, braised as a side dish, or even grilled for a smoky flavor. The fronds can be used as a garnish, added to soups and stews, or incorporated into pesto. The seeds, harvested from mature plants, offer a potent anise flavor perfect for flavoring sausages, breads, and even teas.
Consider these variations to personalize your fennel-growing journey:
* Container Gardening: If you’re short on space, fennel thrives in large containers. Choose a pot at least 12 inches in diameter to accommodate the bulb’s growth.
* Succession Planting: To enjoy a continuous harvest, sow seeds every few weeks throughout the growing season.
* Companion Planting: Fennel is known to attract beneficial insects like ladybugs and hoverflies, which can help control pests in your garden. However, it can inhibit the growth of some plants, so research companion planting carefully.
* Seed Saving: Allow some of your fennel plants to bolt (flower) and collect the seeds for future planting. This is a great way to save money and ensure you always have a supply of fresh fennel.
We strongly encourage you to give this DIY trick a try. It’s easier than you might think, and the rewards are well worth the effort. Imagine the pride you’ll feel serving a dish featuring fennel you grew yourself!
Don’t be afraid to experiment and adapt the techniques to suit your specific climate and growing conditions. Every garden is unique, and the best way to learn is by doing.
Once you’ve experienced the joy of growing fennel at home, we’d love to hear about your experience! Share your tips, tricks, and culinary creations in the comments below. Let’s build a community of home gardeners and inspire others to embrace the deliciousness of homegrown fennel. Happy gardening!
Frequently Asked Questions (FAQ)
What are the best conditions for growing fennel?
Fennel thrives in full sun, requiring at least 6-8 hours of direct sunlight per day. It prefers well-drained soil that is rich in organic matter. The ideal soil pH is between 6.0 and 7.0. While fennel is relatively drought-tolerant once established, consistent moisture is important, especially during bulb development. Avoid overwatering, as this can lead to root rot.
How long does it take for fennel to grow?
From seed to harvest, fennel typically takes between 90 and 115 days, depending on the variety and growing conditions. You can start harvesting the fronds earlier, as needed. The bulb is ready to harvest when it reaches a size of about 3-4 inches in diameter.
Can I grow fennel indoors?
While it’s possible to start fennel seeds indoors, it’s generally not recommended to grow it indoors for its entire life cycle. Fennel requires a lot of sunlight and space to thrive, which can be difficult to provide indoors. If you do attempt to grow it indoors, use a large container, provide ample light (preferably with grow lights), and ensure good air circulation.
What are some common pests and diseases that affect fennel?
Fennel is generally resistant to pests and diseases, but it can be susceptible to aphids, slugs, and snails. Aphids can be controlled with insecticidal soap or by introducing beneficial insects like ladybugs. Slugs and snails can be handpicked or trapped. Root rot can occur in poorly drained soil, so ensure proper drainage.
Is fennel a perennial or an annual?
Fennel is technically a short-lived perennial in warmer climates (zones 6-10), meaning it can live for more than two years. However, it’s often grown as an annual, especially in colder climates, because it tends to bolt (flower) in its second year, which can reduce the quality of the bulb. Bronze fennel is more reliably perennial.
How do I harvest fennel?
To harvest the bulb, gently loosen the soil around the base of the plant and pull it up. You can harvest the fronds at any time by snipping them off with scissors. To harvest the seeds, allow the plant to flower and the seed heads to dry on the plant. Once the seed heads are dry and brown, cut them off and place them in a paper bag. Shake the bag to release the seeds.
Can I eat the entire fennel plant?
Yes, the entire fennel plant is edible! The bulb, fronds, stalks, and seeds can all be used in cooking. The bulb is the most commonly used part, but the fronds add a delicate anise flavor to salads and soups. The stalks can be used like celery, and the seeds add a potent anise flavor to various dishes.
Why is my fennel bolting (flowering)?
Bolting is a natural process that occurs when a plant is stressed or exposed to high temperatures. It can also happen in the second year of growth for perennial varieties. Bolting can reduce the quality of the bulb, making it tough and bitter. To prevent bolting, choose bolt-resistant varieties, provide consistent moisture, and avoid exposing the plants to excessive heat.
Is fennel safe for pets?
Fennel is generally considered safe for pets in small quantities. However, large amounts may cause digestive upset. If you have any concerns, consult with your veterinarian.
What are some creative ways to use homegrown fennel?
Beyond the traditional uses, consider these creative ideas:
* Fennel Pollen: Harvest the pollen from the flowers and use it as a gourmet spice.
* Fennel Tea: Steep the seeds in hot water for a soothing and digestive-friendly tea.
* Fennel-Infused Oil: Infuse olive oil with fennel seeds for a flavorful cooking oil.
* Fennel and Citrus Salad: Combine thinly sliced fennel with oranges or grapefruits for a refreshing salad.
* Grilled Fennel with Parmesan: Grill fennel wedges and top with grated Parmesan cheese.
These are just a few ideas to get you started. The possibilities are endless when you start growing fennel at home! Remember to share your own creative uses and experiences with the community.

Leave a Comment