

Grow Epazote Kitchen: Ever dreamt of stepping into your kitchen garden and snipping fresh, flavorful herbs to elevate your culinary creations? I know I have! Imagine adding a unique, slightly citrusy, and undeniably bold flavor to your dishes, all thanks to a plant you nurtured yourself. That’s the magic of growing your own epazote, and trust me, it’s easier than you think!
Epazote, deeply rooted in Mexican and Central American cuisine, has been used for centuries, not only for its distinctive taste but also for its medicinal properties. Traditionally, it’s been used to alleviate digestive discomfort, making it a staple in bean-heavy dishes. But beyond its practical uses, epazote adds a layer of complexity and authenticity to dishes like quesadillas, soups, and tamales that you simply can’t replicate with other herbs.
In this DIY guide, I’m going to share some simple yet effective tricks to help you successfully grow epazote kitchen, even if you’re a complete beginner. We’ll cover everything from choosing the right seeds and soil to providing the perfect growing conditions and harvesting your bounty. Why buy expensive, often wilted herbs from the store when you can have a thriving epazote plant right at your fingertips? Let’s unlock the secrets to cultivating this fantastic herb and bring a taste of Mexico to your home garden and kitchen!
Growing Epazote in Your Kitchen: A Beginner’s Guide
Hey there, fellow plant enthusiasts! Ever wanted to add a unique, slightly pungent, and oh-so-flavorful herb to your culinary repertoire? Well, look no further than epazote! This amazing herb, traditionally used in Mexican cuisine, is surprisingly easy to grow right in your kitchen. I’m going to walk you through everything you need to know to cultivate your own little epazote patch.
What is Epazote?
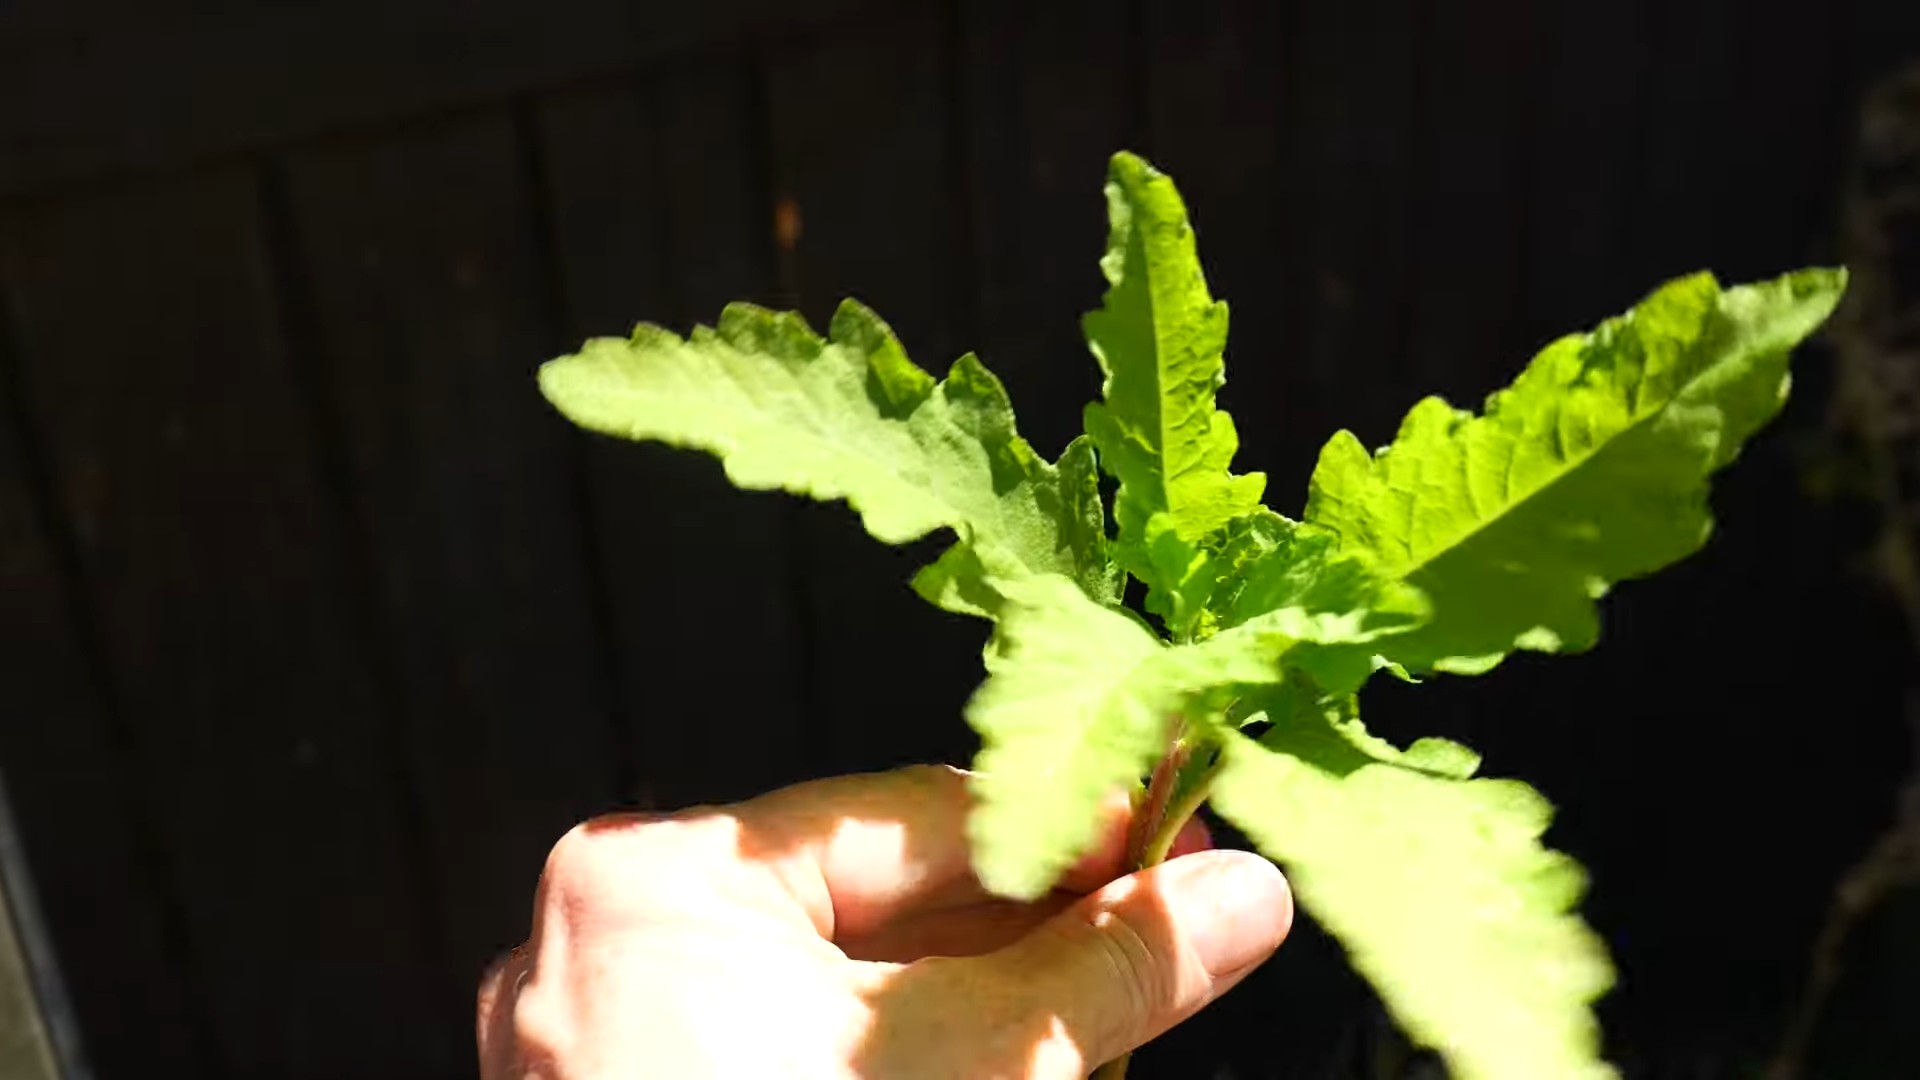
Before we dive in, let’s talk a little about what epazote actually is. Epazote ( *Dysphania ambrosioides*) is a leafy green herb with a distinctive flavor – some say it’s a mix of citrus, anise, and mint, with a hint of gasoline (don’t worry, it tastes better than it sounds!). It’s commonly used in dishes like black beans, quesadillas, and soups, not only for its flavor but also because it’s believed to help reduce gas and bloating associated with eating beans. Pretty cool, right?
Why Grow Epazote Indoors?
While epazote can be grown outdoors, growing it indoors offers several advantages:
* Year-Round Harvest: You can enjoy fresh epazote regardless of the season.
* Pest Control: Indoor environments are generally less susceptible to pests and diseases.
* Convenience: Having fresh herbs readily available in your kitchen is a game-changer for cooking.
* Control: You have complete control over the growing environment, including light, temperature, and humidity.
Getting Started: What You’ll Need
Okay, let’s gather our supplies. Here’s what you’ll need to get your epazote journey started:
* Epazote Seeds: You can find these online or at specialty nurseries. Make sure you’re getting *Dysphania ambrosioides* seeds.
* Potting Mix: Use a well-draining potting mix. A mix designed for herbs or vegetables works great.
* Pots: Choose pots that are at least 6 inches in diameter. Epazote can get fairly large, so bigger is better.
* Grow Lights (Optional but Recommended): While epazote can tolerate some shade, it thrives with plenty of light. Grow lights will ensure your plant gets enough light, especially during the winter months.
* Watering Can or Spray Bottle: For gentle watering.
* Small Shovel or Trowel: For planting and transplanting.
* Seed Starting Tray (Optional): If you prefer to start your seeds indoors before transplanting.
Step-by-Step Guide to Growing Epazote Indoors
Alright, let’s get our hands dirty! Here’s a detailed guide to growing epazote in your kitchen:
1. Starting from Seed (Two Options)
You have two main options for starting your epazote: direct sowing into your pot or starting seeds in a tray. I personally prefer starting in a tray because it gives me more control over the germination process.
Option A: Direct Sowing
1. Prepare the Pot: Fill your chosen pot with potting mix, leaving about an inch of space at the top. Gently pat down the soil.
2. Sow the Seeds: Sprinkle the epazote seeds evenly over the surface of the soil. They are tiny, so don’t worry about spacing them perfectly.
3. Cover Lightly: Lightly cover the seeds with a thin layer of potting mix (about 1/4 inch).
4. Water Gently: Use a spray bottle or watering can with a gentle nozzle to moisten the soil. Be careful not to dislodge the seeds.
5. Provide Light: Place the pot in a sunny location or under grow lights.
6. Keep Moist: Keep the soil consistently moist but not waterlogged. You can cover the pot with plastic wrap to help retain moisture until the seeds germinate.
7. Wait for Germination: Epazote seeds typically germinate in 7-14 days.
Option B: Starting in a Seed Tray
1. Fill the Tray: Fill the seed starting tray with potting mix.
2. Sow the Seeds: Place 2-3 epazote seeds in each cell of the tray.
3. Cover Lightly: Lightly cover the seeds with a thin layer of potting mix.
4. Water Gently: Use a spray bottle to moisten the soil.
5. Provide Light: Place the tray under grow lights or in a sunny location.
6. Keep Moist: Keep the soil consistently moist. A humidity dome can help with this.
7. Wait for Germination: Epazote seeds typically germinate in 7-14 days.
8. Thin Seedlings (If Necessary): Once the seedlings have a few true leaves, thin them to one seedling per cell. Choose the strongest seedling and gently snip off the others at the soil line.
2. Transplanting (If Starting in a Seed Tray)
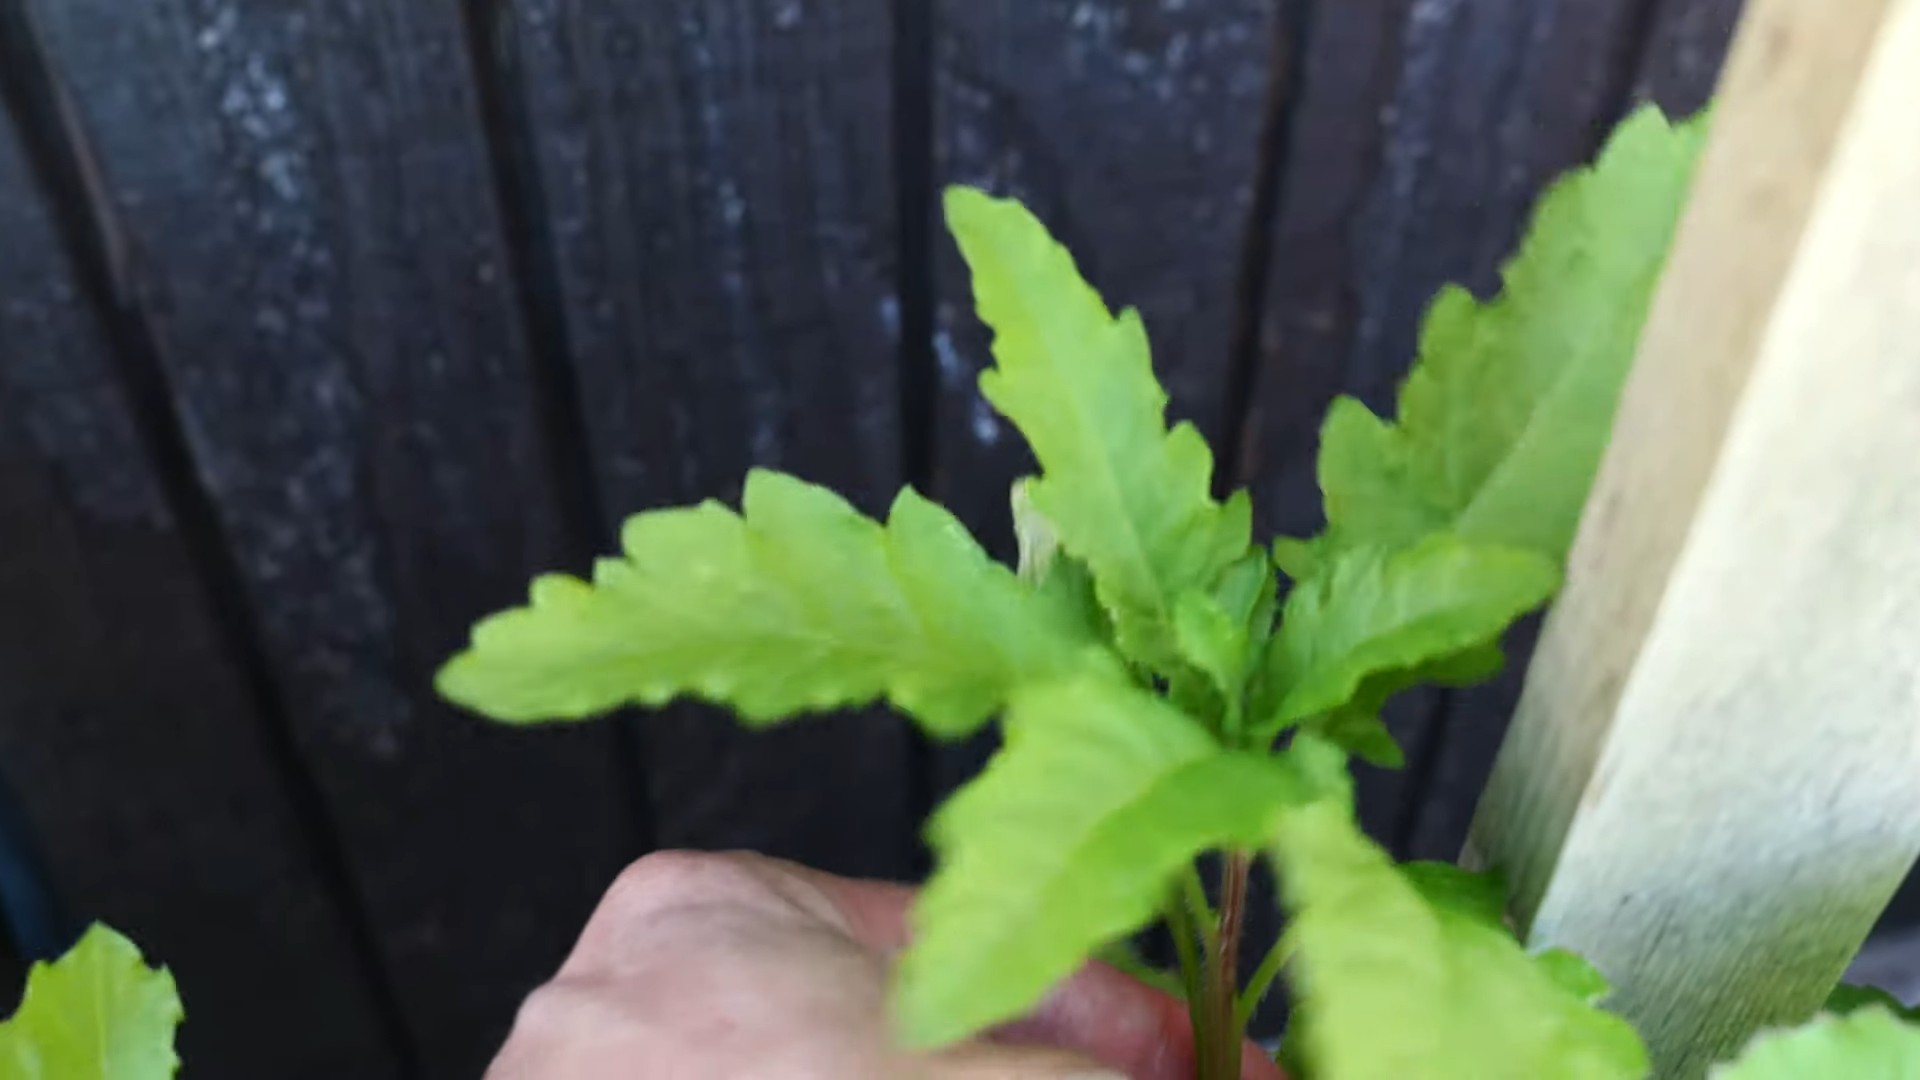
Once your seedlings have developed a few sets of true leaves (the leaves that look like miniature versions of the adult leaves), it’s time to transplant them into their permanent pots.
1. Prepare the Pot: Fill your chosen pot with potting mix, leaving about an inch of space at the top.
2. Gently Remove the Seedling: Carefully remove the seedling from the seed tray cell. Try to disturb the roots as little as possible. You can use a small spoon or trowel to help you.
3. Plant the Seedling: Make a small hole in the center of the potting mix in your pot. Place the seedling in the hole and gently backfill with potting mix.
4. Water Gently: Water the seedling thoroughly.
5. Provide Light: Place the pot in a sunny location or under grow lights.
3. Ongoing Care
Now that your epazote is planted, here’s how to keep it happy and healthy:
1. Light: Epazote needs at least 6 hours of sunlight per day. If you’re not getting enough natural light, use grow lights. I usually keep my grow lights on for 12-14 hours a day.
2. Watering: Water regularly, keeping the soil consistently moist but not waterlogged. Check the soil moisture by sticking your finger about an inch into the soil. If it feels dry, it’s time to water.
3. Fertilizing: Feed your epazote plant every 2-3 weeks with a balanced liquid fertilizer. Follow the instructions on the fertilizer label. I like to use an organic fertilizer.
4. Temperature: Epazote prefers temperatures between 60-80°F (15-27°C).
5. Humidity: Epazote isn’t too picky about humidity, but it appreciates a slightly humid environment. You can increase humidity by misting the plant regularly or placing a tray of water near it.
6. Pruning: Prune your epazote plant regularly to encourage bushier growth. Simply pinch off the tips of the stems. This will also provide you with fresh epazote to use in your cooking!
7. Pest Control: Keep an eye out for pests like aphids or spider mites. If you spot any, treat them with insecticidal soap or neem oil.
Harvesting Your Epazote
The best part! You can start harvesting epazote leaves once the plant is about 6-8 inches tall. Simply snip off the leaves you need with scissors or your fingers. Regular harvesting will encourage the plant to produce more leaves.
When to Harvest: Harvest in the morning for the best flavor.
How to Harvest: Cut stems a few inches above the soil line.
Drying Epazote: If you have more epazote than you can use fresh, you can dry it for later use. Hang the stems upside down in a cool, dry place until they are completely dry. Then, crumble the leaves and store them in an airtight container.
Troubleshooting
Even with the best care, you might encounter a few problems. Here are some common issues and how to address them:
* Yellowing Leaves: This could be a sign of overwatering, underwatering, or nutrient deficiency. Check the soil moisture and adjust your watering accordingly. If the soil is consistently moist, you’re likely overwatering. If the soil is dry, you’re likely underwatering. If you’re fertilizing regularly, the yellowing could be due to a nutrient deficiency. Try using a fertilizer with a higher nitrogen content.
* Leggy Growth: This means your plant isn’t getting enough light. Move it to a sunnier location or provide supplemental light with grow lights.
* Pests: As mentioned earlier, keep an eye out for pests and treat them promptly.
* Slow Growth: This could be due to a number of factors, including insufficient light, poor soil, or lack of nutrients. Make sure your plant is getting enough light
Conclusion
So, there you have it! Growing your own epazote in your kitchen is not just a fun project; it’s a gateway to unlocking a world of authentic Mexican flavors right at your fingertips. Forget relying on potentially wilted or hard-to-find bunches at the grocery store. With a little effort, you can have a thriving epazote plant, ready to enhance your favorite dishes whenever the craving strikes.
Why is this DIY trick a must-try? Because it empowers you to control the quality and freshness of your ingredients. Imagine the difference between using dried herbs and snipping fresh, vibrant epazote leaves directly into your quesadillas, black bean soup, or tamales. The aroma alone is enough to transport you to a bustling Mexican market! Plus, growing your own herbs is incredibly rewarding, connecting you to the food you eat in a more meaningful way.
But the benefits don’t stop there. Growing epazote indoors is surprisingly easy, even for those without a green thumb. It requires minimal space and thrives with basic care. Think of it as a low-maintenance houseplant that also happens to be a culinary powerhouse.
Looking for variations? Consider experimenting with different containers. While a standard pot works perfectly well, you could also repurpose old coffee cans or mason jars for a rustic, eco-friendly touch. You can also try different soil mixes to see what your epazote plant responds to best. Some gardeners swear by adding a bit of compost or worm castings to boost growth. And if you’re feeling adventurous, try propagating your epazote plant from cuttings to expand your herb garden even further. You could even try growing it outdoors during warmer months, bringing it back inside before the first frost.
We’ve covered the basics of how to grow epazote in your kitchen, from sourcing seeds or cuttings to providing the right light and water. Now, it’s your turn to put this knowledge into practice. Don’t be intimidated – even if you encounter a few hiccups along the way, the experience is well worth it. The satisfaction of harvesting your own homegrown epazote and using it to create delicious meals is unparalleled.
We wholeheartedly encourage you to try this DIY trick and experience the joy of fresh, homegrown flavor. Once you’ve given it a shot, we’d love to hear about your experience! Share your tips, tricks, and photos in the comments below. Let’s create a community of epazote enthusiasts and inspire others to embark on this flavorful journey. What are you waiting for? Get growing!
Frequently Asked Questions (FAQ)
What exactly is epazote, and what does it taste like?
Epazote (Dysphania ambrosioides) is a leafy herb native to Central America and Mexico. It’s a staple in Mexican cuisine, known for its distinctive flavor and purported digestive benefits. The taste is often described as a combination of anise, citrus, and mint, with a slightly pungent or medicinal undertone. Some people find it similar to oregano or tarragon. The flavor can be quite strong, so it’s best to use it sparingly at first until you get a feel for its intensity.
Is it difficult to grow epazote indoors?
No, growing epazote indoors is generally considered quite easy, even for beginner gardeners. It’s a relatively low-maintenance plant that adapts well to indoor conditions. The key is to provide it with enough sunlight (or a grow light), well-draining soil, and consistent watering. Avoid overwatering, as this can lead to root rot. With a little attention, you should have no problem cultivating a thriving epazote plant in your kitchen.
Where can I find epazote seeds or cuttings?
Epazote seeds are readily available online from various seed suppliers. You can also check your local nurseries or garden centers, especially those that specialize in herbs or Mexican plants. If you have a friend or neighbor who grows epazote, you could ask for a cutting to propagate. To propagate from a cutting, simply snip off a healthy stem about 4-6 inches long, remove the lower leaves, and place it in a glass of water. Once roots develop, you can transplant it into a pot with soil.
How much sunlight does epazote need when grown indoors?
Epazote thrives in bright, indirect sunlight. Aim for at least 6 hours of sunlight per day. If you don’t have a sunny windowsill, you can supplement with a grow light. Place the grow light a few inches above the plant and leave it on for 12-14 hours per day. Rotate the plant regularly to ensure even growth on all sides.
How often should I water my epazote plant?
Water your epazote plant when the top inch of soil feels dry to the touch. Avoid overwatering, as this can lead to root rot. Ensure that the pot has drainage holes to allow excess water to escape. During the winter months, when the plant is not actively growing, you can reduce watering frequency.
Does epazote have any health benefits?
Epazote has been traditionally used in Mexican medicine for its purported digestive benefits. It’s believed to help reduce gas and bloating, which is why it’s often added to bean dishes. However, it’s important to note that these claims are not scientifically proven, and epazote should be consumed in moderation. Pregnant women should avoid consuming epazote, as it may have adverse effects.
Can I eat the entire epazote plant, or just the leaves?
Typically, only the leaves of the epazote plant are used in cooking. The stems can be quite tough and fibrous. To harvest the leaves, simply snip them off with scissors or your fingers. You can use them fresh or dry them for later use.
How do I dry epazote leaves?
To dry epazote leaves, you can either hang them upside down in a cool, dry place or use a dehydrator. To hang them, tie a bunch of stems together and suspend them in a well-ventilated area away from direct sunlight. It usually takes a few weeks for the leaves to dry completely. Alternatively, you can spread the leaves on a dehydrator tray and dry them at a low temperature until they are brittle. Store the dried leaves in an airtight container in a cool, dark place.
Is epazote safe for pets?
Epazote can be toxic to pets if ingested in large quantities. It’s best to keep your epazote plant out of reach of cats and dogs. If you suspect that your pet has consumed epazote, contact your veterinarian immediately.
My epazote plant is getting leggy. What should I do?
If your epazote plant is becoming leggy (i.e., long and spindly with few leaves), it’s likely not getting enough sunlight. Move it to a sunnier location or supplement with a grow light. You can also prune the plant back to encourage bushier growth. Simply snip off the top of the stems to promote branching.
Leave a Comment