

Grow Corn Kitchen Garden: Imagine stepping outside your back door and harvesting fresh, sweet corn, ready to be grilled, boiled, or added to your favorite summer salad. Sounds like a dream, right? Well, it doesn’t have to be! I’m here to tell you that growing your own corn, even in a small kitchen garden, is totally achievable with a few clever tricks and DIY hacks.
Corn, or maize, has a rich history, dating back thousands of years to its origins in Mexico. It’s been a staple food for countless cultures, and now, you can bring that tradition right to your own backyard! While large-scale corn farming might seem daunting, cultivating a small patch for personal consumption is surprisingly manageable.
Why should you try this DIY project? Well, for starters, the taste of homegrown corn is simply unbeatable – it’s sweeter and fresher than anything you’ll find in the grocery store. Plus, knowing exactly where your food comes from and how it’s grown gives you peace of mind. But more importantly, learning how to grow corn kitchen garden is a fun and rewarding experience that connects you with nature and provides a delicious, healthy harvest. So, let’s dive into some easy-to-follow tips and tricks that will have you enjoying homegrown corn in no time!
Growing Corn in Your Own Kitchen Garden: A DIY Guide
Hello garden friends! Have you ever dreamed of growing your own corn in the garden? It’s easier than you think, and the result is incredibly delicious! In this article, I’ll show you how to grow your own corn in your kitchen garden with simple methods and a bit of patience. Let’s get started!
What you’ll need for growing corn:
- Corn seeds: Choose a variety that is suitable for your region. There are many different types, from sweet corn to popcorn.
- Garden tools: A spade, a rake, and possibly a trowel.
- Garden gloves: To protect your hands.
- Compost or fertilizer: For a good supply of nutrients in the soil.
- Watering can or garden hose: For watering the plants.
- Plant stakes or bamboo sticks: To support the plants if needed.
- Patience and love: The most important thing of all!
Preparing the Soil
Getting off to a good start is half the battle! Before we start planting, we need to prepare the soil. Corn is a heavy feeder and requires nutrient-rich soil.
- Loosen the soil: Use a spade to thoroughly loosen the soil. Remove any stones, roots, and weeds.
- Work in compost: Spread a generous amount of compost or organic fertilizer over the area and work it into the soil with a rake. This ensures a good supply of nutrients.
- Level the soil: Use the rake to level the soil, creating an even surface.
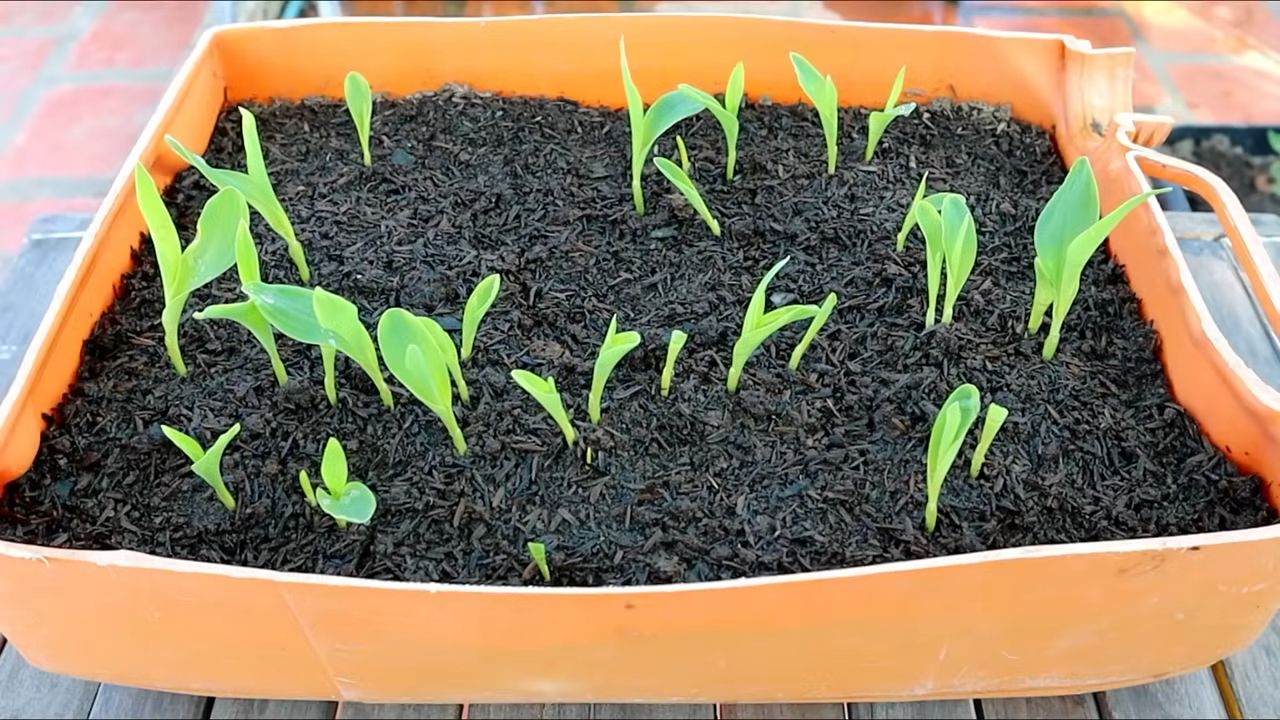
Sowing the Corn
Now comes the exciting part: sowing! Corn is a heat-loving plant, so you should wait to sow until there is no more danger of frost. In most regions, this is from mid-May onwards.
- Make rows: Use the rake to create rows about 75 cm (30 inches) apart.
- Place the seeds: Place the corn seeds in the rows at a distance of about 20-25 cm (8-10 inches). The seeds should be about 3-5 cm (1-2 inches) deep in the soil.
- Close the rows: Gently cover the rows with soil and press down lightly.
- Water: Water the rows thoroughly. This helps the seeds to germinate quickly.
Important Tip: Corn is a wind pollinator. This means the plants should be planted in a block and not in a single row to ensure good pollination. So, plant at least four rows next to each other.
Caring for the Corn
After sowing, the care begins! Corn needs regular care to grow well and produce a bountiful harvest.
- Watering: Make sure the soil is always moist, especially during the flowering period. Corn needs a lot of water.
- Remove weeds: Keep weeds in check. Weeds compete with the corn for nutrients and water.
- Fertilizing: Fertilize the corn regularly during its growth phase with an organic fertilizer.
- Supporting: For tall varieties, it may be necessary to support the plants with stakes or bamboo sticks, especially in strong winds.
- Remove side shoots: Remove the side shoots (also called “suckers”) that form at the base of the plant. These take unnecessary energy from the plant.
Protection from Pests and Diseases
Pests and diseases can also occur in the corn patch. Here are some tips on how to protect your plants:
- Corn borers: The corn borer is a common pest. You can combat it with beneficial insects like parasitic wasps or with biological insecticides.
- Birds: Birds can eat the young seedlings. Protect the plants with a net.
- Fungal diseases: In wet weather, fungal diseases can occur. Ensure good ventilation and remove affected leaves.
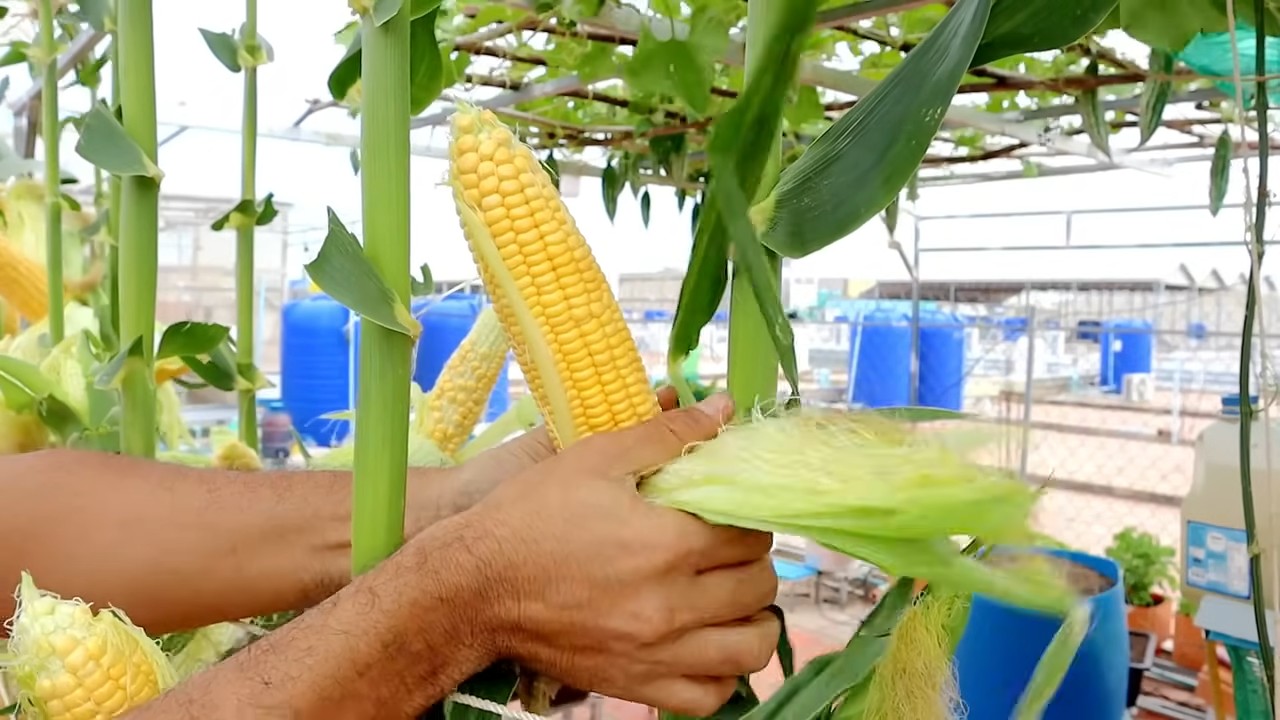
Harvesting the Corn
The time has finally come: the harvest! The timing of the harvest depends on the corn variety. Sweet corn is ripe when the silks on the ear are brown and dry and the kernels are plump and juicy. Popcorn is harvested only when the ears are completely dried out.
- Check the ears: Gently press on the kernels. If they are milky, the sweet corn is ripe.
- Harvest the ears: Carefully break the ears off the plant.
- Preparation: Enjoy your homegrown corn! It tastes great fresh off the grill, cooked, or as an ingredient in many delicious dishes.
Drying Popcorn Correctly
If you have grown popcorn, you need to dry the ears properly before you can turn them into popcorn.
- Dry the ears: Hang the ears in a dry, airy place. This could be, for example, an attic or a garage.
- Drying time: The drying time is several weeks to months. The ears are dry when the kernels are hard and can be easily removed from the cob.
- Remove the kernels: Remove the kernels from the cob and store them in an airtight container.
Additional Tips for Successful Corn Cultivation
- Practice crop rotation: Do not grow corn in the same spot every year. Rotate the crops to avoid depleting the soil of specific nutrients.
- Variety selection: Choose a corn variety that is suitable for your climate and soil conditions.
- Ask your neighbors: Exchange experiences with other gardeners and learn from them.
- Observe: Observe your plants regularly and react quickly to problems.
Common Mistakes in Corn Cultivation and How to Avoid Them
Although growing corn is relatively simple, there are some mistakes to avoid:
Ignoring pests and diseases: Observe your plants regularly and react quickly to problems.
Sowing too early: Wait until there is no more danger of frost.
Not enough space: Give the plants enough space so they can develop well.
Lack of watering: Corn needs a lot of water, especially during the flowering period.
Neglecting fertilization: Corn is a heavy feeder and needs regular fertilization.
Conclusion
So, there you have it! Growing your own corn, right in your kitchen garden, is not only achievable but also incredibly rewarding. Forget the store-bought cobs that lack that fresh-from-the-field sweetness. With a little planning and effort, you can enjoy the unparalleled flavor of homegrown corn, knowing exactly where it came from and how it was grown. This DIY trick transforms even the smallest space into a miniature farm, bringing a touch of rural charm to your urban or suburban life.
The beauty of this method lies in its adaptability. Experiment with different varieties of corn to discover your personal favorite. Try growing sweet corn for grilling, or dent corn for making your own cornmeal. You can even explore ornamental corn varieties for a splash of color and visual interest. Consider companion planting to maximize your yields and deter pests naturally. Marigolds, beans, and squash are all excellent companions for corn.
Don’t be intimidated by the prospect of growing corn at home. It’s a surprisingly straightforward process, and the satisfaction of harvesting your own cobs is well worth the effort. Imagine the look on your family’s faces when you serve up a meal featuring corn you grew yourself! It’s a conversation starter, a source of pride, and a delicious way to connect with nature.
We encourage you to give this DIY corn growing trick a try. Start small, learn as you go, and don’t be afraid to experiment. The journey is just as enjoyable as the destination. And most importantly, share your experiences with us! We’d love to hear about your successes, your challenges, and any tips or tricks you discover along the way. Post photos of your corn plants, share your favorite recipes, and let’s build a community of home corn growers. Together, we can transform our kitchens into thriving gardens and enjoy the simple pleasure of fresh, homegrown corn. So, grab your seeds, get your hands dirty, and start growing! You’ll be amazed at what you can achieve.
Frequently Asked Questions (FAQ)
1. What kind of corn is best for growing in a kitchen garden?
The best type of corn for a kitchen garden depends on your space and preferences. For smaller spaces, consider dwarf or compact varieties like ‘On Deck’ or ‘Golden Bantam’. These varieties are specifically bred to be shorter and more manageable, making them ideal for container gardening or small plots. Sweet corn is a popular choice for eating fresh, while dent corn is better suited for making cornmeal or flour. Ornamental corn varieties can add visual appeal to your garden. Research different varieties and choose one that suits your needs and growing conditions. Remember to check the “days to maturity” on the seed packet to ensure you have enough time in your growing season to harvest your corn.
2. How much space does corn need to grow successfully?
Corn plants need adequate space to thrive. As a general rule, space plants about 8-12 inches apart in rows that are 2-3 feet apart. This spacing allows for proper air circulation and sunlight penetration, which are essential for healthy growth and pollination. If you’re growing in containers, choose pots that are at least 12 inches in diameter and depth. Remember that corn is wind-pollinated, so planting in blocks rather than a single row will improve pollination rates.
3. What kind of soil is best for growing corn?
Corn prefers well-drained, fertile soil that is rich in organic matter. Before planting, amend your soil with compost or well-rotted manure to improve its structure and nutrient content. Corn is a heavy feeder, so it’s important to provide it with adequate nutrients throughout the growing season. A soil pH of 6.0 to 6.8 is ideal for corn growth. You can test your soil pH using a home testing kit or by sending a sample to your local agricultural extension office.
4. How often should I water my corn plants?
Corn plants need consistent moisture, especially during germination and pollination. Water deeply and regularly, aiming to keep the soil consistently moist but not waterlogged. Check the soil moisture regularly by sticking your finger into the soil. If the top inch feels dry, it’s time to water. During hot, dry weather, you may need to water more frequently. Avoid overhead watering, as this can increase the risk of fungal diseases. Instead, water at the base of the plants.
5. How do I know when my corn is ready to harvest?
Knowing when to harvest your corn is crucial for enjoying its peak flavor. For sweet corn, the silks will turn brown and dry, and the kernels will feel plump and milky when squeezed. You can also peel back a portion of the husk to check the kernels directly. Dent corn is ready to harvest when the kernels are hard and dry. The husks will also be dry and brown. Ornamental corn can be harvested when the husks are fully dried and the kernels are hard and glossy.
6. What are some common pests and diseases that affect corn, and how can I prevent them?
Corn can be susceptible to various pests and diseases, including corn earworms, aphids, and fungal diseases like corn smut. To prevent pest and disease problems, practice good garden hygiene. Remove weeds and debris regularly, and provide adequate air circulation around your plants. Companion planting can also help deter pests naturally. For example, planting marigolds near your corn can help repel aphids. If you encounter pest or disease problems, consider using organic pest control methods, such as insecticidal soap or neem oil.
7. Can I grow corn in containers?
Yes, you can grow corn in containers, but it’s important to choose the right variety and container size. Dwarf or compact varieties are best suited for container gardening. Choose pots that are at least 12 inches in diameter and depth. Use a high-quality potting mix that is well-draining and rich in organic matter. Water regularly and fertilize every few weeks with a balanced fertilizer. Remember that container-grown corn may require more frequent watering and fertilization than corn grown in the ground.
8. How can I improve pollination in my corn patch?
Corn is wind-pollinated, so it’s important to ensure adequate pollination for a good harvest. Plant your corn in blocks rather than a single row to increase the chances of pollination. You can also hand-pollinate your corn by gently shaking the tassels (the male flowers at the top of the plant) over the silks (the female flowers emerging from the ears). Do this in the morning when the pollen is most active.
9. Can I save seeds from my homegrown corn?
Yes, you can save seeds from your homegrown corn, but it’s important to choose open-pollinated varieties. Hybrid varieties will not produce true-to-type seeds. Allow the ears to dry completely on the stalk before harvesting the seeds. Store the seeds in a cool, dry place.
10. What are some creative ways to use my homegrown corn?
The possibilities are endless! Of course, you can enjoy it fresh off the cob, grilled, boiled, or steamed. You can also use it in salads, soups, stews, and casseroles. Grind dent corn into cornmeal for making cornbread, muffins, or polenta. Use ornamental corn for fall decorations. Get creative and experiment with different recipes and preparations. The flavor of homegrown corn is unmatched, so enjoy every bite!
Leave a Comment