

Grow Chili Peppers Faster and unlock a world of fiery flavors right in your own backyard! Have you ever dreamt of harvesting a bumper crop of vibrant chili peppers, ready to spice up your favorite dishes? I know I have! But sometimes, patience isn’t my strongest virtue, and waiting for those peppers to ripen can feel like an eternity. That’s why I’ve been diving deep into the world of home gardening hacks, and I’m thrilled to share some incredible DIY tricks that will help you accelerate your chili pepper growing journey.
The cultivation of chili peppers dates back thousands of years, with evidence suggesting their use in the Americas as early as 6,000 BC. From ancient civilizations using them for medicinal purposes to their integral role in cuisines worldwide, chili peppers have a rich and fascinating history. Today, growing your own chili peppers is more popular than ever, but many gardeners struggle with the time it takes for their plants to mature.
That’s where these DIY tricks come in! Whether you’re a seasoned gardener or just starting out, these simple yet effective techniques will empower you to grow chili peppers faster and enjoy a bountiful harvest sooner than you ever thought possible. Imagine adding freshly picked, fiery peppers to your salsa, stir-fries, or even just sprinkling them on your eggs in the morning. With these tips, that dream can become a reality. Let’s get started and turn your garden into a chili pepper paradise!
Chili Peppers Turbo: So bringst du deine Schoten zum Explodieren!
Hey Chili-Heads! Ihr wollt eure Chili-Ernte beschleunigen und schon früher scharfe Früchte genießen? Dann seid ihr hier genau richtig! Ich zeige euch ein paar Tricks, mit denen ihr euren Chili-Pflanzen ordentlich Dampf unter dem Hintern macht. Keine Sorge, das ist alles DIY-freundlich und ohne viel Aufwand machbar. Los geht’s!
Die Basis: Optimale Bedingungen schaffen
Bevor wir mit den Turbo-Methoden loslegen, müssen wir sicherstellen, dass die Grundlagen stimmen. Eine gesunde Chili-Pflanze ist die beste Voraussetzung für schnelles Wachstum und eine reiche Ernte.
* Der richtige Standort: Chili-Pflanzen sind Sonnenanbeter! Sie brauchen mindestens 6-8 Stunden direkte Sonneneinstrahlung pro Tag. Sucht ihnen also einen sonnigen Platz im Garten, auf dem Balkon oder der Fensterbank.
* Der perfekte Boden: Chili-Pflanzen lieben einen gut durchlässigen, nährstoffreichen Boden. Eine Mischung aus Gartenerde, Kompost und Sand ist ideal. Vermeidet Staunässe, denn das mögen die kleinen Scharfmacher gar nicht.
* Die richtige Bewässerung: Gießt eure Chili-Pflanzen regelmäßig, aber nicht zu viel. Die Erde sollte immer leicht feucht sein, aber nicht nass. Am besten testet ihr mit dem Finger, ob die Erde trocken ist, bevor ihr gießt.
* Die passende Temperatur: Chili-Pflanzen fühlen sich bei Temperaturen zwischen 20 und 30 Grad Celsius am wohlsten. Unter 15 Grad Celsius stellen sie das Wachstum ein. Achtet also darauf, dass sie nicht zu kalt stehen.
Turbo-Trick 1: Der Eierschalen-Boost
Eierschalen sind ein echter Geheimtipp für Chili-Pflanzen! Sie enthalten viel Kalzium, das für ein gesundes Wachstum und eine kräftige Fruchtbildung unerlässlich ist. Außerdem helfen sie, den pH-Wert des Bodens zu regulieren.
So geht’s:
1. Eierschalen sammeln: Sammelt über einige Wochen Eierschalen. Achtet darauf, dass sie sauber und trocken sind.
2. Eierschalen zerkleinern: Zerkleinert die Eierschalen mit einem Mörser oder einer Küchenmaschine zu feinem Pulver. Je feiner, desto besser können die Pflanzen das Kalzium aufnehmen.
3. Eierschalen-Pulver einarbeiten: Gebt das Eierschalen-Pulver in den Boden rund um eure Chili-Pflanzen. Arbeitet es leicht ein.
4. Regelmäßig wiederholen: Wiederholt die Anwendung alle 2-3 Wochen.
Turbo-Trick 2: Der Kaffeesatz-Kick
Kaffeesatz ist ein weiterer genialer Dünger für Chili-Pflanzen! Er enthält Stickstoff, Phosphor und Kalium, die alle für ein gesundes Wachstum wichtig sind. Außerdem lockt er Regenwürmer an, die den Boden auflockern und belüften.
So geht’s:
1. Kaffeesatz sammeln: Sammelt euren Kaffeesatz nach dem Brühen. Lasst ihn gut trocknen, um Schimmelbildung zu vermeiden.
2. Kaffeesatz einarbeiten: Gebt den getrockneten Kaffeesatz in den Boden rund um eure Chili-Pflanzen. Arbeitet ihn leicht ein.
3. Regelmäßig wiederholen: Wiederholt die Anwendung alle 2-3 Wochen. Aber Achtung: Nicht zu viel Kaffeesatz verwenden, da er den Boden übersäuern kann.
Turbo-Trick 3: Der Magnesiumsulfat-Schub (Bittersalz)
Magnesiumsulfat, auch bekannt als Bittersalz, ist ein echter Geheimtipp für Chili-Pflanzen, die unter Magnesiummangel leiden. Ein Mangel kann sich durch gelbe Blätter zwischen den Blattadern äußern. Magnesium ist wichtig für die Photosynthese und die Aufnahme anderer Nährstoffe.
So geht’s:
1. Magnesiumsulfat besorgen: Magnesiumsulfat gibt es in Apotheken, Drogerien oder im Gartenfachhandel.
2. Lösung anmischen: Löst 1-2 Teelöffel Magnesiumsulfat in einem Liter Wasser auf.
3. Pflanzen besprühen: Besprüht eure Chili-Pflanzen mit der Lösung. Achtet darauf, dass ihr alle Blätter benetzt, auch die Unterseite.
4. Wiederholen: Wiederholt die Anwendung alle 2-3 Wochen.
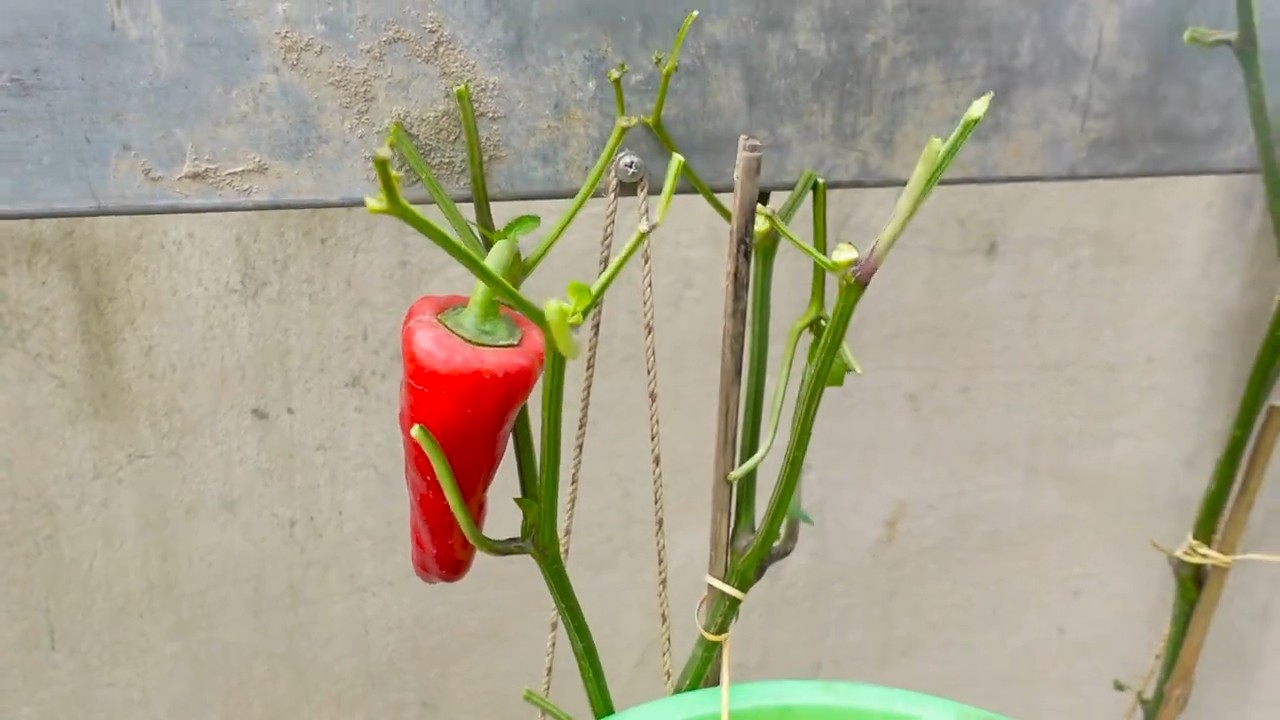
Turbo-Trick 4: Das Beschneiden für mehr Ertrag
Das Beschneiden von Chili-Pflanzen kann das Wachstum und den Ertrag deutlich steigern. Durch das Entfernen von Trieben und Blättern lenkt ihr die Energie der Pflanze in die Fruchtbildung.
So geht’s:
1. Die richtige Zeit: Beschneidet eure Chili-Pflanzen am besten im Frühjahr, bevor sie mit der Blüte beginnen.
2. Die richtigen Werkzeuge: Verwendet eine scharfe und saubere Gartenschere oder ein Messer.
3. Die richtigen Stellen: Entfernt alle Triebe, die aus den Blattachseln wachsen. Diese Triebe nehmen der Pflanze nur unnötig Energie. Entfernt auch alle gelben oder braunen Blätter.
4. Die Spitze kappen: Wenn eure Chili-Pflanze zu hoch wird, könnt ihr die Spitze kappen. Dadurch verzweigt sie sich besser und bildet mehr Blüten.
Turbo-Trick 5: Die Wärme-Matte für den Extra-Kick
Gerade in kühleren Regionen oder in der Anzuchtphase kann eine Wärme-Matte wahre Wunder wirken. Sie sorgt für eine konstante Bodentemperatur, die das Wachstum der Chili-Pflanzen beschleunigt.
So geht’s:
1. Wärme-Matte besorgen: Wärme-Matten gibt es im Gartenfachhandel oder online. Achtet darauf, dass die Matte die richtige Größe für eure Anzuchtbehälter oder Töpfe hat.
2. Wärme-Matte platzieren: Legt die Wärme-Matte unter eure Anzuchtbehälter oder Töpfe.
3. Temperatur einstellen: Stellt die Temperatur der Wärme-Matte auf ca. 25-28 Grad Celsius ein.
4. Regelmäßig kontrollieren: Kontrolliert regelmäßig die Temperatur und die Feuchtigkeit der Erde.
Turbo-Trick 6: Die richtige Beleuchtung
Gerade in der dunklen Jahreszeit oder wenn eure Chili-Pflanzen nicht genügend Sonnenlicht bekommen, kann eine zusätzliche Beleuchtung helfen, das Wachstum zu beschleunigen.
So geht’s:
1. Pflanzenlampe besorgen: Es gibt spezielle Pflanzenlampen, die das richtige Lichtspektrum für das Wachstum von Pflanzen liefern.
2. Lampe installieren: Installiert die Lampe über euren Chili-Pflanzen. Achtet darauf, dass der Abstand zwischen Lampe und Pflanzen nicht zu gering ist, um Verbrennungen zu vermeiden.
3. Beleuchtungsdauer einstellen: Beleuchtet eure Chili-Pflanzen ca. 12-16 Stunden pro Tag.
Turbo-Trick 7: Die richtige Düngung
Neben den Hausmitteln wie Eierschalen und Kaffeesatz ist eine regelmäßige Düngung mit einem speziellen Chili-Dünger wichtig, um die Pflanzen mit allen notwendigen Nährstoffen zu versorgen.
So geht’s:
1. Chili-Dünger besorgen: Es gibt spezielle Chili-Dünger im Gartenfachhandel oder online. Achtet darauf, dass der Dünger die richtige Zusammensetzung für Chili-Pflanzen hat.
2. Dünger anwenden: Wendet den Dünger gemäß den Anweisungen auf der Verpackung an.
3. Regelmäßig düngen: Düngt eure Chili-Pflanzen regelmäßig, aber nicht zu viel. Eine Überdüngung kann schädlich sein.
Turbo-Trick 8: Geduld!
Auch wenn wir alles tun, um das Wachstum zu beschleunigen, brauchen Chili-Pflanzen Zeit. Habt Geduld und gebt ihnen die nötige Pflege. Dann werdet ihr mit einer reichen Ernte belohnt!
Wichtiger Hinweis: Jede Chili-Pflanze ist anders. Beobachtet eure Pflanzen genau und passt die Turbo-Methoden entsprechend an. Was bei der einen Pflanze gut funktioniert, kann bei der anderen weniger effektiv sein.
Ich hoffe, diese Tipps helfen euch dabei,
Conclusion
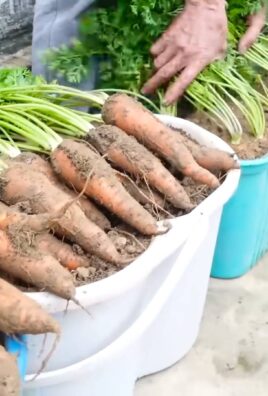
So, there you have it! This simple, yet incredibly effective DIY trick to grow chili peppers faster is a game-changer for any chili enthusiast, from the novice gardener to the seasoned pro. We’ve walked you through the process, highlighting the science behind why it works and providing you with a clear, step-by-step guide to implement it in your own garden.
But why is this a must-try? Because time is precious, and waiting months for your chili peppers to mature can be agonizing, especially when you’re dreaming of spicy salsas, fiery sauces, and flavorful dishes. This method significantly reduces the waiting time, allowing you to harvest your peppers sooner and enjoy the fruits (or rather, the chilies!) of your labor much quicker. Imagine the satisfaction of picking your own homegrown chili peppers, knowing you accelerated their growth with your own two hands.
Beyond the speed factor, this DIY trick also promotes healthier and more robust plants. By providing the seedlings with the optimal conditions for early growth, you’re setting them up for success throughout their entire life cycle. Stronger roots, thicker stems, and more vibrant foliage are just some of the benefits you can expect.
Don’t be afraid to experiment with variations! While we’ve focused on a specific method, feel free to adapt it to your own needs and preferences. For example, you could try using different types of rooting hormones or adjusting the humidity levels based on your local climate. You could also experiment with different types of containers or growing mediums to see what works best for your chili pepper varieties.
Consider using a heat mat underneath your propagation tray to further accelerate germination and early growth, especially if you live in a cooler climate. Just be sure to monitor the temperature closely to avoid overheating the seedlings. Another variation involves using a diluted seaweed extract as a foliar spray to provide your seedlings with essential micronutrients and further boost their growth.
Remember, gardening is all about learning and adapting. Don’t be discouraged if your first attempt isn’t perfect. The key is to keep experimenting, keep learning, and keep growing!
We are confident that this DIY trick will revolutionize your chili pepper growing experience. It’s easy, affordable, and incredibly effective. So, what are you waiting for? Give it a try and see for yourself the amazing results you can achieve.
We’d love to hear about your experiences! Share your results, tips, and variations in the comments below. Let’s create a community of chili pepper enthusiasts who are passionate about growing their own spicy goodness. Tell us what chili pepper varieties you are growing and if you have tried this method before. What were the results? What did you do differently? Your feedback will help others learn and improve their own chili pepper growing techniques. Let’s all learn together and grow chili peppers faster!
FAQ
What exactly does this DIY trick entail?
This DIY trick focuses on creating an optimal environment for chili pepper seedlings during their early stages of growth. It typically involves using a combination of techniques, such as providing consistent warmth, humidity, and light, to accelerate germination and promote rapid root development. The specific methods can vary, but the underlying principle is to mimic the ideal conditions that chili peppers need to thrive.
Why is it important to accelerate the growth of chili peppers?
Chili peppers can be slow to germinate and mature, especially in cooler climates. Accelerating their growth allows you to harvest your peppers sooner, extending your growing season and providing you with a more consistent supply of fresh chilies. It also gives your plants a head start, making them more resilient to pests and diseases.
What are the key factors that contribute to faster chili pepper growth?
Several factors play a crucial role in accelerating chili pepper growth:
* **Warmth:** Chili peppers thrive in warm temperatures, ideally between 75°F and 85°F (24°C and 29°C). Providing consistent warmth during germination and early growth is essential.
* **Humidity:** High humidity levels help to keep the seedlings hydrated and prevent them from drying out. This is particularly important during the first few weeks of growth.
* **Light:** Adequate light is necessary for photosynthesis, the process by which plants convert sunlight into energy. Provide your seedlings with at least 12-14 hours of light per day.
* **Nutrients:** Supplying your seedlings with essential nutrients, either through the growing medium or through foliar feeding, can promote faster growth and stronger roots.
* **Proper Watering:** Overwatering can lead to root rot, while underwatering can stunt growth. Maintain a consistent level of moisture in the soil, allowing it to dry slightly between waterings.
What are some common mistakes to avoid when trying to accelerate chili pepper growth?
* **Overwatering:** This is one of the most common mistakes. Soggy soil can suffocate the roots and lead to fungal diseases.
* **Underwatering:** Allowing the soil to dry out completely can stress the seedlings and slow their growth.
* **Insufficient Light:** If your seedlings don’t receive enough light, they will become leggy and weak.
* **Over-Fertilizing:** Too much fertilizer can burn the roots and damage the seedlings.
* **Ignoring Temperature:** Failing to provide adequate warmth can significantly slow down germination and growth.
Can I use this DIY trick for all types of chili peppers?
Yes, this DIY trick can be used for all types of chili peppers, from mild bell peppers to scorching hot habaneros. However, some varieties may respond better than others. Experiment with different techniques and adjust them based on the specific needs of your chili pepper variety.
How long does it take to see results with this DIY trick?
You should start to see results within a few days of implementing this DIY trick. Germination rates should improve, and seedlings should exhibit faster growth and stronger root development. The exact time frame will depend on the specific techniques you use and the environmental conditions in your area.
What if I don’t have access to specialized equipment like heat mats or grow lights?
While specialized equipment can be helpful, it’s not always necessary. You can still achieve good results by using alternative methods. For example, you can place your seedlings near a warm window or use a regular incandescent light bulb to provide supplemental light. You can also create a makeshift humidity dome by covering your seedlings with a plastic bag or container.
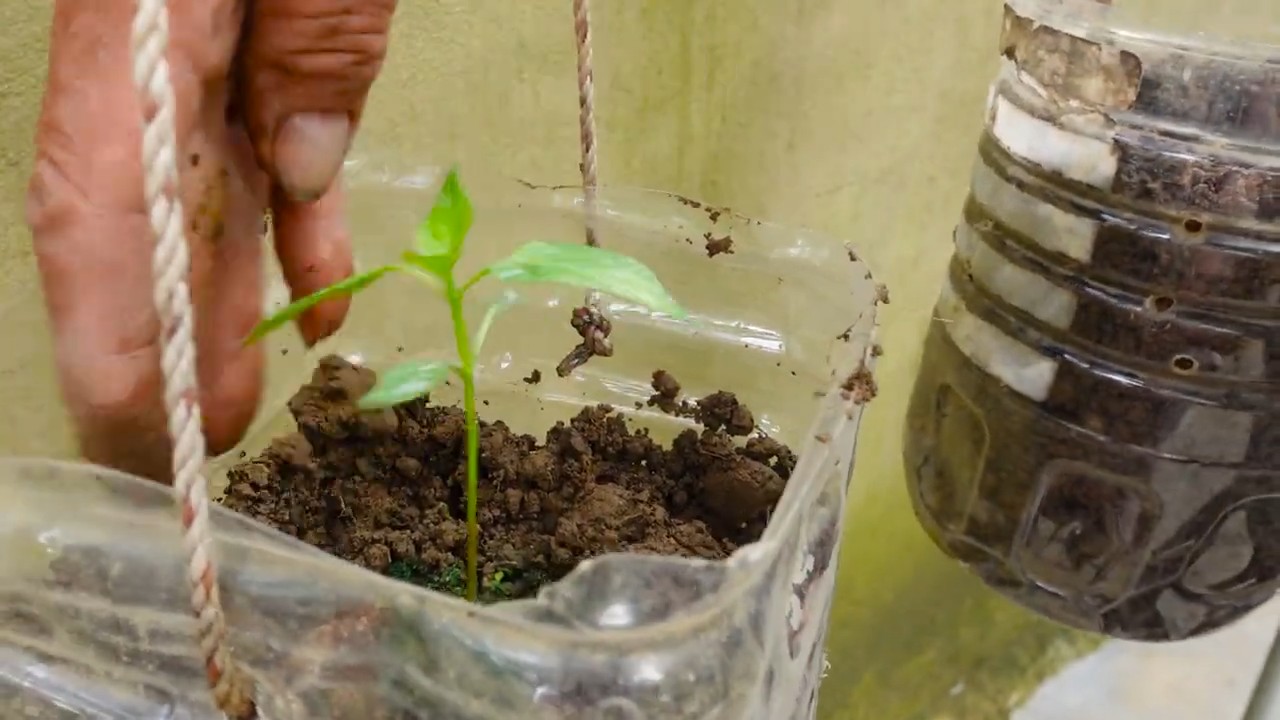
How do I know when my chili pepper seedlings are ready to be transplanted?
Your chili pepper seedlings are ready to be transplanted when they have developed several sets of true leaves and their root systems are well-established. This typically takes about 4-6 weeks after germination. Gently remove a seedling from its container and inspect the roots. If they are circling the bottom of the container, it’s time to transplant.
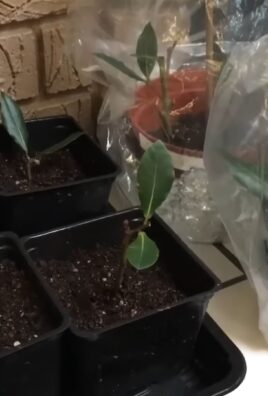
What kind of soil should I use for transplanting my chili pepper seedlings?
Use a well-draining potting mix that is rich in organic matter. You can also amend the soil with compost or other organic fertilizers to provide your plants with essential nutrients.
How can I protect my chili pepper plants from pests and diseases?
Regularly inspect your plants for signs of pests or diseases. Use organic pest control methods, such as insecticidal soap or neem oil, to control infestations. Ensure that your plants have good air circulation and avoid overwatering to prevent fungal diseases.
Where can I find more information about growing chili peppers?
There are many resources available online and in libraries that can provide you with more information about growing chili peppers. Look for websites, books, and articles that are specific to your region and climate. You can also consult with local gardening experts or join a gardening club.

Leave a Comment