

Grow Celery Fast Backyard: Imagine biting into a crisp, refreshing stalk of celery, bursting with flavor, knowing you nurtured it from seed to table, right in your own backyard! For generations, home gardeners have cherished the satisfaction of cultivating their own food, connecting with nature, and enjoying the unparalleled taste of homegrown produce. From ancient Roman gardens to the victory gardens of World War II, growing your own food has always been a symbol of self-sufficiency and connection to the earth.
But let’s be honest, sometimes getting those crunchy stalks of celery to thrive can feel like a real challenge. That’s where these DIY tricks and hacks come in! If you’re tired of waiting ages for your celery to mature or struggling with common gardening woes, this article is your secret weapon. I’m going to share some simple, yet effective, techniques to help you grow celery fast backyard, even if you’re a beginner.
Why is this so important? Because fresh, homegrown celery is not only delicious, but it’s also packed with nutrients and free from harmful pesticides. Plus, there’s nothing quite like the pride of harvesting your own bounty. So, get ready to roll up your sleeves, grab your gardening gloves, and discover the secrets to a thriving celery patch right outside your door!
Grow Celery From Kitchen Scraps: A Beginner’s Guide
Hey there, fellow gardening enthusiasts! Ever wondered if you could magically regrow your favorite veggies from kitchen scraps? Well, guess what? You absolutely can! And today, I’m going to walk you through the super simple process of regrowing celery from that leftover base you usually toss in the compost. It’s a fun, eco-friendly project that’s perfect for beginners and seasoned gardeners alike. Let’s get started!
What You’ll Need
Before we dive in, let’s gather our supplies. You probably have most of these things already!
* Celery Base: The star of the show! Choose a healthy-looking base with about 2-3 inches of stalk attached. Make sure it’s firm and not too wilted.
* Shallow Dish or Bowl: Something to hold water and cradle our celery base.
* Water: Tap water is perfectly fine.
* Spray Bottle (Optional): For misting the celery.
* Potting Soil: A good quality potting mix will give your celery a great start.
* Pot: Choose a pot that’s at least 6-8 inches in diameter to give the celery roots plenty of room to grow.
* Sunny Spot: Celery loves sunshine!
Phase 1: Regrowing in Water
This is where the magic begins! We’re going to coax those roots back to life.
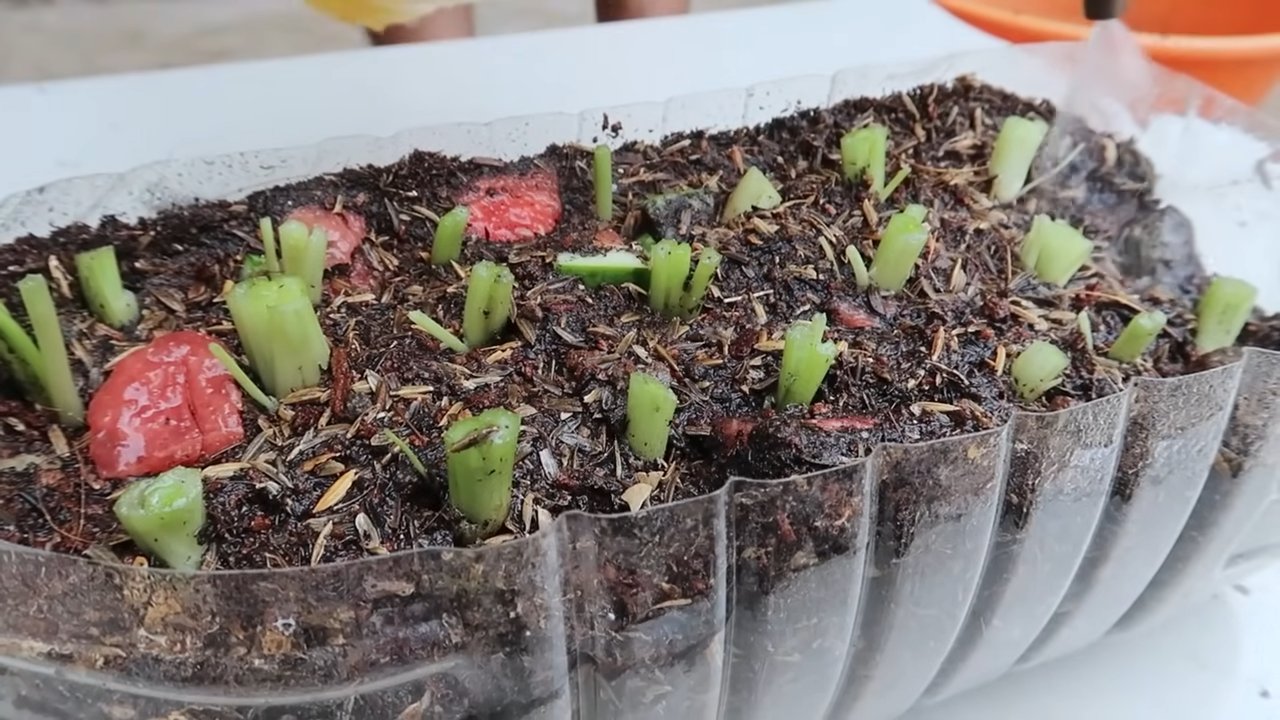
1. Prepare the Celery Base: Gently trim the bottom of the celery base, removing any brown or mushy bits. This will help encourage fresh root growth. I usually cut off about half an inch.
2. Place in Water: Put the celery base in your shallow dish or bowl. Add enough water to cover the bottom inch or so of the base. You don’t want to submerge the entire thing, just the bottom where the roots will emerge.
3. Find a Sunny Spot: Place the dish in a bright, sunny location. A windowsill is perfect! Celery needs plenty of light to thrive.
4. Change the Water Regularly: This is crucial! Change the water every 1-2 days to prevent bacteria growth and keep the water fresh. I usually do it every morning.
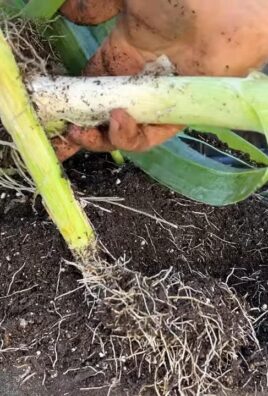
5. Observe and Wait: Now comes the patience part. After a few days (usually 5-7), you should start to see small roots emerging from the bottom of the celery base. You might also notice new green growth sprouting from the top. This is a great sign!
6. Misting (Optional): If you live in a dry climate, you can mist the celery leaves with water every day or two to keep them hydrated.
Phase 2: Planting in Soil
Once your celery has developed a good root system, it’s time to move it to soil.
1. Prepare the Pot: Fill your pot with potting soil, leaving about an inch of space at the top. Gently pat the soil down to remove any air pockets.
2. Create a Hole: Make a hole in the center of the soil that’s large enough to accommodate the celery base and its roots.
3. Transplant the Celery: Carefully remove the celery base from the water. Gently separate the roots if they’ve become tangled. Place the celery base in the hole, making sure the top of the base is level with the soil surface.
4. Fill in the Soil: Gently fill in the hole around the celery base with soil. Pat the soil down lightly to secure the celery in place.
5. Water Thoroughly: Water the soil thoroughly until water drains out of the bottom of the pot. This will help settle the soil and hydrate the roots.
6. Return to a Sunny Spot: Place the pot back in your sunny location.
Phase 3: Ongoing Care
Now that your celery is planted, it’s time to provide it with the care it needs to grow big and strong.
1. Watering: Celery needs consistent moisture. Water your celery regularly, keeping the soil moist but not soggy. Check the soil moisture by sticking your finger about an inch into the soil. If it feels dry, it’s time to water. I usually water mine every other day, but this will depend on your climate and the pot size.
2. Fertilizing (Optional): To give your celery an extra boost, you can fertilize it every few weeks with a balanced liquid fertilizer. Follow the instructions on the fertilizer packaging.
3. Sunlight: Celery loves sunshine! Make sure your plant gets at least 6 hours of sunlight per day. If you don’t have a sunny spot indoors, you can use a grow light.
4. Pest Control: Keep an eye out for pests like aphids or slugs. If you spot any, you can try spraying them with insecticidal soap or hand-picking them off the plant.
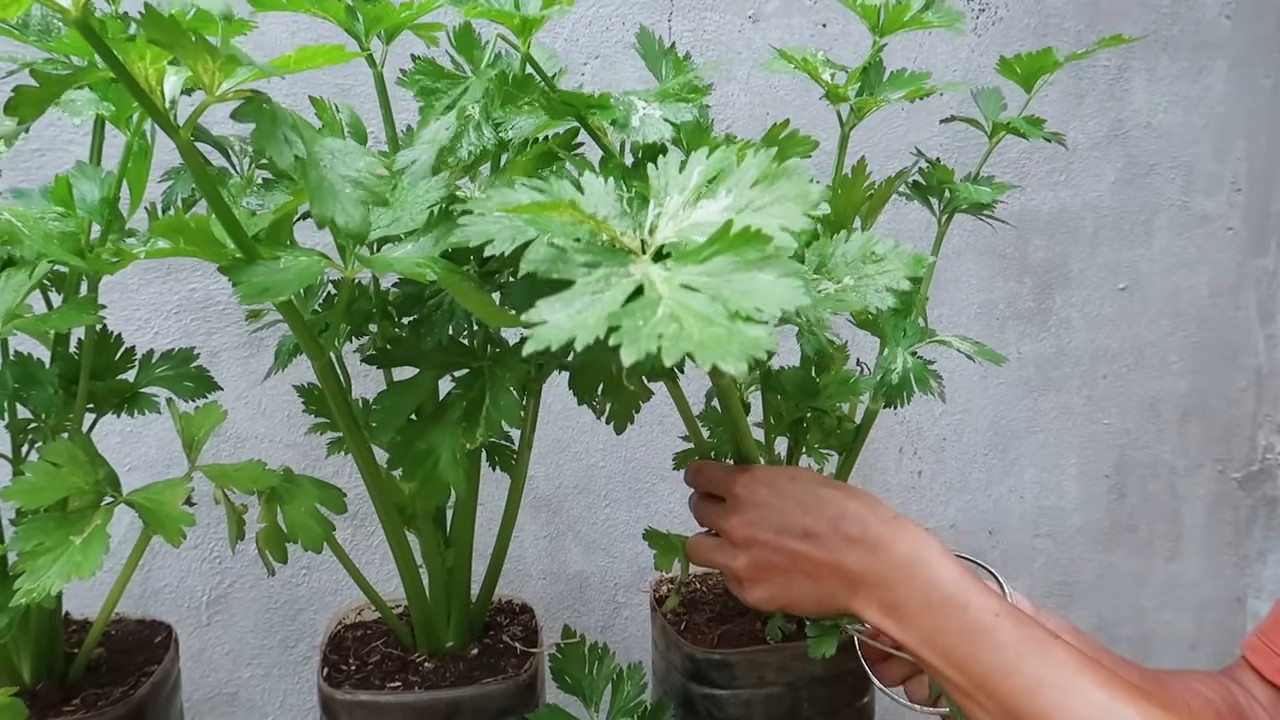
5. Harvesting: You can start harvesting your celery when the stalks are about 6-8 inches long. Simply cut off the stalks you need, leaving the rest of the plant to continue growing. You can harvest individual stalks as needed, or harvest the entire plant at once.
6. Successive Planting: To ensure a continuous supply of celery, you can start new celery bases every few weeks. This way, you’ll always have fresh celery on hand!
Troubleshooting
Sometimes, things don’t go exactly as planned. Here are a few common problems you might encounter and how to fix them:
* Celery Base Rotting: This is usually caused by bacteria growth in the water. Make sure you’re changing the water regularly (every 1-2 days). You can also try adding a drop of hydrogen peroxide to the water to help kill bacteria.
* Slow Growth: This could be due to a lack of sunlight, water, or nutrients. Make sure your celery is getting enough sunlight, water, and fertilizer.
* Yellowing Leaves: This could be a sign of overwatering or underwatering. Check the soil moisture and adjust your watering accordingly. It could also be a sign of nutrient deficiency, so try fertilizing your plant.
* Pests: Keep an eye out for pests and treat them promptly.
Tips for Success
Here are a few extra tips to help you grow the best celery possible:
* Choose a Healthy Celery Base: Start with a firm, healthy-looking celery base. Avoid bases that are wilted, brown, or mushy.
* Use Good Quality Potting Soil: A good quality potting mix will provide your celery with the nutrients it needs to thrive.
* Provide Plenty of Sunlight: Celery needs at least 6 hours of sunlight per day.
* Water Regularly: Celery needs consistent moisture.
* Be Patient: It takes time for celery to grow. Don’t get discouraged if you don’t see results immediately.
Why Regrow Celery?
Regrowing celery from kitchen scraps is a fantastic way to:
* Reduce Food Waste: Instead of throwing away the celery base, you can give it a new life.
* Save Money: You can grow your own celery for free!
* Enjoy Fresh, Homegrown Produce: There’s nothing quite like the taste of fresh, homegrown celery.
* Learn About Gardening: It’s a fun and educational project for kids and adults alike.
* Be More Sustainable: Regrowing your own food is a great way to reduce your environmental impact.
So, there you have it! A complete guide to regrowing celery from kitchen scraps. It’s a simple, rewarding project that anyone can do. Give it a try, and you’ll be amazed at how easy it is to grow your own fresh celery. Happy gardening!
Conclusion
So, there you have it! Growing celery fast in your backyard is not only achievable but also incredibly rewarding. Forget those bland, store-bought stalks that lack flavor and crunch. With this simple DIY trick, you can cultivate vibrant, crisp celery right outside your door, bursting with freshness and packed with nutrients.
This method isn’t just about speed; it’s about control. You have complete oversight over the growing process, ensuring your celery is free from harmful pesticides and chemicals. You know exactly what goes into nurturing your plants, resulting in a healthier and more flavorful harvest for you and your family.
Think of the possibilities! Imagine adding freshly harvested celery to your soups, salads, and smoothies. Picture yourself enjoying a crunchy celery stick with your favorite dip, knowing it came straight from your garden. The taste difference is truly remarkable.
But the benefits extend beyond just taste and health. Gardening is a therapeutic activity that connects you with nature and reduces stress. Watching your celery plants thrive is a deeply satisfying experience. Plus, you’ll be contributing to a more sustainable lifestyle by reducing your reliance on commercially grown produce.
Don’t be afraid to experiment with variations! Try different celery varieties to discover your favorite flavor profile. Some gardeners prefer the sweeter taste of Pascal celery, while others enjoy the more robust flavor of Utah celery. You can also adjust the amount of sunlight and water to see how it affects the growth rate and texture of your celery.
Consider companion planting to further enhance your celery’s growth. Onions, garlic, and marigolds are excellent companions that can help deter pests and improve soil health.
And if you’re feeling adventurous, why not try growing celery from scraps? Simply place the base of a celery stalk in a shallow dish of water and watch it sprout new roots. Once the roots are established, you can transplant it into your garden and continue the growing process.
This DIY trick for growing celery fast is a game-changer for any home gardener, regardless of experience level. It’s easy, affordable, and yields impressive results. So, what are you waiting for? Get your hands dirty and start growing your own delicious celery today!
We encourage you to try this method and share your experiences with us. Let us know what worked best for you, what challenges you encountered, and any tips you have for fellow gardeners. Together, we can create a community of thriving celery growers! Share your photos and stories on social media using #HomegrownCelery and inspire others to embrace the joy of gardening. We can’t wait to see your amazing celery harvests!
Frequently Asked Questions (FAQ)
Q: How long does it actually take to grow celery fast using this method?
A: While “fast” is relative, you can typically harvest celery within 80-100 days using this method, which is significantly faster than traditional growing methods that can take up to 130 days. The exact time will depend on factors like your climate, soil quality, and the specific celery variety you’re growing. Consistent watering and fertilization are key to accelerating growth.
Q: What kind of soil is best for growing celery?
A: Celery thrives in rich, well-drained soil that is high in organic matter. Amend your soil with compost or well-rotted manure before planting to improve its fertility and drainage. A slightly acidic soil pH of 6.0 to 6.8 is ideal. If your soil is heavy clay, consider adding sand or perlite to improve drainage.
Q: How much sunlight does celery need?
A: Celery needs at least six hours of sunlight per day to grow properly. However, in hotter climates, it can benefit from some afternoon shade to prevent the leaves from scorching. Monitor your plants closely and adjust their location if necessary.
Q: How often should I water my celery plants?
A: Celery needs consistent moisture to thrive. Water deeply and regularly, especially during hot, dry weather. Aim to keep the soil consistently moist but not waterlogged. A good rule of thumb is to water when the top inch of soil feels dry to the touch. Mulching around the plants can help retain moisture and suppress weeds.
Q: What kind of fertilizer should I use for celery?
A: Celery is a heavy feeder and benefits from regular fertilization. Use a balanced fertilizer with equal amounts of nitrogen, phosphorus, and potassium. You can also supplement with a liquid fertilizer every two to three weeks. Avoid over-fertilizing, as this can lead to leggy growth and bitter-tasting celery.
Q: What are some common pests and diseases that affect celery?
A: Celery can be susceptible to pests like aphids, celery leaf tiers, and carrot rust flies. Diseases like early blight, late blight, and pink rot can also be a problem. Regularly inspect your plants for signs of pests or diseases and take action promptly. Organic pest control methods, such as insecticidal soap or neem oil, can be effective. Ensure good air circulation around your plants to prevent fungal diseases.
Q: Can I grow celery in containers?
A: Yes, you can grow celery in containers, but you’ll need to choose a large container that is at least 12 inches deep and wide. Use a high-quality potting mix and ensure the container has good drainage. Container-grown celery may require more frequent watering and fertilization than celery grown in the ground.
Q: How do I know when my celery is ready to harvest?
A: Celery is ready to harvest when the stalks are at least 6-8 inches long and the outer stalks are thick and crisp. You can harvest individual stalks as needed or harvest the entire plant at once. To harvest, simply cut the stalks at the base of the plant with a sharp knife.
Q: Can I store celery after harvesting?
A: Yes, you can store celery in the refrigerator for up to two weeks. Wrap the celery stalks in a damp paper towel and place them in a plastic bag or container. You can also freeze celery for longer storage. Blanch the celery stalks in boiling water for two minutes, then transfer them to an ice bath to stop the cooking process. Drain the celery and freeze it in a single layer on a baking sheet. Once frozen, transfer the celery to a freezer bag or container.
Q: What are some creative ways to use homegrown celery?
A: Beyond the usual snacks and soups, get creative! Use celery in stir-fries, salads, or as a base for creamy dips. Celery juice is a popular and healthy beverage. You can also pickle celery for a tangy condiment. Don’t forget the celery leaves! They can be used as a flavorful herb in soups, stews, and salads. The possibilities are endless!


Leave a Comment