

Grow Celery Easily
Have you ever dreamt of enjoying crisp, homegrown celery straight from your garden? I know I have! For years, I thought growing celery was a complicated, almost impossible task, reserved for experienced gardeners. But let me tell you, after discovering a few simple Grow Celery Easily tricks, I’ve been harvesting delicious stalks all season long. This article is packed with easy-to-follow, do-it-yourself (DIY) techniques that will transform your gardening experience and show you just how simple it can be to grow celery easily.
The history of celery cultivation is fascinating! Dating back to ancient times, celery was initially valued more for its medicinal properties than its culinary uses. Over centuries, selective breeding transformed this humble plant into the crunchy, flavorful vegetable we know and love today. But despite its long history, many people still believe growing celery at home is too difficult. That’s where this article comes in!
Why You Need These DIY Celery Growing Hacks
Growing your own celery offers numerous benefits. Firstly, you’ll have access to fresh, pesticide-free celery whenever you want. Imagine the satisfaction of biting into a stalk you nurtured from seed! Secondly, homegrown celery often boasts a superior flavor compared to store-bought varieties. And finally, it’s incredibly rewarding to watch something you planted grow and thrive. These Grow Celery Easily techniques will empower you to experience the joy of home gardening, even if you’re a complete beginner.
So, grab your gardening gloves, and let’s get started on this exciting journey of growing your own delicious celery! Prepare to be amazed by how easy it can be.
Growing Celery from Scraps: A Foolproof Guide
I love celery, but buying it regularly can get expensive. So, I decided to try growing my own from scraps – and it’s easier than you think! This guide will walk you through the entire process, from prepping your celery base to harvesting your delicious, homegrown stalks.
Phase 1: Preparing Your Celery Base
- Choose the right celery: Select a bunch of celery with firm, healthy stalks and a base that’s still relatively intact. Avoid any that are wilting or showing signs of rot.
- Cut the base: Carefully cut off about an inch or two of the base of the celery, ensuring that you include the leafy green part. This is where the roots will develop.
- Remove the outer leaves: Gently remove any wilted or damaged outer leaves. This helps prevent rot and allows for better root growth. You can save these outer leaves for a quick snack or to add to your soup!
- Rinse thoroughly: Rinse the celery base under cool running water to remove any dirt or debris. Make sure to get into all the crevices.
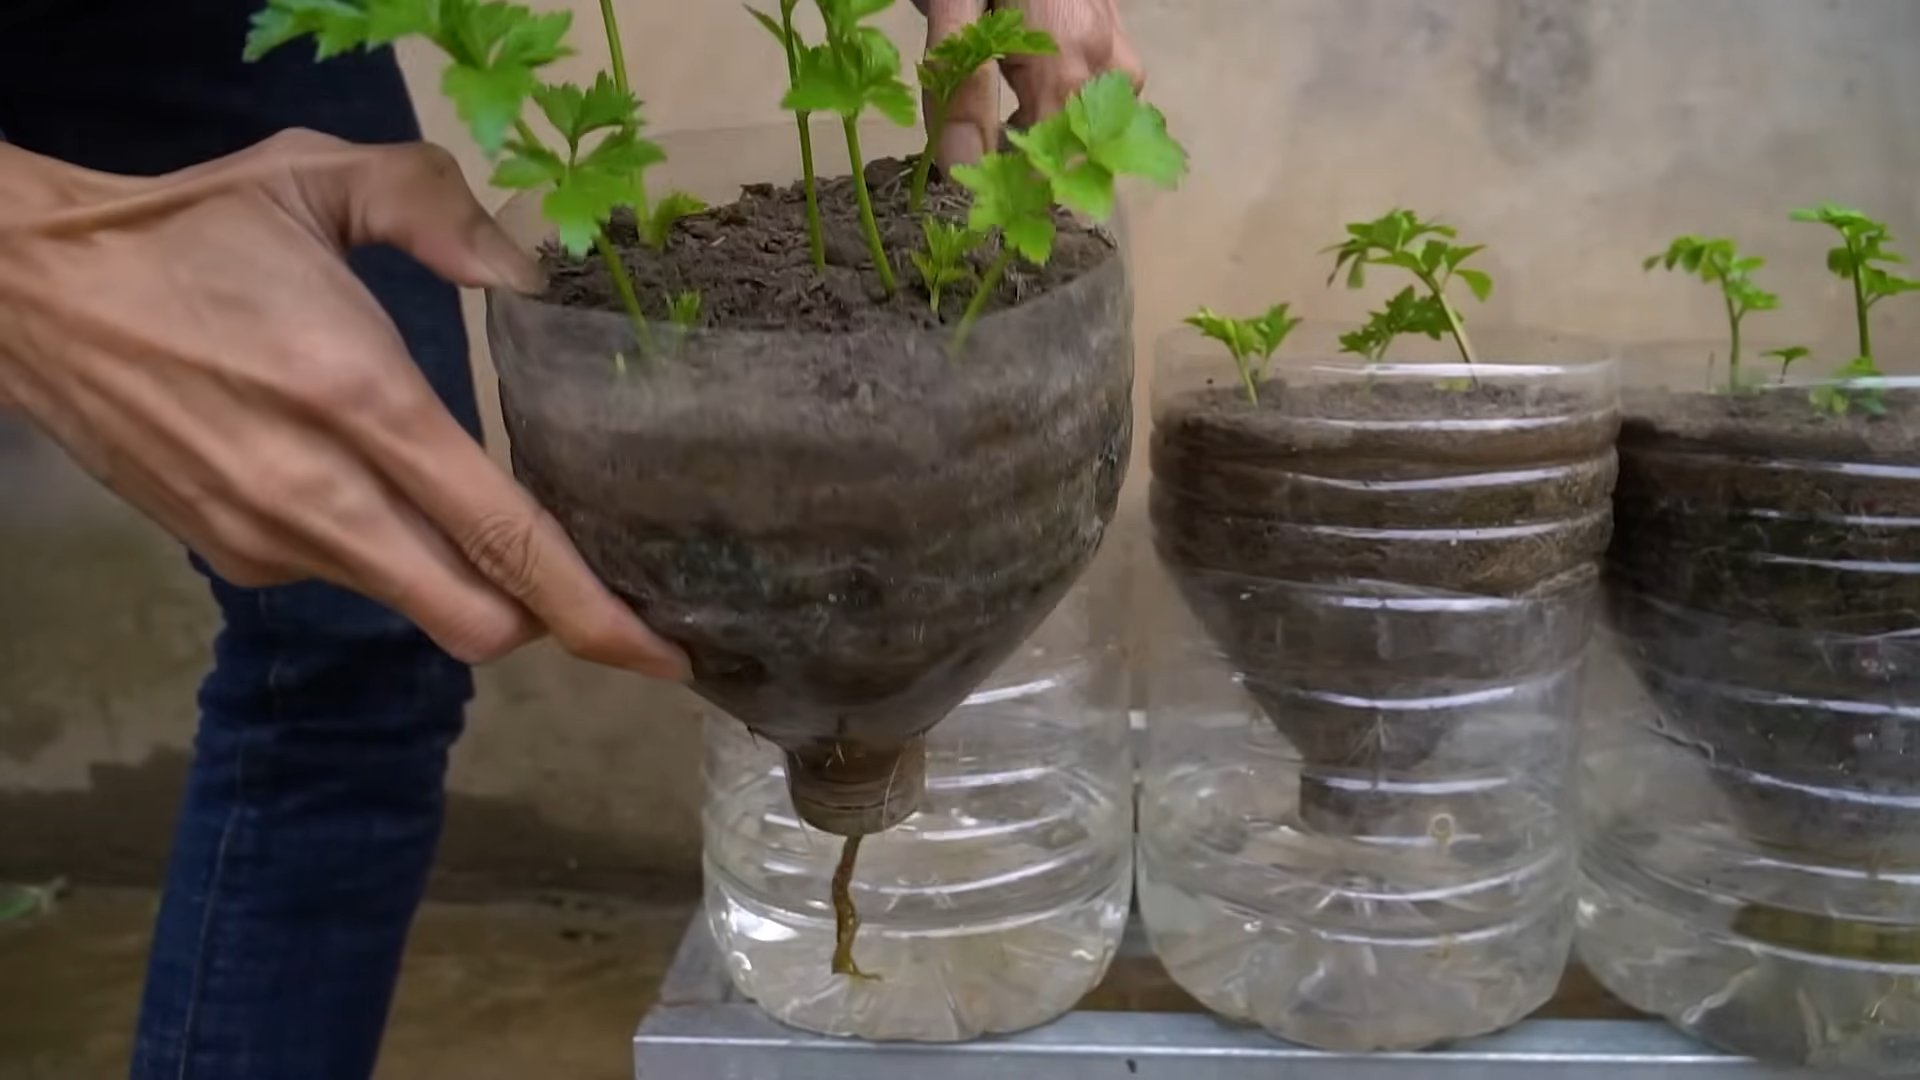
Phase 2: Planting Your Celery
- Choose your container: You can use a variety of containers, from a small shallow dish to a larger pot. Make sure it has drainage holes to prevent waterlogging. A wide, shallow dish works best because celery roots spread out.
- Select your growing medium: I prefer using a well-draining potting mix. Avoid using garden soil directly, as it can be too heavy and compact for celery. A mix specifically designed for herbs or vegetables is ideal.
- Fill the container: Fill your chosen container with the potting mix, leaving about half an inch of space at the top. Gently moisten the soil with water, ensuring it’s evenly damp but not soggy.
- Plant the celery base: Place the prepared celery base in the center of the container, ensuring that the cut end is in contact with the soil. You don’t need to bury it deeply; just enough to keep it stable.
- Add water: Gently water the soil around the celery base, making sure not to overwater. The soil should be consistently moist, but not waterlogged. Overwatering can lead to root rot.
- Provide sunlight: Place the container in a sunny location. Celery needs at least six hours of sunlight per day to thrive. A south-facing windowsill is usually ideal, but you can also use grow lights if natural light is limited.
Phase 3: Caring for Your Celery
- Maintain consistent moisture: Check the soil moisture daily. Water when the top inch of soil feels dry to the touch. Avoid letting the soil completely dry out, as this can stress the plant.
- Avoid overwatering: Overwatering is a common mistake. It can lead to root rot and other problems. Always check the soil moisture before watering.
- Fertilize occasionally: You can use a diluted liquid fertilizer every couple of weeks to promote healthy growth. Follow the instructions on the fertilizer packaging carefully.
- Monitor for pests: Keep an eye out for pests like aphids or slugs. If you notice any pests, treat them promptly using an appropriate organic pesticide or by hand-picking them off.
- Thin out the inner leaves: As the celery grows, you may need to thin out some of the inner leaves to allow for better air circulation and prevent overcrowding. This also helps to prevent diseases.
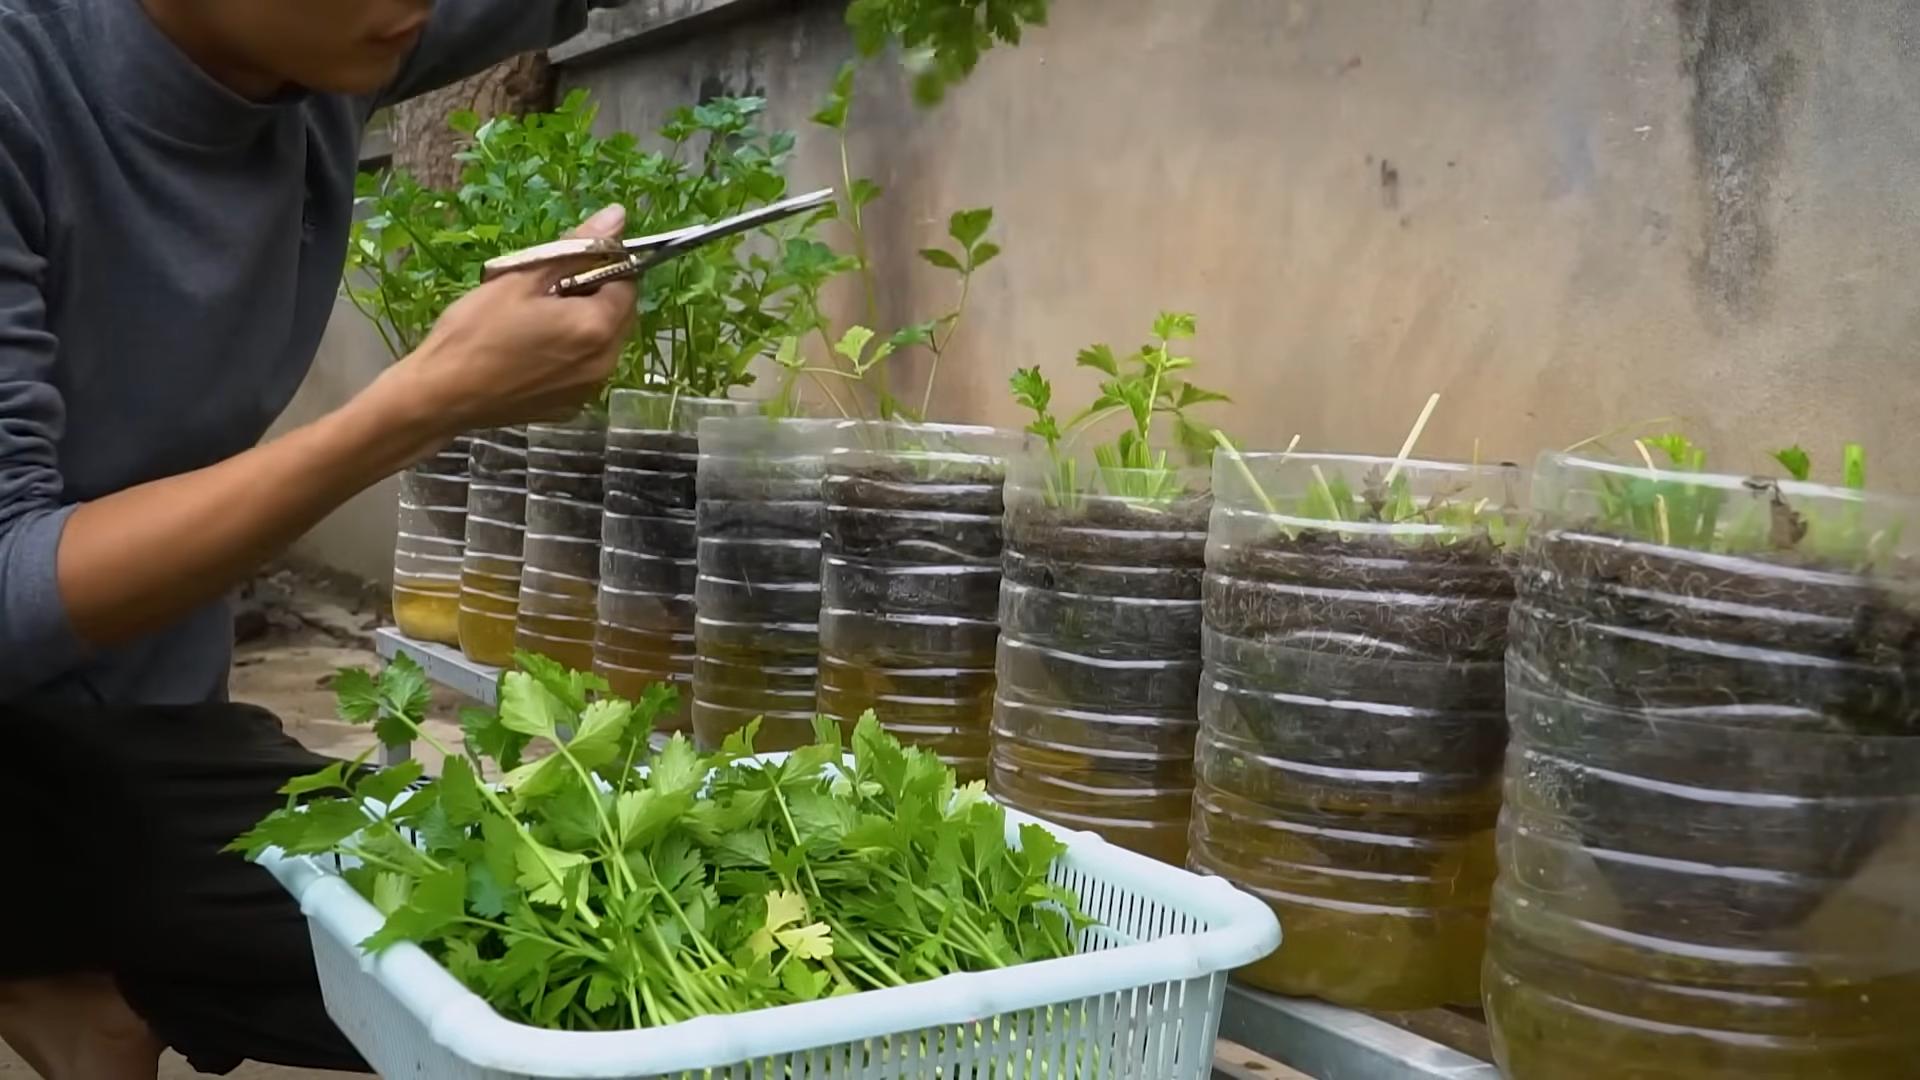
Phase 4: Harvesting Your Celery
- Check for maturity: Celery typically takes 70-80 days to mature, but you can start harvesting individual stalks much sooner. The stalks will be ready when they are firm and crisp.
- Harvesting individual stalks: You can harvest individual stalks as needed by gently pulling them from the base. This allows the remaining stalks to continue growing.
- Harvesting the entire plant: Once the entire plant has matured, you can harvest the entire thing by carefully pulling it up from the roots. This is usually done after about 70-80 days.
- Enjoy your homegrown celery: Use your freshly harvested celery in your favorite recipes! It’s so much more flavorful than store-bought celery.
Troubleshooting Tips
- Yellowing leaves: This could indicate overwatering or underwatering. Adjust your watering schedule accordingly.
- Wilting leaves: This could be due to lack of water, too much sun, or pests. Check the soil moisture, move the plant to a shadier location if needed, and inspect for pests.
- Slow growth: This could be due to lack of nutrients. Try fertilizing the plant with a balanced liquid fertilizer.
- Root rot: This is often caused by overwatering. Ensure your container has good drainage and avoid overwatering.
Important Note:
Remember to always use clean tools and containers to prevent the spread of diseases. Happy gardening!
Conclusion
So there you have it! A simple, effective, and surprisingly satisfying method for growing your own celery. This DIY trick isn’t just about saving money on grocery bills; it’s about experiencing the wonder of nurturing life from a humble stalk. Growing celery easily from scraps is a rewarding project that connects you to your food in a tangible way. The process is incredibly straightforward, requiring minimal effort and resources, yet yielding delicious, fresh celery that surpasses anything you can buy in the store. The vibrant green stalks, crisp and bursting with flavor, are a testament to the power of simple gardening techniques. You’ll be amazed at how quickly your celery grows, and the sense of accomplishment is truly unparalleled. This method is perfect for beginners and seasoned gardeners alike, offering a fantastic entry point into the world of homegrown produce. It’s a sustainable practice that reduces food waste and allows you to enjoy the freshest, most flavorful celery imaginable. Don’t just take our word for it – try it yourself and experience the joy of harvesting your own homegrown celery!
Beyond the basic method, there are numerous ways to customize your celery-growing experience. Experiment with different types of celery – some varieties are known for their particularly robust flavor or larger stalks. You can also try growing your celery in different containers, from simple jars to more elaborate hydroponic systems. Consider adding a nutrient-rich soil amendment to boost growth and enhance the flavor of your celery. For those with limited space, consider growing your celery vertically using a hanging planter or a tiered system. The possibilities are endless! Share your results and variations with us – we’d love to see your thriving celery plants and hear about your experiences. Post your pictures on social media using #GrowCeleryEasily and tag us! Let’s build a community of home celery growers and inspire others to embark on this rewarding journey.
Remember, the key to success lies in providing consistent moisture and ample sunlight. With a little patience and care, you’ll be enjoying the fruits (or rather, the stalks!) of your labor in no time. This simple DIY trick is a gateway to a more sustainable and fulfilling lifestyle, connecting you to the natural world and providing you with fresh, healthy food. So, what are you waiting for? Grab a celery stalk, follow our easy steps, and start growing your own delicious celery today! You won’t regret it.
Frequently Asked Questions
What type of celery is best for this method?
While most celery varieties will work, those with thicker, heartier stalks tend to perform best. Look for varieties specifically labeled for home gardening. Avoid celery that is already showing signs of wilting or damage.
How much sunlight does my celery need?
Celery thrives in bright, indirect sunlight. Aim for at least 6-8 hours of sunlight per day. Avoid placing your celery in direct, intense sunlight, which can scorch the leaves. A south-facing window (in the Northern Hemisphere) is often ideal, but you can supplement with grow lights if necessary.
What kind of container should I use?
Almost any container will work, as long as it has adequate drainage. A simple glass jar, a small pot with drainage holes, or even a repurposed plastic container will do. The size of the container will determine the size of your celery plant. Larger containers allow for larger celery stalks.
What if my celery starts to wilt?
Wilting is often a sign of insufficient water. Check the soil moisture regularly and water thoroughly when the top inch of soil feels dry. Ensure that your container has adequate drainage to prevent root rot. If wilting persists, consider moving your celery to a shadier location.
How long does it take to grow celery from scraps?
It typically takes several weeks to several months to grow a mature celery plant from scraps, depending on the variety and growing conditions. You should start to see noticeable growth within a few weeks, but harvesting mature stalks may take longer.
Can I use tap water to water my celery?
Tap water is generally fine, but if your tap water is heavily chlorinated or contains high levels of minerals, consider using filtered water or letting tap water sit out overnight to allow chlorine to dissipate. This will help prevent potential damage to your celery plant.
What should I do if my celery leaves turn yellow?
Yellowing leaves can indicate several issues, including overwatering, underwatering, nutrient deficiencies, or pest infestations. Check the soil moisture, adjust your watering schedule accordingly, and inspect your plant for any signs of pests. Consider adding a balanced liquid fertilizer if you suspect nutrient deficiency.
Can I grow celery outdoors?
Yes, you can grow celery outdoors, but it’s important to choose a location with partial shade and well-drained soil. Protect your celery from extreme temperatures and strong winds. Outdoors, you’ll need to be more vigilant about watering, especially during hot and dry periods.
What are some common pests that affect celery?
Aphids, spider mites, and slugs are common pests that can affect celery. Regularly inspect your plants for signs of infestation and take appropriate action, such as using insecticidal soap or introducing beneficial insects.
Can I replant the celery after harvesting some stalks?
Yes, you can often harvest some of the outer stalks and leave the inner stalks to continue growing. This will allow you to enjoy a continuous harvest from your celery plant. However, eventually the plant will reach its maturity and will need to be replaced.
Leave a Comment