

Grow Celery at Home? Absolutely! Imagine stepping into your backyard and snipping fresh, crisp celery stalks for your salads, soups, or even just a healthy snack. No more wilted, store-bought celery – just vibrant, homegrown goodness. I’m excited to share some simple yet effective DIY tricks that will transform your garden (or even your balcony!) into a celery-growing haven.
Celery, while a common sight in our grocery stores, has a fascinating history. Originating in the Mediterranean region, it was initially valued for its medicinal properties before becoming a culinary staple. Ancient Greeks and Romans used it for flavoring and even as a symbol of victory! Now, you can connect with that history by cultivating your own celery.
Why bother with the effort? Well, for starters, growing your own celery allows you to control the quality and freshness. You’ll know exactly what’s going into your food, avoiding potentially harmful pesticides. Plus, it’s incredibly rewarding to nurture a plant from seed (or even a leftover stalk!) to a thriving vegetable. In this article, I’ll walk you through easy-to-follow steps and share some clever hacks to ensure you grow celery at home successfully, even if you’re a complete beginner. Let’s get started and unlock the secrets to a bountiful celery harvest!
Grow Your Own Celery: A Beginner’s Guide
Hey there, fellow gardening enthusiasts! Ever thought about growing your own celery? It’s surprisingly easy and rewarding, and nothing beats the fresh, crisp taste of homegrown celery. I’m going to walk you through the whole process, from starting with scraps to harvesting your very own stalks. Let’s get started!
Starting Celery from Scraps: The Regrowth Method
This is my favorite part because it feels like magic! You’re essentially giving a discarded celery base a new lease on life.
* What You’ll Need:
* A celery base (the part you usually chop off and discard).
* A shallow dish or glass.
* Water.
* Potting soil.
* A pot or container (at least 6 inches deep).
* Why This Works: Celery is a biennial plant, meaning it has a two-year life cycle. Even after you’ve eaten the stalks, the base still contains the potential for regrowth. By providing it with water and sunlight, you can encourage it to sprout new roots and leaves.
Step-by-Step Instructions:
1. Prepare the Celery Base: After you’ve used the celery stalks, don’t toss the base! Cut it about 2 inches from the bottom. Make sure the base is firm and healthy-looking, without any signs of rot or mold.
2. Place in Water: Put the celery base in a shallow dish or glass filled with about an inch of water. The cut side should be facing up, and the bottom should be submerged.
3. Find a Sunny Spot: Place the dish in a bright, sunny location, like a windowsill. Celery needs plenty of light to grow.
4. Change the Water Regularly: Change the water every day or two to keep it fresh and prevent bacteria growth. This is super important!
5. Watch for Roots and New Growth: Within a few days, you should start to see small roots emerging from the bottom of the base. You’ll also notice new, tiny leaves sprouting from the center. This is so exciting!
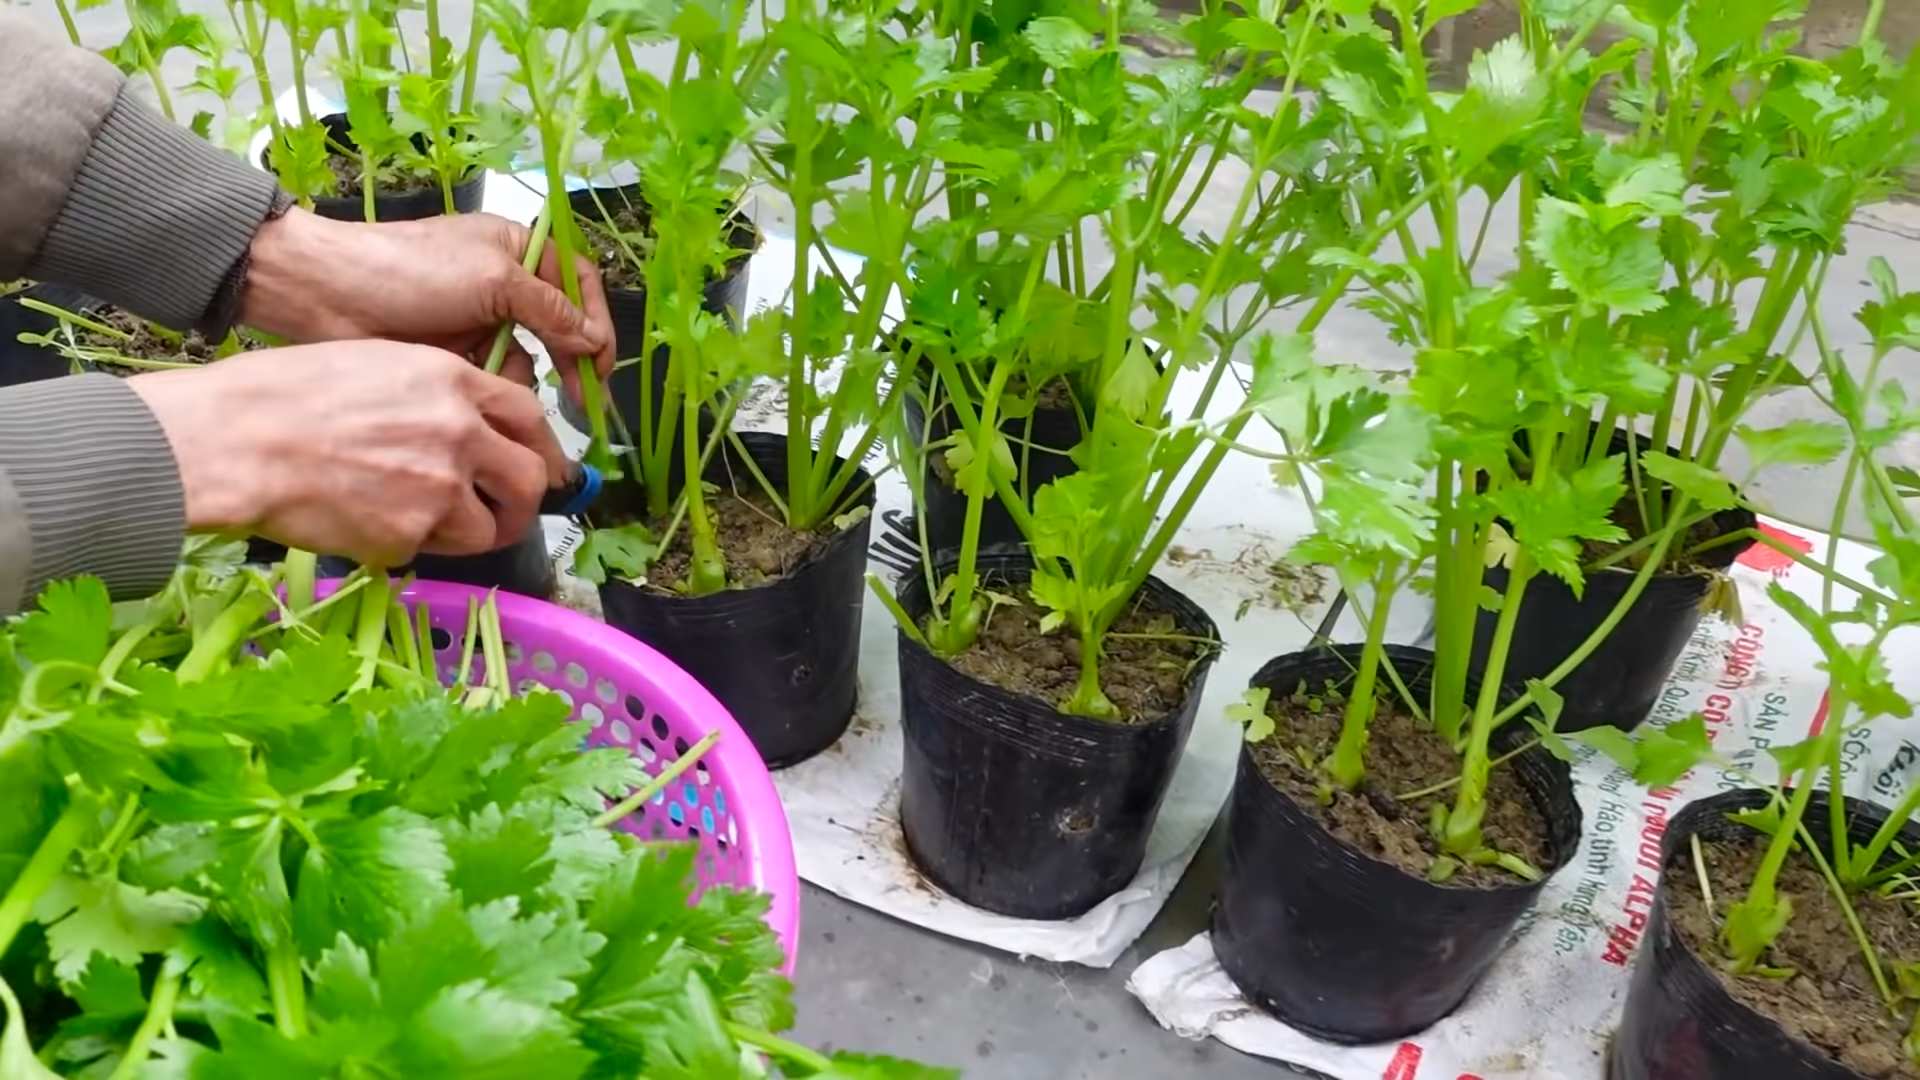
6. Transplant to Soil: Once the roots are about an inch long and the new leaves are well-established (usually after a week or two), it’s time to transplant the celery base to a pot with soil.
7. Prepare the Pot: Fill a pot or container with good-quality potting soil. Make a hole in the center large enough to accommodate the celery base.
8. Plant the Celery: Carefully remove the celery base from the water and place it in the hole. Gently cover the roots with soil, leaving the top of the base exposed.
9. Water Thoroughly: Water the soil thoroughly after planting.
10. Continue to Care for Your Celery: Keep the soil moist but not soggy. Water regularly, especially during hot weather. Provide plenty of sunlight.
Growing Celery from Seed: A More Traditional Approach
While starting from scraps is fun, growing from seed gives you more control over the variety of celery you grow.
* What You’ll Need:
* Celery seeds.
* Seed starting trays or small pots.
* Seed starting mix.
* A spray bottle.
* A grow light (optional, but recommended).
* Potting soil.
* A larger pot or garden bed.
* Why This Works: Celery seeds are tiny and require specific conditions to germinate. Starting them indoors allows you to control the temperature, moisture, and light, giving them the best chance of success.
Step-by-Step Instructions:
1. Start Seeds Indoors (8-10 Weeks Before Last Frost): Celery has a long growing season, so it’s essential to start the seeds indoors well before the last expected frost.
2. Prepare Seed Starting Trays: Fill seed starting trays or small pots with seed starting mix. Moisten the mix with a spray bottle.
3. Sow the Seeds: Celery seeds are very small, so sprinkle them lightly on the surface of the soil. Don’t bury them too deep, as they need light to germinate.
4. Mist with Water: Gently mist the seeds with water to ensure they are moist.
5. Provide Light: Place the seed starting trays under a grow light or in a very sunny location. Celery seeds need light to germinate.
6. Maintain Moisture: Keep the soil consistently moist but not soggy. Use a spray bottle to mist the soil regularly.
7. Maintain Warmth: Celery seeds germinate best at temperatures between 70-75°F (21-24°C). Use a heat mat if necessary.
8. Be Patient: Celery seeds can take up to 2-3 weeks to germinate, so be patient!
9. Thin Seedlings: Once the seedlings have developed a few sets of true leaves, thin them out, leaving only the strongest seedling in each cell or pot.
10. Harden Off Seedlings: Before transplanting the seedlings outdoors, you need to harden them off. This means gradually exposing them to outdoor conditions over a period of a
Hey there, fellow gardening enthusiasts! Ever thought about growing your own celery? It’s surprisingly easy and rewarding, and nothing beats the fresh, crisp taste of homegrown celery. I’m going to walk you through the whole process, from starting with scraps to harvesting your very own stalks. Let’s get started!
Starting Celery from Scraps: The Regrowth Method
This is my favorite part because it feels like magic! You’re essentially giving a discarded celery base a new lease on life.
* What You’ll Need:
* A celery base (the part you usually chop off and discard).
* A shallow dish or glass.
* Water.
* Potting soil.
* A pot or container (at least 6 inches deep).
* Why This Works: Celery is a biennial plant, meaning it has a two-year life cycle. Even after you’ve eaten the stalks, the base still contains the potential for regrowth. By providing it with water and sunlight, you can encourage it to sprout new roots and leaves.
Step-by-Step Instructions:
1. Prepare the Celery Base: After you’ve used the celery stalks, don’t toss the base! Cut it about 2 inches from the bottom. Make sure the base is firm and healthy-looking, without any signs of rot or mold.
2. Place in Water: Put the celery base in a shallow dish or glass filled with about an inch of water. The cut side should be facing up, and the bottom should be submerged.
3. Find a Sunny Spot: Place the dish in a bright, sunny location, like a windowsill. Celery needs plenty of light to grow.
4. Change the Water Regularly: Change the water every day or two to keep it fresh and prevent bacteria growth. This is super important!
5. Watch for Roots and New Growth: Within a few days, you should start to see small roots emerging from the bottom of the base. You’ll also notice new, tiny leaves sprouting from the center. This is so exciting!
6. Transplant to Soil: Once the roots are about an inch long and the new leaves are well-established (usually after a week or two), it’s time to transplant the celery base to a pot with soil.
7. Prepare the Pot: Fill a pot or container with good-quality potting soil. Make a hole in the center large enough to accommodate the celery base.
8. Plant the Celery: Carefully remove the celery base from the water and place it in the hole. Gently cover the roots with soil, leaving the top of the base exposed.
9. Water Thoroughly: Water the soil thoroughly after planting.
10. Continue to Care for Your Celery: Keep the soil moist but not soggy. Water regularly, especially during hot weather. Provide plenty of sunlight.
Growing Celery from Seed: A More Traditional Approach
While starting from scraps is fun, growing from seed gives you more control over the variety of celery you grow.
* What You’ll Need:
* Celery seeds.
* Seed starting trays or small pots.
* Seed starting mix.
* A spray bottle.
* A grow light (optional, but recommended).
* Potting soil.
* A larger pot or garden bed.
* Why This Works: Celery seeds are tiny and require specific conditions to germinate. Starting them indoors allows you to control the temperature, moisture, and light, giving them the best chance of success.
Step-by-Step Instructions:
1. Start Seeds Indoors (8-10 Weeks Before Last Frost): Celery has a long growing season, so it’s essential to start the seeds indoors well before the last expected frost.
2. Prepare Seed Starting Trays: Fill seed starting trays or small pots with seed starting mix. Moisten the mix with a spray bottle.
3. Sow the Seeds: Celery seeds are very small, so sprinkle them lightly on the surface of the soil. Don’t bury them too deep, as they need light to germinate.
4. Mist with Water: Gently mist the seeds with water to ensure they are moist.
5. Provide Light: Place the seed starting trays under a grow light or in a very sunny location. Celery seeds need light to germinate.
6. Maintain Moisture: Keep the soil consistently moist but not soggy. Use a spray bottle to mist the soil regularly.
7. Maintain Warmth: Celery seeds germinate best at temperatures between 70-75°F (21-24°C). Use a heat mat if necessary.
8. Be Patient: Celery seeds can take up to 2-3 weeks to germinate, so be patient!
9. Thin Seedlings: Once the seedlings have developed a few sets of true leaves, thin them out, leaving only the strongest seedling in each cell or pot.
10. Harden Off Seedlings: Before transplanting the seedlings outdoors, you need to harden them off. This means gradually exposing them to outdoor conditions over a period of a week or two. Start by placing them outside for a few hours each day, gradually increasing the amount of time they spend outdoors.
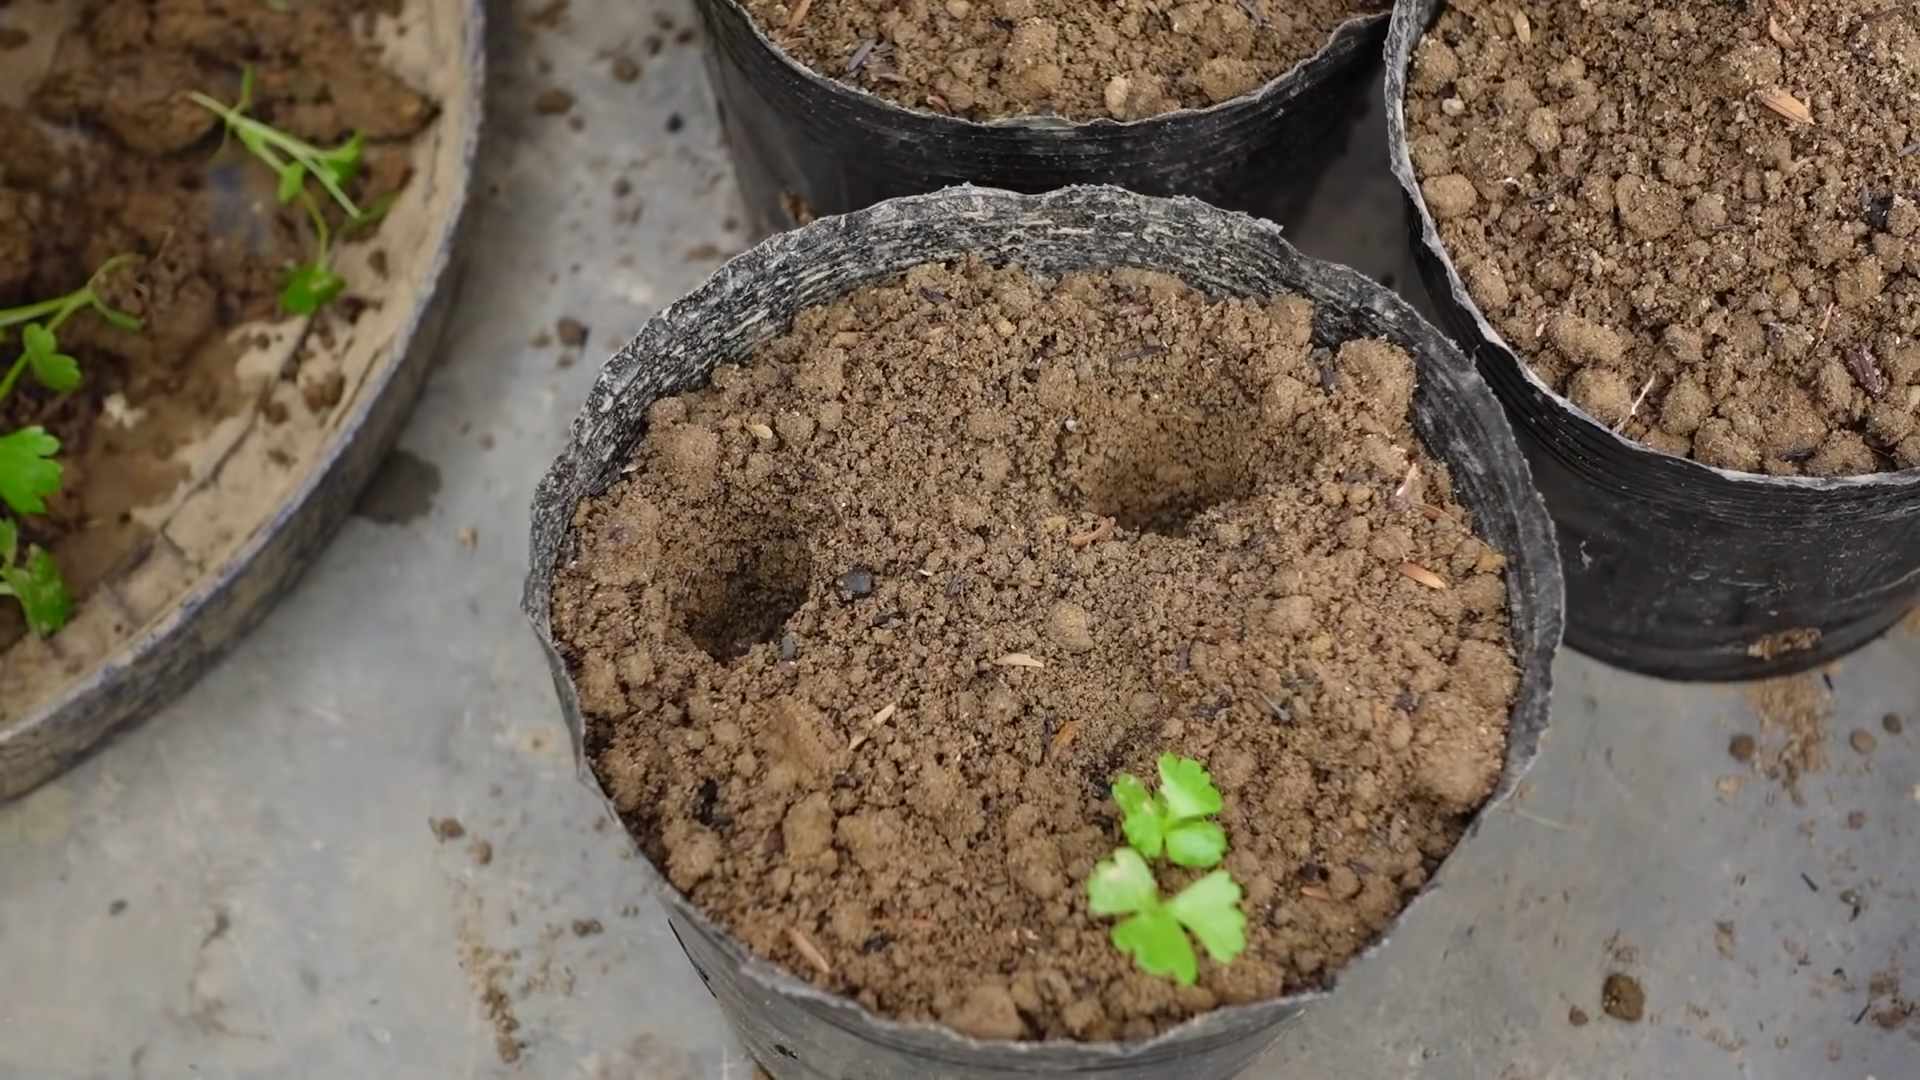
11. Transplant to Garden or Larger Pots: Once the seedlings are hardened off and the danger of frost has passed, it’s time to transplant them to your garden or larger pots.
12. Prepare the Soil: Celery prefers rich, well-drained soil. Amend your soil with compost or other organic matter before planting.
13. Plant the Seedlings: Space the seedlings about 6-8 inches apart in rows that are 12-18 inches apart.
14. Water Thoroughly: Water the seedlings thoroughly after planting.
15. Mulch: Apply a layer of mulch around the plants to help retain moisture and suppress weeds.
Caring for Your Celery Plants: The Key to a Bountiful Harvest
Whether you started from scraps or seeds, proper care is essential for healthy celery plants.
* Sunlight: Celery needs at least 6 hours of sunlight per day.
* Watering: Celery needs consistent moisture. Water regularly, especially during hot weather. The soil should be moist but not soggy.
* Fertilizing: Celery is a heavy feeder, so fertilize regularly with a balanced fertilizer. Follow the instructions on the fertilizer package. I like to use a liquid seaweed fertilizer every few weeks.
* Weeding: Keep the area around your celery plants free of weeds. Weeds compete with celery for nutrients and water.
* Blanching (Optional): Blanching celery stalks makes them more tender and less bitter. About two weeks before harvest, you can blanch the stalks by wrapping them with newspaper or cardboard. Leave the tops of the leaves exposed.
Pest and Disease Control: Keeping Your Celery Healthy
Celery can be susceptible to certain pests and diseases. Here’s what to watch out for:
* Pests:
* Aphids: These tiny insects suck sap from plants. Control them with insecticidal soap or neem oil.
* Celery Leaf Tier: These caterpillars feed on celery leaves. Handpick them or use Bacillus thuringiensis (Bt).
* Slugs and Snails: These pests can damage celery leaves. Use slug bait or handpick them at night.
* Diseases:
* Early Blight: This fungal disease causes brown spots on leaves. Prevent it by providing good air circulation and avoiding overhead watering. Treat with a fungicide if necessary.
* Late Blight: Similar to early blight, but more severe. Prevent it by providing good air circulation and avoiding overhead watering. Treat with a fungicide if necessary.
* Pink Rot: This fungal disease causes a pinkish rot on the stalks. Prevent it by providing good air circulation and avoiding overhead watering.
Harvesting Your Celery: The Moment You’ve Been Waiting For!
You can harvest celery when the stalks are at least 6 inches long.
* How to Harvest:
* Use a sharp knife to cut the stalks at the base of the plant.
* You can harvest individual stalks as needed, or harvest the entire plant at once.
* Storing Celery:
* Store celery in the refrigerator in a plastic bag or container.
* Celery will last for several weeks in the refrigerator.
Enjoying Your Homegrown Celery: Delicious and Nutritious!
Now that you’ve harvested your own celery, it’s time to enjoy it! Celery is a versatile vegetable that can be used in a variety of dishes.
* Snacks:
Conclusion
So, there you have it! Growing celery at home from kitchen scraps is not just a fun experiment; it’s a genuinely rewarding way to reduce food waste, enjoy fresh, flavorful celery, and connect with the natural world, even in a small way. We’ve walked you through the simple steps, from prepping your celery base to nurturing its growth in water and finally transplanting it to soil.
Why is this DIY trick a must-try? Because it’s incredibly easy, cost-effective, and sustainable. Instead of tossing those celery ends into the compost bin (though composting is great too!), you’re giving them a second life, transforming them into a source of crisp, refreshing stalks. Imagine the satisfaction of harvesting celery you’ve personally nurtured from what would have otherwise been garbage! Plus, home-grown celery often boasts a more intense flavor than store-bought varieties, adding a delightful zest to your soups, salads, and snacks.
But don’t stop there! Experiment with different varieties of celery. While the method remains the same, you might find that certain types thrive better in your specific climate or soil conditions. Consider trying heirloom varieties for unique flavors and textures. You can also play around with the growing environment. While celery prefers full sun, providing some afternoon shade in hotter climates can prevent bolting (premature flowering).
And speaking of variations, think about companion planting. Celery is known to benefit from being planted near onions, garlic, and tomatoes, as these plants can help deter pests. Conversely, avoid planting it near parsley, as they compete for the same nutrients.
The key to success with this DIY celery project is patience and observation. Pay attention to your celery’s needs – water it regularly, provide adequate sunlight, and protect it from extreme temperatures. Don’t be discouraged if your first attempt isn’t perfect. Gardening is a learning process, and every experience, even the less successful ones, provides valuable insights.
We wholeheartedly encourage you to give this DIY **grow celery at home** trick a try. It’s a fantastic project for beginners and experienced gardeners alike. It’s a great way to involve children in the gardening process, teaching them about plant life cycles and the importance of sustainability.
Once you’ve harvested your first batch of home-grown celery, we’d love to hear about your experience! Share your photos, tips, and challenges in the comments below. Let’s create a community of celery-growing enthusiasts and inspire others to embrace this simple yet impactful way to reduce waste and enjoy fresh, delicious produce. What are you waiting for? Get those celery ends soaking and start your own home-grown celery adventure today!
Frequently Asked Questions (FAQs)
1. How long does it take to grow celery from a base?
The time it takes to grow celery from a base varies depending on several factors, including the variety of celery, the growing conditions (sunlight, temperature, water), and the quality of the initial celery base. Generally, you can expect to see new growth within a week or two of placing the celery base in water. After about 2-3 weeks in water, the roots should be well-developed enough to transplant the celery to soil. From transplanting to harvest, it can take anywhere from 75 to 100 days for the celery to reach maturity. So, from start to finish, you’re looking at approximately 3-4 months to harvest your own home-grown celery. Remember, patience is key!
2. What kind of water should I use to regrow celery?
Tap water is generally fine for regrowing celery, but it’s best to let it sit out for 24 hours to allow chlorine to dissipate, as chlorine can sometimes inhibit root growth. Filtered water or rainwater are also excellent options. Avoid using distilled water, as it lacks the minerals that plants need to thrive. Change the water every 1-2 days to prevent bacterial growth and keep the celery base healthy.
3. How much sunlight does celery need?
Celery thrives in full sun, which means it needs at least 6-8 hours of direct sunlight per day. However, in hotter climates, providing some afternoon shade can prevent the celery from bolting (premature flowering), which can make the stalks bitter. If you’re growing celery indoors, place it near a sunny window or use a grow light to supplement natural sunlight.
4. What kind of soil is best for growing celery?
Celery prefers rich, well-draining soil that is high in organic matter. Amend your garden soil with compost or well-rotted manure before planting to improve its fertility and drainage. A slightly acidic to neutral soil pH (around 6.0 to 7.0) is ideal. You can also grow celery in containers using a high-quality potting mix.
5. How often should I water my celery plants?
Celery needs consistent moisture to thrive. Water your celery plants deeply whenever the top inch of soil feels dry to the touch. Avoid letting the soil dry out completely, as this can stress the plants and affect their growth. During hot, dry weather, you may need to water your celery plants more frequently. Mulching around the plants can help retain moisture in the soil.
6. What are some common problems when growing celery, and how can I fix them?
Some common problems when growing celery include:
* **Bolting (premature flowering):** This can be caused by stress, such as extreme temperatures or inconsistent watering. Provide consistent moisture and protect your plants from extreme heat.
* **Pests:** Celery can be susceptible to pests such as aphids, celery leaf tiers, and carrot rust flies. Inspect your plants regularly and treat infestations with insecticidal soap or neem oil.
* **Diseases:** Celery can also be affected by diseases such as early blight and late blight. Ensure good air circulation around your plants and avoid overhead watering to prevent fungal diseases. Use a fungicide if necessary.
* **Yellowing leaves:** This can be caused by nutrient deficiencies, overwatering, or underwatering. Ensure your plants are getting adequate nutrients and adjust your watering schedule accordingly.
7. Can I grow celery indoors year-round?
Yes, you can grow celery indoors year-round, provided you can provide adequate sunlight or use a grow light. Choose a container that is at least 8-10 inches deep and wide to accommodate the celery’s root system. Use a high-quality potting mix and water regularly. Fertilize your celery plants every 2-3 weeks with a balanced liquid fertilizer.
8. How do I know when my celery is ready to harvest?
Celery is ready to harvest when the stalks are at least 6-8 inches long and the plant has formed a tight bunch. You can harvest individual stalks as needed or harvest the entire plant at once. To harvest, simply cut the stalks at the base of the plant with a sharp knife.
9. Can I eat the leaves of the celery I grow?
Yes, the leaves of celery are perfectly edible and can be used in salads, soups, and other dishes. They have a stronger flavor than the stalks, so use them sparingly.
10. Is growing celery at home organic?
Growing celery at home can be organic if you use organic soil, fertilizers, and pest control methods. Avoid using synthetic pesticides and herbicides.


Leave a Comment