

Grow Cauliflower at Home and unlock the secrets to fresh, delicious, and homegrown goodness! Have you ever dreamed of strolling into your backyard and harvesting a perfectly formed cauliflower head, ready to be transformed into a creamy soup, a vibrant side dish, or even a trendy cauliflower pizza crust? Well, dream no more! This DIY guide is your passport to cultivating this versatile vegetable right in your own garden.
Cauliflower, a member of the Brassica family, boasts a rich history dating back to ancient times. Originating in the Mediterranean region, it was a prized vegetable in Roman cuisine and gradually spread throughout Europe and beyond. For centuries, growing cauliflower was considered a skill reserved for experienced gardeners, but fear not! I’m here to demystify the process and share simple, effective tricks that will empower even the most novice gardener to succeed.
In today’s world, where we’re increasingly conscious of where our food comes from, growing your own cauliflower offers numerous benefits. Not only will you enjoy the unparalleled taste of freshly harvested produce, but you’ll also reduce your carbon footprint, save money, and gain a deeper connection to nature. Plus, let’s be honest, there’s something incredibly satisfying about nurturing a plant from seed to table! So, if you’re ready to embark on a rewarding gardening adventure and grow cauliflower at home with confidence, keep reading! I’m about to share some game-changing DIY tricks and hacks that will have you harvesting beautiful cauliflower heads in no time.

Blumenkohl Anbauen: Dein DIY-Guide für den eigenen Garten
Hey Gartenfreunde! Habt ihr euch jemals gefragt, wie ihr diesen knackigen, vielseitigen Blumenkohl direkt in eurem Garten anbauen könnt? Ich zeige euch, wie es geht! Es ist einfacher als ihr denkt und das Ergebnis ist einfach unschlagbar – frischer, selbst angebauter Blumenkohl, der besser schmeckt als alles, was ihr im Supermarkt findet. Los geht’s!
Was du brauchst: Die Vorbereitung
Bevor wir loslegen, brauchen wir natürlich die richtigen Materialien und das nötige Wissen. Hier ist eine Liste, damit ihr nichts vergesst:
* Blumenkohlsamen oder Jungpflanzen: Ich empfehle, mit Jungpflanzen zu beginnen, besonders wenn ihr Anfänger seid. Es spart Zeit und Mühe.
* Gute Erde: Blumenkohl liebt nährstoffreiche, gut durchlässige Erde. Kompost ist euer bester Freund!
* Gartenwerkzeug: Spaten, Harke, Gießkanne – das übliche Equipment.
* Dünger: Ein ausgewogener Dünger hilft den Pflanzen beim Wachsen.
* Mulch: Stroh oder Holzhackschnitzel halten die Feuchtigkeit im Boden und unterdrücken Unkraut.
* Schutz vor Schädlingen: Netze oder Vlies schützen eure Pflanzen vor hungrigen Insekten.
* Geduld: Blumenkohl braucht Zeit, um zu wachsen. Aber es lohnt sich!
Schritt-für-Schritt-Anleitung: Blumenkohl pflanzen
Jetzt geht’s ans Eingemachte! Hier ist eine detaillierte Anleitung, wie ihr euren Blumenkohl erfolgreich pflanzt:
1. Den richtigen Zeitpunkt wählen: Blumenkohl ist ein kühles Gemüse. Das bedeutet, dass die beste Zeit zum Pflanzen entweder im Frühjahr (März/April) oder im Spätsommer (Juli/August) ist. Achtet darauf, dass die Temperaturen nicht zu hoch sind, da dies zu Problemen führen kann.
2. Den Boden vorbereiten: Blumenkohl braucht einen gut vorbereiteten Boden. Lockert den Boden mit einem Spaten auf und entfernt Steine und Unkraut. Mischt reichlich Kompost unter, um den Boden mit Nährstoffen anzureichern. Der pH-Wert sollte idealerweise zwischen 6,0 und 7,0 liegen.
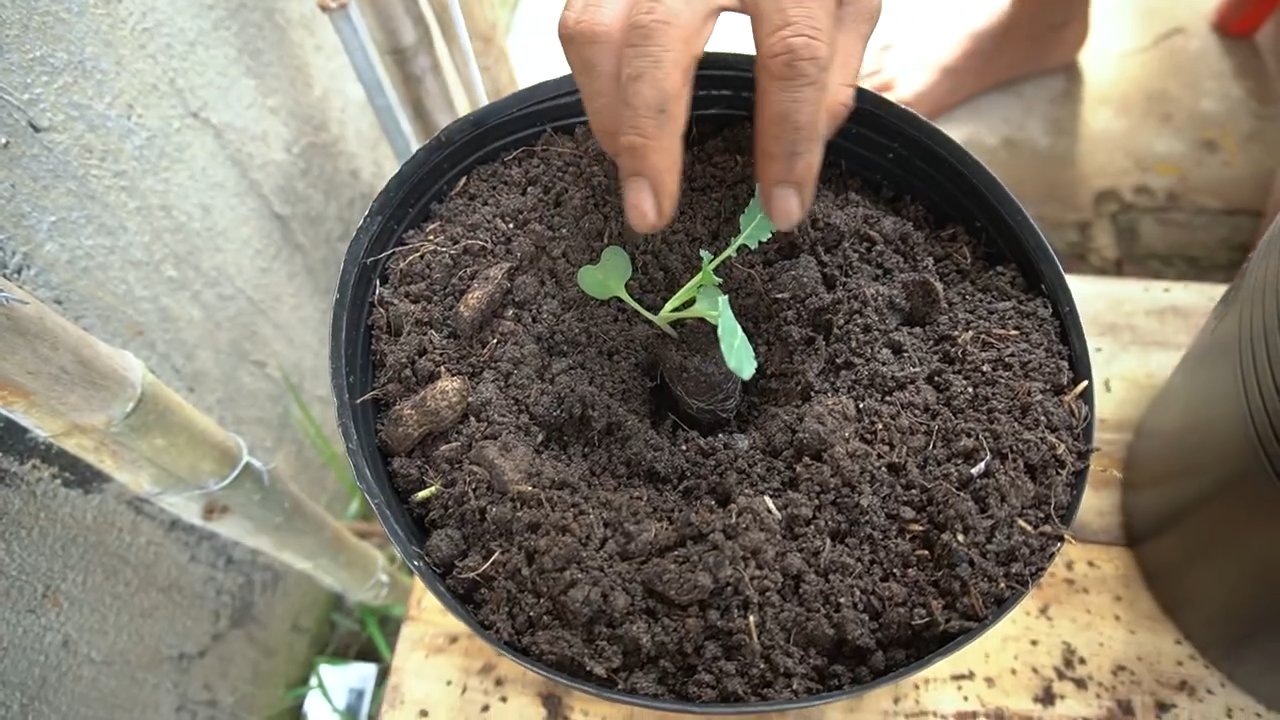
3. Pflanzen oder Säen:
* Jungpflanzen: Wenn ihr Jungpflanzen verwendet, grabt Löcher, die etwas größer sind als die Wurzelballen. Setzt die Pflanzen hinein und füllt die Löcher mit Erde auf. Achtet darauf, dass die Pflanzen nicht zu tief sitzen. Der oberste Teil des Wurzelballens sollte mit der Bodenoberfläche abschließen.
* Samen: Wenn ihr Samen verwendet, sät sie etwa 1 cm tief in Reihen. Haltet die Erde feucht, bis die Samen keimen. Sobald die Sämlinge groß genug sind, könnt ihr sie vereinzeln, sodass sie genügend Platz zum Wachsen haben.
4. Abstand halten: Blumenkohl braucht Platz! Haltet einen Abstand von etwa 45-60 cm zwischen den Pflanzen und 60-75 cm zwischen den Reihen ein. So haben die Pflanzen genügend Platz, um sich auszubreiten und zu wachsen.
5. Gießen: Gießt die Pflanzen nach dem Pflanzen gründlich an. Blumenkohl braucht regelmäßige Bewässerung, besonders während trockener Perioden. Achtet darauf, dass der Boden feucht, aber nicht nass ist.
6. Düngen: Düngt die Pflanzen etwa 2-3 Wochen nach dem Pflanzen mit einem ausgewogenen Dünger. Befolgt die Anweisungen auf der Verpackung. Eine zweite Düngung kann etwa 4-6 Wochen später erfolgen.
7. Mulchen: Tragt eine Schicht Mulch um die Pflanzen auf. Das hilft, die Feuchtigkeit im Boden zu halten, Unkraut zu unterdrücken und den Boden kühl zu halten.
8. Schutz vor Schädlingen: Blumenkohl kann von verschiedenen Schädlingen befallen werden, wie z.B. Kohlweißlingen, Erdflöhen und Kohlfliegen. Verwendet Netze oder Vlies, um die Pflanzen zu schützen. Kontrolliert die Pflanzen regelmäßig auf Schädlinge und entfernt sie gegebenenfalls.
Die Pflege: So bleibt dein Blumenkohl gesund
Die Arbeit ist noch nicht getan, wenn der Blumenkohl gepflanzt ist. Jetzt kommt die Pflege, die entscheidend für eine reiche Ernte ist:
1. Regelmäßiges Gießen: Wie bereits erwähnt, braucht Blumenkohl regelmäßige Bewässerung. Besonders während trockener Perioden solltet ihr darauf achten, dass der Boden nicht austrocknet. Gießt am besten früh morgens, damit die Blätter Zeit haben, abzutrocknen, bevor die Sonne aufgeht. Das hilft, Pilzkrankheiten vorzubeugen.
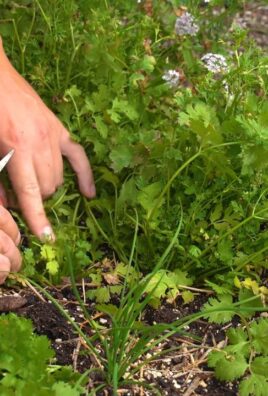
2. Unkraut jäten: Unkraut konkurriert mit dem Blumenkohl um Nährstoffe und Wasser. Jätet regelmäßig Unkraut, um sicherzustellen, dass eure Pflanzen alles bekommen, was sie brauchen.
3. Düngen: Eine zusätzliche Düngung kann während der Wachstumsphase sinnvoll sein. Verwendet einen Dünger, der reich an Stickstoff, Phosphor und Kalium ist.
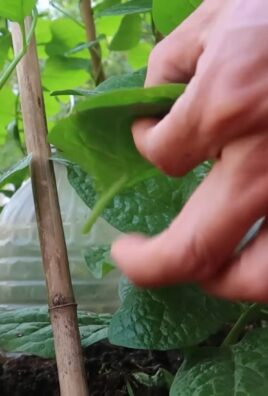
4. Blanchieren (optional): Wenn ihr einen besonders weißen Blumenkohlkopf haben möchtet, könnt ihr ihn blanchieren. Sobald der Kopf etwa die Größe eines Tennisballs hat, brecht ihr die äußeren Blätter zusammen und befestigt sie mit einem Gummiband oder einer Schnur, um den Kopf vor der Sonne zu schützen. Das verhindert, dass der Kopf grün wird.
5. Schädlingsbekämpfung: Kontrolliert eure Pflanzen regelmäßig auf Schädlinge. Bei einem Befall könnt ihr natürliche Schädlingsbekämpfungsmittel wie Neemöl oder Insektizidseife verwenden.
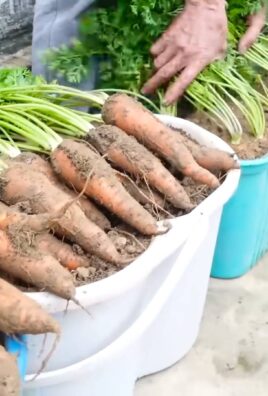
Die Ernte: Der Lohn der Mühe
Nach all der Arbeit kommt endlich der schönste Teil: die Ernte!
1. Den richtigen Zeitpunkt erkennen: Blumenkohl ist erntereif, wenn der Kopf fest und kompakt ist und die gewünschte Größe erreicht hat. Die Größe variiert je nach Sorte, aber in der Regel ist ein Durchmesser von 15-20 cm ein guter Richtwert.
2. Ernten: Schneidet den Blumenkohlkopf mit einem scharfen Messer ab. Lasst etwa 5-8 cm Stiel am Kopf.
3. Lagerung: Blumenkohl hält sich im Kühlschrank etwa 1-2 Wochen. Wickelt ihn in ein feuchtes Tuch, um ihn frisch zu halten.
Häufige Probleme und Lösungen
Auch beim Blumenkohlanbau können Probleme auftreten. Hier sind einige der häufigsten Probleme und wie ihr sie lösen könnt:
* Gelbe Blätter: Gelbe Blätter können ein Zeichen für Nährstoffmangel sein. Düngt die Pflanzen mit einem ausgewogenen Dünger.
* Kleine Köpfe: Kleine Köpfe können durch zu wenig Wasser oder Nährstoffe verursacht werden. Achtet auf regelmäßige Bewässerung und Düngung.
* Schädlinge: Wie bereits erwähnt, können Schädlinge ein Problem sein. Verwendet Netze oder Vlies, um die Pflanzen zu schützen, und kontrolliert sie regelmäßig auf Schädlinge.
* Krankheiten: Blumenkohl kann von verschiedenen Krankheiten befallen werden, wie z.B. Kohlhernie oder Falscher Mehltau. Achtet auf eine gute Belüftung und vermeidet es, die Blätter zu benetzen. Bei einem Befall könnt ihr Fungizide verwenden.
Zusätzliche Tipps für den erfolgreichen Anbau
* Sortenwahl: Wählt eine Sorte, die für euer Klima geeignet ist. Es gibt frühe, mittlere und späte Sorten.
* Fruchtfolge: Baut Blumenkohl nicht jedes Jahr am selben Standort an. Wechselt die Kulturen, um Krankheiten und Schädlingen vorzubeugen.
* Bodenanalyse: Eine Bodenanalyse kann helfen, den pH-Wert und den Nährstoffgehalt des Bodens zu bestimmen. So könnt ihr den Boden optimal vorbereiten.
* Beobachtung: Beobachtet eure Pflanzen regelmäßig, um Probleme frühzeitig zu erkennen und zu beheben.
Ich hoffe, dieser Guide hilft euch dabei, euren eigenen Blumenkohl erfolgreich anzubauen. Es ist ein lohnendes Projekt, das euch mit frischem, gesundem Gemüse belohnt. Viel Spaß beim Gärtnern!
Conclusion
Growing your own cauliflower at home might seem daunting at first, but as you’ve seen, it’s a surprisingly rewarding and achievable endeavor. Forget those bland, overpriced heads at the grocery store! Imagine biting into a crisp, flavorful cauliflower, nurtured by your own hands, bursting with freshness and packed with nutrients. This isn’t just about saving money; it’s about connecting with your food, understanding its journey from seed to table, and experiencing the pure joy of harvesting something you’ve cultivated.
This DIY approach to growing cauliflower offers a level of control you simply can’t get when buying from a store. You choose the variety, ensuring it aligns with your taste preferences and local climate. You control the growing environment, minimizing the use of pesticides and herbicides, resulting in a healthier and more sustainable product. Plus, the satisfaction of successfully growing your own vegetables is an unparalleled feeling.
But the benefits don’t stop there. Growing cauliflower at home opens up a world of culinary possibilities. Experiment with different varieties like the vibrant purple Graffiti cauliflower, the Romanesco with its fractal florets, or the classic Snowball. Try roasting your homegrown cauliflower with herbs and spices, turning it into a creamy soup, or even using it as a low-carb alternative to rice or mashed potatoes. The possibilities are endless!
Don’t be afraid to get your hands dirty and embrace the learning process. Every gardener, regardless of experience, faces challenges. But with a little patience, attention, and the guidance provided in this article, you’ll be well on your way to harvesting your own delicious cauliflower.
We encourage you to take the plunge and try growing cauliflower at home. Start small, perhaps with just a few plants, and gradually expand your garden as you gain confidence. Share your experiences with us! We’d love to hear about your successes, your challenges, and any tips or tricks you’ve discovered along the way. Post pictures of your homegrown cauliflower on social media and tag us. Let’s build a community of home gardeners who are passionate about growing their own food.
Remember, the key to successful cauliflower cultivation lies in providing the right conditions: well-drained soil, ample sunlight, consistent watering, and protection from pests. With a little effort, you can enjoy a bountiful harvest of fresh, flavorful cauliflower right from your own backyard. So, grab your gardening gloves, plant those seeds, and get ready to experience the joy of growing your own food! This DIY project is more than just a gardening task; it’s an investment in your health, your well-being, and your connection to the natural world. Start your journey to grow cauliflower at home today!
Frequently Asked Questions (FAQ)
What is the best time of year to start growing cauliflower?
The best time to start growing cauliflower depends largely on your climate. Cauliflower thrives in cooler temperatures, ideally between 60°F and 70°F (15°C and 21°C). In regions with mild winters, you can plant cauliflower in the fall for a winter harvest. In areas with colder winters, start seeds indoors 6-8 weeks before the last expected frost and transplant them outdoors in the spring after the danger of frost has passed. For a fall harvest in colder climates, start seeds indoors in late spring or early summer. Pay attention to your local weather patterns and adjust planting times accordingly.
How much sunlight does cauliflower need?
Cauliflower requires at least 6 hours of direct sunlight per day to thrive. Choose a planting location that receives ample sunlight throughout the day. If you live in a particularly hot climate, some afternoon shade can be beneficial to prevent the cauliflower from bolting (going to seed prematurely). Monitor your plants closely and adjust their location if necessary to ensure they are receiving enough sunlight.
What kind of soil is best for growing cauliflower?
Cauliflower prefers well-drained, fertile soil that is rich in organic matter. The ideal soil pH is between 6.0 and 7.0. Before planting, amend your soil with compost, aged manure, or other organic materials to improve its fertility and drainage. You can also add a slow-release fertilizer to provide essential nutrients to your plants. Avoid planting cauliflower in heavy clay soil, as this can lead to root rot. If you have clay soil, amend it with plenty of organic matter to improve its drainage.
How often should I water my cauliflower plants?
Cauliflower requires consistent watering, especially during hot, dry weather. Water deeply and regularly, aiming to keep the soil consistently moist but not waterlogged. Check the soil moisture regularly by sticking your finger into the soil about an inch deep. If the soil feels dry, it’s time to water. Avoid overhead watering, as this can increase the risk of fungal diseases. Instead, water at the base of the plants. Mulching around your cauliflower plants can help to retain moisture and suppress weeds.
How do I protect my cauliflower from pests and diseases?
Cauliflower is susceptible to a variety of pests and diseases, including cabbage worms, aphids, flea beetles, and clubroot. To protect your plants, consider using row covers to prevent pests from reaching them. Regularly inspect your plants for signs of pests or diseases and take action promptly. You can use organic pest control methods, such as insecticidal soap or neem oil, to control pests. To prevent diseases, ensure good air circulation around your plants and avoid overhead watering. If you suspect your plants have clubroot, remove and destroy the affected plants and avoid planting cauliflower in the same location for several years. Crop rotation is key to preventing soil-borne diseases.
When is cauliflower ready to harvest?
Cauliflower is typically ready to harvest when the head is firm, compact, and about 6-8 inches in diameter. The exact time to harvest will depend on the variety and growing conditions. Check the seed packet or plant tag for specific information. To harvest, cut the stem just below the head, leaving a few leaves attached. Harvest your cauliflower on a cool, dry day to prevent it from wilting.
Can I grow cauliflower in containers?
Yes, you can grow cauliflower in containers, but you’ll need to choose a large container that is at least 12 inches in diameter and 12 inches deep. Use a high-quality potting mix and ensure the container has good drainage. Water regularly and fertilize every few weeks. Container-grown cauliflower may require more frequent watering and fertilization than cauliflower grown in the ground. Choose a compact cauliflower variety that is well-suited for container growing.
What are some common problems when growing cauliflower and how can I fix them?
Some common problems include:
* **Buttoning:** Small heads forming prematurely, often due to stress such as lack of water or nutrients. Ensure consistent watering and fertilization.
* **Bolting:** Premature flowering, often due to hot weather. Choose heat-tolerant varieties and provide shade during hot afternoons.
* **Clubroot:** A soil-borne disease that causes swollen roots. Improve soil drainage and pH, and practice crop rotation.
* **Pest infestations:** Cabbage worms, aphids, and flea beetles can damage plants. Use row covers, insecticidal soap, or neem oil.
How do I blanch cauliflower?
Blanching is the process of covering the developing cauliflower head to prevent it from turning yellow or brown. This is typically done when the head is about 2-3 inches in diameter. To blanch, simply fold the large leaves around the head and secure them with twine or rubber bands. Check the head regularly and harvest when it is ready. Some cauliflower varieties are self-blanching, meaning their leaves naturally curl around the head.
Can I save seeds from my cauliflower plants?
Saving seeds from cauliflower is a more advanced gardening technique, as cauliflower is a biennial plant, meaning it takes two years to produce seeds. You’ll need to overwinter the plant and allow it to flower and produce seeds in the second year. Cross-pollination can also be an issue, so you’ll need to isolate your cauliflower plants from other members of the Brassica family. If you’re interested in saving seeds, research the process thoroughly before attempting it.
Leave a Comment