

Grow Carrots at Home – and unlock the secrets to a vibrant, delicious harvest right outside your door! Imagine plucking crisp, sweet carrots straight from your garden, knowing exactly where they came from and how they were grown. Forget bland, store-bought veggies; this is about experiencing the unparalleled flavor of homegrown goodness.
For centuries, cultivating carrots has been a rewarding practice, dating back to ancient civilizations where they were prized for their medicinal properties and vibrant colors. While the orange carrot we know and love is a relatively modern development, the joy of nurturing these root vegetables remains timeless.
In today’s fast-paced world, reconnecting with nature and understanding where our food comes from is more important than ever. Learning how to grow carrots at home not only provides you with fresh, healthy produce, but it also offers a therapeutic escape and a sense of accomplishment. Plus, who wouldn’t want to impress their friends and family with their green thumb? This DIY guide will equip you with simple yet effective tricks and hacks to ensure a bountiful carrot crop, even if you’re a complete beginner. Let’s get digging!
Growing Carrots at Home: Your Comprehensive DIY Guide
Hey garden friends! Have you ever dreamed of harvesting your own crisp, sweet carrots directly in the garden or even on the balcony? I can tell you, it’s easier than you think and incredibly satisfying! In this article, I’ll show you step by step how to successfully grow carrots at home. Let’s get started!
What You Need for Growing Carrots
Before we start planting, it’s important that we have prepared everything necessary. Here is a list of the things you’ll need:
- Carrot seeds: Choose a variety that you like and is suitable for your region. There are many different varieties, from small, round carrots to long, slender types.
- Suitable soil: Carrots need loose, well-draining soil. Avoid stony or lumpy soil, as this can lead to deformed carrots.
- Container (optional): If you don’t have a garden, you can also grow carrots in pots or planters. Make sure the container is deep enough (at least 30 cm) so the carrots have enough space to grow.
- Compost or organic fertilizer: To enrich the soil with nutrients.
- Watering can or garden hose: For watering.
- Garden tool: A small trowel or dibber for planting the seeds.
- Mulch (optional): To retain moisture in the soil and suppress weeds.
Preparation is Everything: Soil Preparation for Carrots
The key to healthy, well-formed carrots lies in proper soil preparation. Carrots love loose, sandy loam. Here are the steps I recommend:
- Loosen the soil: Dig the soil where you want to grow the carrots at least 30 cm deep. Remove all stones, roots, and clumps.
- Improve the soil: Mix compost or well-rotted manure into the soil to enrich it with nutrients and improve drainage. If your soil is very heavy, you can also add some sand to loosen it up.
- Smooth the soil: Rake the soil to level it and create a fine surface. This makes sowing the seeds easier.
- Check the pH: Carrots prefer a slightly acidic to neutral pH (between 6.0 and 7.0). You can check your soil’s pH with a soil test kit and adjust it if necessary.
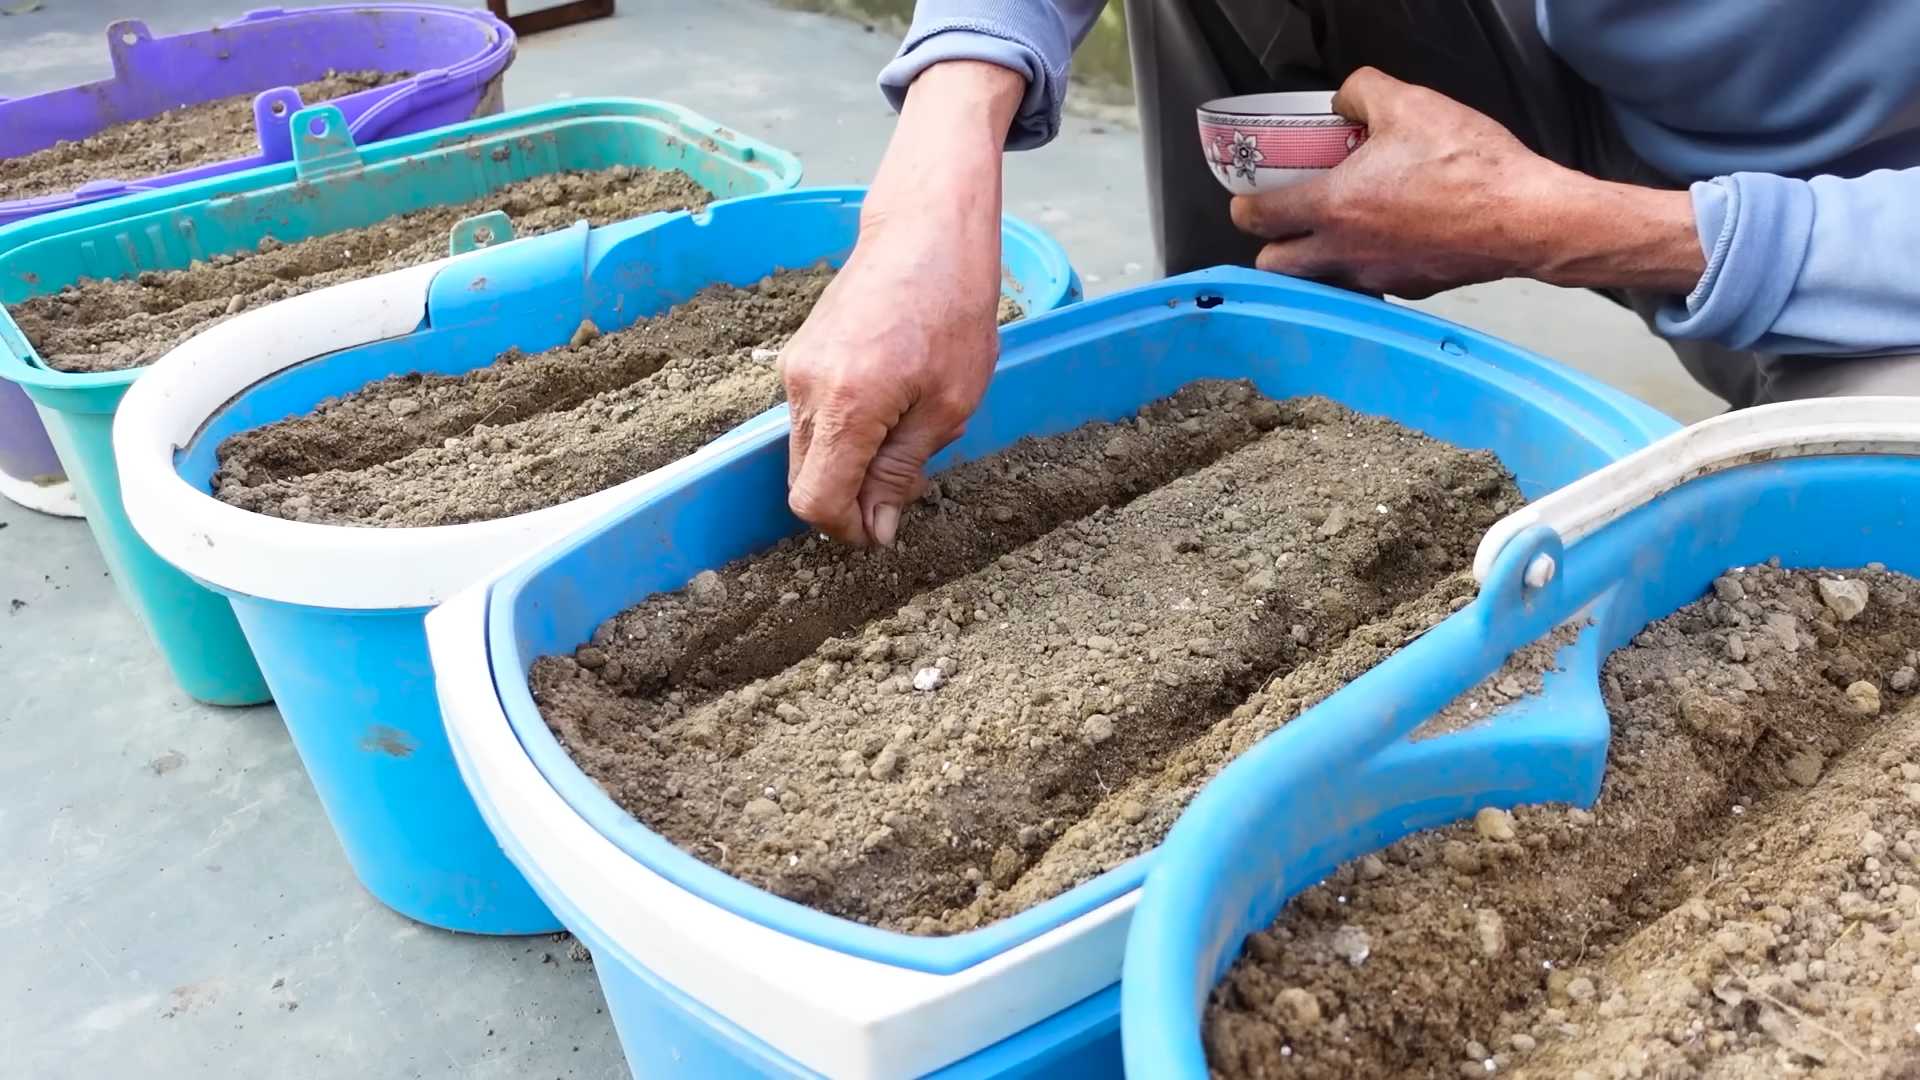
Sowing Carrots: Step-by-Step Guide
Now comes the exciting part: sowing the carrot seeds! Carrot seeds are very small, so it’s important to be careful.
- Make seed drills: Make shallow furrows in the prepared soil with a stick or a rake handle. The furrows should be about 1 cm deep and 15-20 cm apart.
- Sow the seeds: Distribute the carrot seeds evenly in the furrows. Since the seeds are very small, it’s often difficult to sow them individually. Try to sow them as thinly as possible to make thinning out easier later.
- Cover the seeds: Carefully cover the seeds with a thin layer of soil.
- Water: Water the sown furrows carefully with a watering can or a garden hose with a spray nozzle. Be careful not to wash the soil too much, as this can wash away the seeds.
- Keep moist: Keep the soil moist until the seeds germinate. This can take 1-3 weeks depending on temperature and moisture. You can cover the soil with a thin layer of mulch to retain moisture.
Rearing: Caring for Your Carrot Plants
Once the carrot seeds have germinated, the real work begins: caring for the young plants.
- Thinning out: When the carrot plants are about 5 cm tall, you need to thin them out to give them enough space to grow. Remove the weakest plants so that the remaining plants are about 3-5 cm apart. This may seem heartless, but it is necessary to ensure that the remaining carrots have enough space and nutrients to grow.
- Watering: Carrots need regular watering, especially during dry periods. Make sure to keep the soil evenly moist, but avoid waterlogging.
- Weed control: Keep the area around the carrot plants free of weeds. Weeds compete with the carrots for nutrients and water. Weeding is best done by hand to avoid damaging the delicate carrot roots.
- Fertilizing: Fertilize the carrot plants every few weeks with an organic fertilizer. Avoid nitrogen-rich fertilizers, as these can lead to lush leaf growth but small carrots. A fertilizer with high phosphorus and potassium content is ideal.
- Pest protection: Carrots can be infested by various pests, such as the carrot fly. To protect your carrots, you can cover them with an insect net.
Growing Carrots in a Pot: How It’s Done
If you don’t have a garden, you can also easily grow carrots in pots or planters. Here are some tips for growing carrots in a pot:
- Choose the right pot: The pot should be at least 30 cm deep so the carrots have enough space to grow.
- Use the right soil: Use a loose, well-draining potting mix enriched with compost.
- Sow the seeds: Sow the seeds as described above.
- Care for the plants: Care for the plants as described above. Pay special attention to watering, as pots dry out faster than garden soil.
- Location: Place the pot in a sunny location. Carrots need at least 6 hours of sunlight per day.
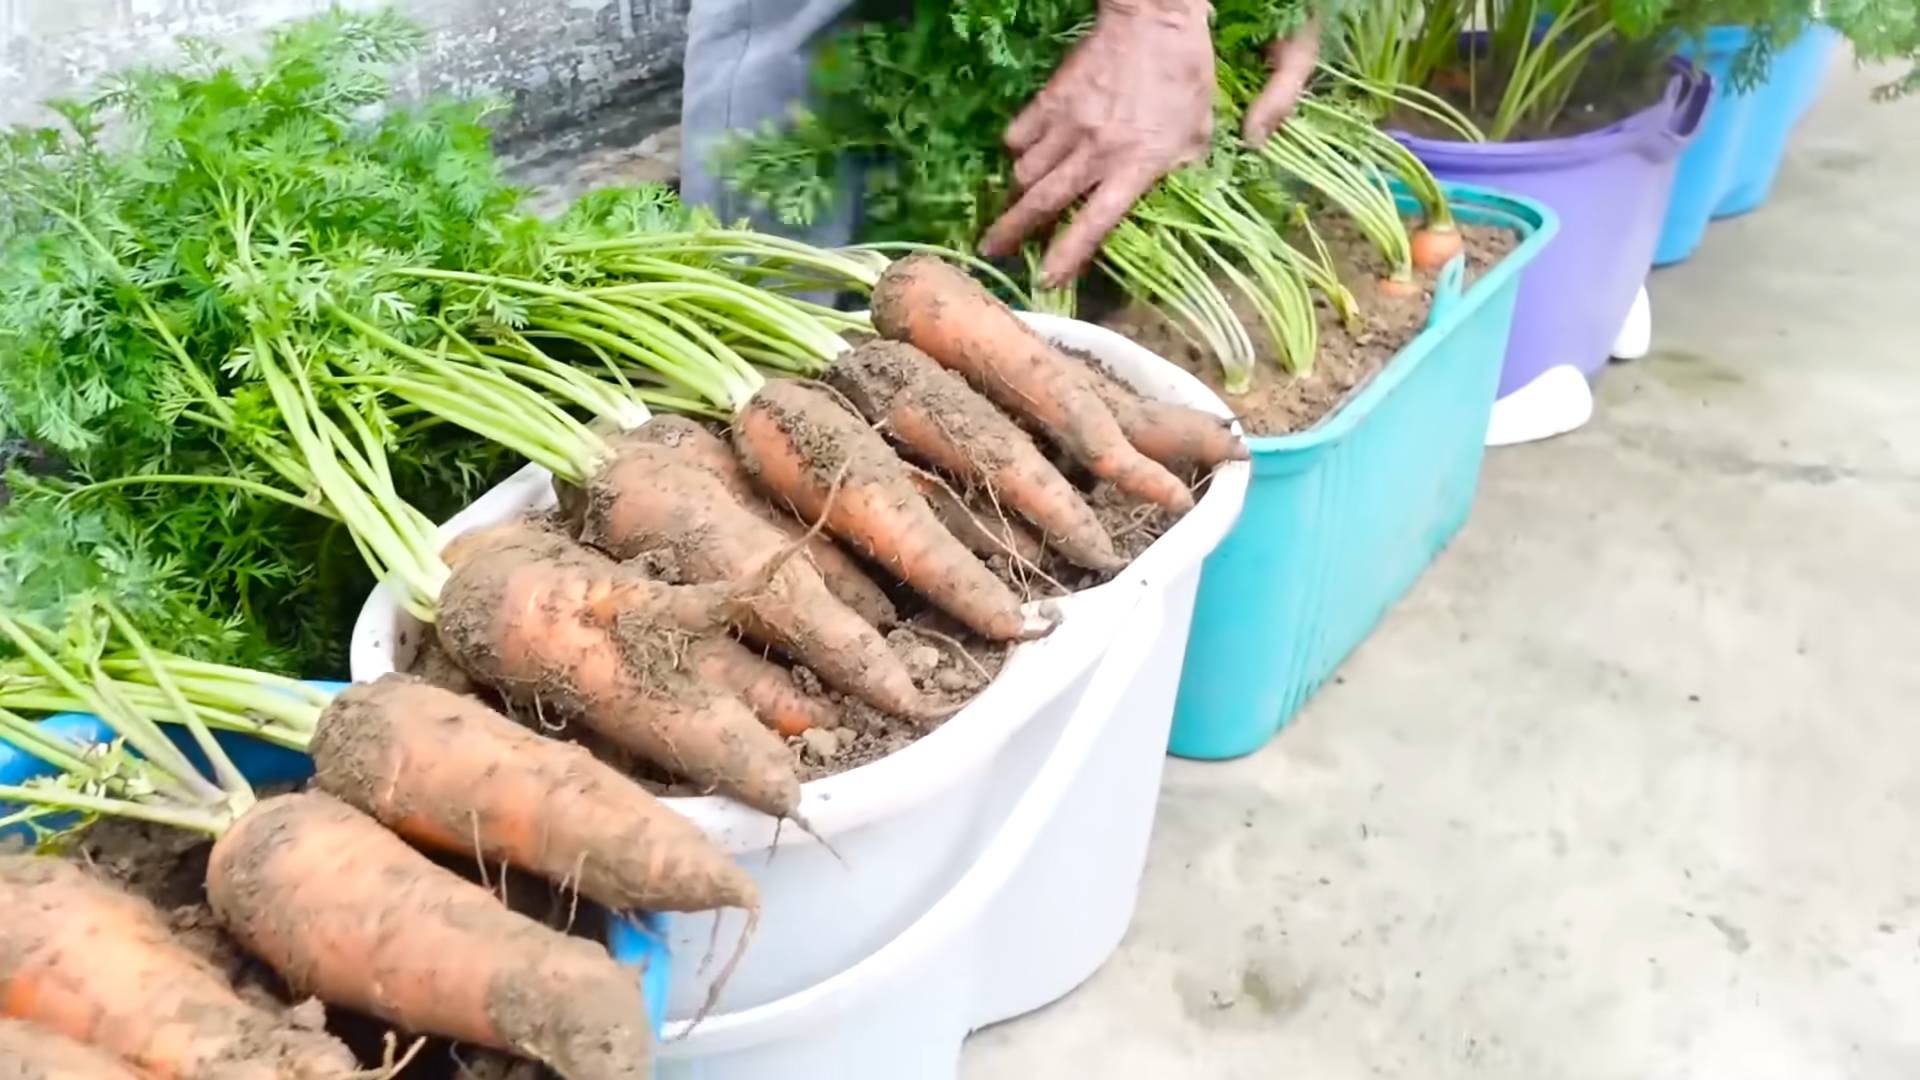
The Harvest: When Are My Carrots Ripe?
The harvest time depends on the carrot variety you have grown. Generally, carrots are ready for harvest after 60-80 days.
- Check the size: The carrots should have reached the desired size. You can carefully remove some soil around a carrot to check its size.
- Check the leaves: The leaves of the carrots may change color slightly or die back when the carrots are ripe.
- Harvesting: Carefully pull the carrots out of the ground. If the soil is very firm, you can loosen it a bit beforehand.
Common Problems and Solutions
Problems can also occur when growing carrots. Here are some common problems and how you can solve them:
Diseases: Watch for signs of diseases and remove affected plants immediately. Ensure good ventilation and avoid…
Deformed carrots: This is often caused by stony or lumpy soil. Make sure to prepare the soil thoroughly before sowing and remove stones and clumps.
Small carrots: This can be caused by sowing too densely, insufficient watering, or a lack of nutrients. Thin out the plants in time, water them regularly, and fertilize them with a suitable fertilizer.
Pests: Protect your carrots from pests by covering them with an insect net or using natural pesticides.
Conclusion
So, there you have it! Growing carrots at home isn’t just a gardening project; it’s an investment in fresh, flavorful produce and a rewarding experience that connects you directly to the food you eat. Forget those bland, store-bought carrots that have traveled miles and lost their vibrancy. Imagine pulling up your own vibrant, sweet, and crisp carrots, bursting with flavor and packed with nutrients. This DIY trick is a must-try for anyone, regardless of their gardening experience.
Why is this a must-try? Because it’s accessible, economical, and incredibly satisfying. You don’t need acres of land or a green thumb of legend. A simple container, some good quality soil, and a sunny spot are all you need to embark on your carrot-growing adventure. Plus, think of the money you’ll save by bypassing the grocery store produce aisle. More importantly, you’ll know exactly what’s going into your food – no pesticides, no preservatives, just pure, unadulterated carrot goodness.
But the benefits extend beyond just the practical. There’s a certain magic in nurturing a seed and watching it transform into something edible. It’s a therapeutic process that can reduce stress, connect you with nature, and provide a sense of accomplishment. And let’s not forget the joy of sharing your homegrown bounty with friends and family. Imagine the look on their faces when you present them with a bunch of freshly harvested, homegrown carrots!
Ready to take your carrot growing to the next level? Consider these variations:
* Rainbow Carrots: Plant a mix of carrot seeds, including orange, yellow, purple, and white varieties, for a visually stunning and flavorful harvest.
* Baby Carrots: Choose a variety specifically bred for baby carrots and harvest them early for a tender and sweet treat.
* Container Gardening: If you’re short on space, container gardening is your best friend. Select a deep container to accommodate the carrot’s root system.
* Succession Planting: Plant new seeds every few weeks to ensure a continuous harvest throughout the growing season.
* Companion Planting: Plant carrots alongside onions, garlic, or rosemary to deter pests and improve growth.
Don’t be afraid to experiment and find what works best for you. Gardening is a journey of learning and discovery, and there’s no right or wrong way to do it. The most important thing is to have fun and enjoy the process.
So, what are you waiting for? Grab some seeds, prepare your soil, and get ready to experience the joy of growing carrots at home. We’re confident that you’ll be amazed by the results. And once you’ve harvested your first batch of homegrown carrots, we want to hear all about it! Share your experiences, tips, and photos in the comments below. Let’s create a community of carrot-growing enthusiasts and inspire others to embrace the joys of homegrown produce. Happy gardening!
Frequently Asked Questions (FAQ)
What kind of soil is best for growing carrots?
Carrots thrive in loose, well-drained soil that is free of rocks and debris. Rocky soil can cause the carrots to fork or become misshapen. A sandy loam soil is ideal, as it allows for good drainage and easy root penetration. Amend heavy clay soil with compost or other organic matter to improve drainage and texture. The ideal pH for carrot growth is between 6.0 and 6.8.
How much sunlight do carrots need?
Carrots need at least 6 hours of direct sunlight per day to grow properly. Choose a location that receives full sun for the majority of the day. If you are growing carrots in containers, you can move them around to ensure they get enough sunlight.
How often should I water my carrots?
Carrots need consistent moisture to grow properly. Water deeply and regularly, especially during dry periods. Aim to keep the soil consistently moist but not waterlogged. Overwatering can lead to root rot. A good rule of thumb is to water when the top inch of soil feels dry to the touch. Mulching around the plants can help retain moisture and suppress weeds.
When is the best time to plant carrots?
The best time to plant carrots depends on your climate. In general, carrots are a cool-season crop and can be planted in early spring or late summer for a fall harvest. In warmer climates, you can plant carrots throughout the fall and winter. Check your local planting calendar for specific dates.
How long does it take for carrots to grow?
Carrots typically take 60-80 days to mature, depending on the variety. Baby carrots can be harvested earlier, around 50-60 days. You can check for ripeness by gently pulling back the soil around the top of the carrot to see its size.
What are some common pests and diseases that affect carrots?
Common pests that affect carrots include carrot rust flies, aphids, and nematodes. Diseases include leaf blight and root rot. To prevent pests and diseases, practice good garden hygiene, such as removing weeds and debris. You can also use organic pest control methods, such as insecticidal soap or neem oil. Ensure proper drainage to prevent root rot.
How do I prevent my carrots from forking or splitting?
Forking or splitting carrots are often caused by rocky soil or inconsistent watering. To prevent this, make sure your soil is loose, well-drained, and free of rocks and debris. Water regularly and consistently, especially during dry periods. Avoid over-fertilizing, as this can also contribute to forking.
Can I grow carrots in containers?
Yes, you can definitely grow carrots in containers! Choose a container that is at least 12 inches deep to accommodate the carrot’s root system. Use a well-draining potting mix and water regularly. Make sure the container receives at least 6 hours of direct sunlight per day.
What are the benefits of growing carrots at home?
Growing carrots at home offers numerous benefits, including:
* Fresh, flavorful produce: Homegrown carrots taste much better than store-bought carrots.
* Cost savings: Growing your own carrots can save you money on groceries.
* Organic gardening: You can control the use of pesticides and fertilizers.
* Therapeutic benefits: Gardening is a relaxing and rewarding activity.
* Educational opportunity: Growing carrots can be a fun and educational experience for children.
How do I store my harvested carrots?
To store your harvested carrots, remove the greens and gently brush off any excess soil. Store the carrots in a cool, dark, and humid place, such as a refrigerator or root cellar. You can also store them in a plastic bag or container to prevent them from drying out. Carrots can last for several weeks or even months when stored properly.
Leave a Comment