

Grow Broccoli Indoors? Absolutely! Imagine harvesting fresh, vibrant broccoli right from your windowsill, even when the snow is falling outside. It sounds like a dream, right? Well, it’s a dream within reach! For centuries, humans have cultivated food in controlled environments, from ancient Roman greenhouses to the elaborate orangeries of the Renaissance. This DIY guide isn’t just about gardening; it’s about connecting with that rich history and taking control of your food source.
Let’s face it, store-bought broccoli can be expensive and sometimes lacks that fresh, crisp flavor we crave. Plus, knowing exactly where your food comes from and how it’s grown is incredibly empowering. That’s where this DIY trick comes in. I’m going to show you simple, step-by-step instructions on how to grow broccoli indoors, regardless of your experience level. Whether you’re a seasoned gardener or a complete newbie, I’ll provide you with the knowledge and confidence to cultivate your own delicious broccoli crop. Get ready to ditch the grocery store and embrace the joy of homegrown goodness!
Growing Broccoli Indoors: Your DIY Guide for a Bountiful Harvest
Hey garden friends! Do you also want to harvest fresh broccoli, whether there’s snow outside or the sun is shining? Then you’ve come to the right place! I’ll show you how to successfully grow broccoli indoors. It’s easier than you think and really fun!
What you need: Your Shopping List
Before we get started, we need a few things. Don’t worry, you probably have most of them at home already!
- Broccoli seeds: It’s best to choose a variety that is suitable for growing in pots. There are special “baby” broccoli varieties that are particularly well-suited.
- Starter pots or trays: Small pots or trays to start the seeds.
- Seed starting mix: Special soil for starting seedlings. It is low in nutrients and loose, so the roots can grow well.
- Larger pots: Pots with a diameter of at least 30 cm (12 inches) for the mature broccoli plants.
- Potting soil: High-quality potting soil that drains well.
- Grow light (optional, but recommended): Especially in winter, when there is little sunlight, a grow light is worth its weight in gold.
- Spray bottle: For moistening the soil.
- Watering can: For watering the plants.
- Liquid fertilizer: For vegetables, to provide the plants with sufficient nutrients.
- Scissors or knife: For harvesting the broccoli.
Phase 1: Starting the Seeds – Small Seeds, Big Dreams
Starting the seeds is the first step to your own broccoli. Here we lay the foundation for a bountiful harvest.
- Preparation of the starter pots: Fill the starter pots or trays with seed starting mix. Lightly press the soil down.
- Sowing the seeds: Place 2-3 broccoli seeds in each pot. Cover the seeds with a thin layer of soil (approx. 0.5 cm or 1/4 inch).
- Watering: Gently moisten the soil with a spray bottle. It should be damp, but not wet.
- Location: Place the starter pots in a bright and warm place. A temperature of 18-20°C (64-68°F) is ideal.
- Moisture: Keep the soil moist by regularly spraying it with the spray bottle.
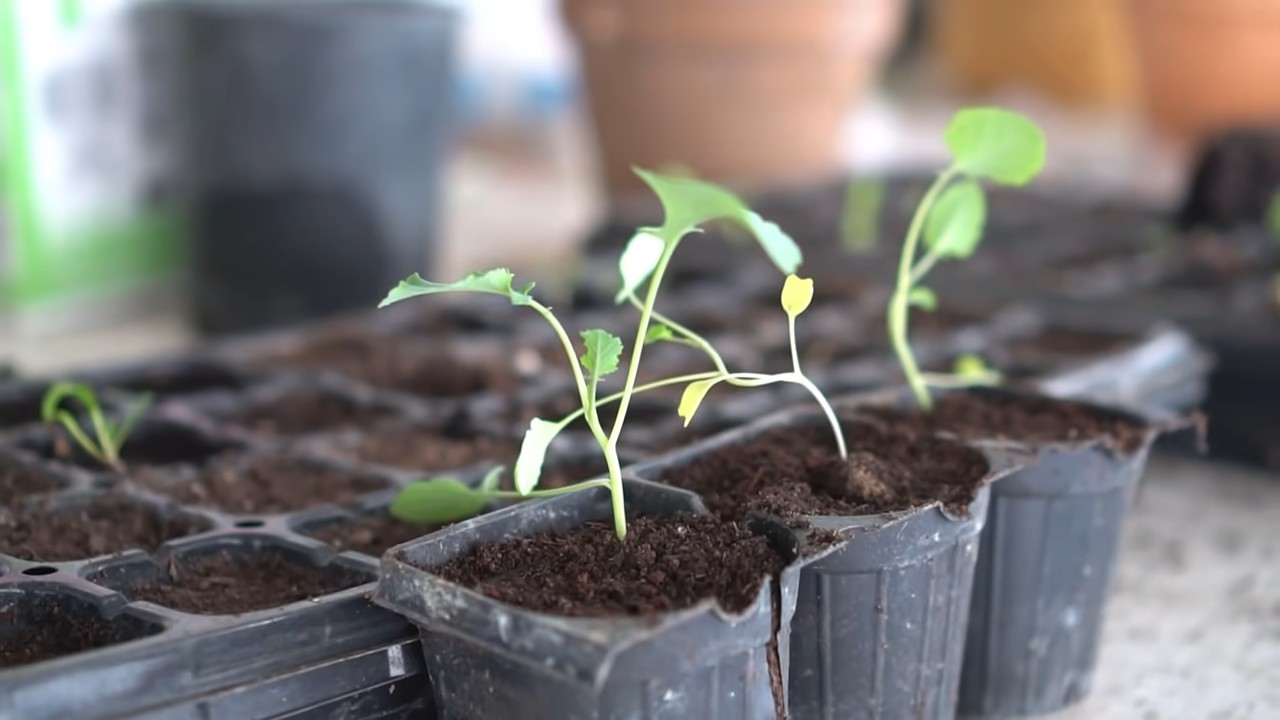
- Germination: After about 5-10 days, the first seedlings should be visible.
- Thinning: As soon as the seedlings have a few leaves, you can thin them. This means you leave only the strongest seedling in each pot. You can gently pull out the others or cut them with scissors.
Phase 2: Repotting – More Space to Grow
When the small broccoli plants are large enough, they need more space. Repotting is an important step for them to develop optimally.
- Preparation of the larger pots: Fill the larger pots with potting soil. Leave a rim of about 2-3 cm (1 inch) at the top.
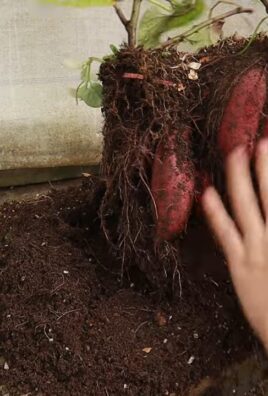
- Lifting the seedlings: Carefully remove the small broccoli plants from the starter pots. Be careful not to damage the roots.
- Placing in the larger pots: Place the seedlings in the prepared pots. The top of the root ball should be level with the soil surface.
- Filling with soil: Fill the pots with soil and press it down lightly.
- Watering: Water the plants thoroughly.
Phase 3: Care – Love and Attention for Your Broccoli Plants
Now the real work begins! With the right care, you can soon look forward to a bountiful broccoli harvest.
- Location: Broccoli needs a lot of light. Place the pots in a bright spot, e.g., on a south-facing windowsill. If the light is not sufficient, you should use a grow light.
- Watering: Water the plants regularly, but avoid waterlogging. The soil should always be slightly moist.
- Fertilizing: Fertilize the plants every 2-3 weeks with a liquid fertilizer for vegetables. Pay attention to the dosage instructions on the package.
- Temperature: Broccoli doesn’t like it too hot. A temperature of 15-20°C (59-68°F) is ideal.
- Ventilation: Ensure good air circulation to prevent fungal diseases. Ventilate the room regularly or set up a fan.
- Pests: Watch out for pests like aphids or cabbage white caterpillars. If infested, you can collect the pests or treat them with a biological pesticide.
- Rotating: Rotate the pots regularly so the plants grow evenly and don’t lean towards the light.
Phase 4: The Harvest – Finally, Homegrown Broccoli!
After about 60-80 days, you can harvest your first broccoli!
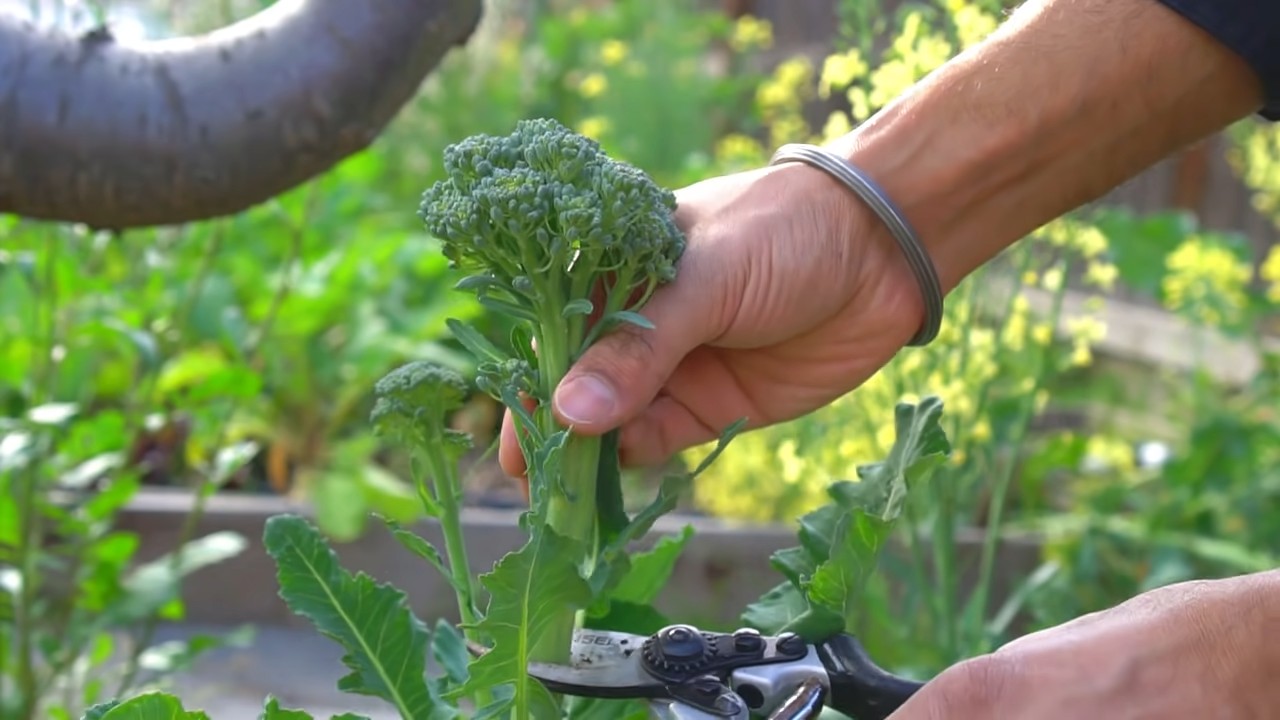
- Harvest time: The broccoli is ready when the florets are firm and closed.
- Harvesting method: Cut the broccoli with a sharp knife or scissors. Leave some leaves on the plant so it can continue to grow.
- Secondary harvest: Often, smaller side shoots with broccoli will form after the main harvest. You can harvest these as well.
Additional Tips for Growing Broccoli Indoors
- Variety selection: Choose varieties that are suitable for growing in pots. There are special “baby” broccoli varieties that are particularly well-suited.
- Grow light: Especially in winter, when there is little sunlight, a grow light is worth its weight in gold. It provides sufficient light and promotes plant growth.
- Repotting: If the plants become too large for the pots, you can transplant them into even larger pots.
- Diseases: Watch out for diseases like downy mildew or clubroot. If infested, you should remove the affected plants and replace the soil.
- Rotation: Don’t grow broccoli in the same pots every year to prevent diseases.
Common Problems and Solutions
- Yellow leaves: Yellow leaves can be a sign of a nutrient deficiency. Fertilize the plants with a liquid fertilizer for vegetables.
- Wilted leaves: Wilted leaves can be a sign of a lack of water. Water the plants thoroughly.
- Small broccoli heads: Small broccoli heads can be a sign of a lack of light. Move the plants to a brighter location or use a grow light.
- Pests: Watch out for pests like aphids or cabbage white caterpillars. If infested, you can collect the pests or treat them with a biological pesticide.
I hope this guide helps you to grow your own broccoli indoors. It’s a great feeling to harvest fresh vegetables from your own cultivation. Happy gardening! And don’t forget to share your successes with me!
Conclusion
So, there you have it! Growing broccoli indoors might seem like a daunting task, reserved for seasoned gardeners with sprawling greenhouses. But as we’ve shown, with a little planning, the right setup, and a dash of patience, you can absolutely cultivate your own supply of fresh, delicious broccoli right in the comfort of your home.
Why is this DIY trick a must-try? Beyond the sheer satisfaction of nurturing a plant from seed to harvest, growing broccoli indoors offers several compelling advantages. Firstly, you gain complete control over the growing environment. No more battling unpredictable weather patterns, voracious pests, or soil-borne diseases that can decimate an outdoor crop. You dictate the temperature, humidity, light exposure, and nutrient levels, creating the ideal conditions for your broccoli to thrive.
Secondly, indoor broccoli cultivation extends your growing season. You’re no longer limited by the constraints of your local climate. Enjoy fresh broccoli even during the coldest winter months, bringing a touch of spring to your table year-round. This is especially beneficial for those living in regions with short growing seasons.
Thirdly, and perhaps most importantly, you know exactly what goes into your food. No harmful pesticides, herbicides, or artificial fertilizers. Just pure, organic broccoli grown with love and care. This is a significant advantage for health-conscious individuals and families who prioritize clean eating.
But the benefits don’t stop there. Growing broccoli indoors can be a therapeutic and rewarding experience. The simple act of tending to your plants, observing their growth, and harvesting your own food can be incredibly grounding and stress-relieving. It’s a fantastic way to connect with nature, even when you’re stuck indoors.
Now, let’s talk about variations. While we’ve outlined a general approach to growing broccoli indoors, feel free to experiment and adapt the techniques to suit your specific needs and preferences.
* Try different broccoli varieties: Explore various broccoli cultivars, such as ‘Waltham 29’ for its compact size or ‘DiCicco’ for its early maturity. See which varieties perform best in your indoor environment.
* Experiment with hydroponics: If you’re feeling adventurous, consider growing your broccoli hydroponically. This soilless method can accelerate growth and maximize yields.
* Utilize vertical gardening techniques: Maximize your space by growing broccoli in vertical planters or stacked containers. This is an excellent option for those with limited square footage.
* Companion planting: Consider planting compatible herbs or flowers alongside your broccoli to deter pests and attract beneficial insects. Marigolds, basil, and dill are excellent choices.
Ultimately, the key to success with growing broccoli indoors is to be observant, patient, and willing to learn. Pay close attention to your plants’ needs, adjust your growing conditions as necessary, and don’t be afraid to experiment.
We wholeheartedly encourage you to give this DIY trick a try. It’s a rewarding and sustainable way to enjoy fresh, healthy broccoli year-round. And most importantly, we want to hear about your experiences! Share your tips, tricks, and challenges in the comments below. Let’s create a community of indoor broccoli growers and learn from each other. What are you waiting for? Start growing broccoli indoors today!
Frequently Asked Questions (FAQ)
Q: What is the best time of year to start growing broccoli indoors?
A: The beauty of growing broccoli indoors is that you’re not limited by the seasons! You can technically start your seeds any time of year. However, if you’re aiming for a specific harvest time, such as having fresh broccoli for Thanksgiving, you’ll need to factor in the plant’s maturity time (typically 50-70 days from transplant). Starting seeds 8-10 weeks before your desired harvest date is a good rule of thumb. For continuous harvests, consider staggering your planting schedule, starting new seeds every few weeks. This will ensure a steady supply of fresh broccoli throughout the year.
Q: How much light does indoor broccoli need? Can I use regular fluorescent lights?
A: Broccoli requires a significant amount of light to thrive. Ideally, aim for 12-14 hours of light per day. While natural sunlight is always beneficial, especially from a south-facing window, it’s often not sufficient, especially during the winter months. Supplementing with artificial grow lights is crucial. Regular fluorescent lights can work, but they are not the most efficient option. LED grow lights are highly recommended as they provide the full spectrum of light that broccoli needs for optimal growth, while also being energy-efficient and long-lasting. Look for LED grow lights specifically designed for vegetable gardening, with a color temperature around 6500K (cool white) for vegetative growth and 2700K (warm white) for flowering (broccoli head formation). Position the lights close to the plants (6-12 inches) and adjust as they grow.
Q: What kind of soil is best for growing broccoli indoors?
A: Broccoli prefers well-draining, nutrient-rich soil. A good starting point is a high-quality potting mix specifically formulated for vegetables. Avoid using garden soil, as it can be too heavy and compact, hindering drainage and root development. You can also amend your potting mix with compost or other organic matter to boost its nutrient content. Consider adding perlite or vermiculite to improve drainage and aeration. A slightly acidic to neutral pH (around 6.0-7.0) is ideal for broccoli. You can test the pH of your soil using a soil testing kit and adjust it accordingly with lime (to raise pH) or sulfur (to lower pH).
Q: How often should I water my indoor broccoli plants?
A: Watering frequency depends on several factors, including the size of your container, the type of soil you’re using, and the ambient temperature and humidity. As a general rule, water your broccoli plants when the top inch of soil feels dry to the touch. Avoid overwatering, as this can lead to root rot. When you water, water thoroughly, ensuring that the water drains out of the bottom of the container. This helps to flush out excess salts and prevent nutrient buildup. During hot, dry periods, you may need to water more frequently. Conversely, during cooler, more humid periods, you may need to water less often. Monitor your plants closely and adjust your watering schedule accordingly.
Q: How do I deal with pests and diseases when growing broccoli indoors?
A: One of the advantages of growing broccoli indoors is that you have more control over pests and diseases. However, it’s still important to be vigilant and take preventative measures. Regularly inspect your plants for signs of pests, such as aphids, whiteflies, or cabbage worms. If you spot any pests, remove them manually or treat your plants with an organic insecticide, such as neem oil or insecticidal soap. To prevent diseases, ensure good air circulation around your plants and avoid overwatering. If you notice any signs of disease, such as yellowing leaves or fungal growth, remove the affected leaves and treat your plants with an organic fungicide. Maintaining a clean growing environment is also crucial. Regularly clean your containers and growing area to prevent the buildup of pests and diseases.
Q: When will my indoor broccoli be ready to harvest?
A: Broccoli is typically ready to harvest 50-70 days after transplanting, depending on the variety. The main head should be firm, compact, and dark green. The individual florets should be tightly closed. If the florets start to open and turn yellow, it’s a sign that the broccoli is overripe. To harvest, cut the main head off the plant with a sharp knife, leaving a few inches of stem. Side shoots will often develop after the main head is harvested, providing you with additional broccoli florets over time. Harvest these side shoots as they mature.
Q: Can I grow broccoli indoors in a small apartment?
A: Absolutely! While broccoli plants can get relatively large, you can still grow them successfully in a small apartment with some careful planning. Choose compact broccoli varieties that are well-suited for container gardening. Utilize vertical gardening techniques, such as hanging planters or stacked containers, to maximize your space. Ensure that your plants receive adequate light, either from a sunny window or with the help of grow lights. With a little creativity and effort, you can enjoy fresh, homegrown broccoli even in the smallest of spaces.
Q: Is growing broccoli indoors organically possible?
A: Yes, growing broccoli indoors organically is not only possible but highly recommended! By controlling the growing environment, you can minimize the need for synthetic pesticides and fertilizers. Use organic potting mix, compost, and other organic amendments to nourish your plants. Choose organic pest control methods, such as neem oil or insecticidal soap, to deal with any pests that may arise. By following organic gardening practices, you can ensure that your indoor broccoli is healthy, delicious, and free from harmful chemicals.
Q: What are some common problems when growing broccoli indoors and how can I fix them?
A: Some common problems include:
* Leggy growth: This is usually caused by insufficient light. Provide more light, either by moving your plants to a sunnier location or by using grow lights.
* Yellowing leaves: This can be caused by overwatering, underwatering, nutrient deficiencies, or pests. Check the soil moisture, fertilize your plants with a balanced organic fertilizer, and inspect them for pests.
* Small or underdeveloped heads: This
Leave a Comment