

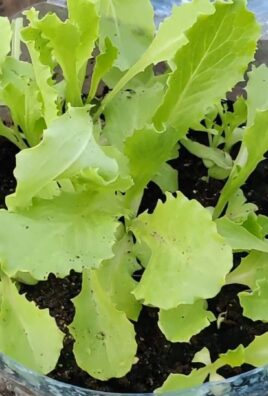
Grow Bok Choy Indoors? Absolutely! Imagine fresh, crisp bok choy, bursting with flavor, ready to harvest right from your windowsill. No more relying on wilted supermarket greens! For centuries, Asian cultures have cherished bok choy, not just for its delicious taste but also for its nutritional benefits. It’s a staple in stir-fries, soups, and salads, and now, you can easily cultivate your own supply, regardless of your outdoor space.
I know what you’re thinking: “Indoor gardening sounds complicated!” But trust me, it doesn’t have to be. This DIY guide is packed with simple, effective tricks and hacks that will empower you to grow bok choy indoors successfully, even if you’re a complete beginner. We’ll break down everything from choosing the right container and soil to providing optimal lighting and watering techniques.
In today’s busy world, having access to fresh, healthy food is more important than ever. Growing your own bok choy indoors not only provides you with a sustainable source of vitamins and minerals but also offers a therapeutic and rewarding experience. So, let’s ditch the store-bought veggies and embark on this exciting journey of indoor gardening together! Get ready to transform your living space into a thriving mini-farm, one bok choy leaf at a time!
Grow Your Own Rosemary: A Beginner’s Guide
Hey there, fellow plant enthusiasts! I’m so excited to share my experience with growing rosemary at home. It’s easier than you might think, and having fresh rosemary on hand for cooking is a total game-changer. Plus, the fragrance is just divine! Let’s dive in.
Choosing Your Rosemary
Before we get our hands dirty, let’s talk about choosing the right rosemary plant. You have a few options:
* Seeds: Starting from seed is the most economical, but it takes the longest and can be a bit tricky. Rosemary seeds have a low germination rate, so be prepared to plant more than you need.
* Cuttings: This is my preferred method! It’s faster than seeds and allows you to propagate from an existing plant you admire. Ask a friend or neighbor if you can snip a few cuttings.
* Starter Plants: Buying a small rosemary plant from a nursery is the easiest option. You’ll have a head start, and the plant is already established.
No matter which method you choose, make sure you select a healthy-looking plant or cutting. Look for vibrant green foliage and avoid anything that looks wilted, yellowed, or has signs of pests.
Propagating Rosemary from Cuttings
This is my favorite method, so let’s get into the details!
What You’ll Need:
* Sharp, clean pruning shears or a knife
* Rosemary plant to take cuttings from
* Rooting hormone (optional, but recommended)
* Small pots or containers
* Well-draining potting mix (a mix of perlite, vermiculite, and peat moss works well)
* Spray bottle with water
* Plastic bag or humidity dome (optional)
Step-by-Step Instructions:
1. Take Your Cuttings: Using your clean pruning shears or knife, take cuttings that are about 4-6 inches long. Choose stems that are healthy and have new growth. Make the cut just below a leaf node (the point where leaves grow from the stem). I usually take several cuttings to increase my chances of success.
2. Prepare the Cuttings: Remove the leaves from the bottom 1-2 inches of each cutting. This will expose the nodes where roots will form. If you’re using rooting hormone, dip the cut end of each cutting into the hormone powder or liquid. This will encourage root development.
3. Plant the Cuttings: Fill your small pots or containers with well-draining potting mix. Make a small hole in the center of each pot and gently insert the cutting. Press the soil around the cutting to secure it.
4. Water and Cover: Water the cuttings gently with a spray bottle until the soil is moist but not soggy. To create a humid environment, you can cover the pots with a plastic bag or place them under a humidity dome. This will help prevent the cuttings from drying out.
5. Provide Light and Warmth: Place the cuttings in a warm location with bright, indirect light. Avoid direct sunlight, which can scorch the leaves.
6. Monitor and Water: Check the cuttings regularly to make sure the soil stays moist. Water when the top inch of soil feels dry. Remove the plastic bag or humidity dome for a few hours each day to allow for air circulation and prevent mold growth.
7. Wait for Roots: It usually takes about 4-8 weeks for roots to develop. You can gently tug on the cuttings to see if they’ve rooted. If you feel resistance, that means roots have formed!
8. Transplant: Once the cuttings have developed a good root system, you can transplant them into larger pots or directly into your garden.
Growing Rosemary from Seed
While it takes longer, growing rosemary from seed can be very rewarding.
What You’ll Need:
* Rosemary seeds
* Seed starting tray or small pots
* Seed starting mix
* Spray bottle with water
* Heat mat (optional, but recommended)
* Grow light (optional, but recommended)
Step-by-Step Instructions:
1. Prepare the Seed Starting Tray: Fill your seed starting tray or small pots with seed starting mix. Moisten the mix with a spray bottle.
2. Sow the Seeds: Sprinkle the rosemary seeds evenly over the surface of the soil. Gently press them into the soil, but don’t bury them too deep. Rosemary seeds need light to germinate.
3. Provide Warmth and Light: Place the seed starting tray on a heat mat to provide bottom heat. This will help speed up germination. Place the tray under a grow light or in a location with bright, indirect light.
4. Keep the Soil Moist: Mist the soil regularly with a spray bottle to keep it moist but not soggy.
5. Wait for Germination: Rosemary seeds can take anywhere from 14-25 days to germinate, so be patient!
6. Thin Seedlings: Once the seedlings have emerged, thin them out so that only the strongest seedlings remain.
7. Transplant: Once the seedlings have developed a few sets of true leaves, you can transplant them into larger pots or directly into your garden.
Caring for Your Rosemary Plant
Now that you have your rosemary plant, let’s talk about how to keep it happy and healthy.
Sunlight:
Rosemary loves sunlight! Aim for at least 6-8 hours of direct sunlight per day. If you’re growing rosemary indoors, place it near a sunny window or use a grow light.
Watering:
Rosemary is drought-tolerant, so it doesn’t need a lot of water. Water deeply when the top inch of soil feels dry, but avoid overwatering, which can lead to root rot. Make sure your pot has good drainage.
Soil:
Rosemary prefers well-draining soil. A mix of potting soil, sand, and perlite works well.
Fertilizing:
Rosemary doesn’t need a lot of fertilizer. You can fertilize it once or twice a year with a balanced fertilizer.
Pruning:
Pruning is essential for keeping your rosemary plant healthy and productive. Prune regularly to encourage bushier growth and prevent the plant from becoming leggy. You can also prune to harvest rosemary for cooking.
Overwintering:
If you live in a cold climate, you’ll need to overwinter your rosemary plant indoors. Bring it inside before the first frost and place it near a sunny window or under a grow light. Water sparingly during the winter months.
Troubleshooting
Even with the best care, you might encounter some problems with your rosemary plant. Here are a few common issues and how to address them:
* Yellowing Leaves: This can be caused by overwatering, underwatering, or nutrient deficiencies. Adjust your watering schedule and fertilize if necessary.
* Root Rot: This is caused by overwatering and poor drainage. Make sure your pot has good drainage and avoid overwatering.
* Pests: Rosemary can be susceptible to pests like spider mites and aphids. Inspect your plant regularly and treat any infestations with insecticidal soap or neem oil.
* Powdery Mildew: This is a fungal disease that can affect rosemary plants in humid conditions. Improve air circulation and treat with a fungicide if necessary.
Harvesting Rosemary
Harvesting rosemary is easy! Simply snip off sprigs of rosemary as needed. The more you harvest, the bushier your plant will become. The best time to harvest rosemary is in the morning, after the dew has dried.
Using Your Rosemary
Now for the fun part – using your homegrown rosemary! Here are a few ideas:
* Cooking: Rosemary is a versatile herb that can be used in a variety of dishes, including roasted meats, vegetables, soups, and sauces.
* Infused Oil: Infuse olive oil with rosemary for a flavorful cooking oil.
* Rosemary Water: Boil rosemary sprigs in water to make a refreshing and fragrant rosemary water.
* Potpourri: Dry rosemary sprigs and use them in potpourri to add a pleasant scent to your home.
* Decoration: Rosemary sprigs can be used in floral arrangements and wreaths.
Growing rosemary at home is a rewarding experience that anyone can enjoy. With a little bit of care and attention, you can have a thriving rosemary plant that provides you with fresh herbs for years to come. Happy gardening!
Conclusion
So, there you have it! Growing bok choy indoors is not only achievable, but it’s also a rewarding experience that brings fresh, nutritious greens right to your fingertips. This DIY trick transforms your windowsill or spare room into a miniature garden, offering a sustainable and cost-effective way to enjoy this versatile vegetable year-round. Forget relying solely on grocery store produce, often shipped from afar and lacking the vibrant freshness of homegrown. With a little patience and the right setup, you can cultivate your own supply of crisp, flavorful bok choy, ready to enhance your stir-fries, soups, and salads.
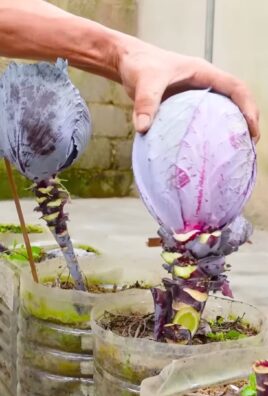
The beauty of this indoor gardening project lies in its adaptability. Feel free to experiment with different varieties of bok choy. While the dwarf varieties are particularly well-suited for indoor containers, you might be surprised at how well other types adapt with proper care and adequate space. Consider trying baby bok choy for a quicker harvest and more tender leaves, or explore the vibrant colors of red bok choy for an added visual appeal to your dishes.
Beyond variety, you can also tailor your growing environment to optimize your bok choy’s growth. If natural light is limited, supplement with grow lights to ensure your plants receive the necessary energy for photosynthesis. Experiment with different soil mixes to find the perfect balance of drainage and nutrient retention. And don’t be afraid to adjust your watering schedule based on the humidity levels in your home.
Growing bok choy indoors is more than just a gardening project; it’s a step towards self-sufficiency and a connection to the natural world. It’s a chance to learn about plant life cycles, develop your green thumb, and enjoy the satisfaction of harvesting your own food. Plus, it’s a fantastic way to add a touch of greenery to your living space and purify the air.
We wholeheartedly encourage you to give this DIY trick a try. It’s a simple, accessible, and incredibly rewarding way to bring the garden indoors. Once you’ve harvested your first batch of homegrown bok choy, we’d love to hear about your experience! Share your tips, tricks, and photos in the comments below. Let’s build a community of indoor bok choy enthusiasts and inspire others to embrace the joy of growing their own food. What are you waiting for? Get planting!
Frequently Asked Questions (FAQ)
What are the best bok choy varieties to grow indoors?
Dwarf varieties of bok choy, such as ‘Toy Choy’ or ‘Bonsai Bok Choy,’ are generally the best choices for indoor growing due to their compact size and shorter growing season. These varieties are well-suited for container gardening and won’t outgrow their space as quickly as larger types. However, you can also successfully grow baby bok choy indoors, which offers a faster harvest. Experimenting with different varieties is part of the fun, but starting with a dwarf variety will increase your chances of success, especially for beginners. Remember to provide adequate space and light for whichever variety you choose.
How much light does indoor bok choy need?
Bok choy requires at least 6 hours of direct sunlight per day to thrive. If you don’t have a sunny windowsill, you’ll need to supplement with grow lights. LED grow lights are a great option as they are energy-efficient and provide the full spectrum of light that plants need. Position the grow lights a few inches above the plants and adjust the height as they grow. Insufficient light can lead to leggy growth and reduced yields. Observe your plants closely; if they are stretching towards the light source, it’s a sign that they need more light.
What type of soil is best for growing bok choy indoors?
A well-draining potting mix is essential for growing bok choy indoors. Avoid using garden soil, as it can become compacted and doesn’t provide adequate drainage. A good potting mix will contain a blend of peat moss, perlite, and vermiculite. You can also add compost to the mix to provide extra nutrients. The ideal pH level for bok choy is between 6.0 and 7.5. Consider using a soil testing kit to ensure your soil is within this range.
How often should I water my indoor bok choy?
Water your bok choy regularly, keeping the soil consistently moist but not waterlogged. Check the soil moisture by sticking your finger about an inch deep. If the soil feels dry, it’s time to water. Avoid overwatering, as this can lead to root rot. The frequency of watering will depend on factors such as the size of the container, the type of potting mix, and the humidity levels in your home. In general, you may need to water every 2-3 days.
How do I fertilize my indoor bok choy?
Bok choy is a heavy feeder and benefits from regular fertilization. Use a balanced liquid fertilizer diluted to half strength every 2-3 weeks. Look for a fertilizer with an NPK ratio of around 10-10-10. You can also use organic fertilizers such as compost tea or fish emulsion. Avoid over-fertilizing, as this can burn the roots. Monitor your plants for signs of nutrient deficiencies, such as yellowing leaves, and adjust your fertilization schedule accordingly.
What are some common pests and diseases that affect indoor bok choy?
Common pests that can affect indoor bok choy include aphids, spider mites, and whiteflies. Regularly inspect your plants for signs of infestation, such as small insects on the leaves or webbing. You can control these pests by spraying the plants with insecticidal soap or neem oil. Diseases that can affect bok choy include downy mildew and powdery mildew. To prevent these diseases, ensure good air circulation and avoid overwatering. If you notice signs of disease, remove the affected leaves and treat the plants with a fungicide.
How long does it take to harvest bok choy grown indoors?
The time to harvest bok choy grown indoors depends on the variety and growing conditions. Baby bok choy can be harvested in as little as 30 days, while larger varieties may take 45-60 days. You can harvest the entire plant at once or harvest individual leaves as needed. To harvest individual leaves, cut the outer leaves near the base of the plant, leaving the inner leaves to continue growing.
Can I grow bok choy indoors year-round?
Yes, you can grow bok choy indoors year-round, provided you provide the plants with adequate light, water, and nutrients. Indoor growing allows you to control the environment and avoid the seasonal limitations of outdoor gardening. However, you may need to adjust your growing practices based on the time of year. For example, you may need to provide supplemental light during the winter months when natural light is limited.
How do I prevent my indoor bok choy from bolting (going to seed)?
Bolting is a common problem with bok choy, especially when grown in warm temperatures. To prevent bolting, keep the growing environment cool and provide consistent moisture. Avoid exposing the plants to sudden temperature fluctuations. If you notice signs of bolting, such as a tall flower stalk emerging from the center of the plant, harvest the bok choy immediately. While the leaves may become slightly bitter after bolting, they are still edible.
What size container is best for growing bok choy indoors?
The ideal container size for growing bok choy indoors depends on the variety. For dwarf varieties, a container that is at least 6 inches deep and 6 inches wide is sufficient. For larger varieties, you’ll need a container that is at least 12 inches deep and 12 inches wide. Ensure the container has drainage holes to prevent waterlogging. You can also grow multiple bok choy plants in a larger container, spacing them about 6 inches apart.

Leave a Comment