

Grow Basil Indoors? Absolutely! Imagine having fresh, fragrant basil right at your fingertips, ready to elevate your culinary creations, no matter the season. Forget those sad, wilted bunches from the grocery store; with a few simple tricks, you can cultivate your own thriving basil plant indoors, bringing a touch of the Mediterranean to your home.
Basil, revered for centuries, boasts a rich history. Originating in Southeast Asia, it journeyed westward, becoming a staple in Italian cuisine and a symbol of good luck in some cultures. But you don’t need a sprawling Italian garden to enjoy this herb’s vibrant flavor.
In today’s busy world, convenience is key. That’s why learning how to grow basil indoors is so valuable. It’s a fantastic way to ensure you always have fresh herbs on hand, saving you trips to the store and reducing food waste. Plus, it’s incredibly rewarding to nurture a plant from seed to harvest. I’m excited to share some easy DIY tricks and hacks that will have you enjoying homegrown basil in no time. Let’s get started!
Growing Tomatoes at Home: A DIY Guide for Delicious Results
Hey there, fellow gardening enthusiasts! I’m so excited to share my tried-and-true method for growing juicy, flavorful tomatoes right in your own backyard (or even on your balcony!). Forget those bland, store-bought tomatoes – nothing beats the taste of a homegrown beauty, ripened to perfection under the sun. This guide will walk you through every step, from choosing the right variety to troubleshooting common problems. Let’s get our hands dirty!
Choosing the Right Tomato Variety
Before we even think about planting, we need to decide what kind of tomatoes we want to grow. There are literally hundreds of varieties, each with its own unique flavor, size, and growth habit. Here’s a quick rundown to help you choose:
* **Determinate vs. Indeterminate:** This is a crucial distinction. Determinate tomatoes grow to a certain size and then produce all their fruit at once, making them ideal for canning. Indeterminate tomatoes, on the other hand, keep growing and producing fruit throughout the season. I personally prefer indeterminate varieties because I love having a continuous supply of fresh tomatoes.
* **Tomato Size:** Do you want tiny cherry tomatoes, medium-sized slicers, or giant beefsteak tomatoes? Cherry tomatoes are great for snacking and salads, slicers are perfect for sandwiches, and beefsteaks are… well, they’re just impressive!
* **Disease Resistance:** Look for varieties that are resistant to common tomato diseases like Fusarium wilt (F), Verticillium wilt (V), and nematodes (N). This will save you a lot of headaches down the road.
* **Days to Maturity:** This tells you how long it will take for the tomatoes to ripen after planting. Choose varieties that are appropriate for your climate and growing season.
My personal favorites include ‘Early Girl’ (early and reliable), ‘Roma’ (great for sauces), and ‘Brandywine’ (amazing flavor, but takes a bit longer to mature).
Starting Your Tomato Seeds (or Buying Seedlings)
You have two options here: start your own seeds indoors or buy seedlings from a nursery. Starting seeds gives you more control over the process and allows you to choose from a wider variety of tomatoes. Buying seedlings is easier and faster, but you’ll be limited to what the nursery has in stock.
Starting Seeds Indoors:
This is how I usually do it because I love the satisfaction of watching those tiny seeds sprout into plants.
1. **Gather Your Supplies:** You’ll need seed starting trays or small pots, seed starting mix (not regular potting soil!), tomato seeds, a spray bottle, and a grow light (optional, but highly recommended).
2. **Sow the Seeds:** Fill the trays or pots with seed starting mix, moisten it with the spray bottle, and sow the seeds about ¼ inch deep. I usually plant 2-3 seeds per cell, just in case some don’t germinate.
3. **Provide Warmth and Light:** Tomato seeds need warmth to germinate. Place the trays in a warm location (around 70-75°F) or use a heat mat. If you’re using a grow light, position it a few inches above the trays and keep it on for 14-16 hours a day.
4. **Keep the Soil Moist:** Water the seeds regularly with the spray bottle to keep the soil moist but not soggy.
5. **Thin the Seedlings:** Once the seedlings have their first true leaves (the second set of leaves that appear after the initial seed leaves), thin them out by snipping off the weaker seedlings at the soil line. Leave only one strong seedling per cell.
6. **Harden Off the Seedlings:** Before transplanting the seedlings outdoors, you need to “harden them off” to acclimate them to the outdoor environment. Gradually expose them to increasing amounts of sunlight and wind over a period of 7-10 days. Start by placing them in a sheltered spot for an hour or two each day, and gradually increase the time and exposure.
Buying Seedlings:
If you’re short on time or space, buying seedlings is a perfectly fine option.
1. **Choose Healthy Seedlings:** Look for seedlings that are stocky, green, and free from pests and diseases. Avoid seedlings that are leggy (tall and spindly) or have yellowing leaves.
2. **Check the Roots:** Gently remove a seedling from its pot and inspect the roots. They should be white and healthy-looking, not brown and root-bound.
3. **Harden Off the Seedlings:** Even if you buy seedlings, it’s still a good idea to harden them off for a few days before planting them outdoors.
Preparing Your Garden Bed
Tomatoes need plenty of sunlight and well-drained soil to thrive. Choose a location that gets at least 6-8 hours of direct sunlight per day.
1. **Amend the Soil:** Tomatoes are heavy feeders, so it’s important to amend the soil with plenty of organic matter, such as compost or well-rotted manure. This will improve drainage, aeration, and nutrient content. I usually dig in a generous amount of compost a few weeks before planting.
2. **Check the Soil pH:** Tomatoes prefer a slightly acidic soil pH of around 6.0-6.8. You can test your soil pH with a soil testing kit and amend it accordingly. If your soil is too alkaline, you can add sulfur to lower the pH. If it’s too acidic, you can add lime to raise the pH.
3. **Consider Raised Beds:** If your soil is poor or poorly drained, consider growing your tomatoes in raised beds. Raised beds provide better drainage and allow you to control the soil quality.
Planting Your Tomato Plants
Now for the fun part!
1. **Choose the Right Time:** Wait until the danger of frost has passed and the soil has warmed up to at least 60°F before planting your tomato plants.
2. **Dig a Hole:** Dig a hole that is deep enough to bury the bottom third of the tomato plant’s stem. This may seem strange, but tomatoes have the amazing ability to grow roots from their stems, which will result in a stronger, healthier plant.
3. **Add Fertilizer:** Add a handful of slow-release tomato fertilizer to the bottom of the hole. This will provide the plant with a steady supply of nutrients as it grows.
4. **Plant the Tomato Plant:** Gently remove the tomato plant from its pot and loosen the roots. Place the plant in the hole and backfill with soil, gently firming it around the base of the plant.
5. **Water Thoroughly:** Water the tomato plant thoroughly after planting.
6. **Add Support:** If you’re growing indeterminate tomato varieties, you’ll need to provide them with support, such as stakes, cages, or trellises. I prefer using tomato cages because they’re easy to install and provide good support. Install the support at the time of planting to avoid damaging the roots later.
Caring for Your Tomato Plants
Once your tomato plants are in the ground, it’s important to provide them with proper care to ensure a bountiful harvest.
1. **Water Regularly:** Tomatoes need consistent moisture, especially during hot, dry weather. Water deeply and regularly, aiming for about 1-2 inches of water per week. Avoid watering the foliage, as this can promote disease. Drip irrigation or soaker hoses are a great way to water tomatoes efficiently.
2. **Fertilize Regularly:** Tomatoes are heavy feeders and need regular fertilization to produce a good crop. Fertilize every 2-3 weeks with a balanced tomato fertilizer.
3. **Prune Your Tomato Plants:** Pruning can help improve air circulation, reduce disease, and encourage fruit production. For indeterminate varieties, remove the suckers (the small shoots that grow between the main stem and the branches). This will direct the plant’s energy towards fruit production.
4. **Mulch Around Your Plants:** Mulching around your tomato plants with straw, wood chips, or other organic materials will help retain moisture, suppress weeds, and regulate soil temperature.
5. **Watch Out for Pests and Diseases:** Keep an eye out for common tomato pests and diseases, such as aphids, tomato hornworms, and early blight. Treat any problems promptly with appropriate organic or chemical controls. I prefer using organic methods whenever possible.
Dealing with Common Tomato Problems
Even with the best care, you may encounter some problems along the way. Here are a few common issues and how to deal with them:
* **Blossom End Rot:** This is caused by a calcium deficiency and results in a dark, leathery spot on the bottom of the tomato. To prevent blossom end rot, ensure that your soil is well-drained and that you’re watering consistently. You can also add calcium to the soil by amending it with bone meal or crushed eggshells.
* **Sunscald:** This occurs when tomatoes are exposed to too much direct sunlight, causing them to develop white or yellow patches. To prevent sunscald, provide your plants with some shade during the hottest part of the day.
* **Cracking:** This is caused by fluctuations in moisture levels and results in cracks on the surface of the tomato. To prevent cracking
Conclusion
So, there you have it! Mastering the art of growing basil indoors is not only achievable but also incredibly rewarding. We’ve walked through the essential steps, from selecting the right variety to providing optimal light and water. But why is this DIY trick a must-try?
Firstly, imagine the convenience of having fresh, fragrant basil readily available, regardless of the season. No more last-minute trips to the grocery store or settling for dried herbs that lack the vibrant flavor of fresh basil. With your own indoor basil garden, you’ll always have the perfect ingredient to elevate your pasta sauces, pizzas, salads, and countless other dishes. The difference in taste is truly remarkable.
Secondly, growing basil indoors is a sustainable and cost-effective alternative to purchasing commercially grown basil. You’ll reduce your carbon footprint by eliminating the need for transportation and packaging, and you’ll save money in the long run by avoiding frequent trips to the store. Plus, there’s something deeply satisfying about nurturing a plant from seed to harvest.
But the benefits don’t stop there. Basil is known for its aromatic properties, and having a basil plant indoors can help purify the air and create a more pleasant and inviting atmosphere in your home. It’s a natural air freshener that smells delicious!
Now, let’s talk about variations. While we’ve focused on growing sweet basil, the most common variety, you can experiment with other types of basil, such as lemon basil, Thai basil, or purple basil. Each variety has its unique flavor profile and aroma, adding a touch of culinary adventure to your indoor garden. You can also try growing basil from cuttings, which is a faster and easier way to propagate new plants. Simply take a cutting from an existing basil plant, place it in water, and wait for roots to develop before transplanting it into soil.
Another fun variation is to create a small herb garden by growing basil alongside other herbs, such as mint, parsley, or chives. This will give you a wider range of fresh herbs to choose from and add visual appeal to your indoor space. Consider using a self-watering planter to simplify the watering process and ensure that your herbs receive consistent moisture.
Growing basil indoors is more than just a gardening project; it’s an investment in your culinary creativity, your well-being, and the environment. It’s a simple yet powerful way to bring the joys of nature into your home and enjoy the fresh, vibrant flavors of basil year-round.
So, what are you waiting for? Grab a pot, some soil, and some basil seeds or cuttings, and get started on your indoor basil garden today. We’re confident that you’ll be amazed by the results.
We encourage you to try this DIY trick and share your experience with us. Let us know what varieties of basil you’re growing, what challenges you’ve encountered, and what tips you’ve discovered along the way. Share your photos and stories on social media using #IndoorBasilGarden, and let’s inspire others to join the indoor gardening movement. We can’t wait to see your thriving basil plants!
Frequently Asked Questions (FAQ)
What is the best location for growing basil indoors?
The ideal location for growing basil indoors is a spot that receives at least 6-8 hours of direct sunlight per day. A south-facing window is usually the best option. If you don’t have access to enough natural light, you can supplement with a grow light. Place the grow light about 6-12 inches above the basil plant and keep it on for 12-14 hours per day.
How often should I water my indoor basil plant?
Water your basil plant when the top inch of soil feels dry to the touch. Avoid overwatering, as this can lead to root rot. When you water, water thoroughly until water drains out of the bottom of the pot. Make sure the pot has drainage holes to prevent water from accumulating. During the warmer months, you may need to water more frequently than during the cooler months.
What type of soil is best for growing basil indoors?
Use a well-draining potting mix that is specifically formulated for herbs or vegetables. Avoid using garden soil, as it can be too heavy and compact, which can hinder drainage and suffocate the roots. You can also amend your potting mix with perlite or vermiculite to improve drainage.
How do I fertilize my indoor basil plant?
Fertilize your basil plant every 2-4 weeks with a balanced liquid fertilizer diluted to half strength. Look for a fertilizer that is specifically formulated for herbs or vegetables. Avoid over-fertilizing, as this can lead to leggy growth and a decrease in flavor.
How do I harvest basil from my indoor plant?
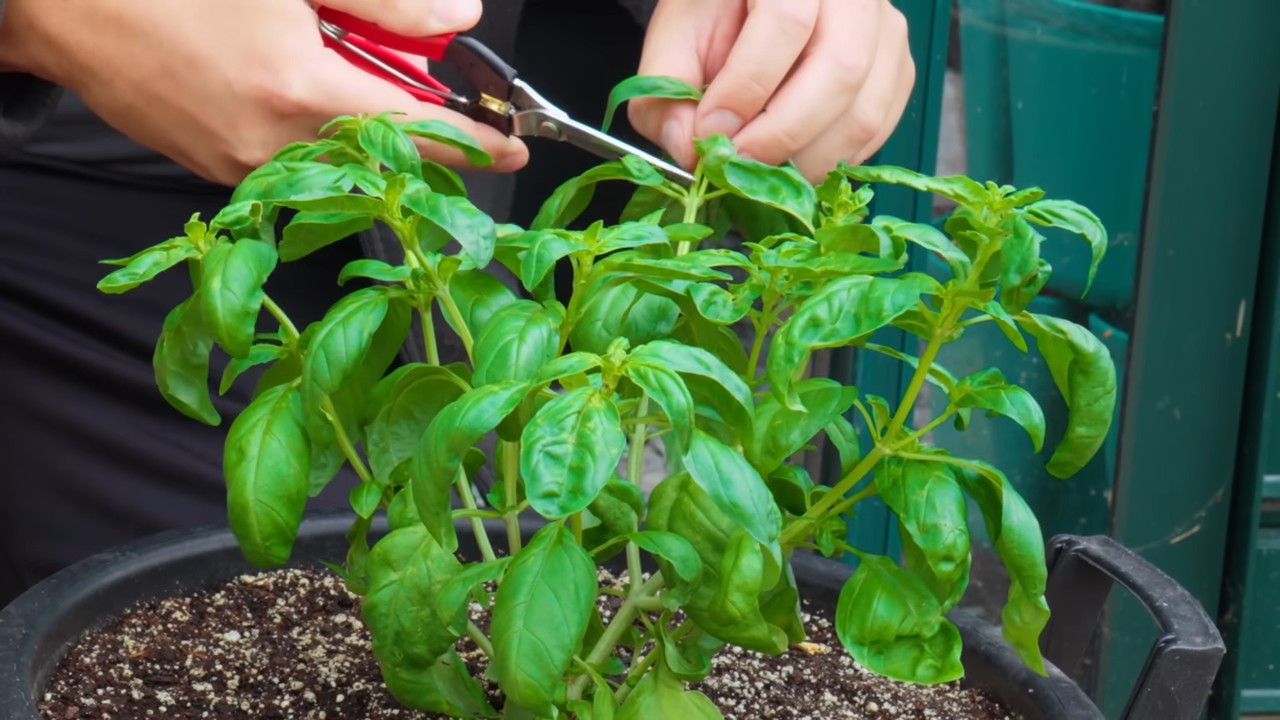
Harvest basil leaves regularly to encourage bushier growth. Pinch off the top sets of leaves, just above a leaf node (where leaves grow from the stem). This will encourage the plant to produce more side shoots and leaves. Avoid harvesting more than one-third of the plant at a time.
Why are the leaves on my basil plant turning yellow?
Yellowing leaves can be a sign of several problems, including overwatering, underwatering, nutrient deficiency, or pest infestation. Check the soil moisture to determine if you are watering too much or too little. If the soil is consistently wet, reduce your watering frequency. If the soil is dry, water more often. If you suspect a nutrient deficiency, fertilize your plant with a balanced liquid fertilizer. Inspect the leaves for signs of pests, such as aphids or spider mites.
How do I deal with pests on my indoor basil plant?
Inspect your basil plant regularly for signs of pests, such as aphids, spider mites, or whiteflies. If you find pests, you can try washing them off with a strong stream of water or wiping the leaves with a damp cloth. You can also use insecticidal soap or neem oil to control pests. Be sure to follow the instructions on the product label carefully.
Can I grow basil from seed indoors?
Yes, you can easily grow basil from seed indoors. Start the seeds in a seed starting tray or small pots filled with seed starting mix. Keep the soil moist and warm, and provide plenty of light. Once the seedlings have developed a few sets of true leaves, you can transplant them into larger pots.
How long does it take for basil to grow indoors?
Basil typically takes about 4-6 weeks to grow from seed to harvestable size. However, the exact time will depend on the variety of basil, the growing conditions, and your care.
My basil plant is flowering. Should I remove the flowers?
Yes, you should remove the flowers from your basil plant to encourage continued leaf production. Once the plant starts to flower, it will focus its energy on producing seeds, which will reduce the flavor and quantity of the leaves. Pinch off the flower buds as soon as you see them.
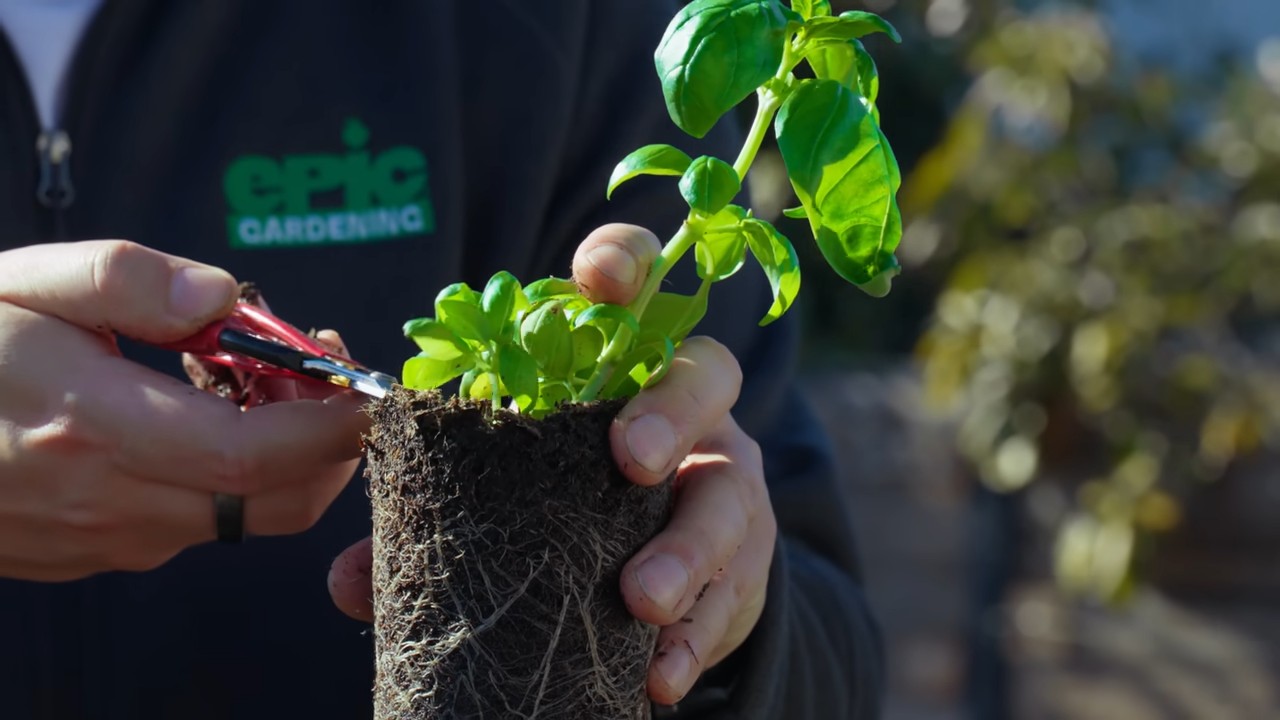
Can I propagate basil from cuttings?
Yes, propagating basil from cuttings is a quick and easy way to create new plants. Take a 4-6 inch cutting from a healthy basil plant, removing the lower leaves. Place the cutting in a glass of water, making sure that the leaves are above the water line. Roots should start to develop within a week or two. Once the roots are about an inch long, you can transplant the cutting into a pot filled with potting mix.
What are some common problems when growing basil indoors?
Some common problems when growing basil indoors include overwatering, underwatering, nutrient deficiency, pest infestation, and lack of light. By providing your basil plant with the right growing conditions and care, you can avoid these problems and enjoy a thriving indoor basil garden.
Leave a Comment