

Grow baby carrots at home? Absolutely! Imagine plucking perfectly petite, sweet baby carrots straight from your own backyard – it’s easier than you think, and incredibly rewarding. Forget those bland, store-bought carrots; we’re talking about vibrant, flavorful veggies you nurtured yourself. This isn’t just about gardening; it’s about connecting with nature, enjoying the freshest produce, and saving money, all while adding a touch of charm to your home.
Home gardening, in general, has a rich history, dating back to ancient civilizations where cultivating food was a necessity. Over time, it evolved into a cherished pastime, a way to reconnect with the earth and enjoy the fruits (and vegetables!) of our labor. Growing your own food, even something as simple as baby carrots, offers a sense of accomplishment and control over what you eat.
But why baby carrots specifically? Well, let’s be honest, who doesn’t love them? They’re perfect for snacking, lunchboxes, and adding a touch of sweetness to any meal. Plus, space can be a constraint, and baby carrots are ideal for small gardens or even containers on your balcony. In this DIY guide, I’ll share my favorite tricks and hacks to help you grow baby carrots at home successfully, even if you’re a complete beginner. Get ready to dig in and discover the joy of homegrown goodness!

Baby Karotten selber ziehen: Ein kinderleichtes DIY-Projekt für den Garten oder Balkon
Hallo liebe Gartenfreunde! Habt ihr Lust, eure eigenen knackigen, süßen Baby Karotten zu ziehen? Es ist einfacher als ihr denkt und macht riesig Spaß, besonders mit Kindern! Ich zeige euch, wie ihr das ganz einfach zu Hause hinbekommt, egal ob im Garten oder auf dem Balkon. Los geht’s!
Was ihr für euer Baby Karotten Projekt braucht:
* Karottensamen: Wählt am besten eine Sorte, die für Baby Karotten geeignet ist. Es gibt spezielle Sorten, die kleiner und süßer bleiben. Ich persönlich mag die “Pariser Markt” oder “Amsterdam Forcing” sehr gerne.
* Geeignete Erde: Karotten lieben lockere, sandige Erde. Schwere, lehmige Erde kann dazu führen, dass sie sich verzweigen oder krumm wachsen. Ich empfehle eine Mischung aus Gartenerde, Sand und Kompost.
* Behälter (optional): Wenn ihr keinen Garten habt, könnt ihr Baby Karotten auch in Töpfen oder Balkonkästen ziehen. Achtet darauf, dass der Behälter mindestens 20 cm tief ist, damit die Karotten genug Platz zum Wachsen haben.
* Gießkanne oder Sprühflasche: Für die Bewässerung.
* Geduld: Karotten brauchen Zeit zum Wachsen.
Schritt-für-Schritt Anleitung:
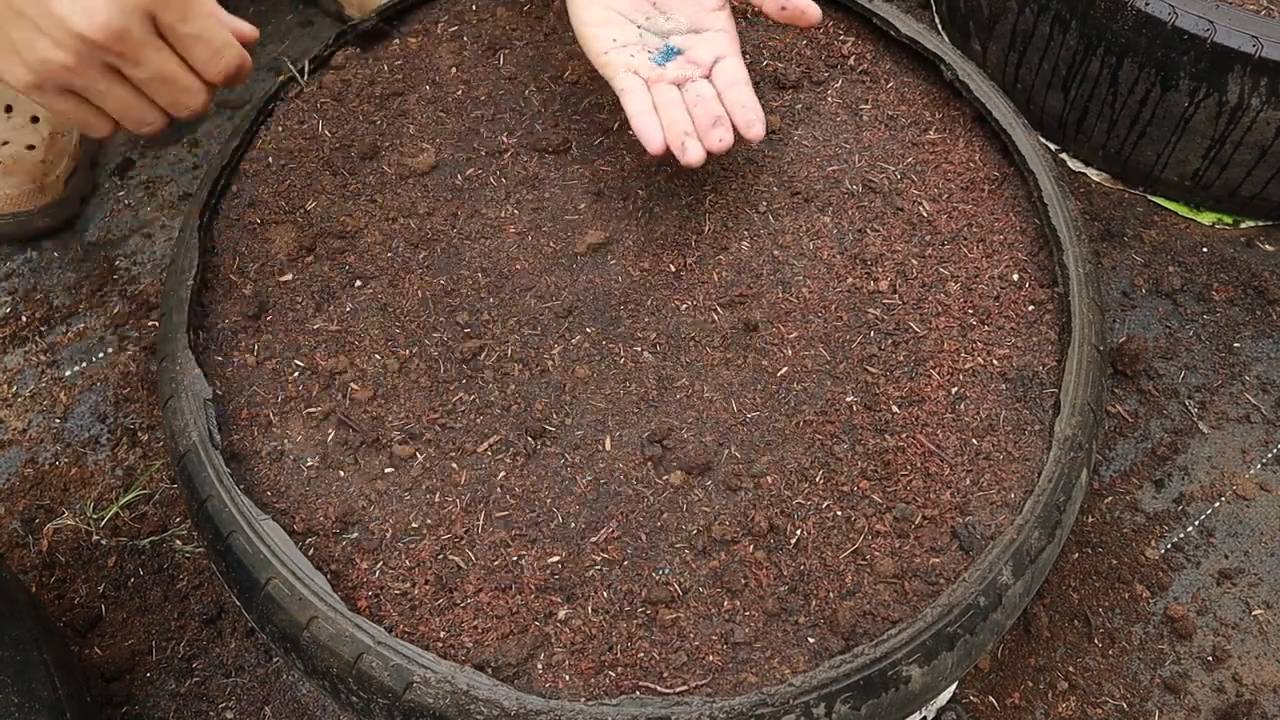
1. Vorbereitung des Bodens oder Behälters:
1. Boden lockern: Wenn ihr die Karotten im Garten anbauen wollt, lockert den Boden gründlich auf. Entfernt Steine und Wurzeln, die das Wachstum behindern könnten. Ich nehme dafür gerne eine Grabegabel und einen Rechen.
2. Erde vorbereiten: Mischt die Gartenerde mit Sand und Kompost. Das sorgt für eine gute Drainage und ausreichend Nährstoffe.
3. Behälter befüllen: Wenn ihr Töpfe oder Balkonkästen verwendet, füllt sie mit der vorbereiteten Erde. Lasst oben etwa 2-3 cm Platz.
2. Aussaat der Karottensamen:
1. Samen verteilen: Karottensamen sind sehr klein. Mischt sie am besten mit etwas Sand, um sie gleichmäßiger verteilen zu können. Ich nehme dafür ein kleines Schälchen und vermische die Samen vorsichtig mit dem Sand.
2. Aussaat in Reihen oder breitwürfig: Ihr könnt die Samen entweder in Reihen aussäen (mit einem Abstand von etwa 5-7 cm zwischen den Reihen) oder breitwürfig verteilen. Ich bevorzuge die Reihensaat, weil es später einfacher ist, die Pflanzen zu vereinzeln.
3. Samen andrücken: Drückt die Samen leicht in die Erde. Sie sollten nicht tiefer als 1 cm liegen.
4. Mit Erde bedecken: Bedeckt die Samen mit einer dünnen Schicht Erde.
5. Angießen: Gießt die Erde vorsichtig an. Am besten verwendet ihr eine Sprühflasche, damit die Samen nicht weggespült werden.
3. Pflege der Karottenpflanzen:
1. Feuchtigkeit halten: Die Erde sollte immer leicht feucht sein, aber nicht nass. Gießt regelmäßig, besonders bei trockenem Wetter. Ich prüfe die Feuchtigkeit immer mit dem Finger. Wenn sich die Erde trocken anfühlt, wird gegossen.
2. Unkraut jäten: Entfernt regelmäßig Unkraut, das die Karottenpflanzen behindern könnte. Unkraut kann Nährstoffe und Licht stehlen.
3. Vereinzeln: Wenn die Karottenpflanzen etwa 2-3 cm groß sind, müsst ihr sie vereinzeln. Das bedeutet, dass ihr die schwächsten Pflanzen entfernt, damit die stärkeren genug Platz zum Wachsen haben. Der Abstand zwischen den Pflanzen sollte etwa 2-3 cm betragen. Ich mache das am liebsten mit einer kleinen Pinzette.
4. Düngen (optional): Wenn die Karottenpflanzen blass aussehen oder schlecht wachsen, könnt ihr sie mit einem organischen Dünger düngen. Ich verwende gerne Komposttee oder verdünnte Brennnesseljauche. Aber Vorsicht: Nicht zu viel düngen, sonst werden die Karotten zu groß und verlieren ihren süßen Geschmack.
4. Ernte der Baby Karotten:
1. Erntezeitpunkt: Baby Karotten sind in der Regel nach etwa 60-70 Tagen erntereif. Ihr könnt sie aber auch schon früher ernten, wenn sie euch klein genug erscheinen.
2. Ernten: Zieht die Karotten vorsichtig aus der Erde. Wenn der Boden sehr fest ist, könnt ihr ihn vorher etwas auflockern. Ich nehme dafür gerne eine kleine Schaufel.
3. Reinigen: Wascht die Karotten gründlich unter fließendem Wasser.
4. Genießen: Jetzt könnt ihr eure selbstgezogenen Baby Karotten genießen! Sie schmecken roh als Snack, im Salat oder als Beilage zu warmen Gerichten.
Zusätzliche Tipps und Tricks:
* Sonniger Standort: Karotten brauchen viel Sonne, um gut zu wachsen. Wählt einen Standort, der mindestens 6 Stunden Sonne pro Tag bekommt.
* Fruchtfolge beachten: Baut Karotten nicht jedes Jahr am selben Standort an. Eine Fruchtfolge hilft, Krankheiten und Schädlinge zu vermeiden.
* Schädlinge bekämpfen: Karotten können von verschiedenen Schädlingen befallen werden, z.B. von der Möhrenfliege. Schützt eure Pflanzen mit einem Insektenschutznetz oder verwendet natürliche Schädlingsbekämpfungsmittel. Ich habe gute Erfahrungen mit Neemöl gemacht.
* Sortenwahl: Experimentiert mit verschiedenen Karottensorten, um eure Lieblingssorte zu finden. Es gibt viele verschiedene Farben und Formen.
* Kinder einbeziehen: Das Anbauen von Baby Karotten ist ein tolles Projekt für Kinder. Sie lernen dabei, woher ihr Essen kommt und wie man Pflanzen pflegt.
Häufige Probleme und Lösungen:
* Karotten verzweigen sich: Das liegt meistens an zu schwerer Erde oder Steinen im Boden. Lockert den Boden gründlich auf und entfernt Steine.
* Karotten wachsen krumm: Auch das kann an zu schwerer Erde oder Steinen im Boden liegen. Achtet außerdem darauf, dass die Pflanzen genug Platz zum Wachsen haben.
* Karotten werden von der Möhrenfliege befallen: Schützt eure Pflanzen mit einem Insektenschutznetz oder verwendet natürliche Schädlingsbekämpfungsmittel.
* Karotten schmecken bitter: Das kann an zu viel Dünger oder zu wenig Wasser liegen. Achtet auf eine ausgewogene Düngung und regelmäßige Bewässerung.
Ich hoffe, diese Anleitung hilft euch dabei, eure eigenen Baby Karotten zu ziehen. Es ist ein wirklich lohnendes Projekt, das viel Freude bereitet. Viel Erfolg und guten Appetit!
Conclusion
So, there you have it! Growing baby carrots at home is not only achievable but also surprisingly rewarding. Forget those pre-packaged, often bland, store-bought baby carrots. Imagine the vibrant color, the intense sweetness, and the satisfying crunch of baby carrots you’ve nurtured from seed to snack, right in your own backyard (or even on your balcony!). This DIY trick is a must-try for several compelling reasons.
First and foremost, you control the entire process. You know exactly what goes into your soil, what (if any) fertilizers are used, and when your carrots are harvested. This translates to healthier, more flavorful, and potentially organic baby carrots, free from the preservatives and chemicals sometimes found in commercially grown produce.
Secondly, it’s incredibly cost-effective. A packet of carrot seeds is significantly cheaper than buying bags of baby carrots week after week. Over time, the savings add up, making this a budget-friendly way to enjoy fresh, healthy snacks.
Thirdly, it’s a fantastic learning experience, especially if you have children. Gardening teaches patience, responsibility, and an appreciation for the natural world. Watching those tiny seeds sprout and grow into delicious baby carrots is a truly magical experience.
But the best reason to try this DIY trick is the taste! Homegrown baby carrots, harvested at their peak ripeness, are simply bursting with flavor. They’re sweeter, crisper, and more intensely carrot-y than anything you’ll find in the supermarket.
Ready to take your baby carrot game to the next level? Consider these variations:
* **Rainbow Baby Carrots:** Plant a mix of different colored carrot seeds (purple, yellow, white, orange) for a visually stunning and equally delicious harvest.
* **Container Gardening:** If you’re short on space, grow your baby carrots in containers. Just make sure the containers are deep enough (at least 12 inches) and have good drainage.
* **Succession Planting:** Plant a new batch of carrot seeds every few weeks to ensure a continuous supply of fresh baby carrots throughout the growing season.
* Herb Companions: Plant herbs like rosemary or sage near your carrots. These herbs can help deter pests and may even enhance the flavor of your carrots.
Don’t be intimidated if you’re a beginner gardener. Growing baby carrots at home is relatively easy, and the rewards are well worth the effort. So, grab a packet of seeds, prepare your soil, and get ready to enjoy the freshest, most flavorful baby carrots you’ve ever tasted.
We’re confident that once you try this DIY trick, you’ll be hooked. We encourage you to share your experiences with us! Post photos of your homegrown baby carrots on social media using #HomegrownBabyCarrots and tell us about your successes (and any challenges you encounter along the way). We can’t wait to see what you create! Happy gardening!
Frequently Asked Questions (FAQ)
What is the best time of year to plant baby carrots?
The best time to plant baby carrots depends on your climate. In general, carrots are a cool-season crop, so they thrive in spring and fall. For spring planting, sow seeds as soon as the soil can be worked, typically a few weeks before the last expected frost. For fall planting, sow seeds about 2-3 months before the first expected frost. In warmer climates, you may be able to grow carrots throughout the winter. Check your local planting calendar for specific dates.
What kind of soil is best for growing baby carrots?
Baby carrots need loose, well-drained soil that is free of rocks and clumps. Rocky soil can cause the carrots to fork or become misshapen. Amend heavy clay soil with compost or other organic matter to improve drainage and aeration. The ideal soil pH for carrots is between 6.0 and 6.8. Before planting, till the soil to a depth of at least 12 inches to allow the roots to grow freely.
How much sunlight do baby carrots need?
Baby carrots need at least 6 hours of sunlight per day. Choose a sunny location in your garden that receives direct sunlight for most of the day. If you’re growing carrots in containers, make sure to place them in a sunny spot.
How often should I water baby carrots?
Baby carrots need consistent moisture to thrive. Water deeply and regularly, especially during dry periods. Aim to keep the soil consistently moist but not waterlogged. A good rule of thumb is to water when the top inch of soil feels dry to the touch. Avoid overhead watering, as this can promote fungal diseases.
How long does it take for baby carrots to grow?
Baby carrots typically take 50-70 days to mature, depending on the variety and growing conditions. Check the seed packet for specific information on the maturity time for your chosen variety. You can start harvesting baby carrots when they reach the desired size, usually around 3-4 inches long.
How do I prevent pests and diseases from affecting my baby carrots?
Several pests and diseases can affect baby carrots, including carrot rust flies, aphids, and fungal diseases. To prevent these problems, practice good garden hygiene. Remove weeds and debris from around your carrot plants, and avoid overcrowding. You can also use row covers to protect your carrots from pests. If you notice signs of disease, treat your plants with an appropriate fungicide. Companion planting with herbs like rosemary and sage can also help deter pests.
Can I grow baby carrots in containers?
Yes, you can grow baby carrots in containers. Choose a container that is at least 12 inches deep and has good drainage. Fill the container with a well-draining potting mix. Sow the carrot seeds according to the instructions on the seed packet. Water regularly and fertilize every few weeks with a balanced fertilizer.
What are some common problems when growing baby carrots and how can I fix them?
Some common problems include:
* **Forked or misshapen carrots:** This is usually caused by rocky or compacted soil. Amend the soil with compost or other organic matter to improve drainage and aeration. Remove any rocks or clumps from the soil before planting.
* **Slow growth:** This can be caused by insufficient sunlight, poor soil, or lack of water. Make sure your carrots are getting at least 6 hours of sunlight per day. Amend the soil with compost or fertilizer to provide essential nutrients. Water regularly to keep the soil consistently moist.
* **Pest infestations:** Carrot rust flies and aphids are common pests of carrots. Use row covers to protect your plants from pests. You can also use insecticidal soap or neem oil to control infestations.
* **Bitter taste:** This can be caused by hot weather or inconsistent watering. Carrots prefer cool weather and consistent moisture. Provide shade during hot weather and water regularly to keep the soil consistently moist.
How do I know when my baby carrots are ready to harvest?
Baby carrots are ready to harvest when they reach the desired size, usually around 3-4 inches long. You can gently pull up a few carrots to check their size. If they’re not quite ready, leave them in the ground for a few more days.
How should I store my harvested baby carrots?
To store your harvested baby carrots, remove the tops and wash them thoroughly. Place the carrots in a plastic bag or container and store them in the refrigerator. They should last for several weeks. You can also freeze baby carrots for longer storage. Blanch them in boiling water for a few minutes, then cool them in ice water. Drain well and store in freezer bags.

Leave a Comment