

Garlic growing plastic bag hack – sounds a little unconventional, right? But trust me, this simple DIY trick can revolutionize your home gardening game, especially if you’re short on space or just starting out! I’m so excited to share this with you.
For centuries, garlic has been a staple in cuisines and cultures worldwide, revered not only for its pungent flavor but also for its medicinal properties. From ancient Egypt, where it fueled the pyramid builders, to modern-day kitchens, garlic has always held a special place. But did you know you don’t need a sprawling garden to enjoy fresh, homegrown garlic?
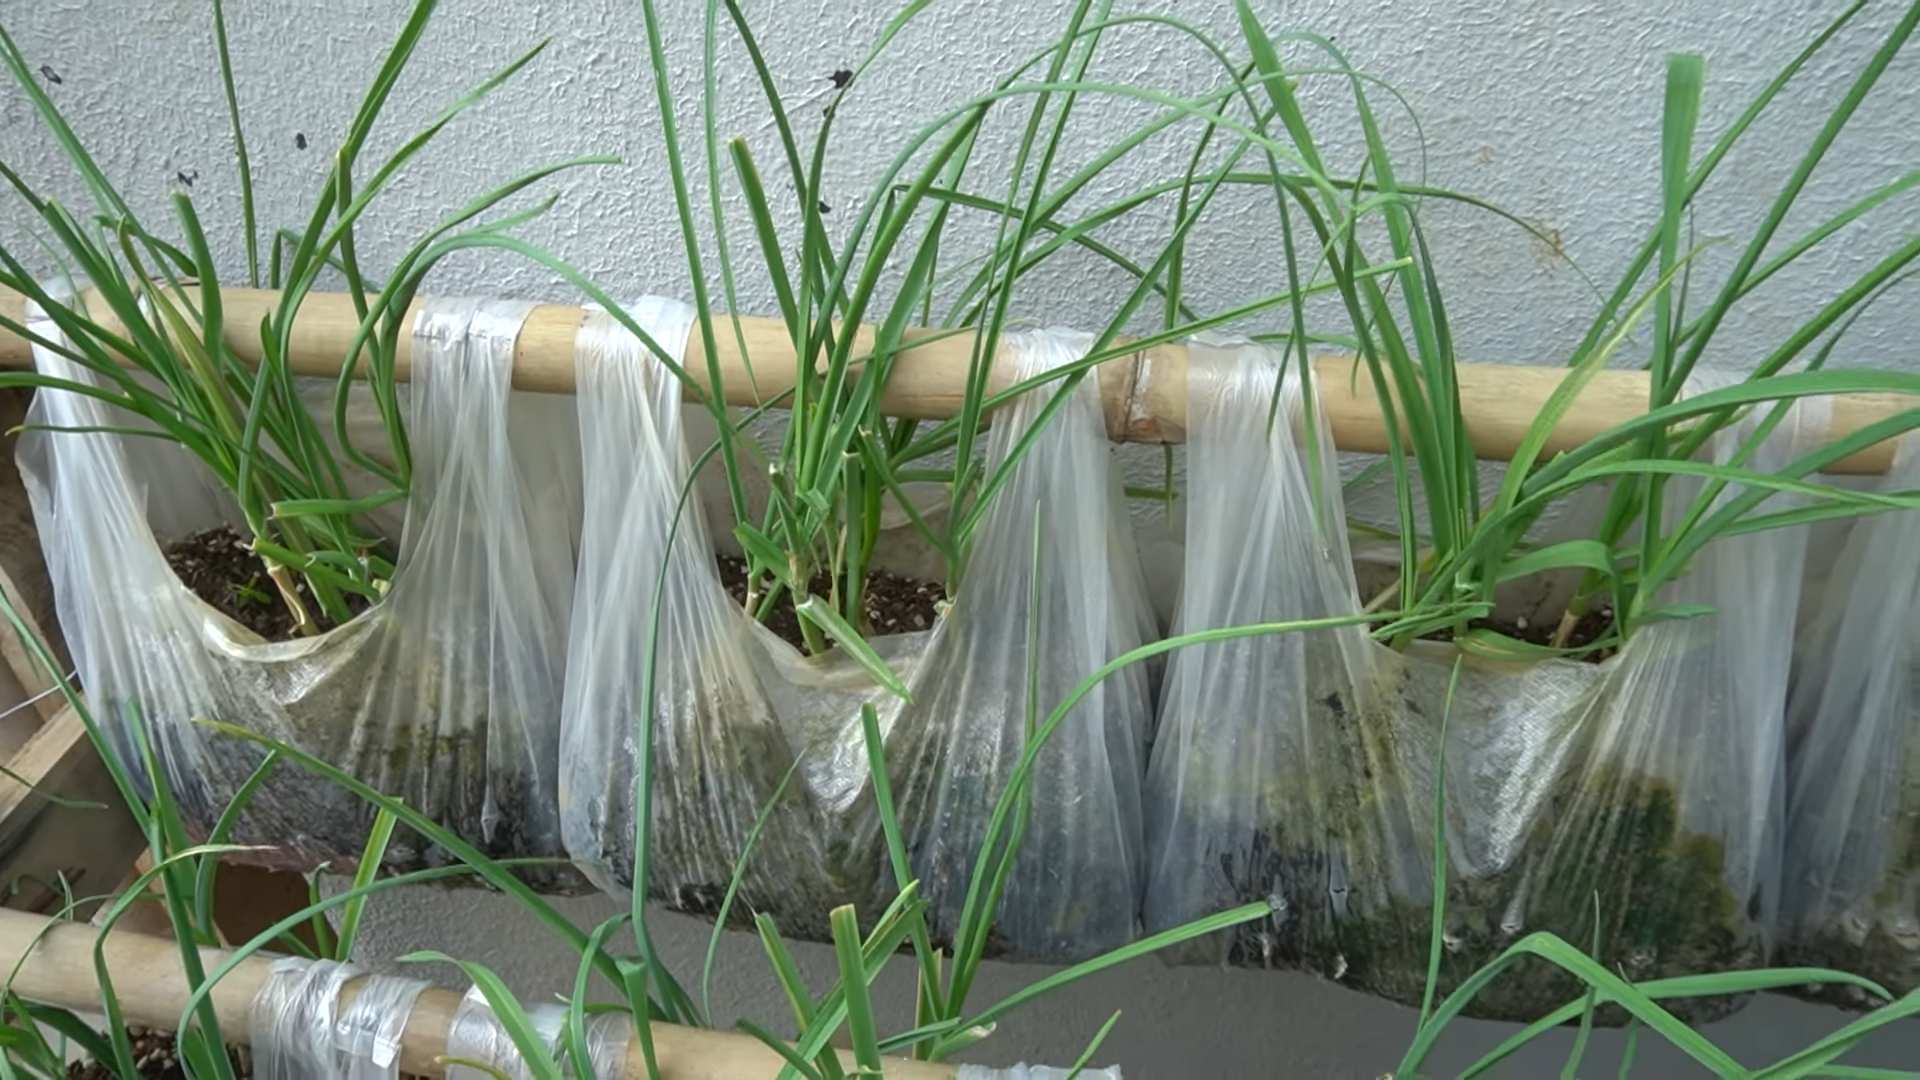
That’s where this clever hack comes in. Many of us dream of a bountiful garden, overflowing with fresh herbs and vegetables. However, limited space, poor soil, or even just a lack of time can often stand in our way. This garlic growing plastic bag hack offers a simple, affordable, and incredibly effective solution. It allows you to grow delicious, healthy garlic right on your balcony, patio, or even indoors! Imagine the satisfaction of harvesting your own garlic, knowing exactly where it came from and how it was grown. Plus, it’s a fantastic way to reduce waste by repurposing those plastic bags we all seem to accumulate. So, let’s dive in and discover how you can transform a simple plastic bag into a thriving garlic patch!
Grow Garlic Like a Pro: The Plastic Bag Hack You Need to Know!
Hey there, fellow garlic lovers! Are you dreaming of plump, flavorful garlic bulbs but don’t have a sprawling garden? Or maybe you’re just looking for a super easy and space-saving way to grow your own? Well, you’re in the right place! I’m going to share my favorite secret weapon: growing garlic in a plastic bag! Yes, you read that right. It’s surprisingly simple, incredibly effective, and perfect for anyone, regardless of their gardening experience. Let’s dive in!
Why Grow Garlic in a Plastic Bag?
Before we get started, you might be wondering, “Why a plastic bag? Isn’t that a bit… unconventional?” And you’d be right, it’s not your typical garden bed. But trust me, there are some serious advantages:
* Space-Saving Superstar: Perfect for balconies, patios, or even a sunny windowsill. You don’t need acres of land to enjoy homegrown garlic.
* Excellent Drainage Control: We can customize the drainage to prevent waterlogging, which is a garlic’s worst enemy.
* Easy to Move: Need to chase the sun? No problem! Just pick up the bag and move it.
* Cost-Effective: Reusing plastic bags is eco-friendly and saves you money on expensive pots.
* Beginner-Friendly: This method is incredibly forgiving and easy to learn.
What You’ll Need
Alright, let’s gather our supplies. This is a pretty low-key project, so you probably have most of this stuff lying around already:
* A Large, Sturdy Plastic Bag: Think the kind you get from the grocery store (the thicker the better!) or even a heavy-duty garbage bag. Just make sure it’s clean and doesn’t have any holes.
* Garlic Cloves: Choose organic garlic from a local farmer’s market or garden center. Avoid supermarket garlic, as it’s often treated to prevent sprouting. Look for firm, healthy cloves.
* Potting Mix: A good quality potting mix is essential for healthy growth. Avoid using garden soil, as it can be too heavy and compact.
* Perlite or Vermiculite (Optional): Adding perlite or vermiculite will improve drainage and aeration.
* Water: For watering your garlic, of course!
* Scissors or a Knife: For creating drainage holes.
* A Sunny Spot: Garlic needs at least 6 hours of sunlight per day.
Step-by-Step Guide: Planting Your Garlic
Okay, let’s get our hands dirty! This is the fun part.
1. Prepare the Bag: The first thing we need to do is prepare the plastic bag. This is crucial for drainage.
* Carefully poke drainage holes in the bottom of the bag. I usually make about 10-15 holes, spaced a few inches apart. You don’t want the soil to become waterlogged.
* If you’re using a very large bag, you might want to reinforce the sides by folding them down a few times. This will help the bag maintain its shape.
2. Fill the Bag with Potting Mix: Now it’s time to fill the bag with potting mix.
* If you’re using perlite or vermiculite, mix it into the potting mix at a ratio of about 1:4 (one part perlite/vermiculite to four parts potting mix).
* Fill the bag about three-quarters full with the potting mix. Don’t pack it down too tightly.
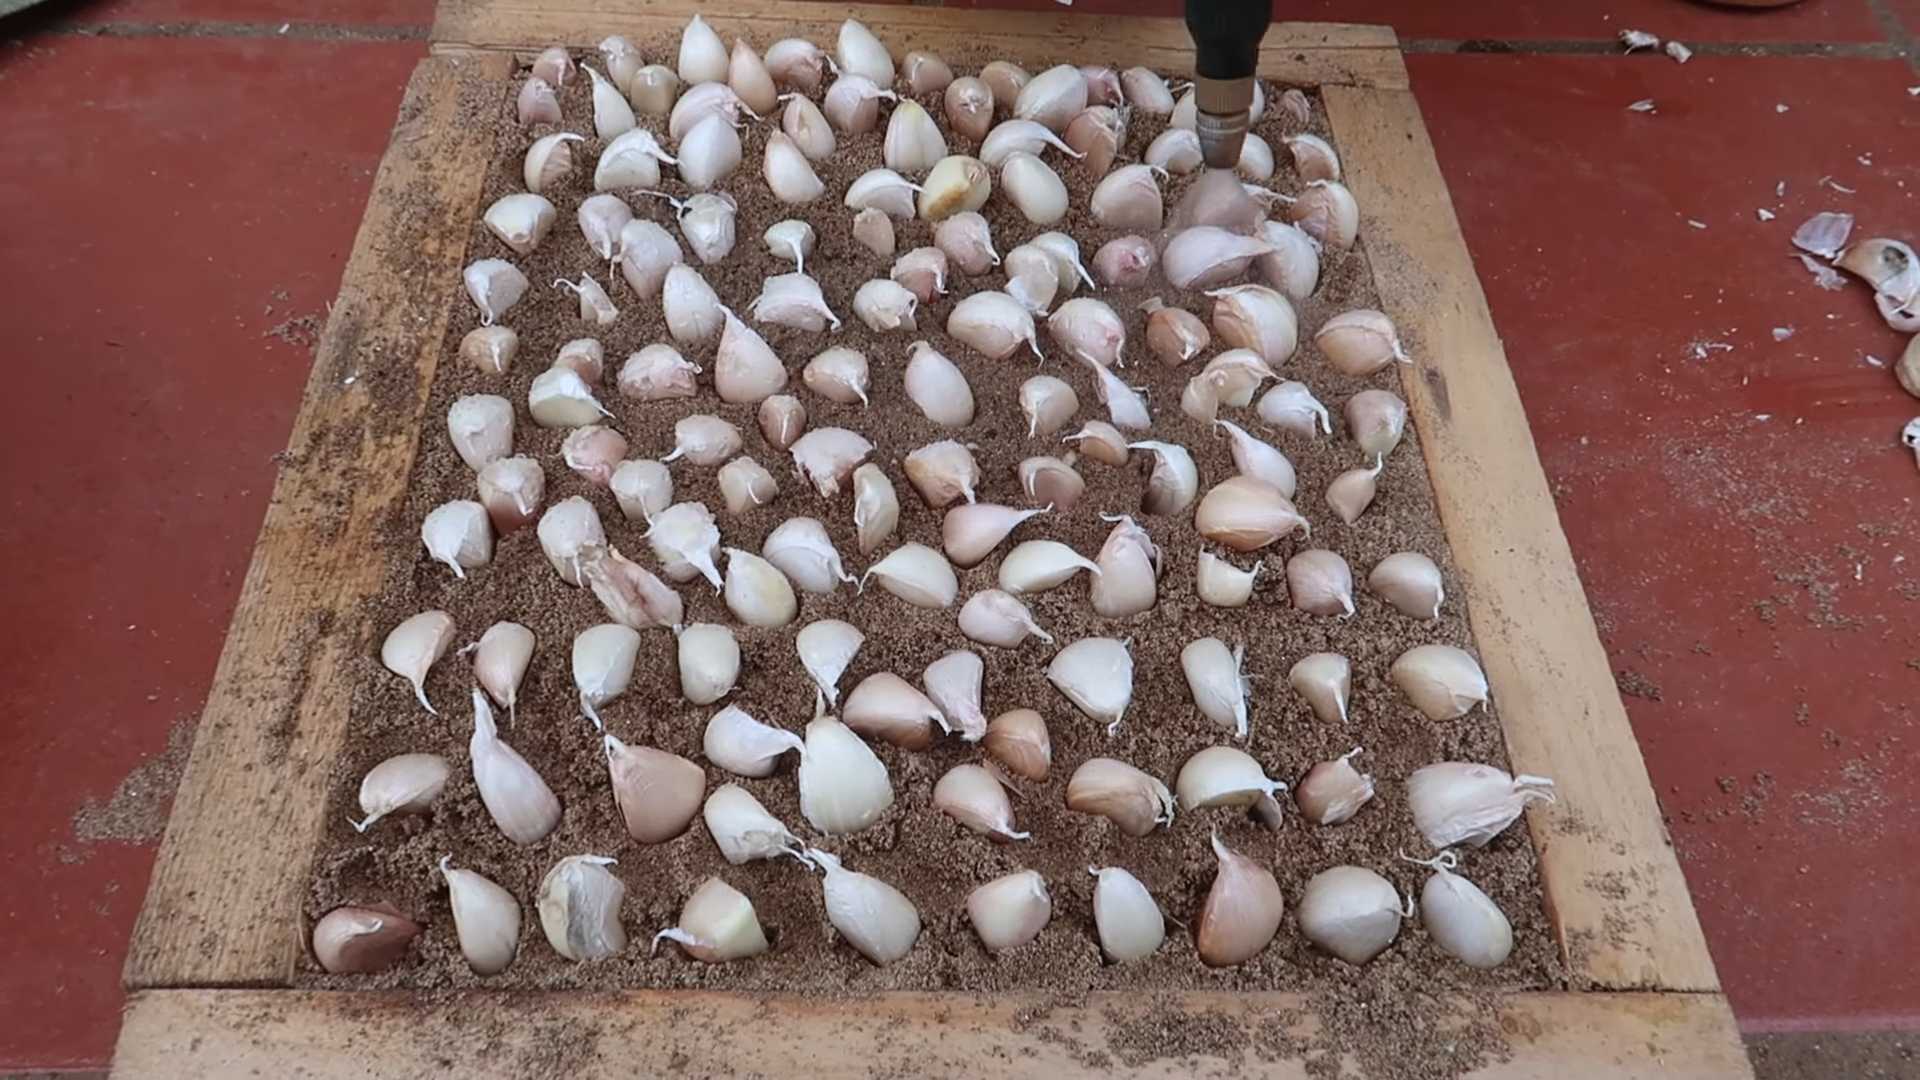
3. Prepare the Garlic Cloves: Before planting, we need to prepare the garlic cloves.
* Gently separate the cloves from the bulb, being careful not to damage them.
* Leave the papery skin on the cloves. This will help protect them from drying out.
* Select the largest, healthiest cloves for planting. These will produce the biggest bulbs.
4. Plant the Garlic Cloves: Now for the main event!
* Make small holes in the potting mix, about 2-3 inches deep and 4-6 inches apart.
* Place each clove in a hole, pointy end facing up.
* Cover the cloves with potting mix and gently pat down the soil.
5. Water Thoroughly: After planting, water the bag thoroughly until water drains out of the drainage holes. This will help settle the soil and encourage root growth.
6. Find a Sunny Spot: Place the bag in a sunny location where it will receive at least 6 hours of sunlight per day. A south-facing balcony or patio is ideal.
Caring for Your Garlic
Now that your garlic is planted, it’s time to nurture it and watch it grow! Here’s what you need to do:
1. Watering: Water regularly, especially during dry periods. The soil should be moist but not soggy. Check the soil moisture by sticking your finger into the soil. If it feels dry an inch or two below the surface, it’s time to water.
2. Fertilizing: Garlic is a heavy feeder, so it needs regular fertilization.
* About a month after planting, start fertilizing with a balanced liquid fertilizer diluted to half strength.
* Fertilize every 2-3 weeks throughout the growing season.
3. Weeding: Keep the bag free of weeds. Weeds compete with the garlic for nutrients and water.
4. Mulching (Optional): Adding a layer of mulch, such as straw or wood chips, can help retain moisture, suppress weeds, and regulate soil temperature.
5. Pest and Disease Control: Garlic is generally pest-resistant, but keep an eye out for common garden pests like aphids or spider mites. If you notice any pests, treat them with an organic insecticide.
* Good air circulation is key to preventing fungal diseases. Make sure the bag is not overcrowded and that the plants have plenty of space to breathe.
Harvesting Your Garlic
The moment we’ve all been waiting for! Harvesting your homegrown garlic is incredibly rewarding.
1. When to Harvest: Garlic is typically ready to harvest in late spring or early summer, about 8-9 months after planting.
* Look for signs that the plants are ready to harvest, such as yellowing and browning of the lower leaves.
* The tops of the plants may also start to fall over.
2. How to Harvest:
* Gently loosen the soil around the bulbs with a trowel or garden fork.
* Carefully lift the bulbs out of the soil, being careful not to damage them.
* Shake off any excess soil.
3. Curing Your Garlic: Curing is essential for long-term storage.
* Hang the garlic bulbs in a cool, dry, well-ventilated place for 2-3 weeks.
* The leaves and stems will dry out and the outer skins will become papery.
4. Storing Your Garlic:
* Once the garlic is cured, trim the roots and stems.
* Store the bulbs in a cool, dry, dark place, such as a pantry or basement.
* Properly cured and stored garlic can last for several months.
Troubleshooting
Even with the best planning, sometimes things don’t go exactly as expected. Here are a few common problems you might encounter and how to fix them:
* Yellowing Leaves: This could be a sign of overwatering, underwatering, or nutrient deficiency. Check the soil moisture and adjust your watering schedule accordingly. Fertilize with a balanced fertilizer.
* Small Bulbs: This could be due to insufficient sunlight, poor soil, or overcrowding. Make sure the bag is in a sunny location and fertilize regularly. Thin out the plants if they are too close together.
* Rotting Bulbs: This is usually caused by overwatering or poor drainage. Make sure the bag has adequate drainage holes and avoid overwatering.
* Pests: Inspect your plants regularly for pests and treat them with an organic insecticide if necessary.
Tips and Tricks for Garlic Growing Success
Here are a few extra tips to help you grow the best garlic ever:
* Choose the Right Variety: There are many different varieties of garlic, each with its own unique flavor and characteristics. Experiment with different varieties to find your favorites.
* Plant in the Fall: Garlic needs a period of cold dormancy to develop properly. Plant your garlic in the fall, about 4-6 weeks before the first frost.
* Don’t Overwater: Overwatering is one of the most common mistakes people make when growing garlic. Garlic prefers well-drained soil and doesn’t like to sit in water.
* Rotate Your Crops: Avoid planting garlic in the same spot year after year. Crop
Conclusion
So, there you have it! The garlic growing plastic bag hack – a simple, space-saving, and surprisingly effective way to cultivate your own fresh garlic, even if you don’t have a traditional garden. We’ve walked you through the process, highlighting the ease and accessibility of this method. But why is this DIY trick a must-try?
Firstly, it’s about control. You have complete control over the soil quality, watering schedule, and overall environment, leading to healthier, more flavorful garlic. Store-bought garlic, while convenient, often lacks the robust taste and freshness of homegrown. With this method, you’re guaranteeing yourself a supply of pungent, aromatic garlic that will elevate your cooking to a whole new level.
Secondly, it’s incredibly space-efficient. Apartment dwellers, balcony gardeners, and anyone with limited outdoor space can rejoice! This method allows you to grow garlic in a compact, manageable container, bringing the joy of gardening to even the smallest of living spaces. Forget about tilling a large plot of land; all you need is a plastic bag, some soil, and a sunny spot.
Thirdly, it’s cost-effective. Growing your own garlic significantly reduces your grocery bill and eliminates the need to constantly purchase garlic from the store. Plus, you can save some of your harvest to replant next season, creating a sustainable cycle of fresh garlic production.
But the benefits don’t stop there. This method is also a fantastic learning experience, especially for beginner gardeners. It’s a low-risk, high-reward project that teaches you about plant growth, soil composition, and the importance of proper watering. It’s a fun and engaging way to connect with nature and appreciate the process of growing your own food.
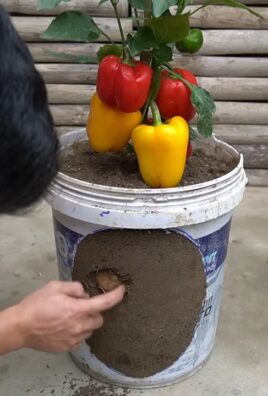
Now, let’s talk about variations. While we’ve focused on using a plastic bag, you can easily adapt this method to other containers, such as buckets, pots, or even repurposed plastic containers. Just ensure that the container has adequate drainage holes to prevent waterlogging.
You can also experiment with different types of garlic. Softneck varieties, like California Early or Silverskin, are well-suited for warmer climates, while hardneck varieties, like Rocambole or Porcelain, thrive in colder regions. Research which varieties grow best in your area and give them a try.
Another variation is to add companion plants to your garlic bag. Herbs like chamomile, dill, and parsley can help deter pests and improve the overall health of your garlic plants. Just be sure to choose plants that have similar watering and sunlight requirements.
Finally, consider adding a layer of mulch to the top of the soil. Mulch helps retain moisture, suppress weeds, and regulate soil temperature. Straw, wood chips, or shredded leaves are all excellent choices for mulch.
We wholeheartedly encourage you to try this garlic growing plastic bag hack. It’s a rewarding and fulfilling experience that will provide you with a constant supply of fresh, flavorful garlic. Don’t be afraid to experiment, adapt the method to your specific needs, and most importantly, have fun!
Once you’ve tried it, we’d love to hear about your experience. Share your photos, tips, and tricks in the comments section below. Let’s create a community of garlic growers and inspire others to embrace this simple and effective DIY method. What worked for you? What challenges did you face? What are your favorite ways to use your homegrown garlic? Your feedback is invaluable and will help us improve this guide for future readers. So, get your hands dirty, plant some garlic, and let us know how it goes! We can’t wait to hear your garlic growing success stories!
Frequently Asked Questions (FAQ)
What kind of soil should I use for growing garlic in a plastic bag?
The best soil for growing garlic in a plastic bag is a well-draining, nutrient-rich potting mix. Avoid using garden soil, as it can be too heavy and compact, leading to poor drainage and root rot. Look for a potting mix that contains a blend of peat moss, perlite, and vermiculite. You can also amend your potting mix with compost or aged manure to provide additional nutrients. A slightly acidic to neutral pH (around 6.0 to 7.0) is ideal for garlic growth.
How often should I water my garlic plants in a plastic bag?
Water your garlic plants regularly, especially during dry periods. The soil should be consistently moist but not waterlogged. Overwatering can lead to root rot, while underwatering can stunt growth. Check the soil moisture by sticking your finger about an inch into the soil. If it feels dry, it’s time to water. Water deeply, allowing the excess water to drain out of the drainage holes in the plastic bag. Reduce watering during the dormant period in the winter.
How much sunlight do garlic plants need?
Garlic plants need at least 6 hours of direct sunlight per day to thrive. Choose a sunny location for your plastic bag garden, such as a south-facing balcony or windowsill. If you don’t have enough natural sunlight, you can supplement with grow lights.
When is the best time to plant garlic in a plastic bag?
The best time to plant garlic is in the fall, about 4-6 weeks before the first expected frost. This allows the garlic cloves to establish roots before winter dormancy. In warmer climates, you can plant garlic in late winter or early spring.
How do I know when my garlic is ready to harvest?
Garlic is typically ready to harvest in the summer, about 8-9 months after planting. The leaves will start to turn yellow and brown, and the bulb will begin to swell. To check if the garlic is ready, carefully dig up a bulb and examine it. The bulb should be well-formed and the cloves should be plump and easy to separate.
Can I grow garlic indoors in a plastic bag?
While it’s possible to grow garlic indoors, it’s more challenging than growing it outdoors. Garlic needs a lot of sunlight, which can be difficult to provide indoors. If you do grow garlic indoors, make sure to place it in a sunny location and supplement with grow lights. Also, be aware that indoor-grown garlic may not produce as large of bulbs as outdoor-grown garlic.
What are some common pests and diseases that affect garlic plants?
Some common pests that affect garlic plants include aphids, thrips, and onion maggots. Diseases that can affect garlic include white rot, downy mildew, and rust. To prevent pests and diseases, choose disease-resistant varieties, practice good sanitation, and avoid overwatering. If you do encounter pests or diseases, treat them promptly with appropriate organic or chemical controls.
Can I reuse the plastic bag for growing garlic again next year?
Yes, you can reuse the plastic bag for growing garlic again next year, but it’s important to clean it thoroughly first. Remove all the old soil and debris, and wash the bag with soap and water. Disinfect the bag with a solution of bleach and water (1 part bleach to 9 parts water) to kill any remaining pathogens. Rinse the bag thoroughly before reusing it. However, keep in mind that plastic bags can degrade over time, so you may need to replace them after a few years.
How do I store my harvested garlic?
After harvesting your garlic, cure it for 2-3 weeks in a cool, dry, well-ventilated place. Hang the garlic bulbs upside down or spread them out on a screen or rack. Once the garlic is cured, trim the roots and stems, and store the bulbs in a cool, dry, dark place. Properly cured and stored garlic can last for several months.
What if my garlic doesn’t form a bulb?
There are several reasons why your garlic might not form a bulb. It could be due to insufficient sunlight, poor soil quality, improper watering, or planting at the wrong time of year. Make sure your garlic plants are getting at least 6 hours of direct sunlight per day, are planted in well-draining, nutrient-rich soil, and are watered regularly but not overwatered. Also, ensure that you’re planting your garlic at the appropriate time of year for your climate. If you’ve addressed all these factors and your garlic still isn’t forming a bulb, it could be due to a nutrient deficiency. Try fertilizing your plants with a balanced fertilizer or a fertilizer specifically formulated for garlic.
Leave a Comment